Scale a Kubernetes Cluster on Oracle Cloud Native Environment
Introduction
Scaling up a Kubernetes cluster means adding nodes; likewise, scaling down occurs by removing nodes. These nodes can be either control plane or worker nodes. Oracle recommends against scaling the cluster up and down simultaneously but instead performing a scale up and down in two separate commands.
It's also recommended to scale the Kubernetes cluster control plane or worker nodes in odd numbers to avoid split-brain scenarios and maintain the quorum. For example, 3, 5, or 7 control plane or worker nodes ensure the cluster's reliability.
This tutorial starts with an existing Highly Available Kubernetes cluster running on Oracle Cloud Native Environment that builds upon these labs:
- Deploy Oracle Cloud Native Environment
- Deploy an External Load Balancer with Oracle Cloud Native Environment
- Use OCI Cloud Controller Manager on Oracle Cloud Native Environment
Objectives
In this lab, you will learn:
- To add two new control plane nodes and two new worker nodes to a cluster
- Scale down the cluster by removing those same nodes
Prerequisites
Minimum of a 9-node Oracle Cloud Native Environment cluster:
- Operator node
- 3 Kubernetes control plane nodes
- 5 Kubernetes worker nodes
Each system should have Oracle Linux installed and configured with:
- An Oracle user account (used during the installation) with sudo access
- Key-based SSH, also known as password-less SSH, between the hosts
- Installation of Oracle Cloud Native Environment
Additional requirements include:
Access to a Load Balancer such as OCI Load Balancer
4 additional Oracle Linux instances with:
- The same OS and patch level as the original cluster
- The completion of the prerequisite steps to install Oracle Cloud Native Environment
- Set up the Kubernetes control plane and worker nodes
Deploy Oracle Cloud Native Environment
Note: If running in your own tenancy, read the linux-virt-labs GitHub project README.md and complete the prerequisites before deploying the lab environment.
Open a terminal on the Luna Desktop.
Clone the
linux-virt-labsGitHub project.git clone https://github.com/oracle-devrel/linux-virt-labs.gitChange into the working directory.
cd linux-virt-labs/ocneInstall the required collections.
ansible-galaxy collection install -r requirements.ymlUpdate the Oracle Cloud Native Environment configuration.
cat << EOF | tee instances.yml > /dev/null
compute_instances:
  1:
    instance_name: "ocne-operator"
    type: "operator"
  2:
    instance_name: "ocne-control-01"
    type: "controlplane"
  3:
    instance_name: "ocne-worker-01"
    type: "worker"
  4:
    instance_name: "ocne-worker-02"
    type: "worker"
  5:
    instance_name: "ocne-control-02"
    type: "controlplane"
  6:
    instance_name: "ocne-control-03"
    type: "controlplane"
  7:
    instance_name: "ocne-control-04"
    type: "controlplane"
  8:
    instance_name: "ocne-control-05"
    type: "controlplane"
  9:
    instance_name: "ocne-worker-03"
    type: "worker"
  10:
    instance_name: "ocne-worker-04"
    type: "worker"
  11:
    instance_name: "ocne-worker-05"
    type: "worker"
  12:
    instance_name: "ocne-worker-06"
    type: "worker"
  13:
    instance_name: "ocne-worker-07"
    type: "worker"
EOF
Deploy the lab environment.
ansible-playbook create_instance.yml -e localhost_python_interpreter="/usr/bin/python3.6" -e ocne_type=full -e use_ocne_full=true -e use_lb=true -e use_oci_ccm=true -e "@instances.yml" -e empty_cp_nodes='2' -e empty_wrk_nodes='2' -e subnet_cidr_block="10.0.0.0/24"The free lab environment requires the extra variable
local_python_interpreter, which setsansible_python_interpreterfor plays running on localhost. This variable is needed because the environment installs the RPM package for the Oracle Cloud Infrastructure SDK for Python, located under the python3.6 modules.Important: Wait for the playbook to run successfully and reach the pause task. At this stage of the playbook, the installation of Oracle Cloud Native Environment is complete, and the instances are ready. Take note of the previous play, which prints the public and private IP addresses of the nodes it deploys and any other deployment information needed while running the lab.
Confirm the Kubernetes Environment
Open a terminal and connect via SSH to the ocne-operator node.
ssh oracle@<ip_address_of_node>Set up the
kubectlcommand on the operator node.mkdir -p $HOME/.kube; \ ssh ocne-control-01 "sudo cat /etc/kubernetes/admin.conf" > $HOME/.kube/config; \ sudo chown $(id -u):$(id -g) $HOME/.kube/config; \ export KUBECONFIG=$HOME/.kube/config; \ echo 'export KUBECONFIG=$HOME/.kube/config' >> $HOME/.bashrcVerify the deployment of the Kubernetes and OCI-CCM modules.
olcnectl module instances \
--environment-name myenvironment
The output should display the three control plane nodes, five worker nodes, and the kubernetes and oci-ccm modules.
Verify that the cluster is running.
kubectl get nodesThe
STATUScolumn shows all nodes in aReadystate.
Set up the New Kubernetes Nodes
When scaling up an Oracle Cloud Native Environment, any new nodes require all of the prerequisites listed in this tutorial's Prerequisites section.
Note: The initial lab deployment handles the prerequisite steps for our additional Oracle Cloud Native Environment Kubernetes nodes.
We scale up this environment using the ocne-control-04 and ocne-control-05 instances as the new control plane nodes while using the ocne-worker-06 and ocne-worker-07 instances as the new worker nodes. With the prerequisites completed and the Oracle Cloud Native Environment Platform Agent service enabled, we can generate certificates.
Create X.509 Private CA Certificates
This deployment uses X.509 Private CA Certificates to secure node communication. Other methods exist to manage and deploy the certificates, such as using the HashiCorp Vault secrets manager or certificates signed by a trusted Certificate Authority (CA). Covering the usage of these other methods is outside the scope of this tutorial.
Create a list of new nodes.
for NODE in 'ocne-control-04' 'ocne-control-05' 'ocne-worker-06' 'ocne-worker-07'; do VAR+="${NODE},"; done
VAR=${VAR%,}
The provided bash script creates a comma-separated list of the nodes to add to the cluster during the scale-up procedure.
Generate and distribute certificates for the new nodes using the existing private CA.
Use the
--byo-ca-certoption to specify the location of the existing CA Certificate and the--byo-ca-keyoption to specify the location of the existing CA Key. Use the--nodesoption and provide the FQDN of the new control plane and worker nodes.olcnectl certificates distribute \ --cert-dir $HOME/certificates \ --byo-ca-cert $HOME/certificates/ca/ca.cert \ --byo-ca-key $HOME/certificates/ca/ca.key \ --nodes $VAR
Configure the Platform Agent to Use the Certificates
Configure the Platform Agent on each new node to use the certificates copied over in the previous step. We accomplish this task from the operator node by running the command over ssh.
Configure for each additional control plane and worker node.
for host in ocne-control-04 ocne-control-05 ocne-worker-06 ocne-worker-07
do
ssh $host /bin/bash <<EOF
  sudo /etc/olcne/bootstrap-olcne.sh --secret-manager-type file --olcne-component agent
EOF
done
Access the OCI Load Balancer and View the Backends
Because having more than one node defined for the Kubernetes control plane requires a Load Balancer, it is interesting to view the configuration we automatically set up when deploying the free lab environment. These steps show the three nodes deployed and configured when creating the lab as having a Healthy status.
Switch from the Terminal to the Luna desktop
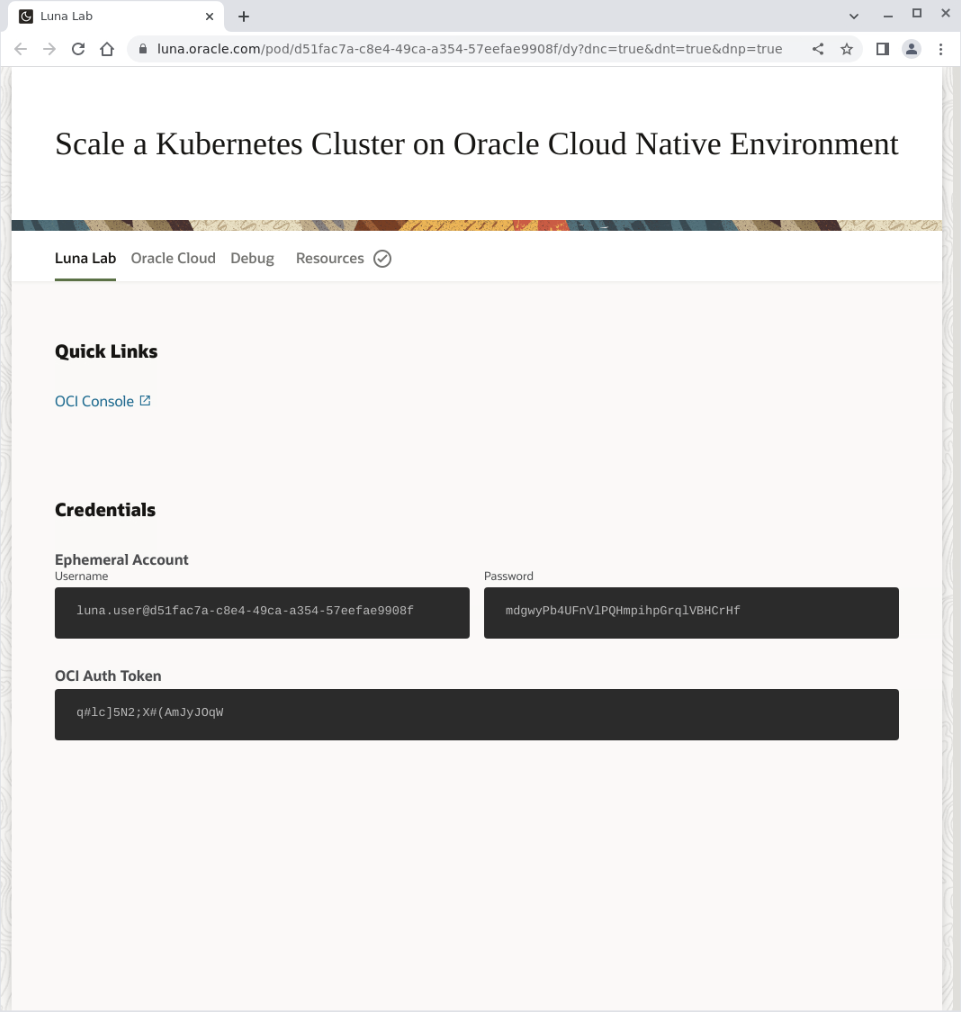
Open the Luna Lab details page using the Luna Lab icon.
Click on the OCI Console link.
The Oracle Cloud Console login page displays.
Enter the
User NameandPassword(found on the Luna Lab tab in the Credentials section).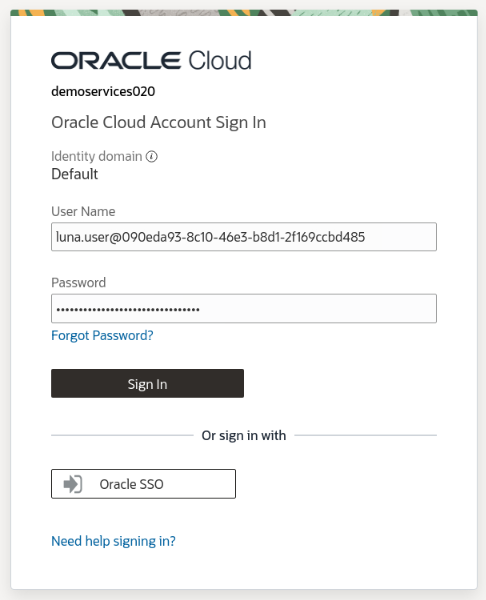
Click the
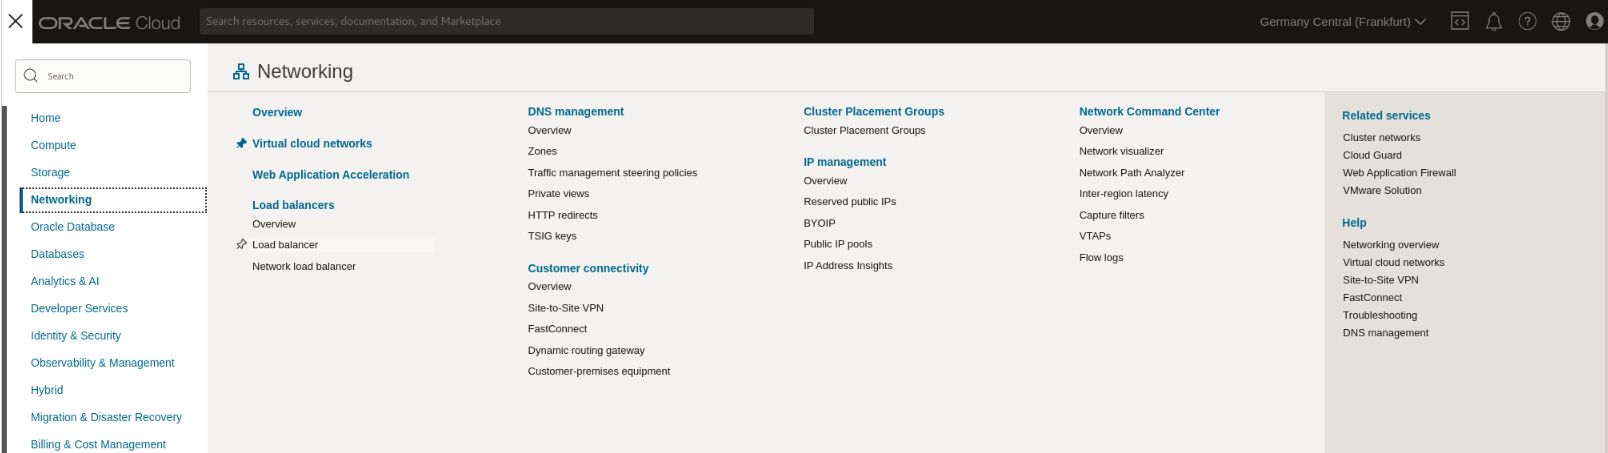
Sign-inbutton.Click on the navigation menu in the page's top-left corner, then Networking and Load Balancer.
The Load Balancers page displays.
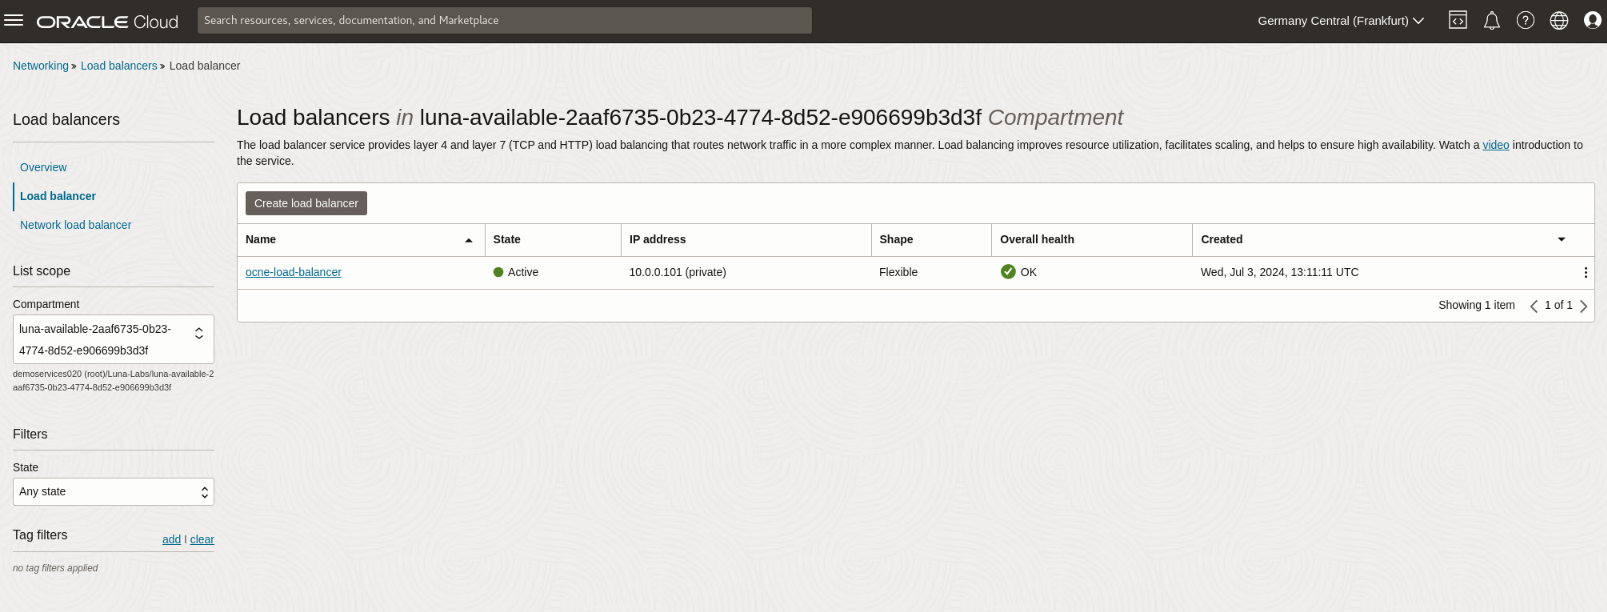
Click on the ocne-load-balancer item listed in the table.
Scroll down the page.
Under the Resources section in the navigation panel on the left-hand side of the browser window, click on the link to the Backend Sets.
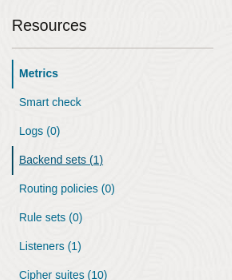
The Backend Sets table displays.
Click on the ocne-lb-backend-set link under the Name column within the Backend Sets table.

Scroll down the page.
Under the Resources section in the navigation panel on the left-hand side of the browser window, click the Backends link.

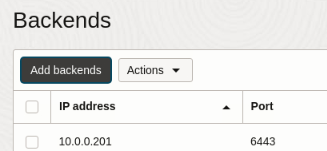
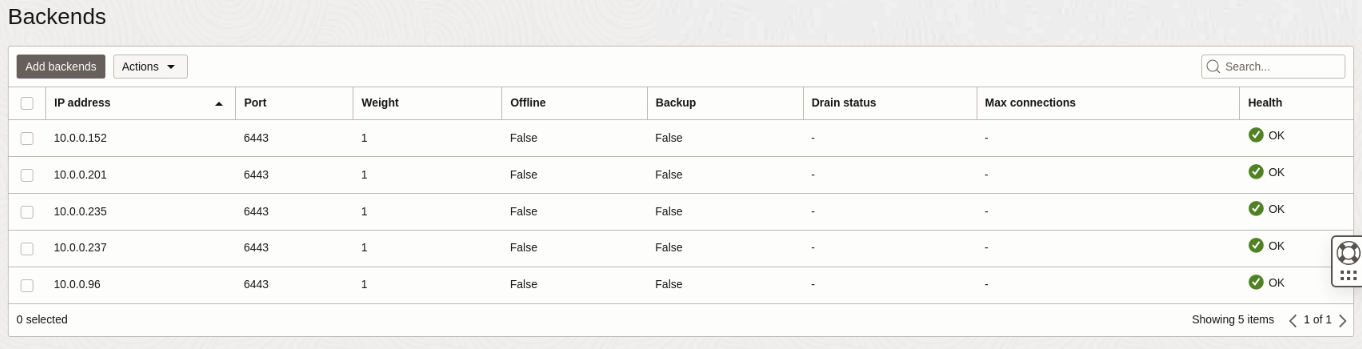
The page displays the Backends representing the control plane nodes.

Note The three backend nodes are in the OK state. Keep this browser tab open, as we'll return to this page to add the new control plane nodes and check the status after completing the scale-up steps.
Scale Up the Control Plane and Worker Nodes
Run the module update command.
Use the
olcnectl module updatecommand. The Platform API Server validates and compares the configuration changes with the cluster's state. After the comparison, it recognizes the need to add more nodes to the cluster.olcnectl module update \ --environment-name myenvironment \ --name mycluster \ --control-plane-nodes ocne-control-01:8090,ocne-control-02:8090,ocne-control-03:8090,ocne-control-04:8090,ocne-control-05:8090 \ --worker-nodes ocne-worker-01:8090,ocne-worker-02:8090,ocne-worker-03:8090,ocne-worker-04:8090,ocne-worker-05:8090,ocne-worker-06:8090,ocne-worker-07:8090 \ --log-level debugThe
--log-level debugshows the command's output to the console in debug mode, allowing the user to follow along with the progress.Respond with
yto the following prompts during the upgrade process.[WARNING] Update will shift your workload and some pods will lose data if they rely on local storage. Do you want to continue? (y/N) yNote: Wait for the scale-up operation to complete before continuing with the tutorial steps. Given the size of the cluster, it can take upwards of 25-30 minutes.
Switch to the browser and the Cloud Console window.
Click the Add backends button within the Backends section.
The Add backends panel displays.
Click the checkbox next to
ocne-control-04andocne-control-05and change theportvalue for each to6443.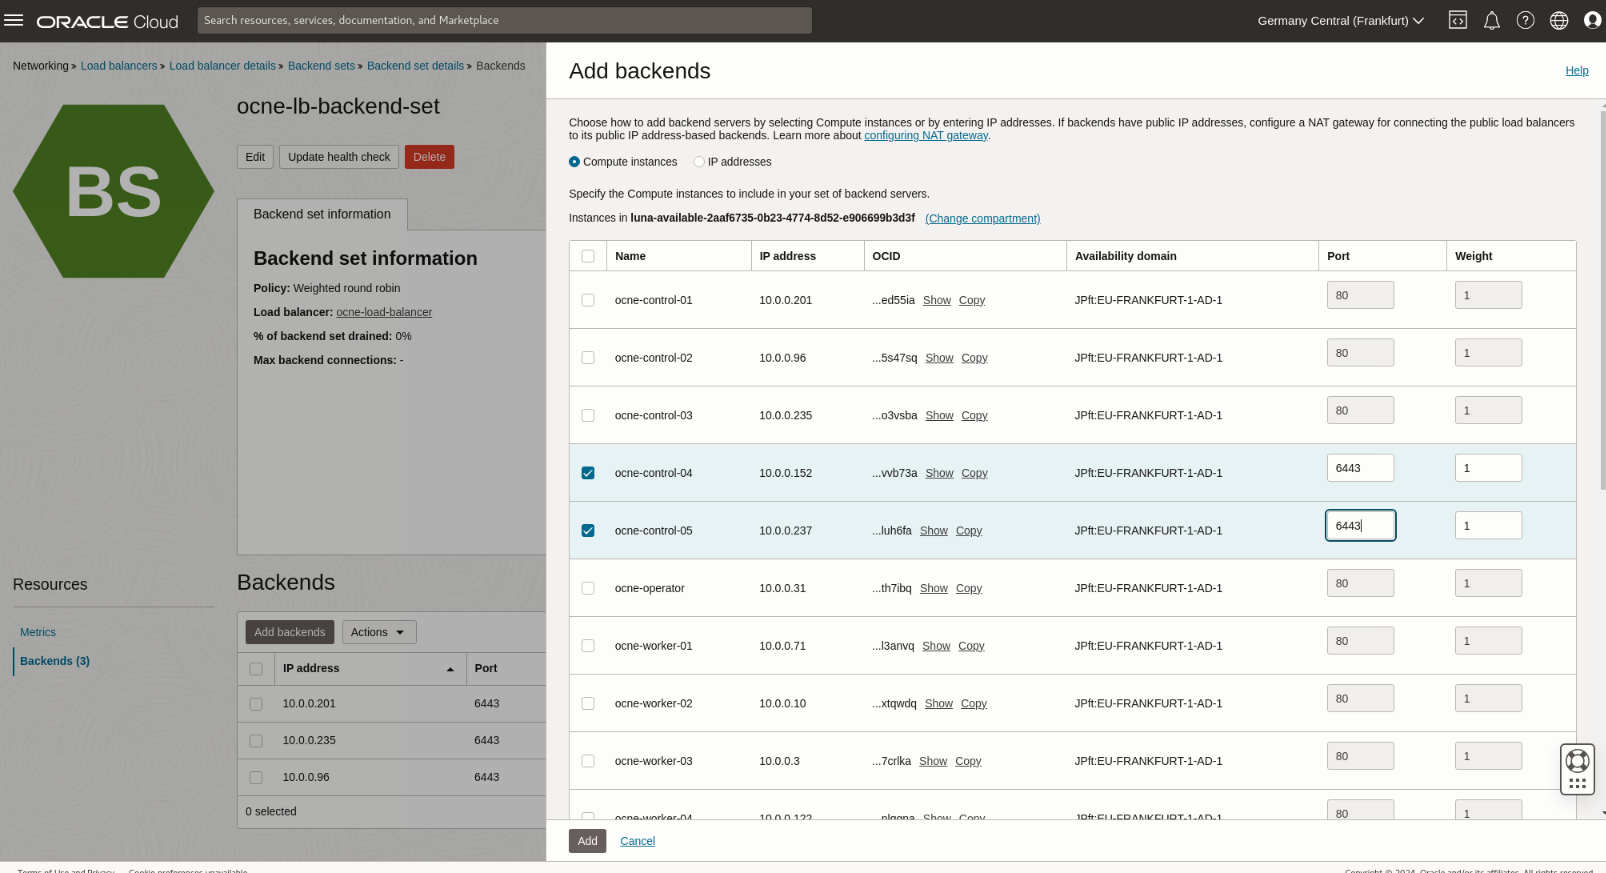
Click the Add button at the bottom of the panel.
A Work request submitted dialog box appears, and when completed, it shows a status of
Successful.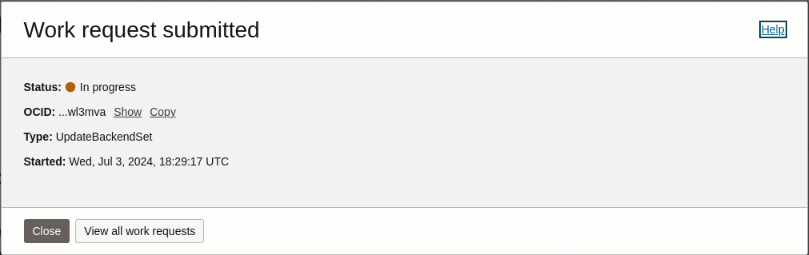
Click the Close button in the dialog box.
Confirm the Backends section shows the new control plane nodes appearing healthy.
Confirm the addition of the new control plane and worker nodes to the cluster.
kubectl get nodesWith
ocne-control-04,ocne-control-05,ocne-work-06, andocne-worker-07in the list, they are now part of the cluster. This output confirms a successful scale-up operation.
Scale Down the Control Plane Nodes
Next, we'll scale down the control plane nodes to demonstrate that the control plane and worker nodes can scale independently.
Update the cluster and remove the nodes.
olcnectl module update \
--environment-name myenvironment \
--name mycluster \
--control-plane-nodes ocne-control-01:8090,ocne-control-02:8090,ocne-control-03:8090 \
--worker-nodes ocne-worker-01:8090,ocne-worker-02:8090,ocne-worker-03:8090,ocne-worker-04:8090,ocne-worker-05:8090,ocne-worker-06:8090,ocne-worker-07:8090 \
--log-level debug \
--force
Note: The
--forcewill avoid and suppress the module update warning messages.Switch to the browser and the Cloud Console window.
Confirm the Load Balancer's Backend Set status.
The page shows three healthy (
Health = 'OK') and two unhealthy nodes. The unhealthy nodes will eventually change fromWarning - Connection failedtoCritical - Connection failed. After removing nodes from the Kubernetes cluster, they appear critical to the load balancer since they are no longer available.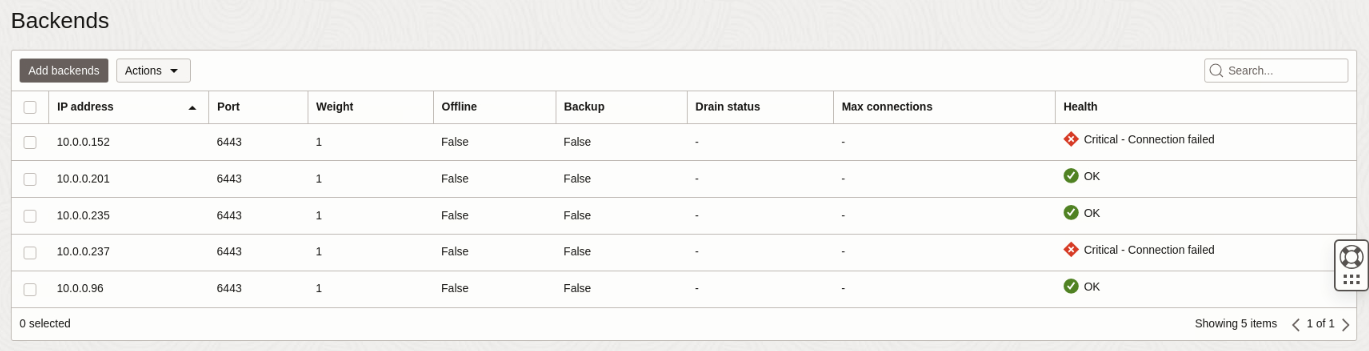
The load balancer will not route traffic to the unhealthy nodes. If removing these control plane nodes from the Oracle Cloud Native Environment cluster is temporary, you can leave them in the OCI Load Balancer Backends list. Otherwise, we recommend removing them by clicking the checkbox next to each unhealthy node, clicking the Actions drop-down list of values, and then selecting Delete. A Delete backends dialog appears to confirm the action. Click the Delete backends button to confirm. A Work request submitted dialog appears and shows a status of
Successfulafter removing the backends. Click the Close button to exit the dialog.Switch to the terminal window.
Confirm the removal of the control plane nodes.
kubectl get nodesThe output again shows the original three control plane nodes, confirming a successful scale-down operation.
Summary
That completes the demonstration of adding and removing Kubernetes nodes from a cluster. While this exercise demonstrated updating the control plane and worker nodes simultaneously, this is not the recommended approach to scaling up or scaling down an Oracle Cloud Native Environment Kubernetes cluster. In production environments, administrators should undertake these tasks separately.