Deploy an External Load Balancer with Oracle Cloud Native Environment
Introduction
The control plane node within Oracle Cloud Native Environment is responsible for cluster management and provides access to the API used to configure and manage resources within the Kubernetes cluster. Kubernetes administrators can run control plane node components within a Kubernetes cluster as a set of containers within a dedicated pod, and even replicate these components to provide highly available (HA) control plane node functionality.
Another way to replicate the control plane components is to add additional control plane nodes. Replicating nodes ensures the ability to handle more requests for control plane functionality and prevents the API from being unavailable. The API becomes unavailable in a single control plane cluster when the control plane node is offline, so the environment cannot respond to node failures or perform any new operations. These operations may include creating new resources or editing or moving existing ones.
When running in a highly available configuration, Oracle Cloud Native Environment requires a load balancer to route traffic to the control plane nodes. We can use the Load Balancer in Oracle Cloud Infrastructure (OCI) to meet this requirement.
Objectives
At the end of this tutorial, you should be able to do the following:
- Configure an OCI Load Balancer for use with Oracle Cloud Native Environment
- Configure Oracle Cloud Native Environment to use the OCI Load Balancer
- Verify failover between the control plane nodes completes successfully
Prerequisites
Minimum of a 6-node Oracle Cloud Native Environment cluster:
- Operator node
- 3 Kubernetes control plane nodes
- 2 Kubernetes worker nodes
Each system should have Oracle Linux installed and configured with:
- An Oracle user account (used during the installation) with sudo access
- Key-based SSH, also known as password-less SSH, between the hosts
- Installation of Oracle Cloud Native Environment
Deploy Oracle Cloud Native Environment
Note: If running in your own tenancy, read the linux-virt-labs GitHub project README.md and complete the prerequisites before deploying the lab environment.
Open a terminal on the Luna Desktop.
Clone the
linux-virt-labsGitHub project.git clone https://github.com/oracle-devrel/linux-virt-labs.gitChange into the working directory.
cd linux-virt-labs/ocneInstall the required collections.
ansible-galaxy collection install -r requirements.ymlUpdate the Oracle Cloud Native Environment configuration.
cat << EOF | tee instances.yml > /dev/null
compute_instances:
  1:
    instance_name: "ocne-operator"
    type: "operator"
  2:
    instance_name: "ocne-control-01"
    type: "controlplane"
  3:
    instance_name: "ocne-worker-01"
    type: "worker"
  4:
    instance_name: "ocne-worker-02"
    type: "worker"
  5:
    instance_name: "ocne-control-02"
    type: "controlplane"
  6:
    instance_name: "ocne-control-03"
    type: "controlplane"
EOF
Deploy the lab environment.
ansible-playbook create_instance.yml -e localhost_python_interpreter="/usr/bin/python3.6" -e ocne_type=full -e "@instances.yml"The free lab environment requires the extra variable
local_python_interpreter, which setsansible_python_interpreterfor plays running on localhost. This variable is needed because the environment installs the RPM package for the Oracle Cloud Infrastructure SDK for Python, located under the python3.6 modules.Important: Wait for the playbook to run successfully and reach the pause task. At this stage of the playbook, the installation of Oracle Cloud Native Environment is complete, and the instances are ready. Take note of the previous play, which prints the public and private IP addresses of the nodes it deploys and any other deployment information needed while running the lab.
Create an Oracle Cloud Infrastructure Load Balancer
Open the browser and log in to the Cloud Console.
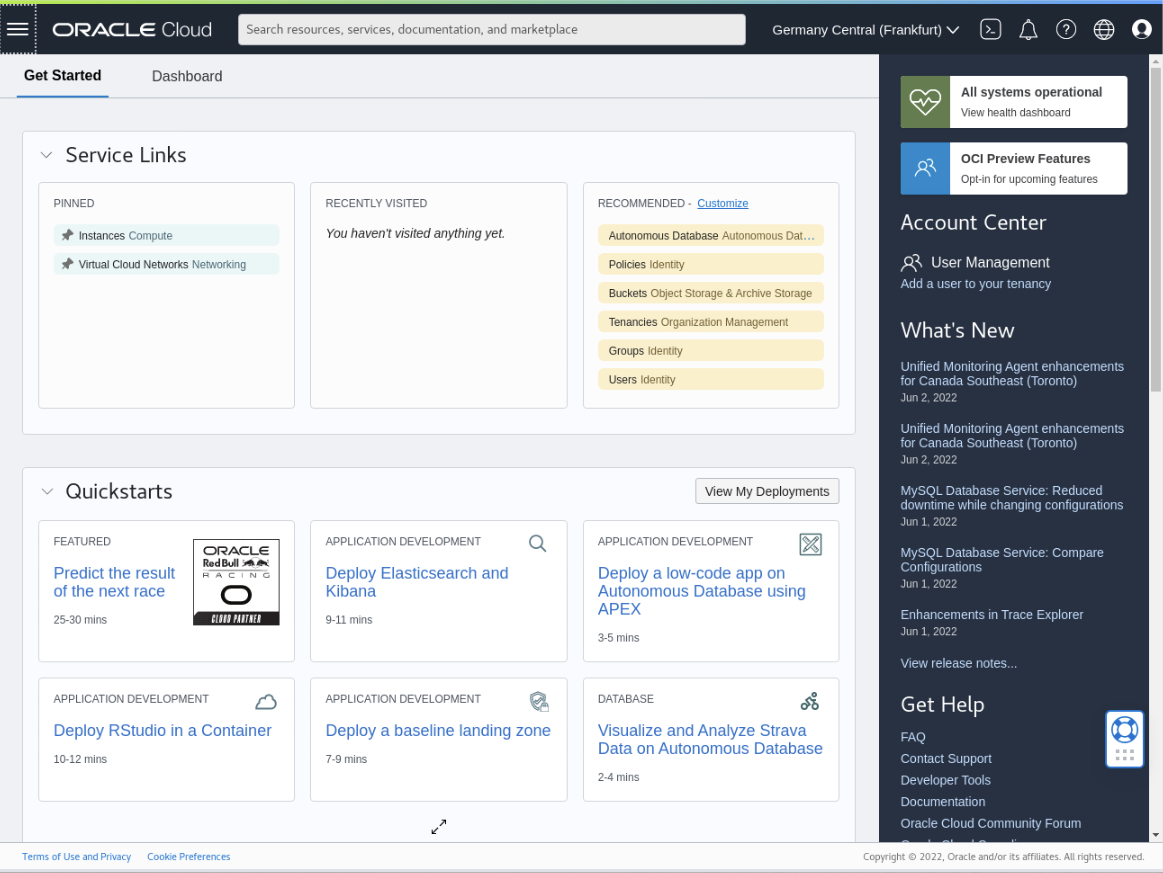
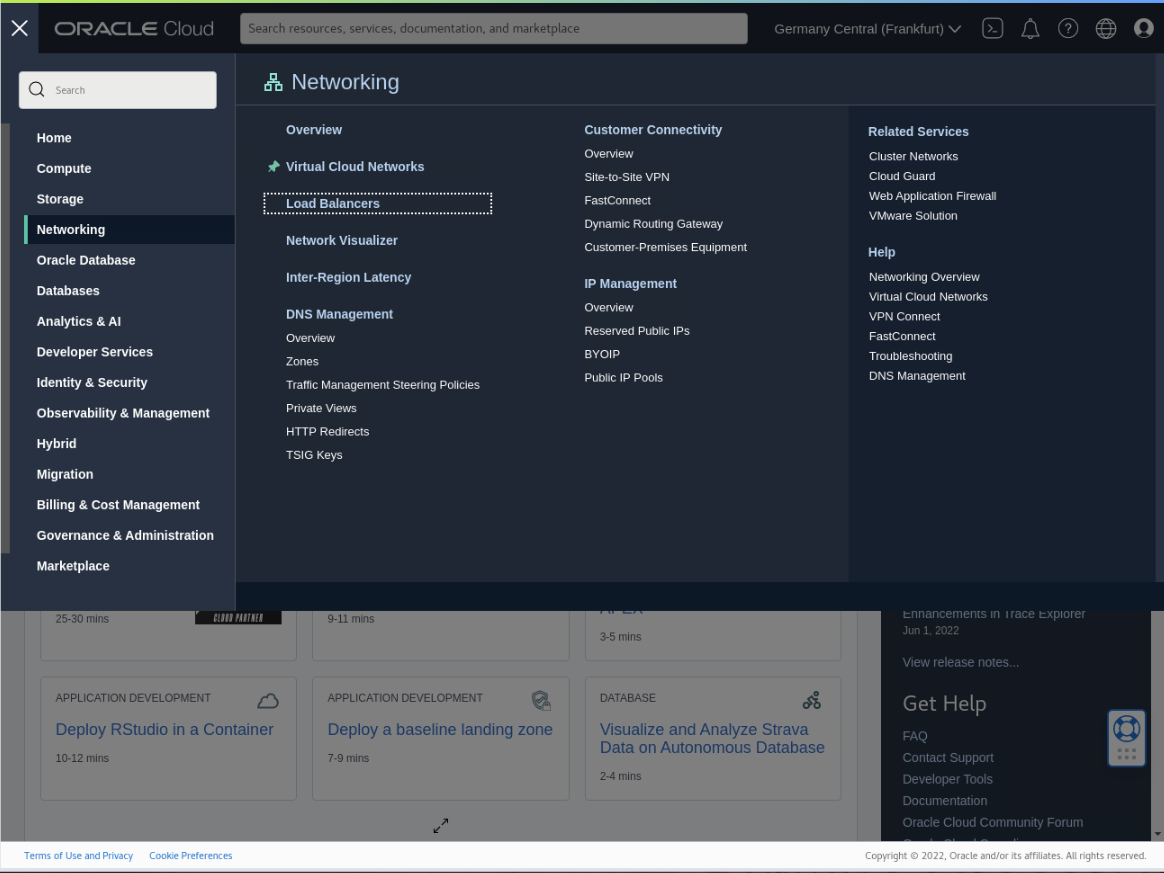
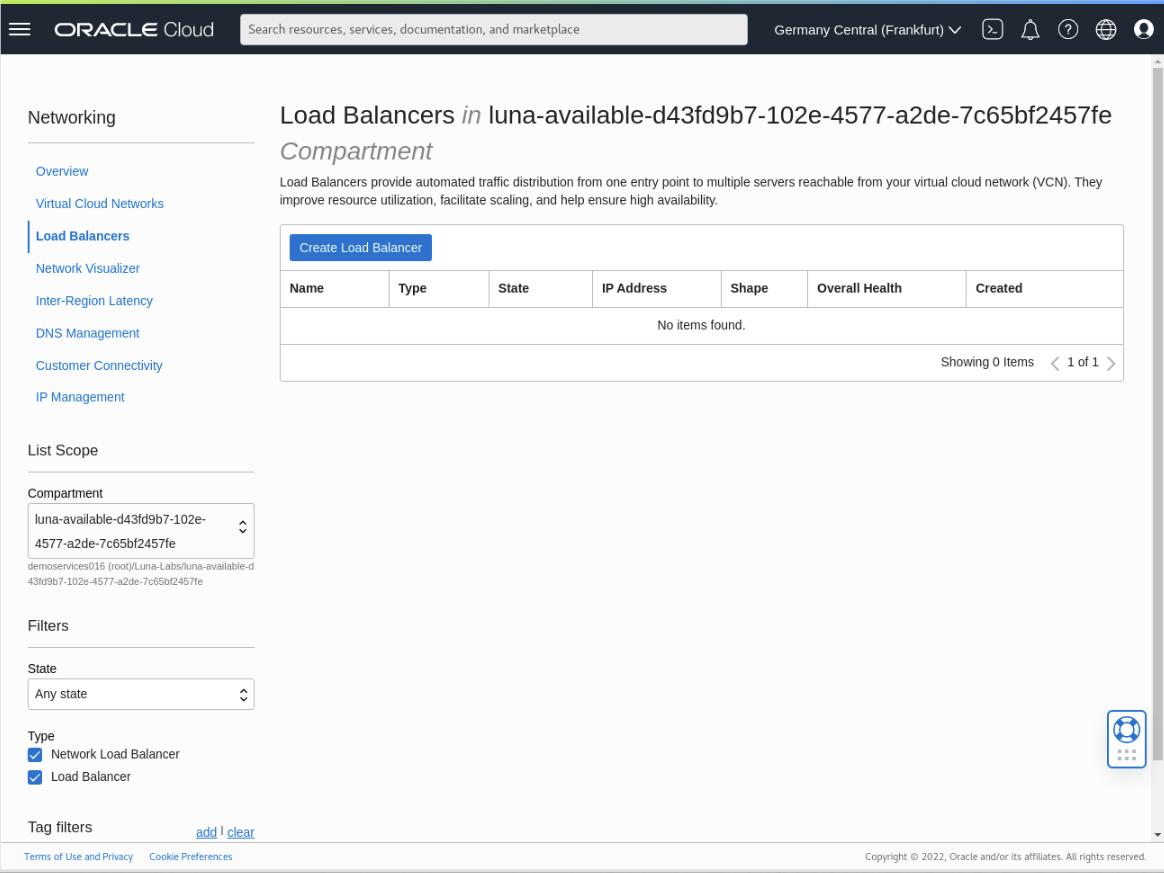
Click on the navigation menu in the page's top-left corner, then Networking and Load balancers.
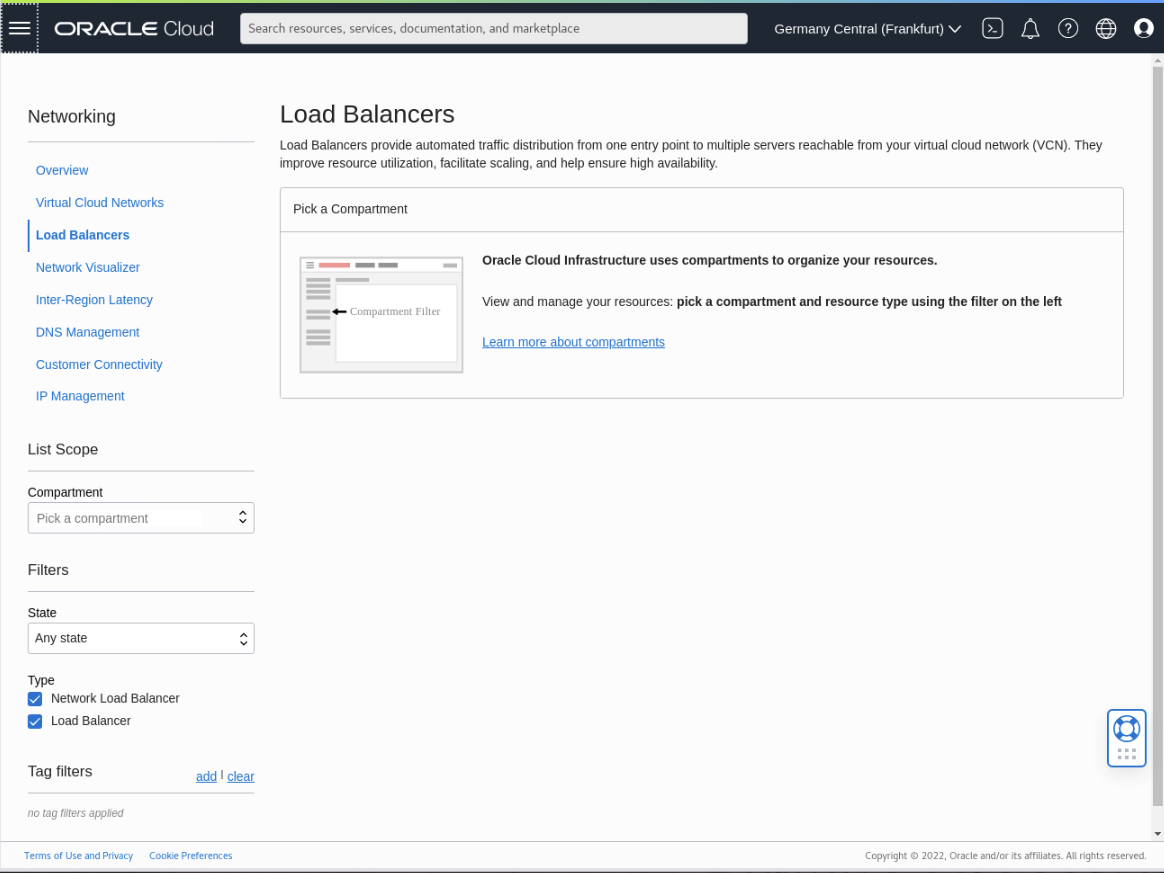
The Load Balancers page displays.
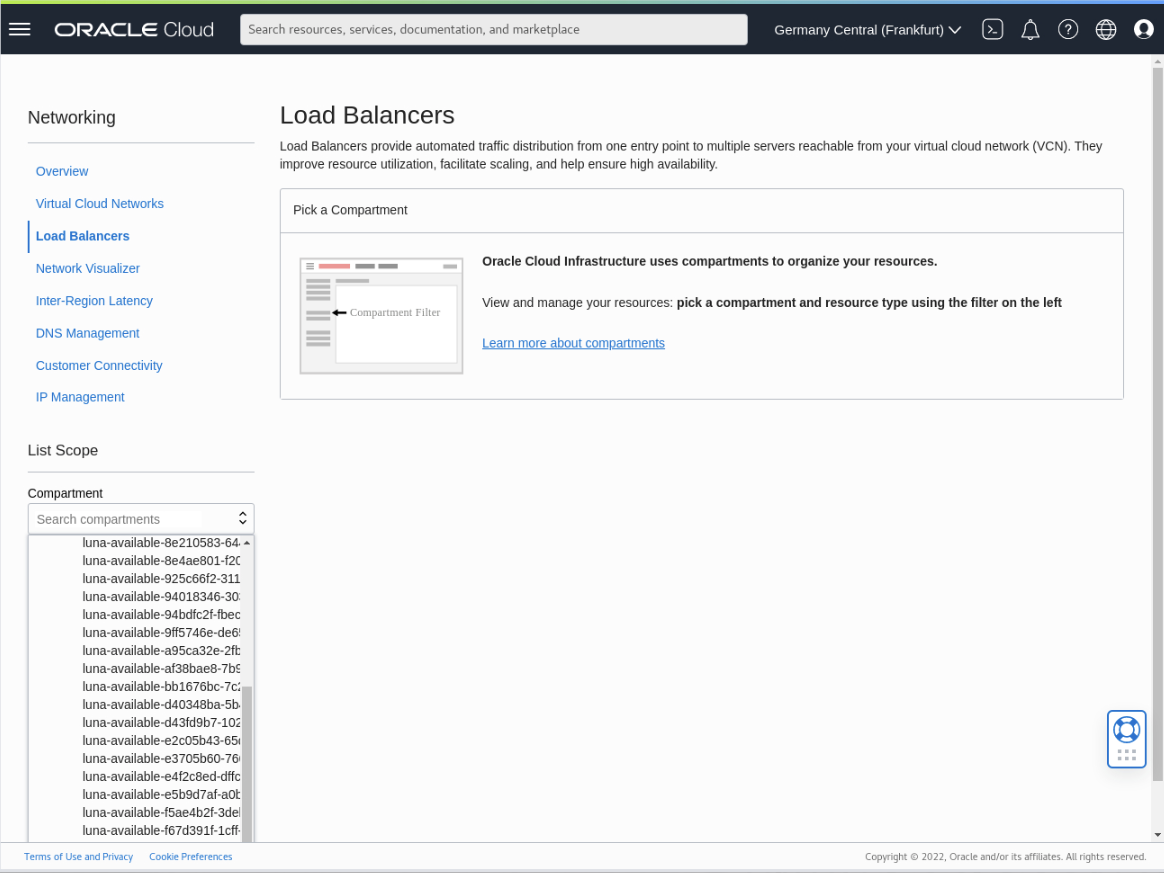
Locate your compartment within the Compartments drop-down list.
Click on the Create load balancer button.
Add Load Balancer Details
Set the name to ocne-load-balancer
Click the Private option in the visibility type section.
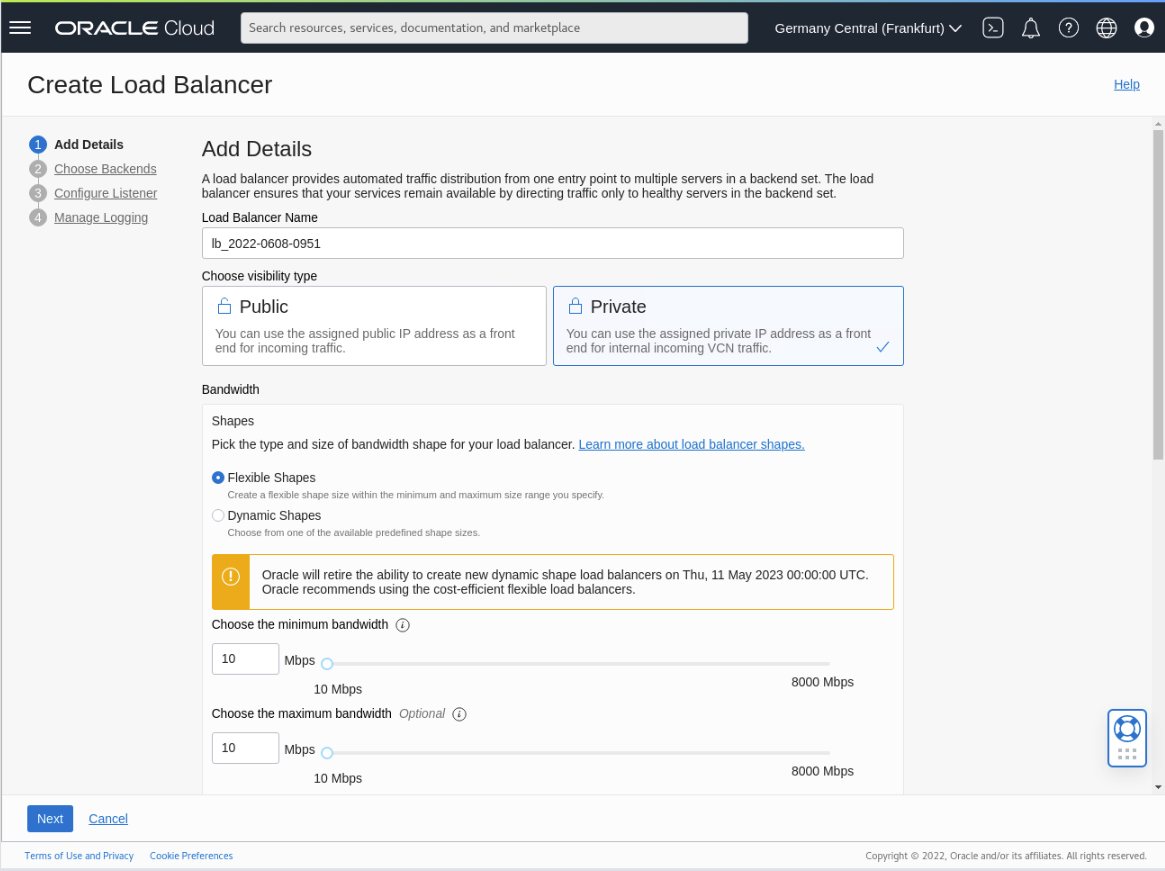
Keep the default Flexible shapes and min/max bandwidth of 10Mbps.
Scroll down the page to the Choose networking section.
Select the value from the drop-down list box for Visual cloud network and Subnet.
When using the deployment playbook, the Virtual cloud network is Linuxvirt Virtual Cloud Network, and the Subnet is Linuxvirt Subnet (regional).
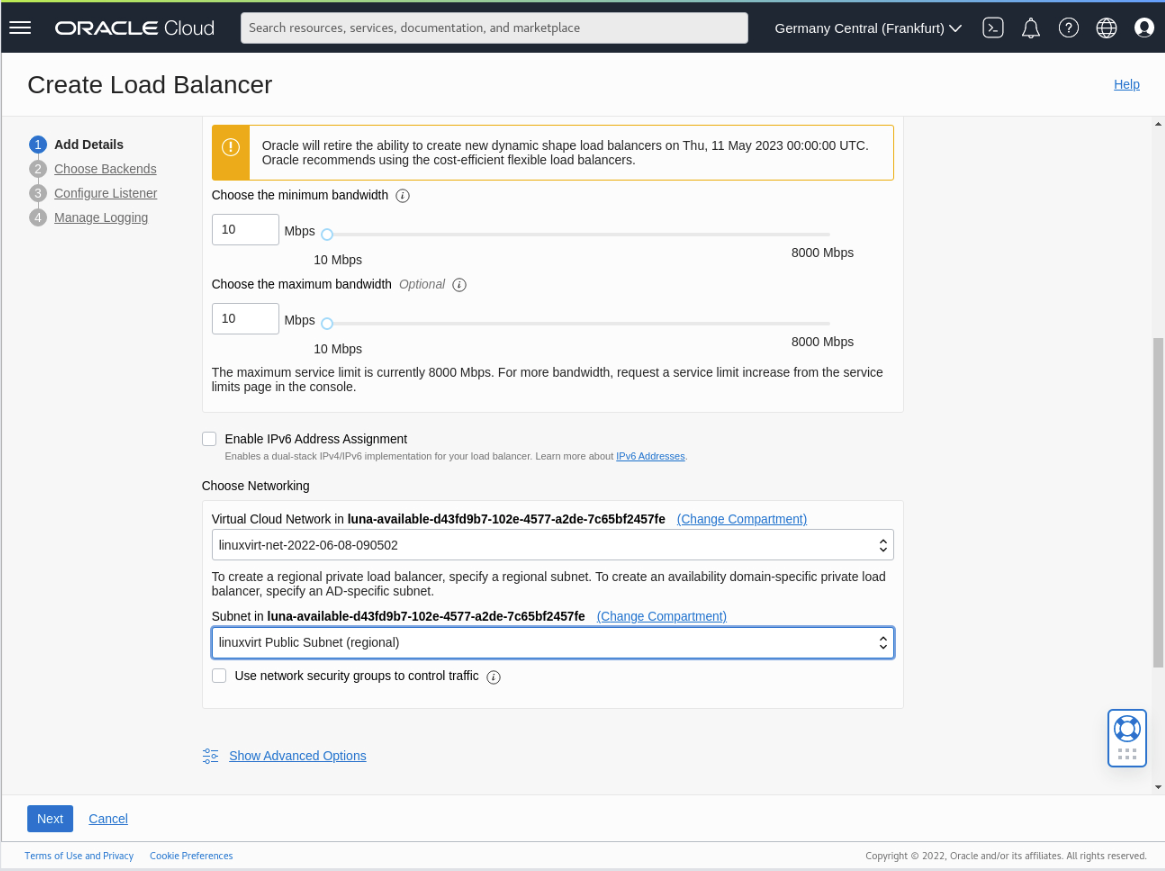
Click the Next button.
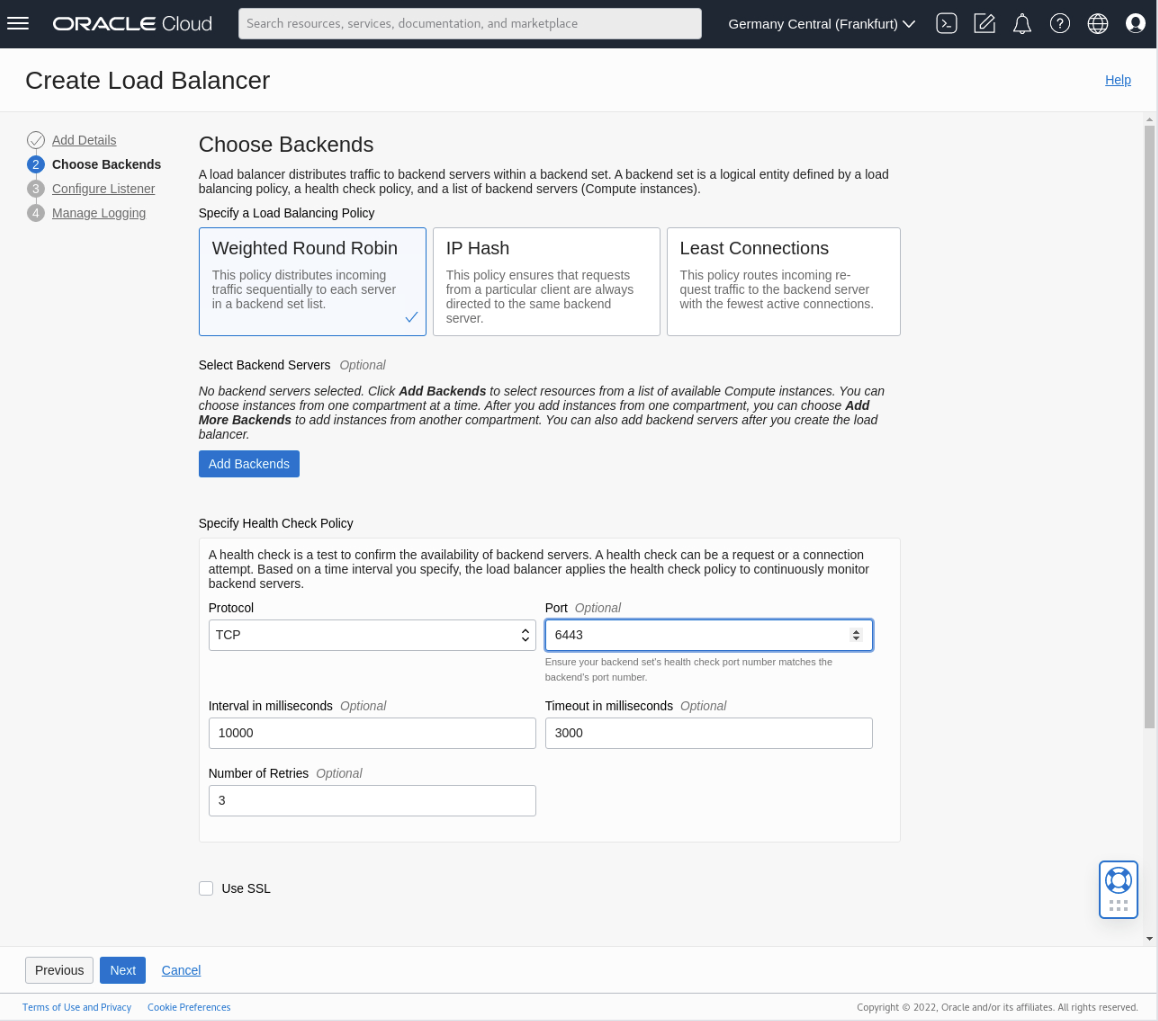
Set Load Balancer Policy and Protocol
Set the load balancing policy to Weighted round robin
Modify the Specify health check policy section.
- Set the Protocol to TCP from the list of values.
- Change the Port value from 80 to 6443.
Add Backend Nodes
Click the Add backends button to open its dialog window.
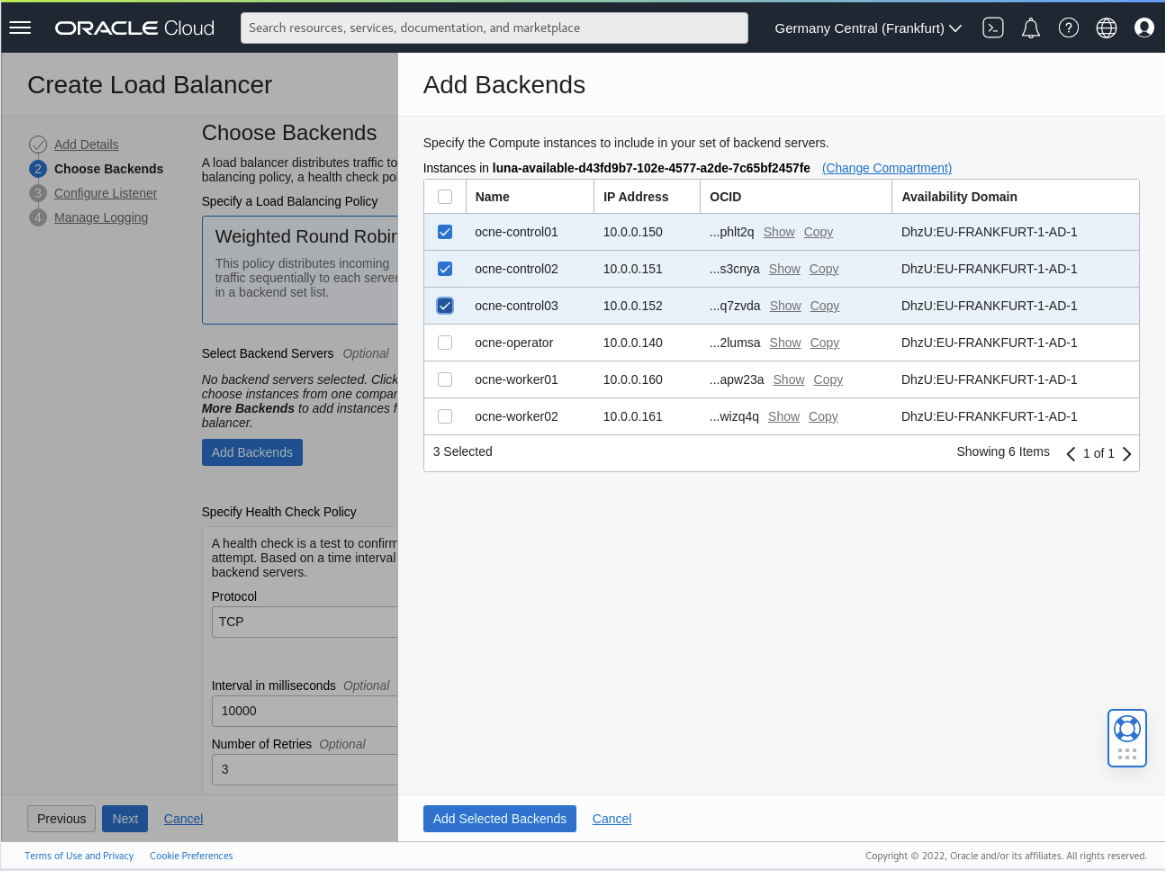
Select the three control plane nodes and click the Add selected backends button.
- ocne-control-01
- ocne-control-02
- ocne-control-03
Update the Port column to 6443 for each of the backend servers.
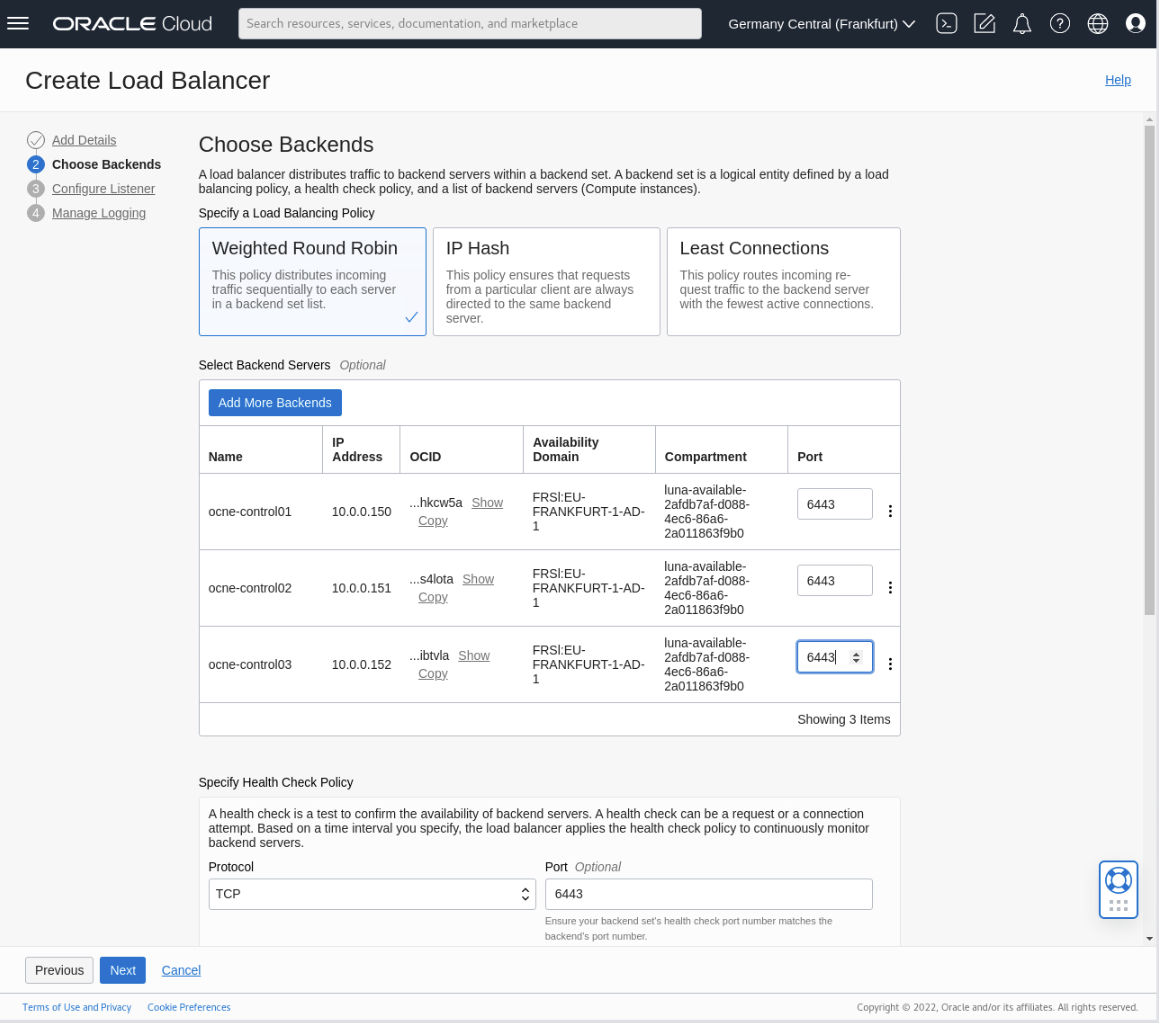
Click the Next button.
Configure the Load Balancer Listener
Select TCP as the type of traffic your listener handles.
Change the port your listener monitors for ingress traffic from the default 22 to 6443.
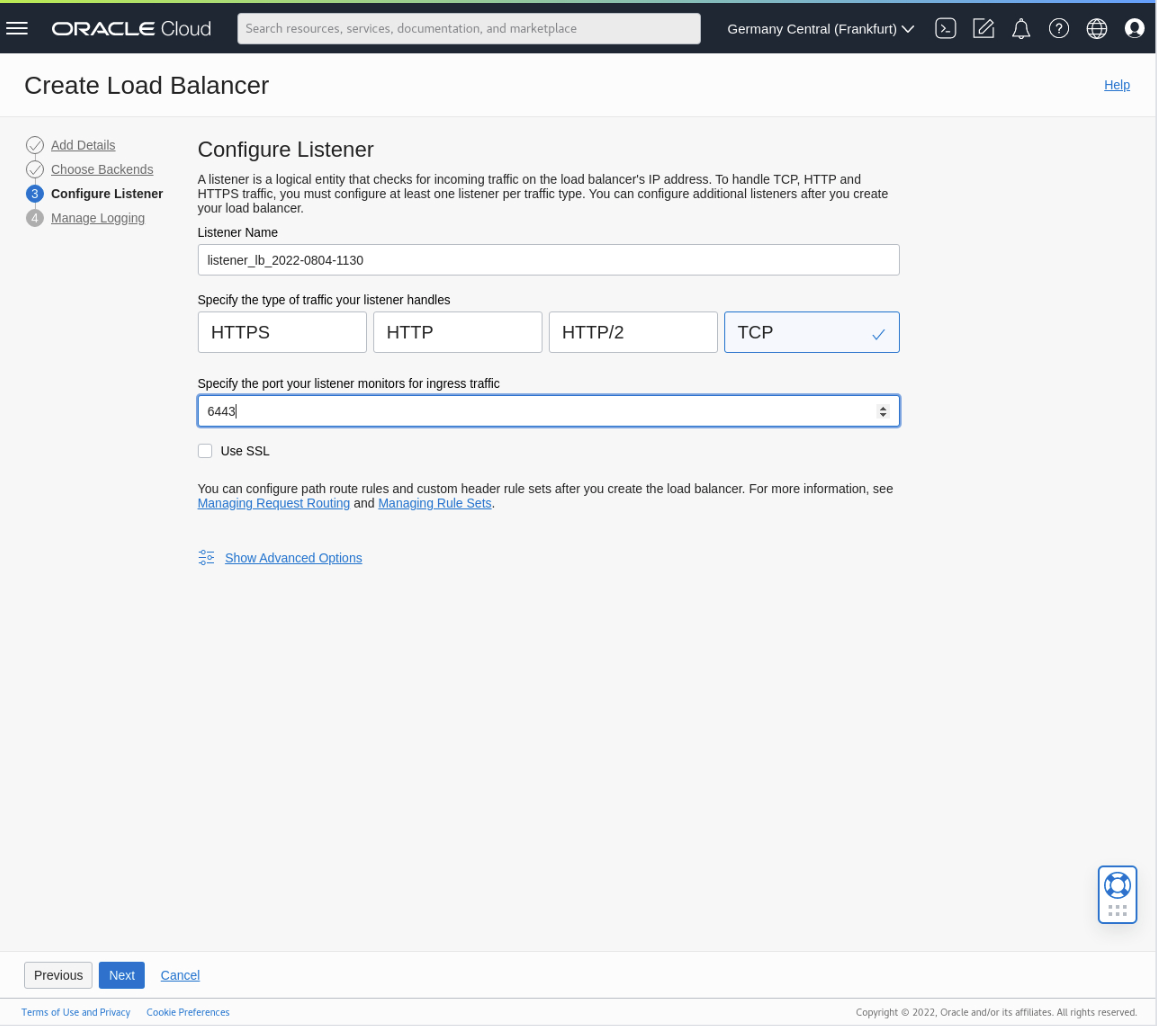
Click the Next button.
Configure Load Balancer Logging
The last step in setting up a load balancer is the Manage logging option.
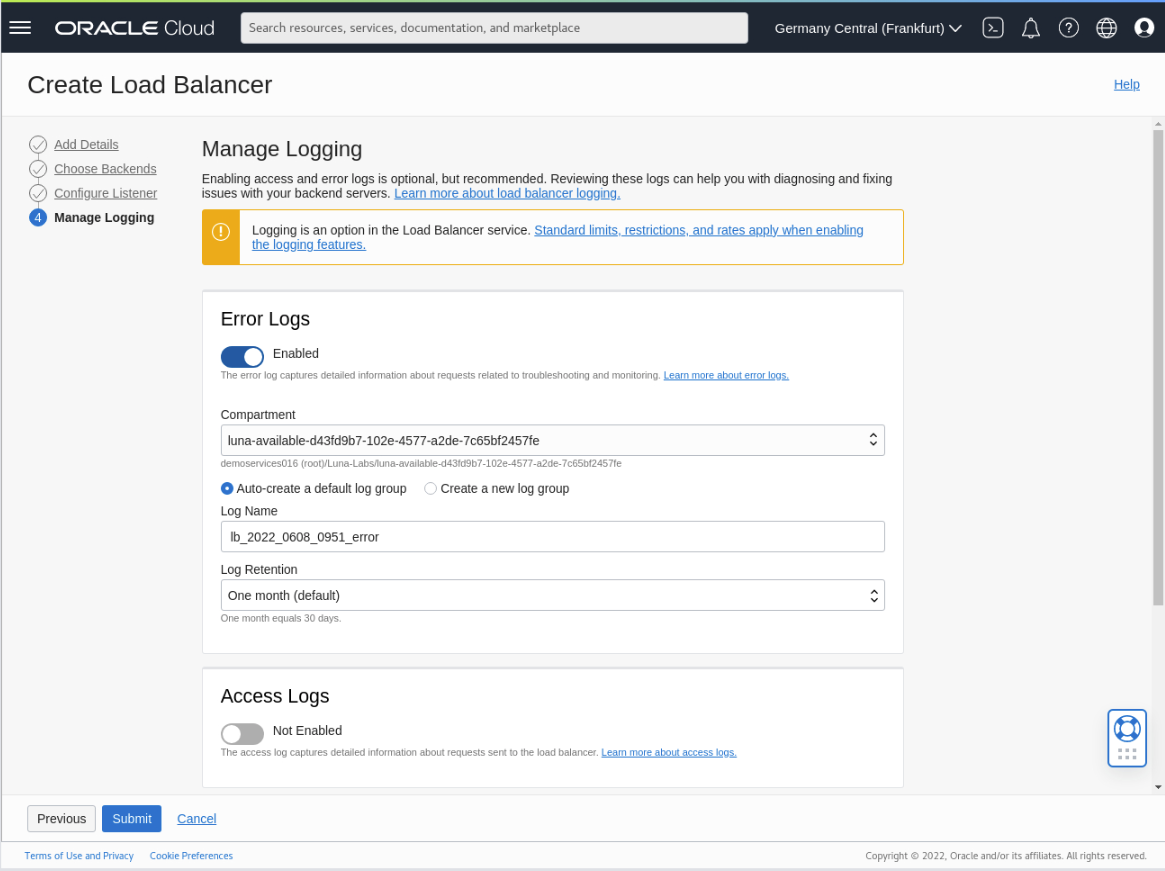
Our scenario requires no changes.
Click the Submit button to create the load balancer.
Load Balancer Information
The browser displays the Load balancer overview page.
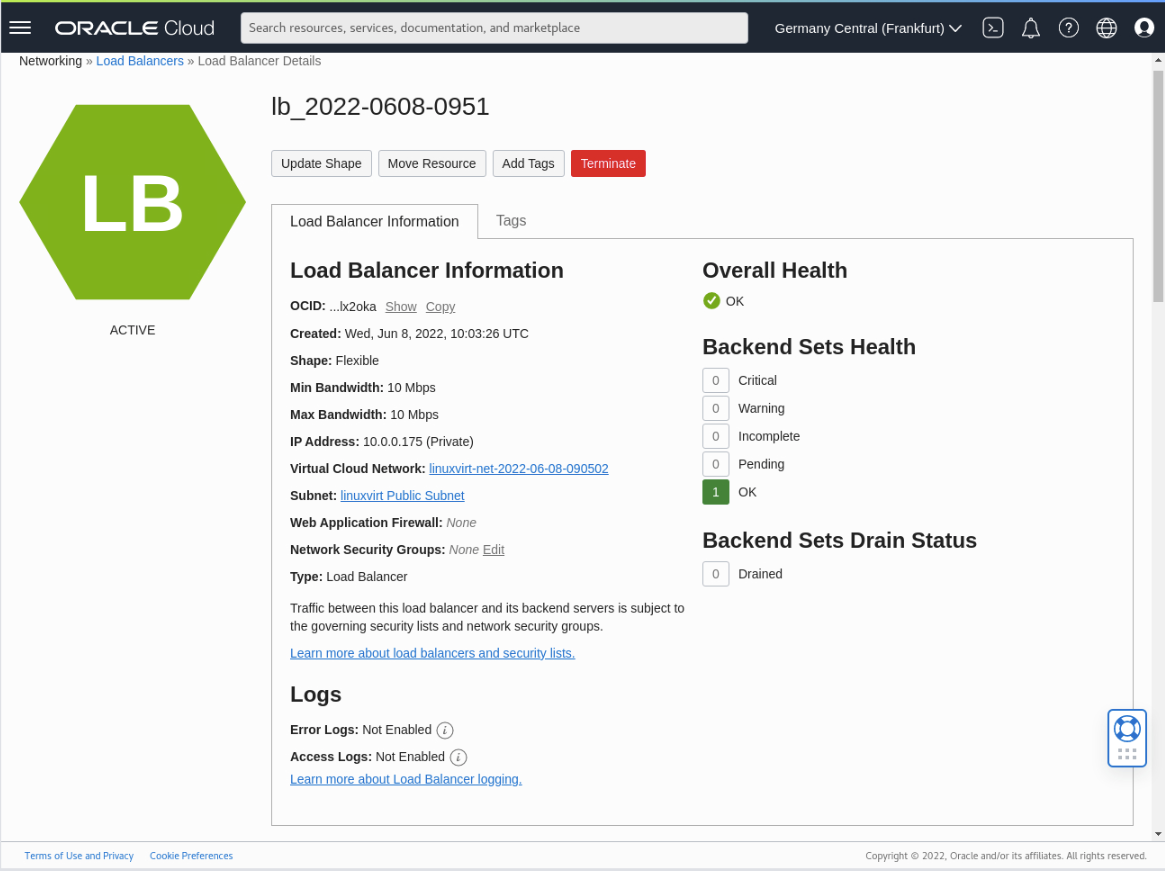
Note: The Overall Health and Backend Sets Health sections will not display as a green OK since we have yet to create the Kubernetes cluster for Oracle Cloud Native Environment.
Create a Platform CLI Configuration File
Administrators can use a configuration file to simplify creating and managing environments and modules. The configuration file, written in valid YAML syntax, includes all information about creating the environments and modules. Using a configuration file saves repeated entries of various Platform CLI command options.
More information on creating a configuration file is in the documentation at Using a Configuration File .
Note: When entering more than one control plane node in the
myenvironment.yamlwhen configuring the Oracle Cloud Native Environment, then the Platform CLI requires a load balancer entry as a new argument (load-balancer: <enter-your-load-balancer-ip-here>) in the configuration file.
Open a terminal and connect via SSH to the ocne-operator node.
ssh oracle@<ip_address_of_node>Get the load balancer IP address.
The deployment playbook completes the following preparatory steps on the operator node during deployment, which allows using the OCI CLI to succeed.
Install Oracle Cloud Infrastructure CLI.
Look up the OCID of the Compartment hosting the Oracle Cloud Native Environment.
Add these environment variables to the users
~/.bashrcfile.COMPARTMENT_OCID=<compartment_ocid>LC_ALL=C.UTF-8LANG=C.UTF-8
LB_IP=$(oci lb load-balancer list --auth instance_principal --compartment-id $COMPARTMENT_OCID | jq -r '.data[]."ip-addresses"[]."ip-address"')Display the load balancer IP address.
echo $LB_IPCreate a configuration file with the load balancer entry.
cat << EOF | tee ~/myenvironment.yaml > /dev/null
environments:
  - environment-name: myenvironment
    globals:
      api-server: 127.0.0.1:8091
      secret-manager-type: file
      olcne-ca-path: /etc/olcne/certificates/ca.cert
      olcne-node-cert-path: /etc/olcne/certificates/node.cert
      olcne-node-key-path:  /etc/olcne/certificates/node.key
    modules:
      - module: kubernetes
        name: mycluster
        args:
          container-registry: container-registry.oracle.com/olcne
          load-balancer: $LB_IP:6443
          control-plane-nodes:
            - ocne-control-01.$(hostname -d):8090
            - ocne-control-02.$(hostname -d):8090
            - ocne-control-03.$(hostname -d):8090
          worker-nodes:
            - ocne-worker-01.$(hostname -d):8090
            - ocne-worker-02.$(hostname -d):8090
          selinux: enforcing
          restrict-service-externalip: true
          restrict-service-externalip-ca-cert: /home/oracle/certificates/ca/ca.cert
          restrict-service-externalip-tls-cert: /home/oracle/certificates/restrict_external_ip/node.cert
          restrict-service-externalip-tls-key: /home/oracle/certificates/restrict_external_ip/node.key
EOF
Create the Environment and Kubernetes Module
Create the environment.
cd ~
olcnectl environment create --config-file myenvironment.yaml
Create the Kubernetes module.
olcnectl module create --config-file myenvironment.yamlValidate the Kubernetes module.
olcnectl module validate --config-file myenvironment.yamlIn the free lab environment, there are no validation errors. The command's output provides the steps required to fix the nodes if there are any errors.
Install the Kubernetes module.
olcnectl module install --config-file myenvironment.yamlNote: The deployment of Kubernetes to the nodes will take several minutes to complete.
Verify the deployment of the Kubernetes module.
olcnectl module instances --config-file myenvironment.yamlExample Output:
INSTANCE              MODULE      STATE
mycluster             kubernetes  installed
ocne-control-01:8090  node        installed
ocne-control-02:8090  node        installed
ocne-control-03:8090  node        installed
ocne-worker-01:8090   node        installed
ocne-worker-02:8090   node        installed
Set up the Kubernetes Command Line Tool
Set up the
kubectlcommand on each control plane node.for host in ocne-control-01 ocne-control-02 ocne-control-03 do printf "====== $host ======\n\n" ssh $host \ "mkdir -p $HOME/.kube; \ sudo cp -i /etc/kubernetes/admin.conf $HOME/.kube/config; \ sudo chown $(id -u):$(id -g) $HOME/.kube/config; \ export KUBECONFIG=$HOME/.kube/config; \ echo 'export KUBECONFIG=$HOME/.kube/config' >> $HOME/.bashrc" doneVerify that
kubectlworks.ssh ocne-control-02 "kubectl get nodes"The output shows that each node in the cluster is ready, along with its current role and version.
Once you complete these steps, installing a three control plane node Oracle Cloud Native Environment with an external load balancer is complete.
Confirm the Load Balancer is Active
The next several sections confirm that the external load balancer detects when a control plane node fails, removes it from the traffic distribution policy, and then adds it back into the cluster after the node recovers, thus allowing that node to accept API traffic once again.
Connect and log in to the Cloud Console.

Click on the navigation menu in the page's top-left corner, then Networking and Load Balancers.

The Load Balancers page displays.

Locate your compartment within the Compartments drop-down list.

Click on the link for the load balancer created at the beginning of this tutorial.
Scroll down to the Backend sets link on the left-hand side of the browser under the Resources heading.
Click on the Backend sets link.
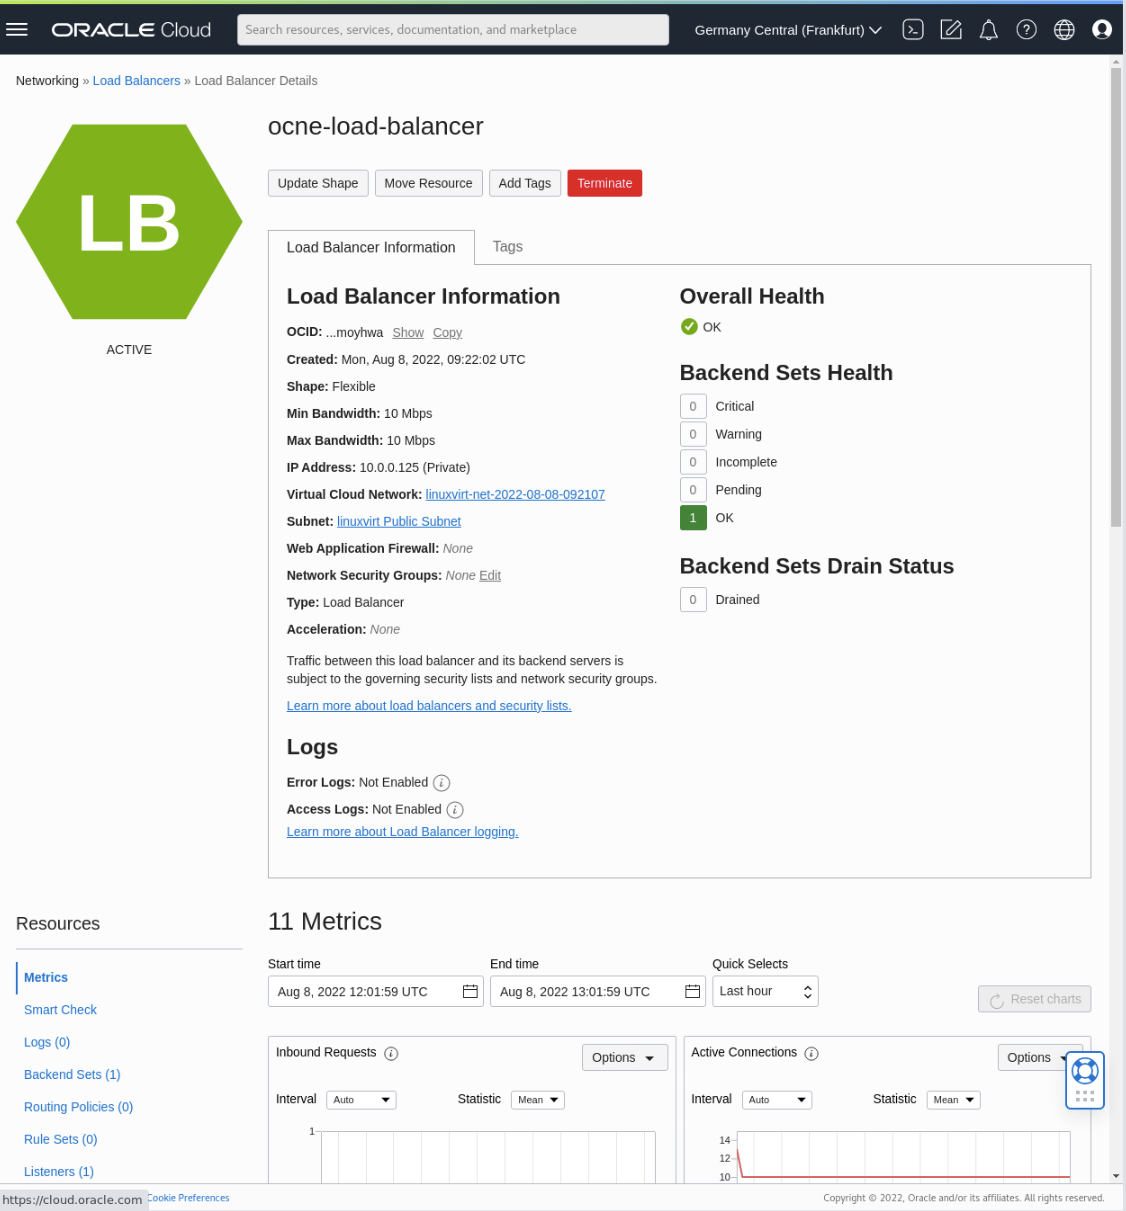
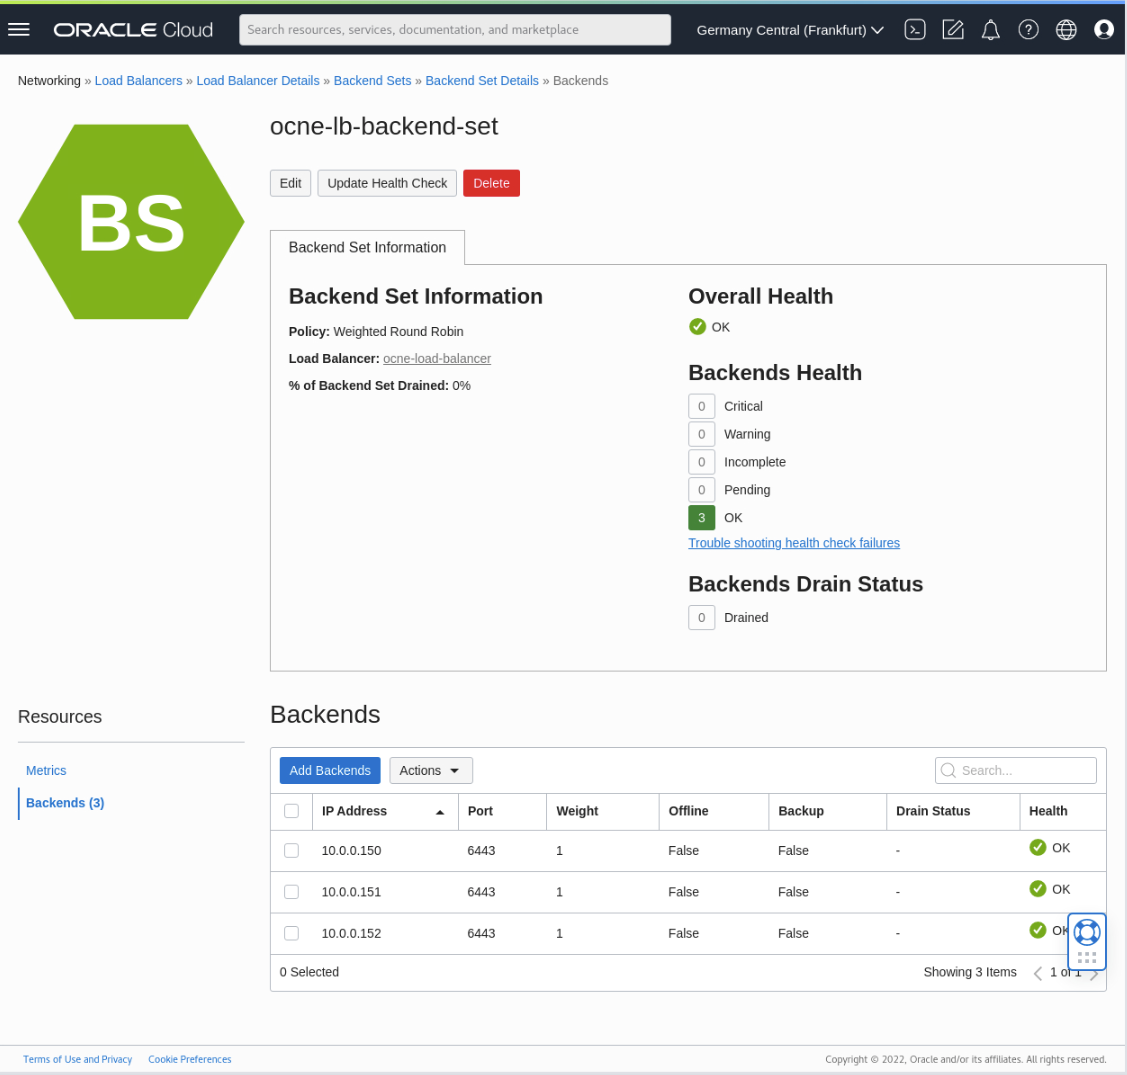
A link to the existing Backend Set displays.
Click the link for the name of the backend set created as part of the load balancer.
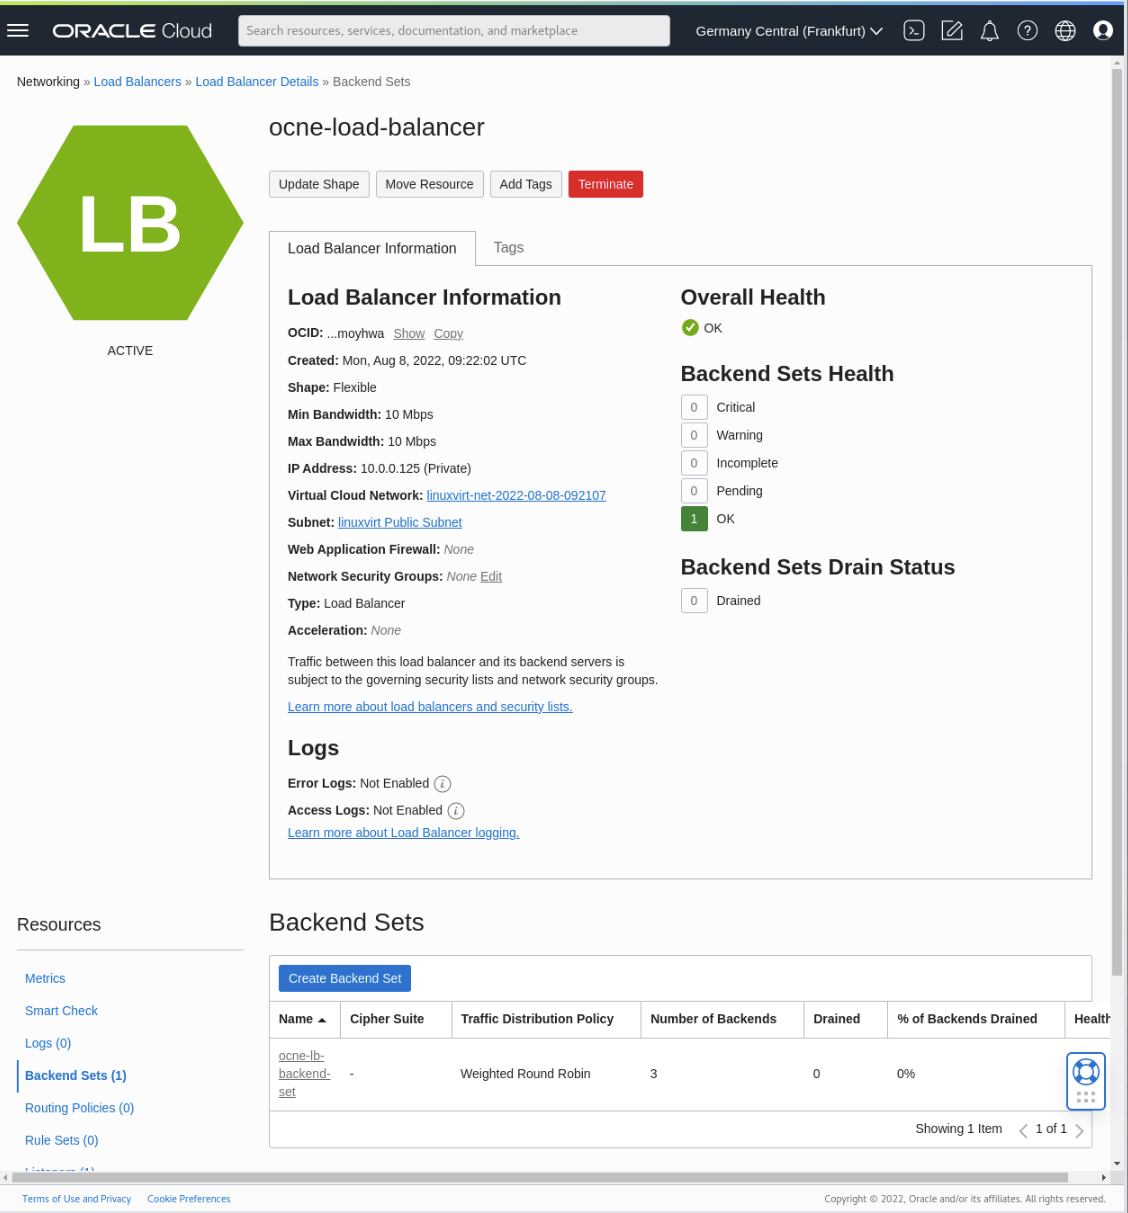
Click on the Backends link on the left-hand side of the browser under the Resources heading.
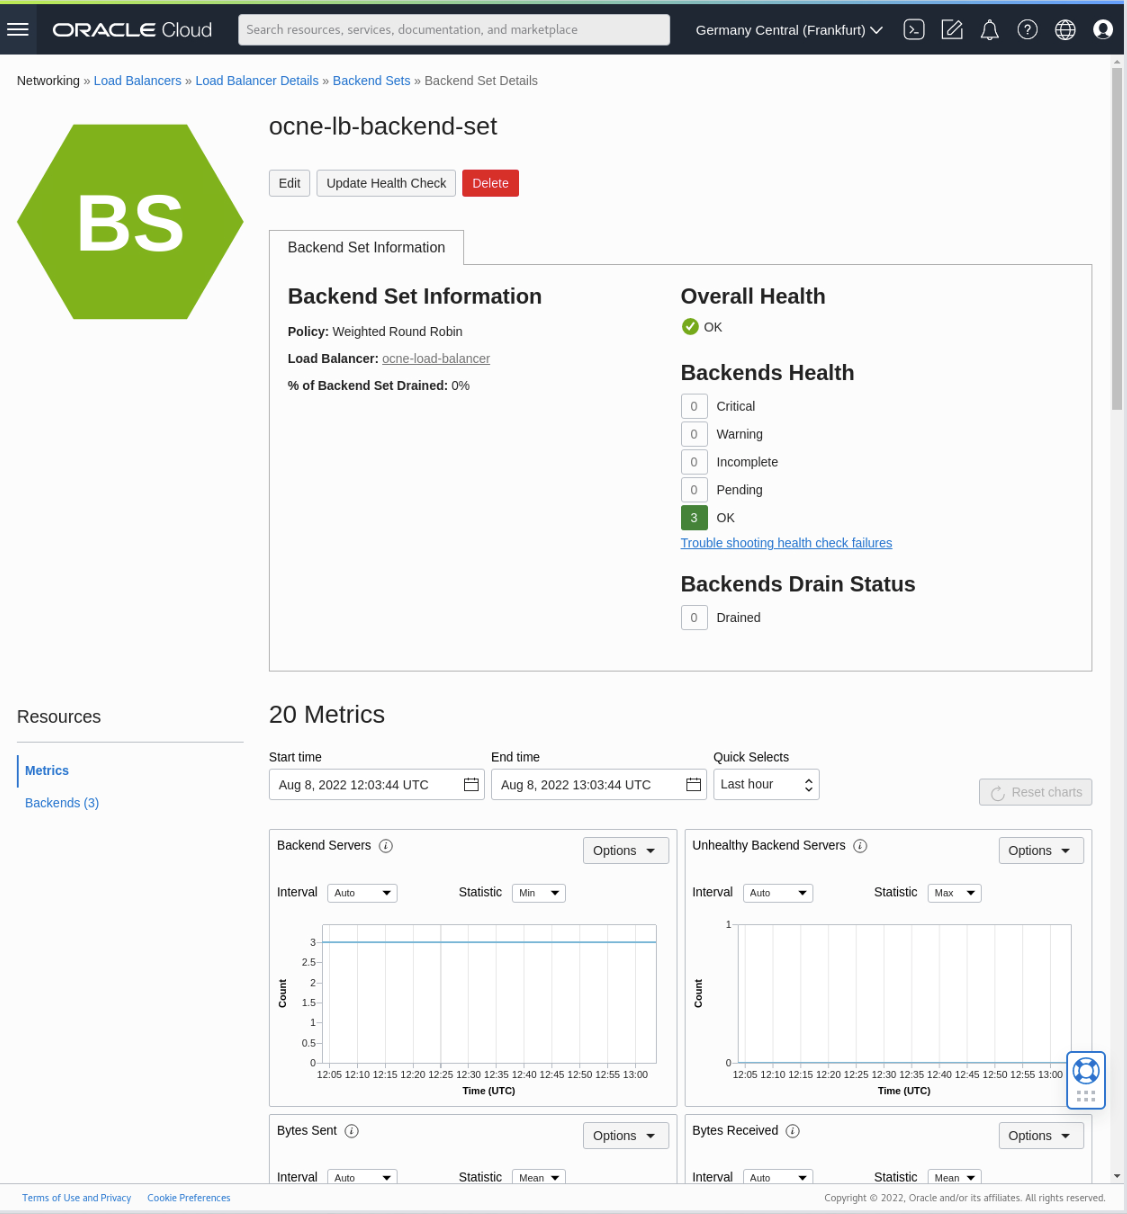
The screen confirms there are three healthy nodes present.
Stop One of the Control Plane Node Instances
Click on the navigation menu at the top-left corner of the page, then click on Compute and then Instances.
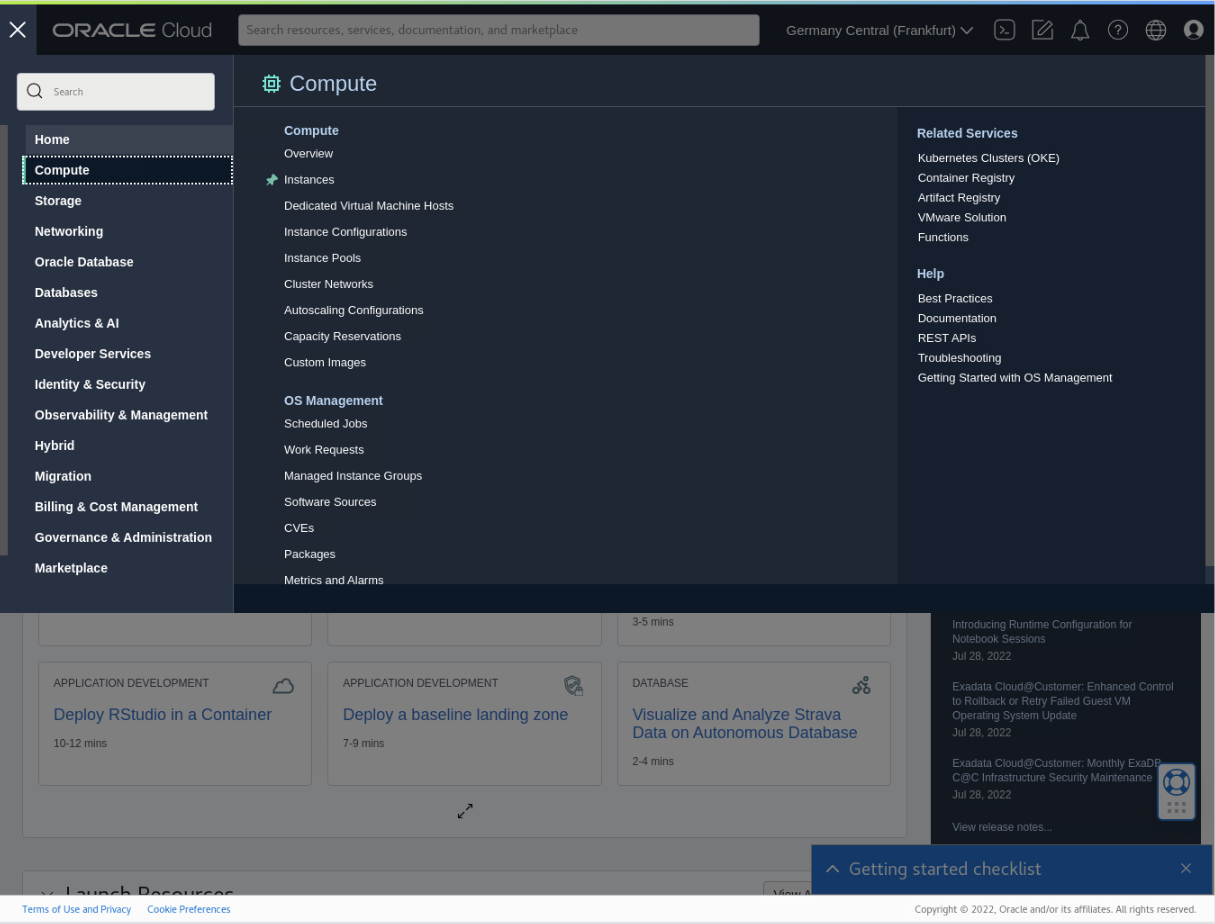
The Instances page displays.
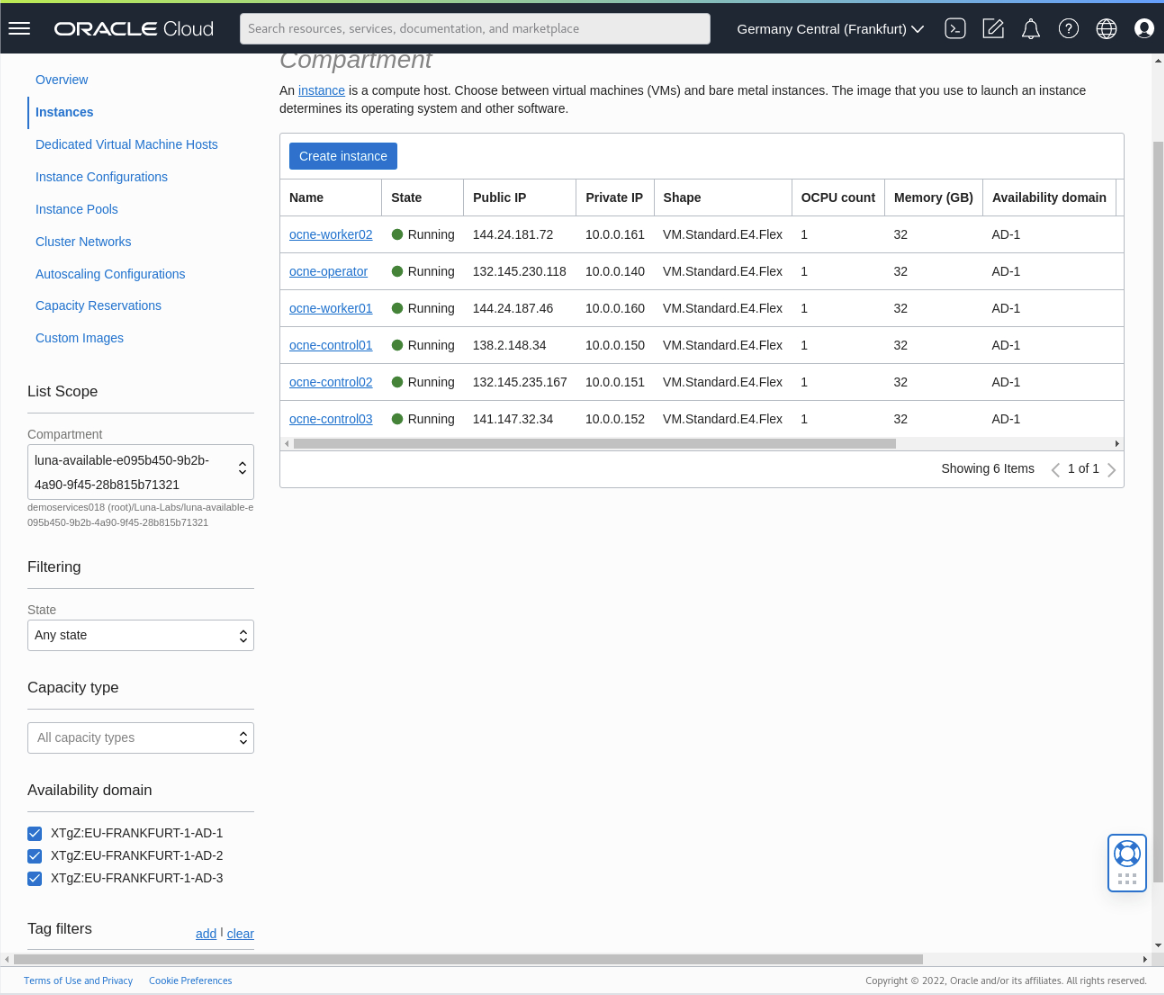
Click on the link for ocne-control-01.
The datails for this instance displays.
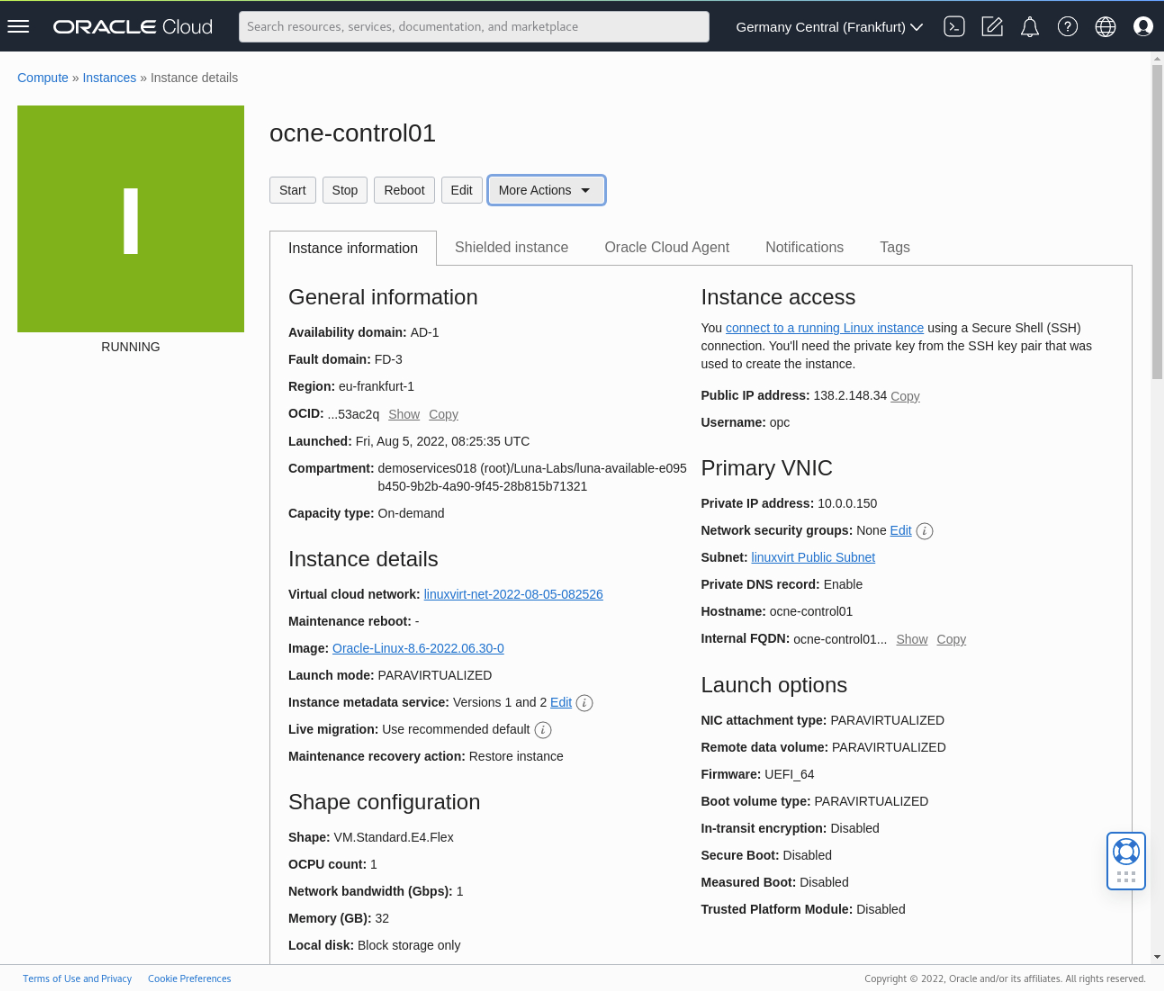
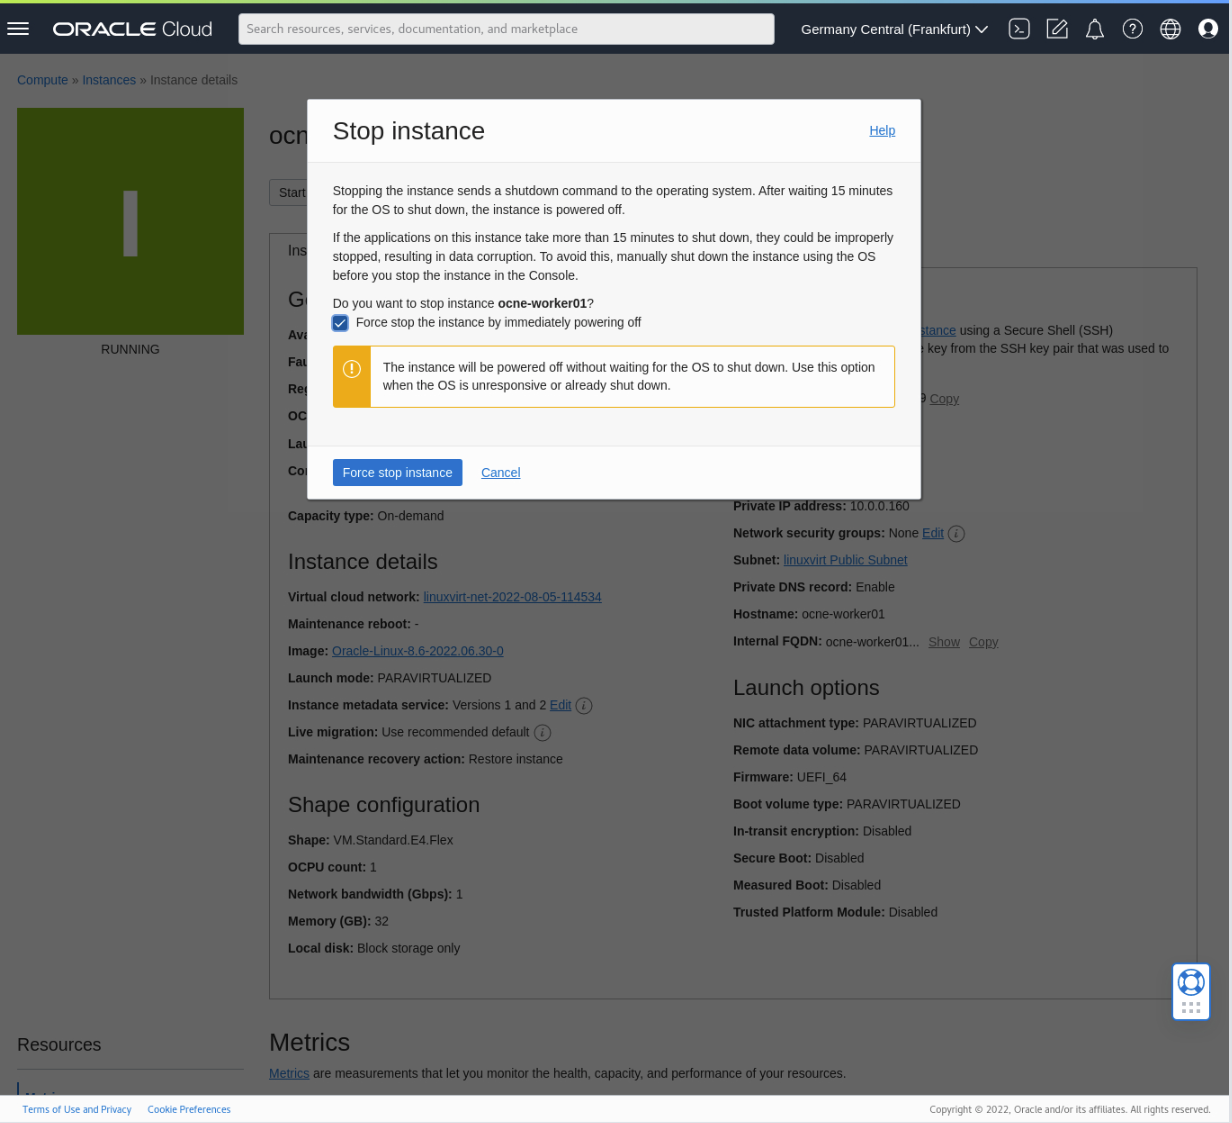
Click on the Stop button.
In the pop-up dialog box, select the Force stop the instance by immediately powering off checkbox, and then click the Force stop instance button.
Note: Do NOT do this on a production system as it may incur data loss, corruption, or worse for the entire system.
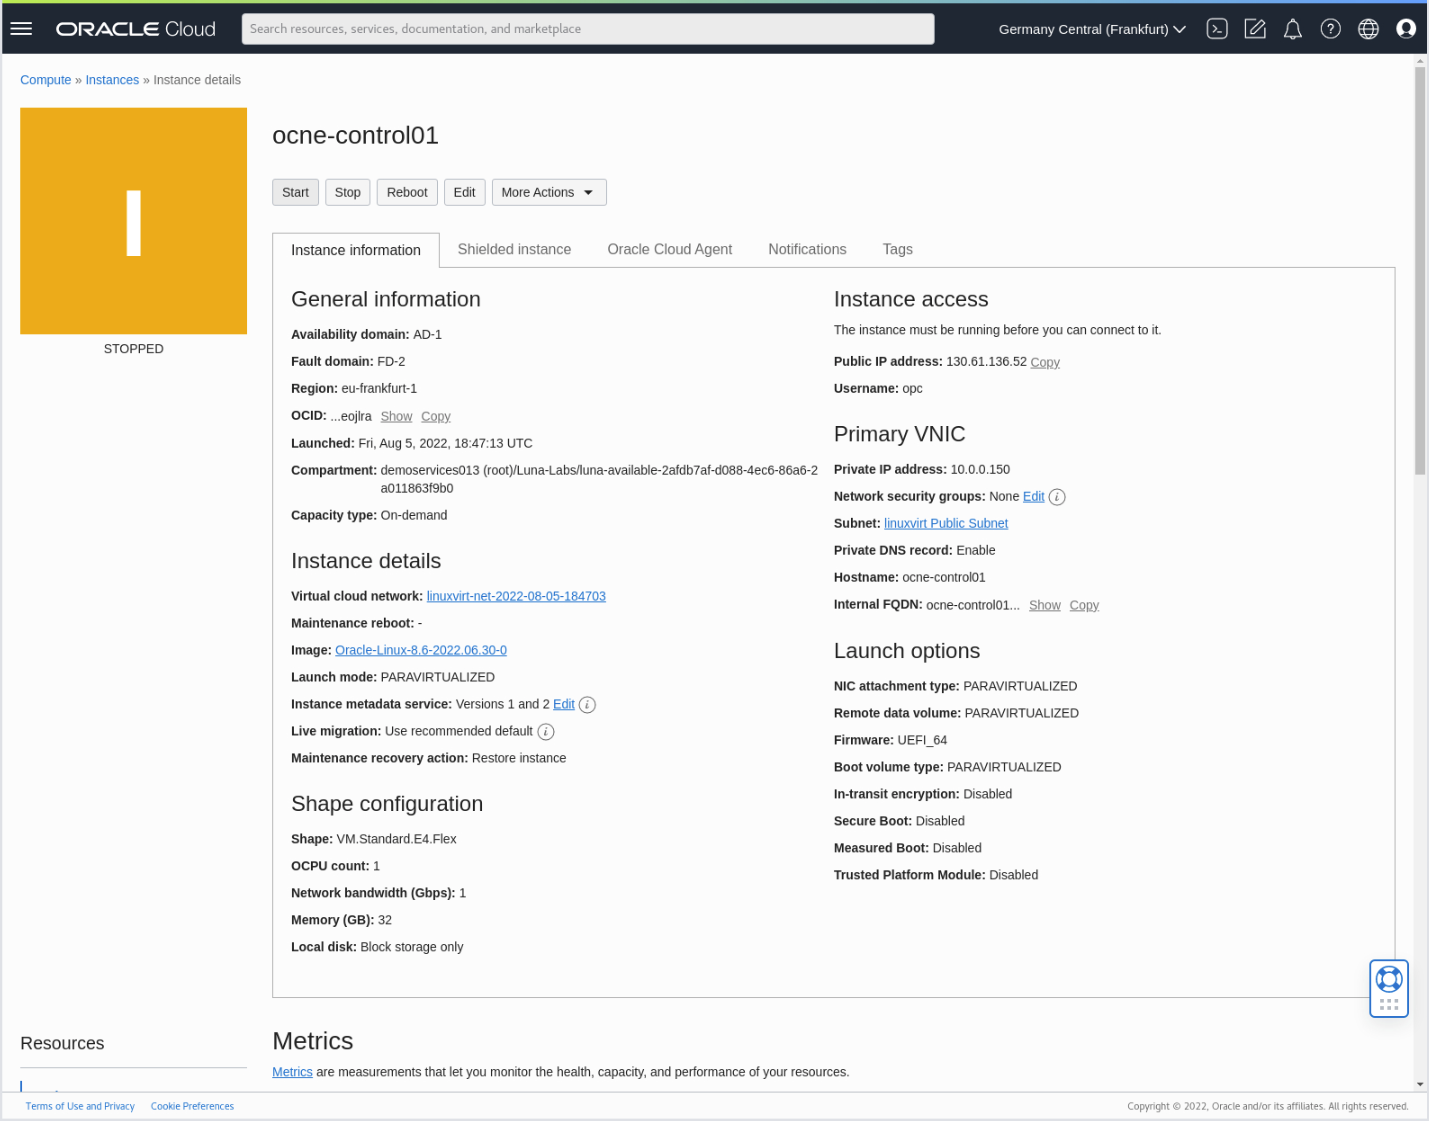
Wait until the Instance details page confirms the instance is Stopped.
Verify the Oracle Cloud Infrastructure Load Balancer Registers the Control Plane Node Failure
Navigate back to Networking > Load balancers.
Click the link for the load balancer.
Under Resources on the lower left panel, click on Backend sets.
Then click on the link containing the name of the backend set.
Click Backends to display the nodes.
The status on this page should update automatically within 2-3 minutes.
The page initially displays a Warning status.
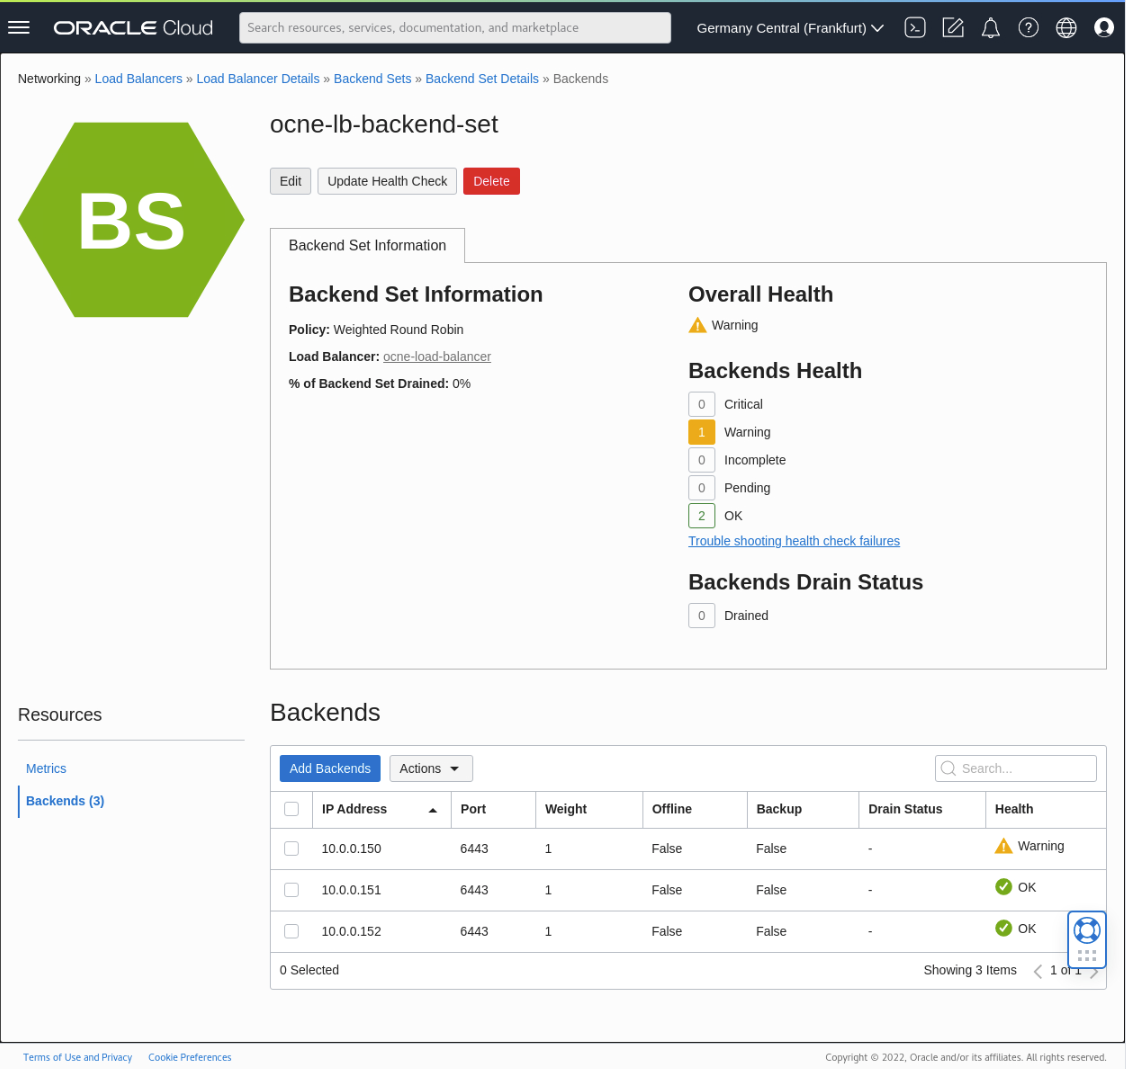
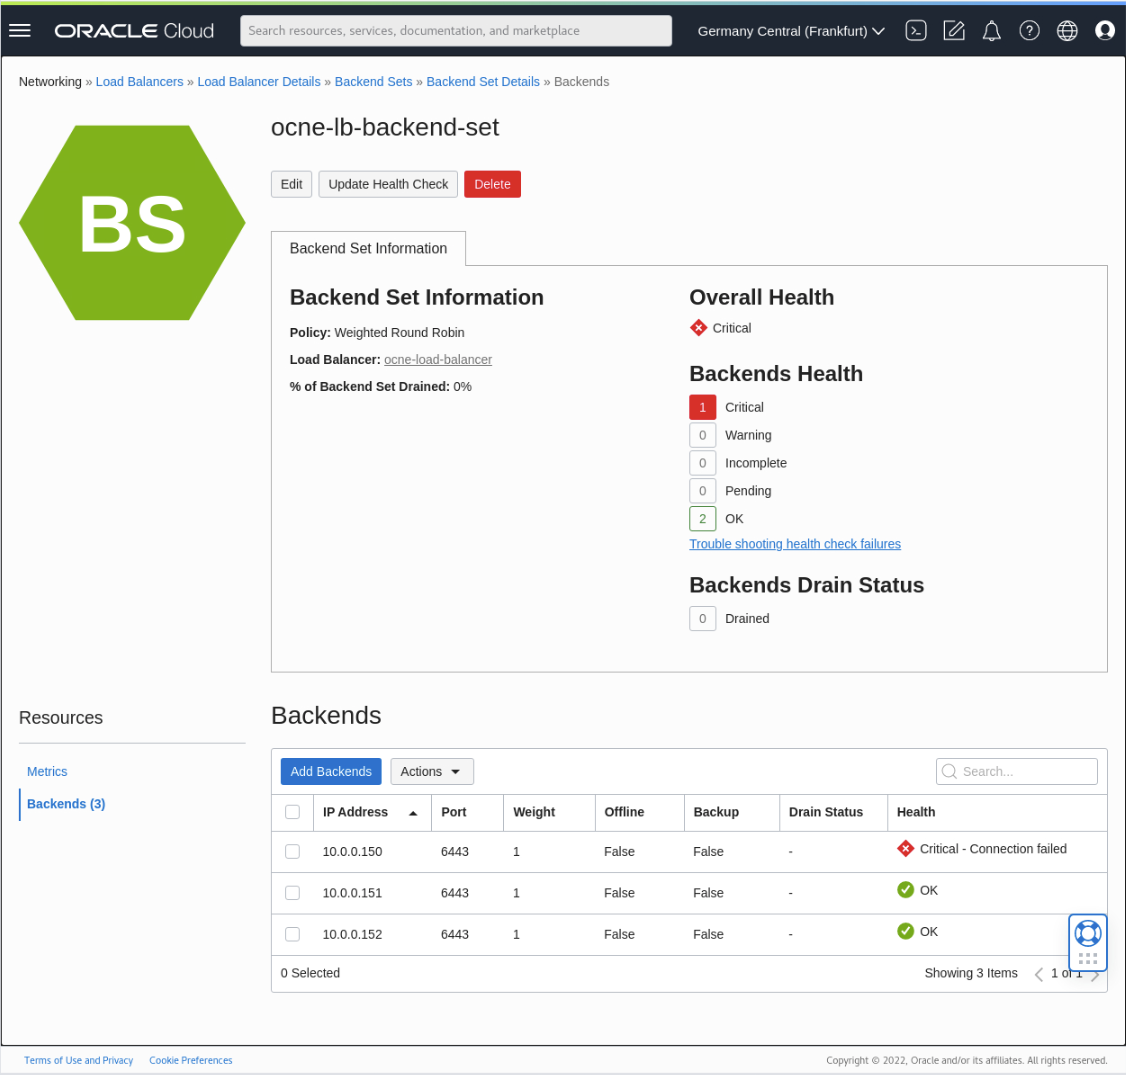
A few minutes later, the status updates to a Critical status. This status indicates that the OCI Load balancer process confirms the node as unresponsive. Therefore, the load balancer will no longer forward incoming requests to the unavailable backend control plane node.
Confirm the Oracle Cloud Native Environment Cluster Responds
Given at least two active members remain in the cluster, the active control plane nodes should respond to kubectl commands.
Switch to the open ocne-operator terminal session.
Verify
kubectlresponds.The output shows the control plane node that we stopped in a status of
NotReady(Unavailable).ssh ocne-control-02 "kubectl get nodes"Example Output:
NAME STATUS ROLES AGE VERSION ocne-control-01 NotReady control-plane 10m v1.28.3+3.el8 ocne-control-02 Ready control-plane 10m v1.28.3+3.el8 ocne-control-03 Ready control-plane 8m6s v1.28.3+3.el8 ocne-worker-01 Ready <none> 7m40s v1.28.3+3.el8 ocne-worker-02 Ready <none> 7m37s v1.28.3+3.el8 [oracle@devops-node ~]$*Note: It takes approximately 2-3 minutes before the NotReady status displays. If necessary, please repeat the
kubectl get nodescommand until the status changes fromReadytoNotReady.Switch to the Cloud Console within the browser.
Navigate to Compute > Instances.
Click on the stopped control plane node.
Start the instance by clicking the Start button.
Wait until the Status section turns Green and confirms the Instance is Running.
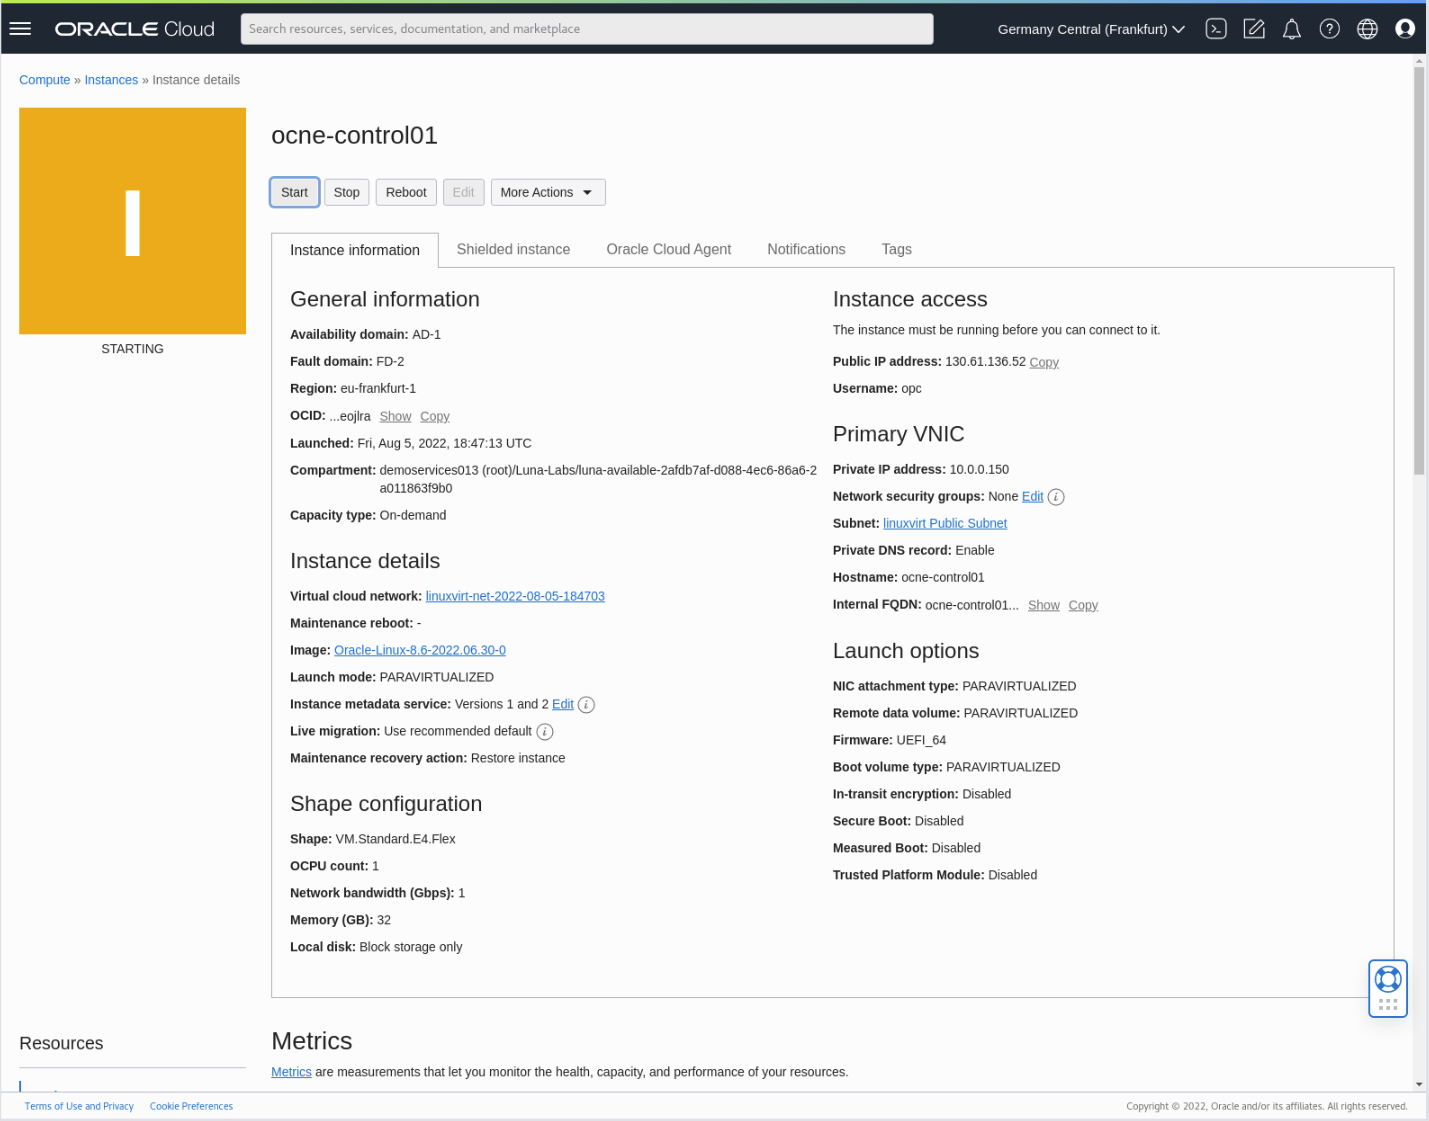
Verify the Control Plane Node Rejoins the Oracle Cloud Infrastructure Load Balancer Cluster
Navigate back to Networking > Load Balancers.
Click the link for the load balancer.
Under Resources on the lower left panel, click on Backend Sets.
Then click on the link containing the name of the backend set.
Click Backends to display the nodes.
Note: Status changes may take 2-3 minutes.
The Overall Health shows a Warning status until the node restarts and is detected.
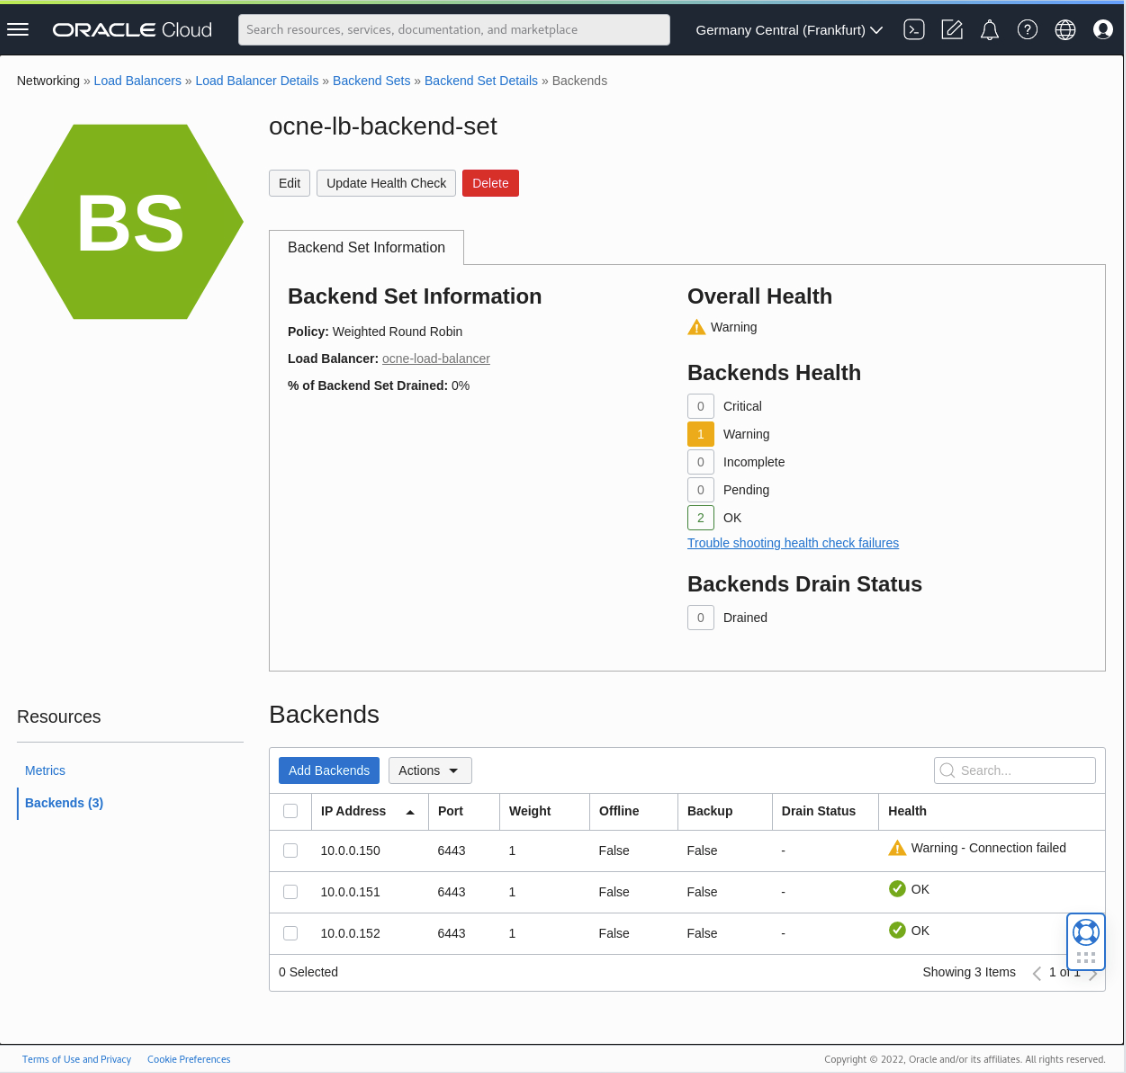
Once detected, the Overall Health reports as a green OK.
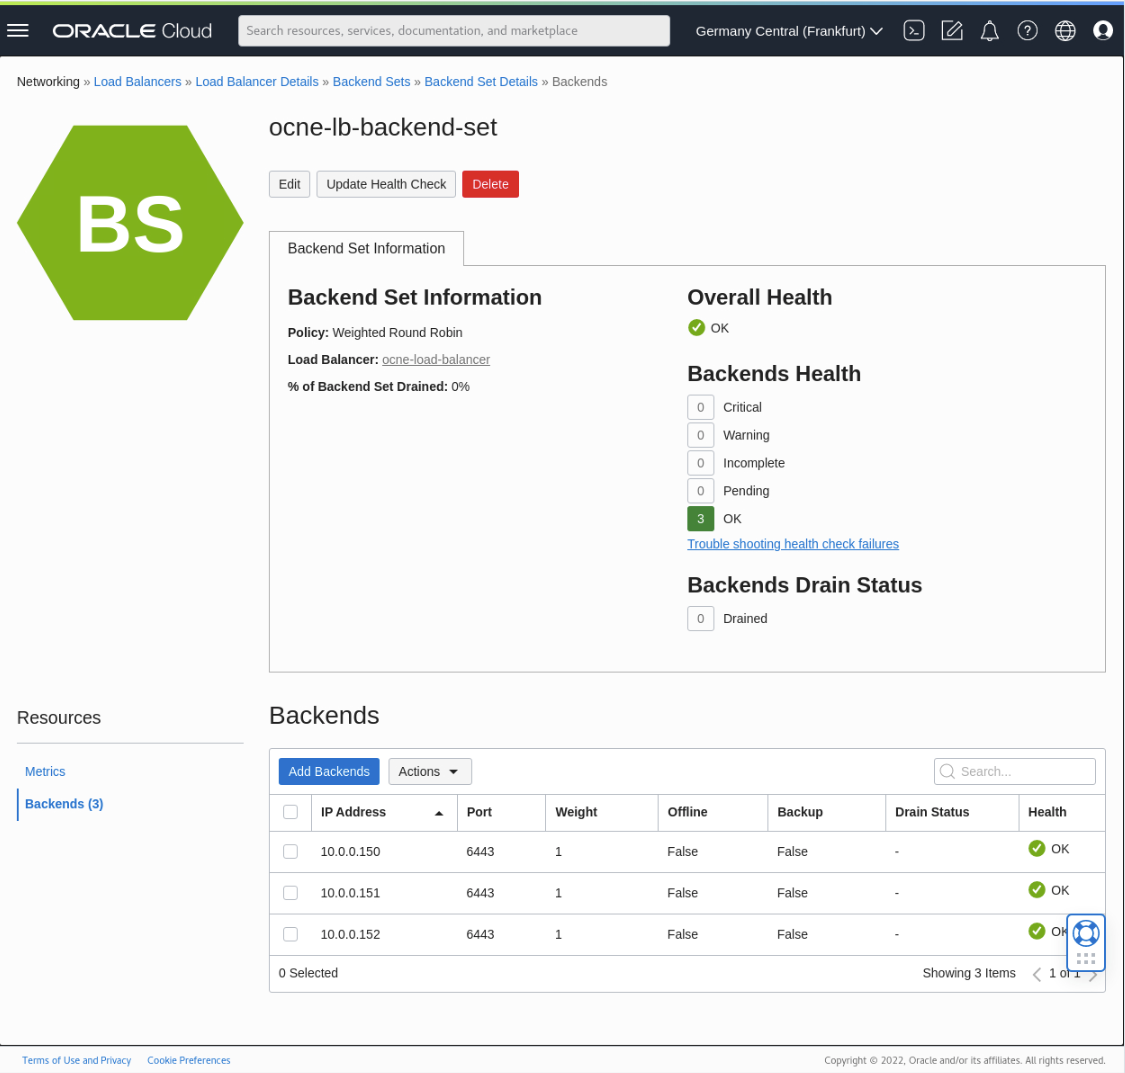
The control plane node rejoins the cluster, and all three control plane nodes participate and accept incoming traffic to the cluster.
Get the Control Plane Node Status
Switch to the open ocne-operator terminal session.
Verify
kubectlresponds.The output reports all control plane nodes as
Ready(Available).ssh ocne-control-02 "kubectl get nodes"Example Output:
NAME              STATUS   ROLES           AGE     VERSION
ocne-control-01   Ready    control-plane   10m     v1.28.3+3.el8
ocne-control-02   Ready    control-plane   10m     v1.28.3+3.el8
ocne-control-03   Ready    control-plane   8m6s    v1.28.3+3.el8
ocne-worker-01    Ready    <none>          7m40s   v1.28.3+3.el8
ocne-worker-02    Ready    <none>          7m37s   v1.28.3+3.el8
[oracle@devops-node ~]$
Summary
These steps confirm that Oracle Cloud Infrastructure Load Balancer has been configured correctly and accepts requests successfully for Oracle Cloud Native Environment.