Create an Oracle Linux Storage Appliance in Oracle Cloud Infrastructure
Introduction
The Oracle Linux Storage Appliance provides a fast and easy way to build a shared storage system on Oracle Cloud Infrastructure. It enables you to export files by using the protocols Network File System (NFS) v3 and v4, and Windows Server Message Block (SMB) v3 (Samba).
The Oracle Linux Storage Appliance is intended for use on Oracle Cloud Infrastructure only.
The Oracle Linux Storage Appliance can run on all Oracle Cloud Infrastructure shapes.
When associating the appliance instance with a Virtual Cloud Network, select a VCN that is configured with the appropriate ingress security list rules.
Objectives
Upon completion of this Lab you will be able to:
- Create an Oracle Linux Storage Appliance compute instance
- Configure the required VCN security list ingress rules to support the appliance
- Initial login to the appliance through a browser and setup up initial admin password
- Create and attach block volumes to the storage appliance
- Create a storage pool
Prerequisites
- Oracle Cloud Infrastructure web console
The next section describes hands-on exercises you can perform in a lab environment to create a new Oracle Linux Storage Appliance and create a storage pool. To access the lab, click Launch lab next to the tutorial title.
Note: When using the free lab environment, see Oracle Linux Lab Basics for connection and other usage instructions.
Create a Oracle Linux Storage Appliance instance
To create an Oracle Linux Storage Appliance, you build a compute instance using the free Oracle Linux Storage Appliance image provided.
To access the appliance, ingress rules to allow access to the a range of TCP and UDP ports need to be configured to the VCN the appliance uses.
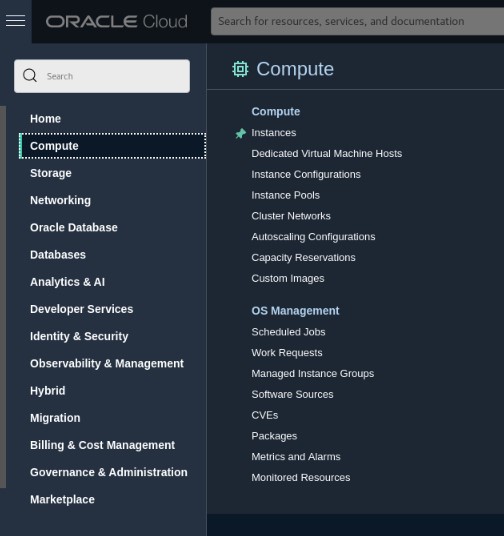
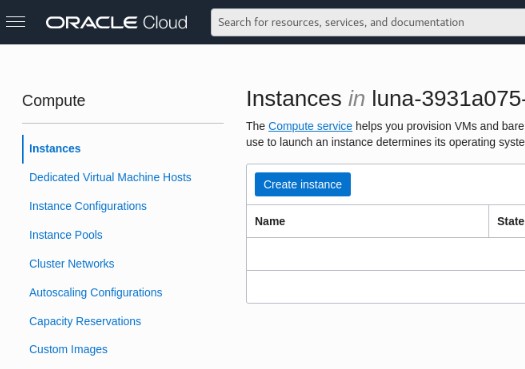
Click on the web console menu, then Compute, and Instances to list the current compute instance information for your compartment.
Note: You may see existing instances associated with the compartment for your lab. Do not modify any existing instances.
Click Create instance.
Specific information is required to create an instance. For some parts of the dialog, if left blank, will be automatically populated by the system with default or preconfigured information.
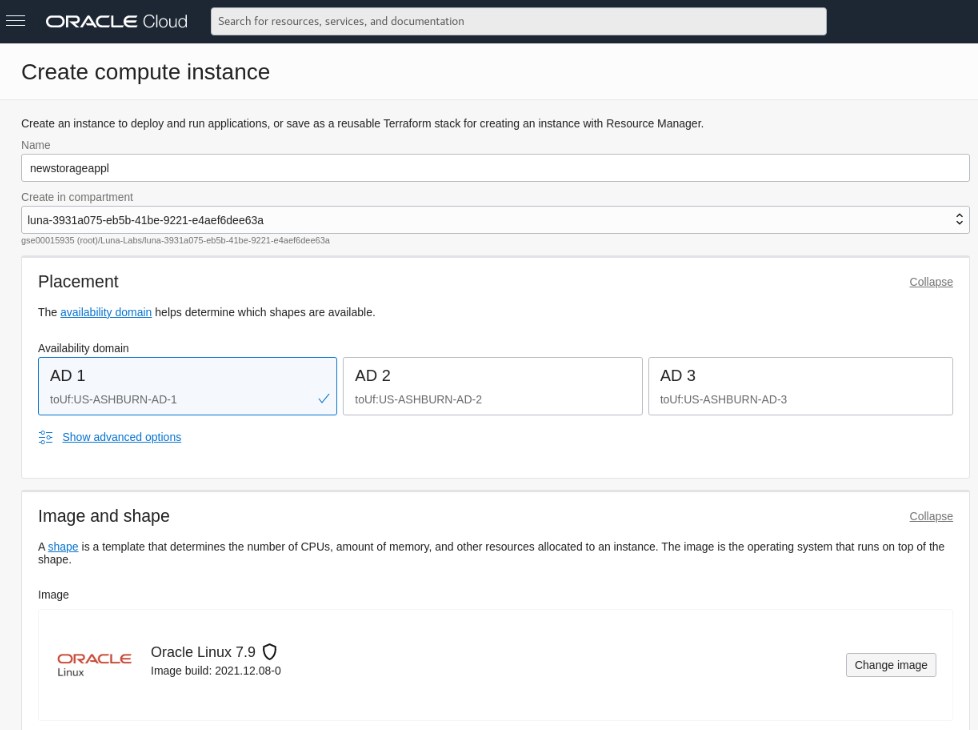
Name - Give a name for your storage appliance name.
Create in Compartment - Keep the default compartment provided for this lab.
Placement - Keep the preset default Availability Domain setting presented when the dialog opened.
Note: Later in the lab, new block volumes will be created. It is important to create the block volumes in the same Availability Domain as the compute instance in order to be able to attach them to the instance.
Image and Shape - Click the Change Image button.

- Click the Marketplace tile at the top. As there are many pages of images returned, in the search box type storage for the search criteria. A filtered list is returned. Alternatively, instead of searching, at the bottom right of the images list click the next page arrow (>) until you can see the Oracle Linux Storage Appliance image listed..
- Tick the box beside Oracle Linux Storage Appliance to choose this image.
Note: Do not choose the image 'Oracle Linux Storage Appliance (Autonomous Linux)'.
- Tick the box to accept the terms and restrictions.
- Click the Select Image button.
Shape - Do not change the shape offered in the dialog. The hardware resources for this lab have been pre selected.
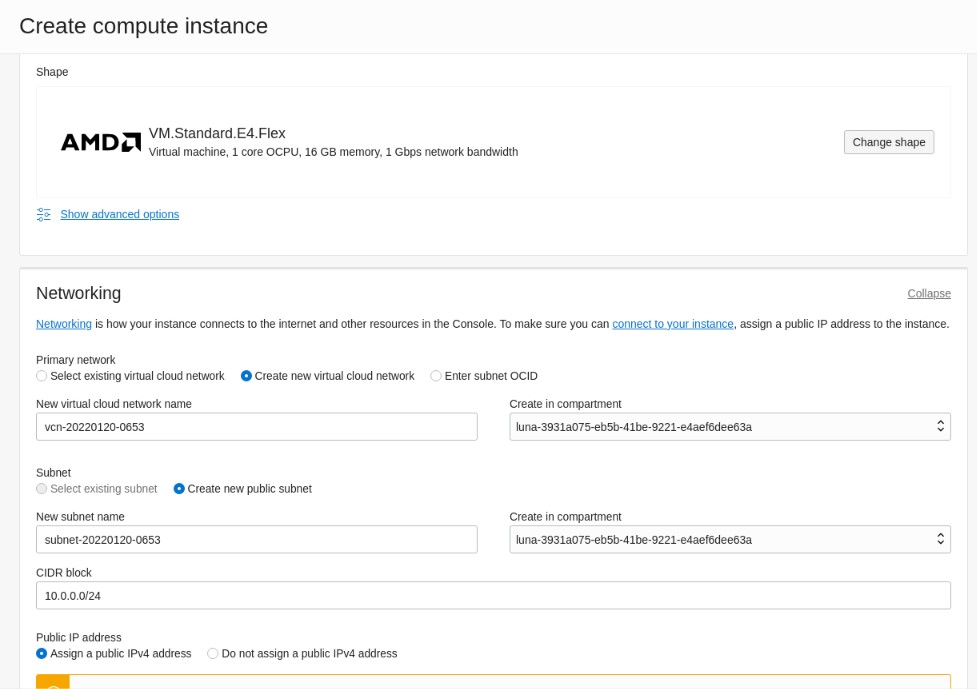
Networking - Keep the networking settings at their default.
Primary network - Keep the default setting to Create new virtual cloud network.
New virtual cloud network name - Keep the preconfigured name.
Subnet - Keep the default to create new public subnet.
New subnet name - Keep the default subnet name preconfigured in the dialog.
CIDR block - Keep the preconfigured 10.0.0.0/24 range already populated in dialog.
Public IP address - Keep the default to Assign a public IPv4 address
Note: With these settings a new public subnet is created to allow for connections to and from the internet. Private IP addresses will be assigned from the 10.0.0.0/24 range.
Add SSH Keys - To allow communication between your lab desktop and the new storage appliance instance, you use a public SSH key that is available on your lab desktop.
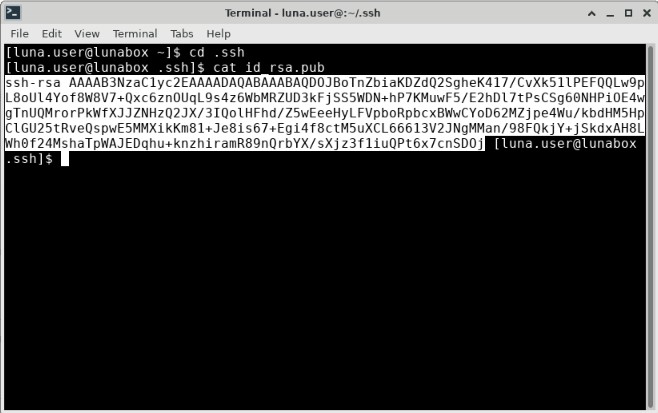
On your lab environment desktop click the Applications menu, select Terminal Emulator to open a terminal.
Change to the .ssh directory.
cd ~/.sshView the contents of the id_rsa.pub key file.
cat id_rsa.pubHighlight the contents of the file. Take care not include other parts of the terminal output. Right click on the highlighted content, select copy.
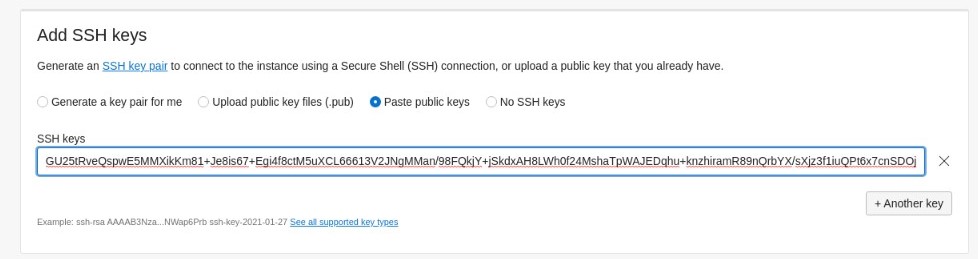
Return to the Create Instance dialog, select the radio button to Paste public keys. Right click on the SSH Keys input field and paste the key information.
Scroll down and click the Create button.
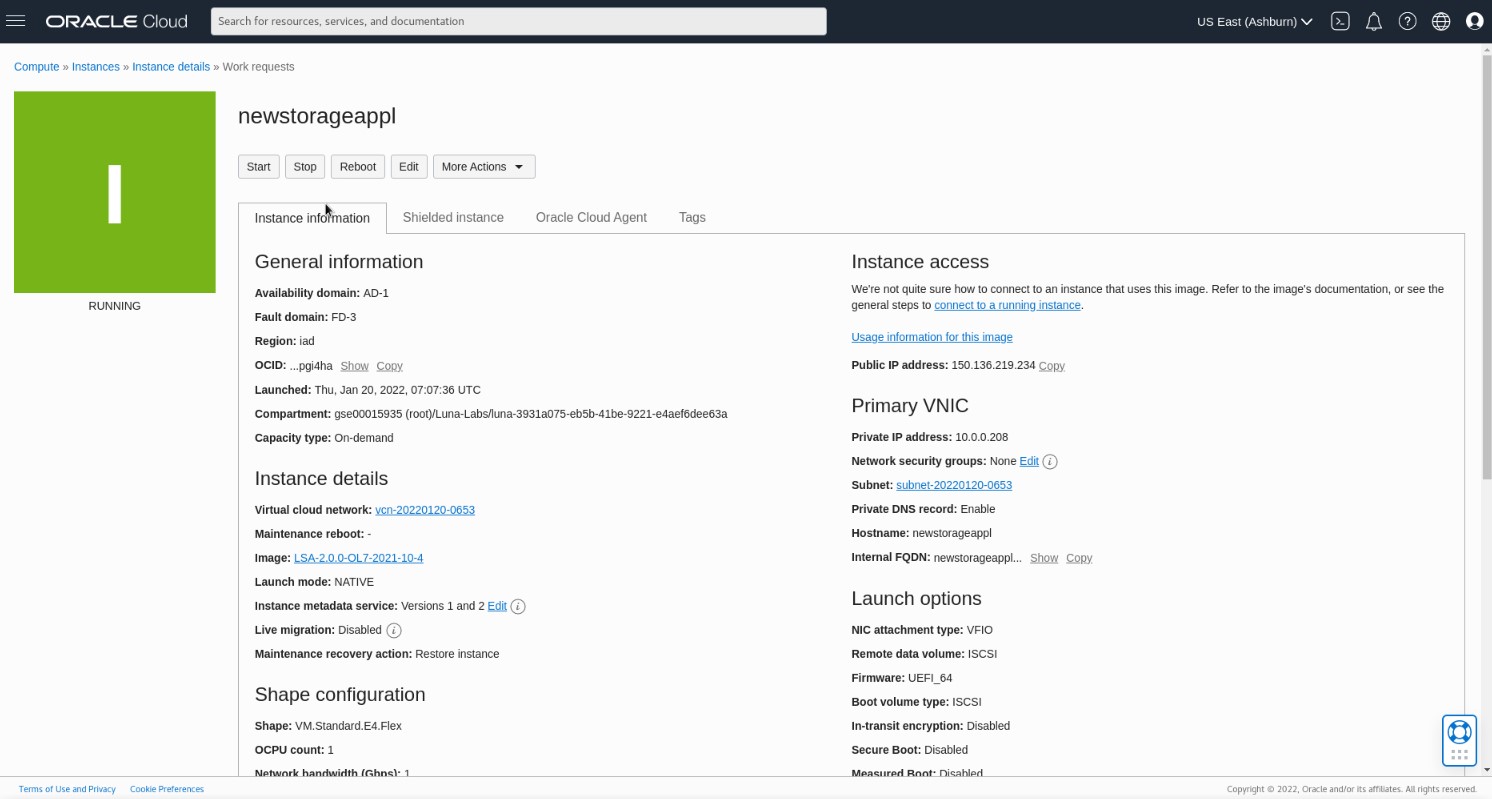
You are redirected to Instance Details automatically, showing the provisioning of the new instance. After a few minutes the instance will be running and available.
Configure Security List Ingress Rules for the Virtual Cloud Network
To support the various protocols used to communicate with, and access storage on the appliance, required ports are configured to the stateful ingress rules of the default security list for the Virtual Cloud Network (VCN) that this instance is using.
Security lists control the traffic in and out of the various subnets associated with the VCN.
With the appliance connecting to the public and private subnets of the VCN, the ingress rules allow incoming traffic on those ports for the specified protocol, service, and function.
In the Instance details section of the Instance Information tab, click on the link beside Virtual cloud network to view the VCN details page.
Under Resources, click on Security Lists.
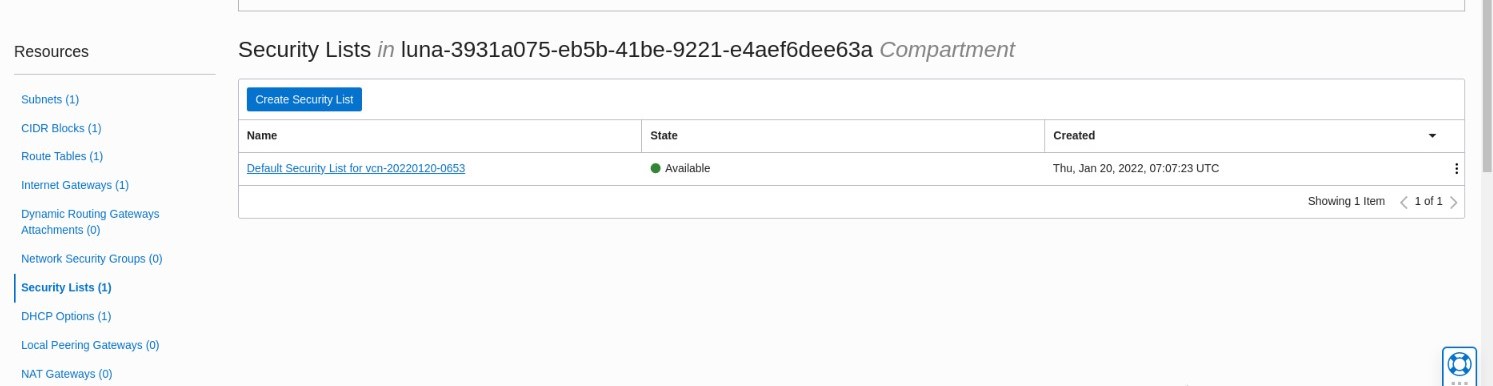
Click on the name of the default security list in the table.
Note: If You see Egress Rules listed, under Resources click Ingress Rules to show the list of ingress rules.
Click Add Ingress Rules button.
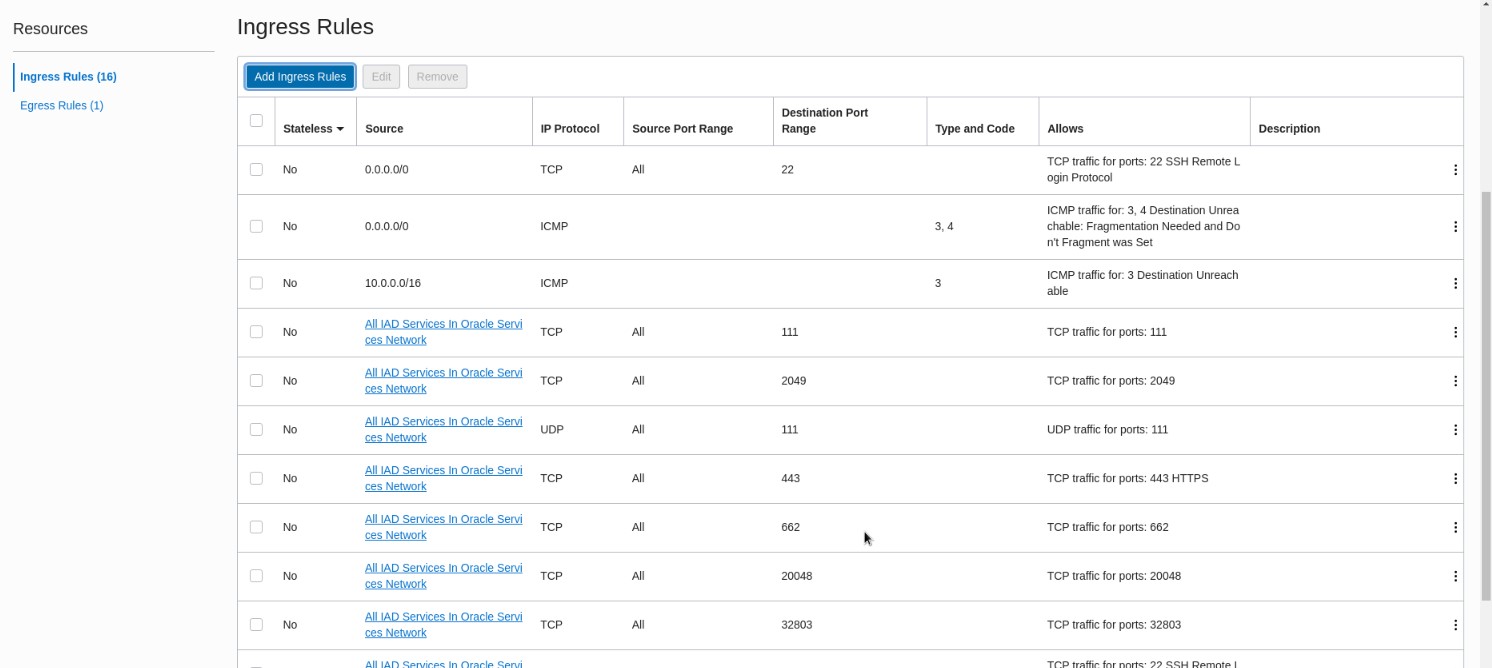
The following table lists the TCP and UDP ports that need to be configured. Add a rule for each of the entries in the table. Depending on your real world environment, some rules may not be required, but for practice in this lab, add rules for all the required ports.
| Service | Destintation Port Range | Protocol |
|---|---|---|
| nfs-server | 111 | TCP |
| nfs-server | 2049 | TCP |
| mountd | 111 | UDP |
| httpd | 443 | TCP |
| statd | 662 | TCP |
| mountd | 20048 | TCP |
| lockd | 32803 | TCP |
| sshd | 22 | TCP |
| smbd | 135 | TCP |
| smbd | 139 | TCP |
| smbd | 445 | TCP |
| nmbd | 137 | UDP |
| nmbd | 138 | TCP |
You can find more information about the required ports and more in this document:
https://docs.oracle.com/en-us/iaas/oracle-linux/storage-appliance/index.htm#prereqs
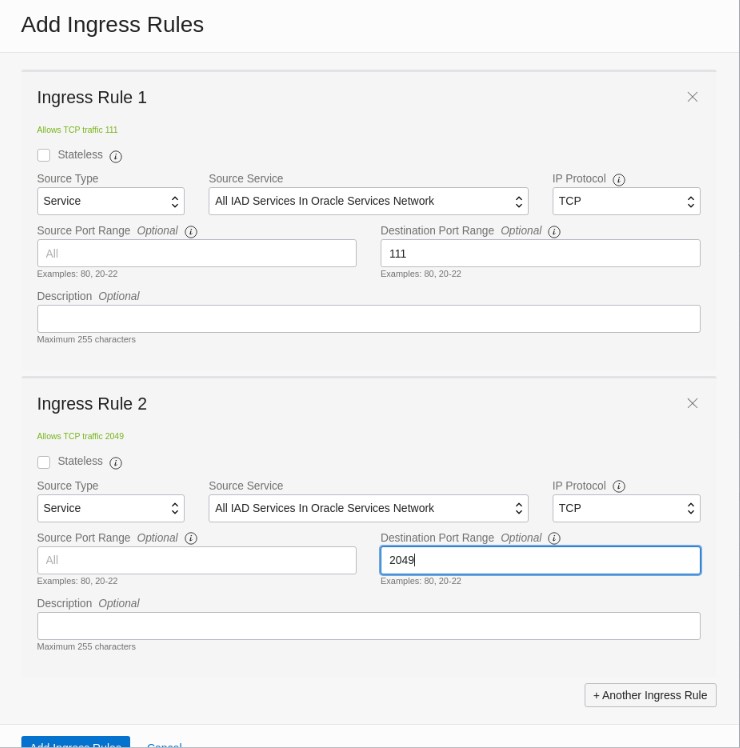
Stateless - Leave the box unchecked to create a stateful rule.
Source Type - Select Service from the dropdown.
Source Service - Select All IAD Services in Oracle Services Network from the dropdown.
IP Protocol - Carefully select TCP or UDP as indicated in the table above for the required ports.
Destination Port Range - Insert the port number as indicated in the table.
Add multiple entries to the dialog by clicking the + Another Ingress Rule button.
Note: Carefully check that all the table entries are entered correctly.
With all rules added to the dialog, click Add Ingress Rules.
You see all the rules listed in the Ingress Rules list.
Initial login in to the Oracle Linux Storage Appliance
Click on the web console menu, then Compute and Instances to return to list of compute instance information for your compartment
Click on the name of your storage appliance instance to open its details page.
On the Instance Details page, in the Instance access section, click Copy beside the Public IP address shown to copy the address to the copy/paste buffer.
In the lab environment, for this Tenancy, the VNIC associated with this IP address is on a private network behind a secure bastion server.
For this reason, you are using the Public IP address of the storage appliance to connect to and configure it through a browser.
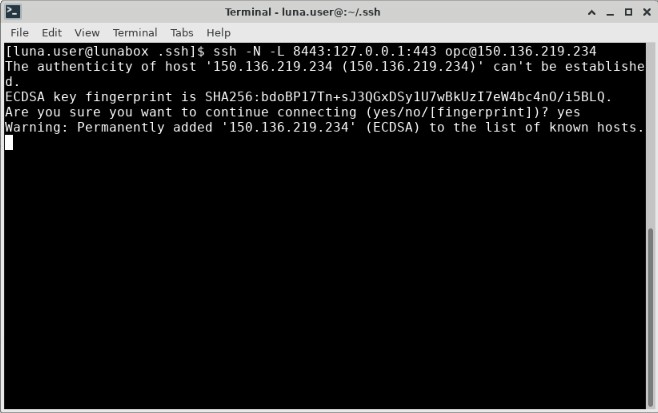
You use an OpenSSH Local Port Forward to connect to the appliance web console.
The Local Port Forward allows for a secure connection between the local browser and the remote web console for the appliance through the bastion server.
Note: In your real world environment, it would not be recommended to use the public IP on your appliance for connections to it, as it exposes some services to the public internet. It would be better to use a private IP that is protected by your network architecture.
Open your Terminal Emulator window.
Create the SSH local port forwarding. Paste or type in the Public IP address to the <public IP address> section of the command.
ssh -N -L 8443:127.0.0.1:443 opc@<public IP address>Enter yes to continue connecting.
The command finishes by saying the IP address is added to the list of known hosts.
Open a new browser tab or window.
Connect to the appliance web console using the address https://127.0.0.1:8443. It is important to include 'https://'.
Note: The port 8443 is the local port on the SSH port forward, which connects to the web console on port 443.
Click Advanced on the warning screen that informs the connection is not private.
Click the link Proceed to 127.0.0.1 (unsafe).
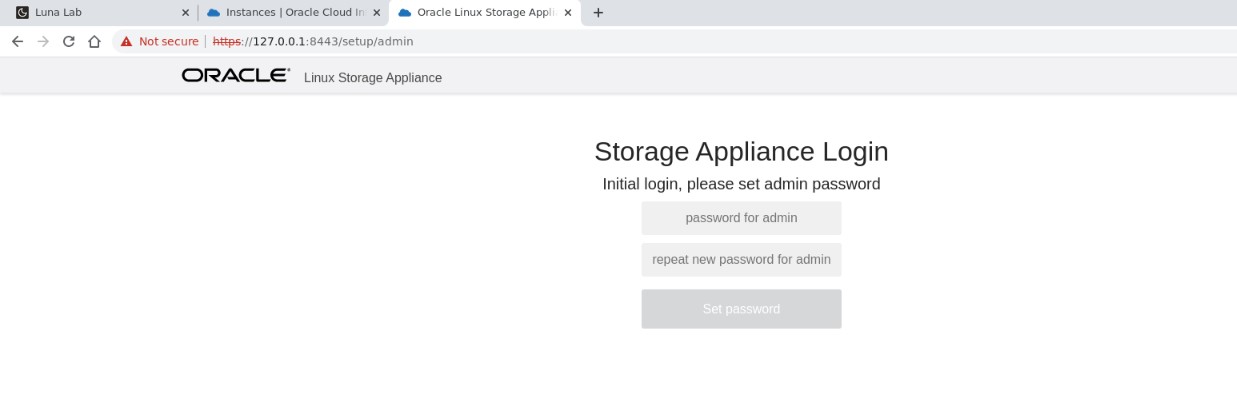
For the initial login to a new Oracle Linux Storage Appliance, you must set the admin password.
Note: Hovering over the password input fields show the password must contain at least one number, one special character, one lowercase, and one uppercase letter, and at least eight characters.
Use MyStorage123! for the password.
Type the same new password into both fields and then click the Set password button.
The page will refresh and present the Oracle Linux Storage Appliance login screen.
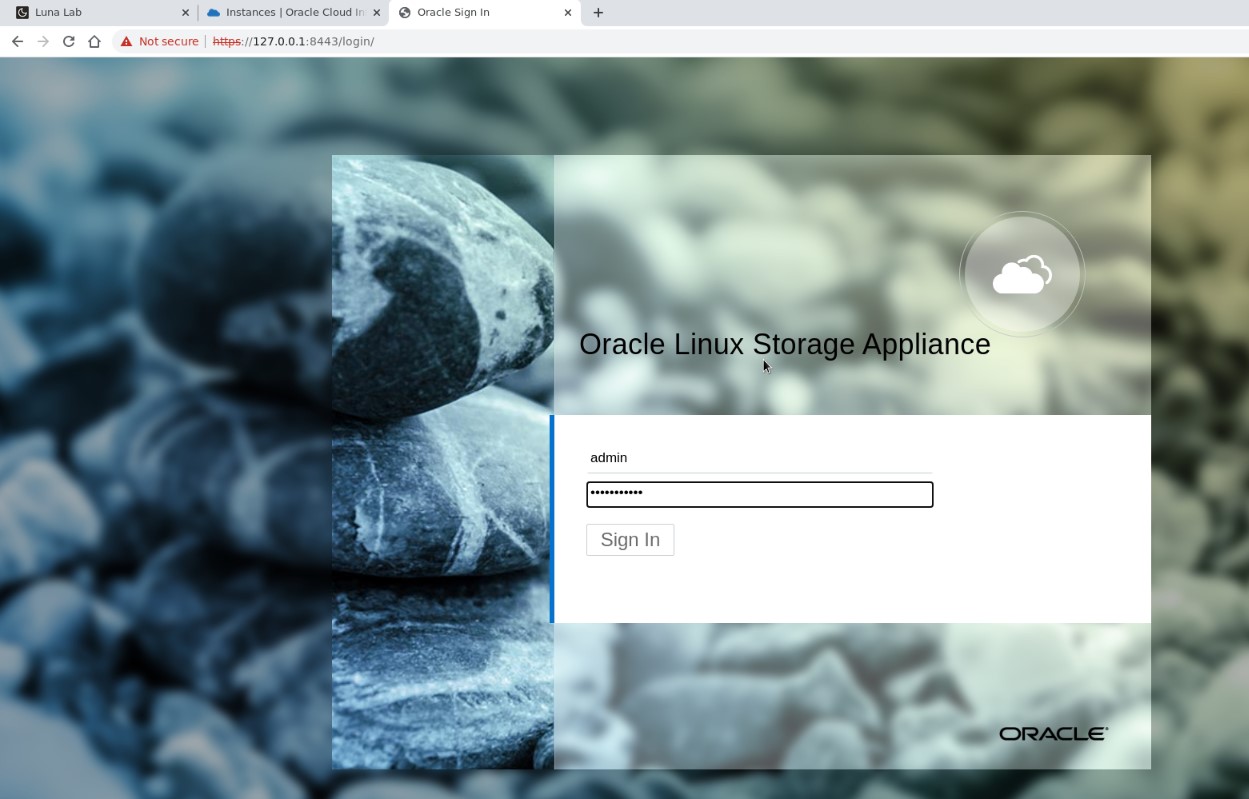
Log in to the appliance with the username admin and your new password, click Sign In.
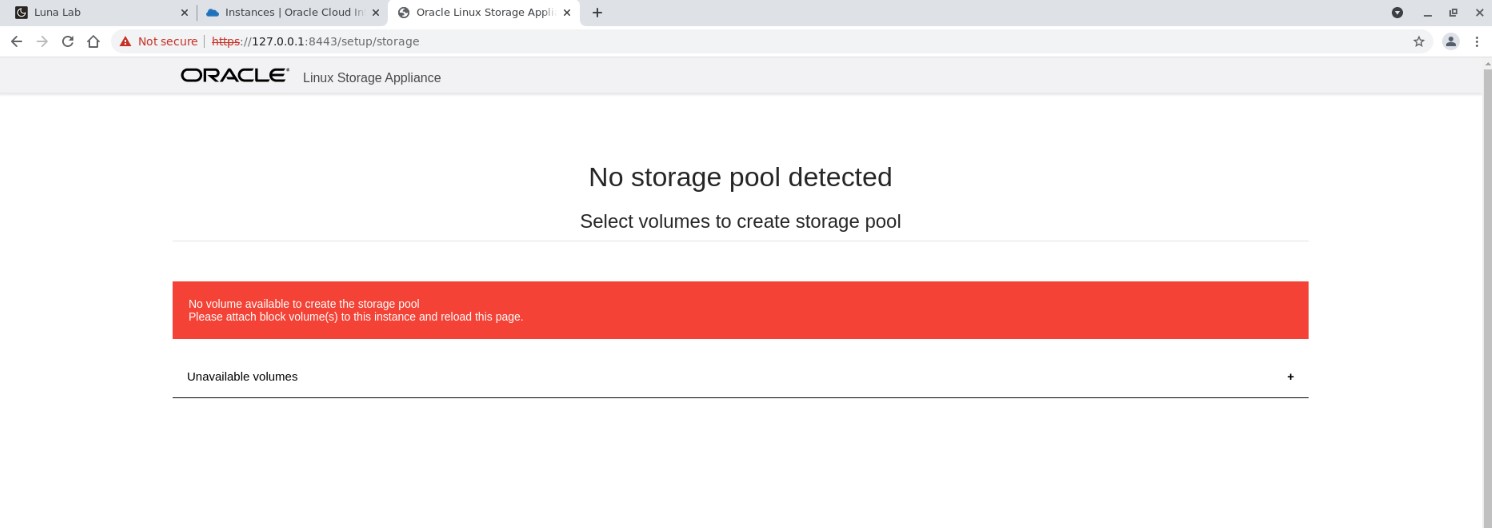
As this is a new appliance, there are no storage pools configured yet. It informs that there are no volume devices attached to the appliance for creating pools.
Create and attach block volumes to the storage appliance
You create two block volumes and attach them to the storage appliance. These will provide devices to be used for a storage pool on the appliance.
Return to your Oracle Cloud Infrastructure web console browser window.
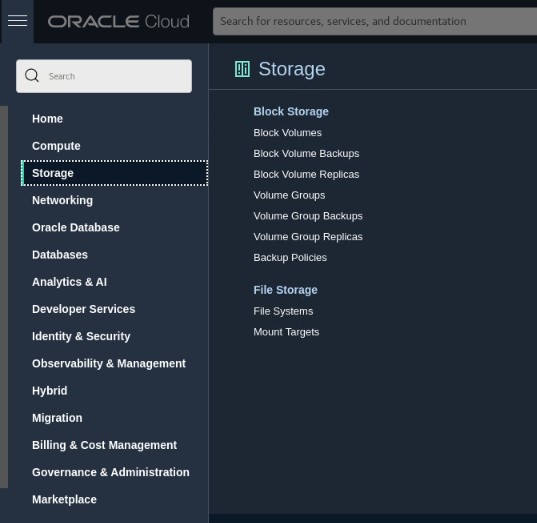
Click on the web console menu, then Storage, and Block Volumes to list the current block volume information for your compartment.
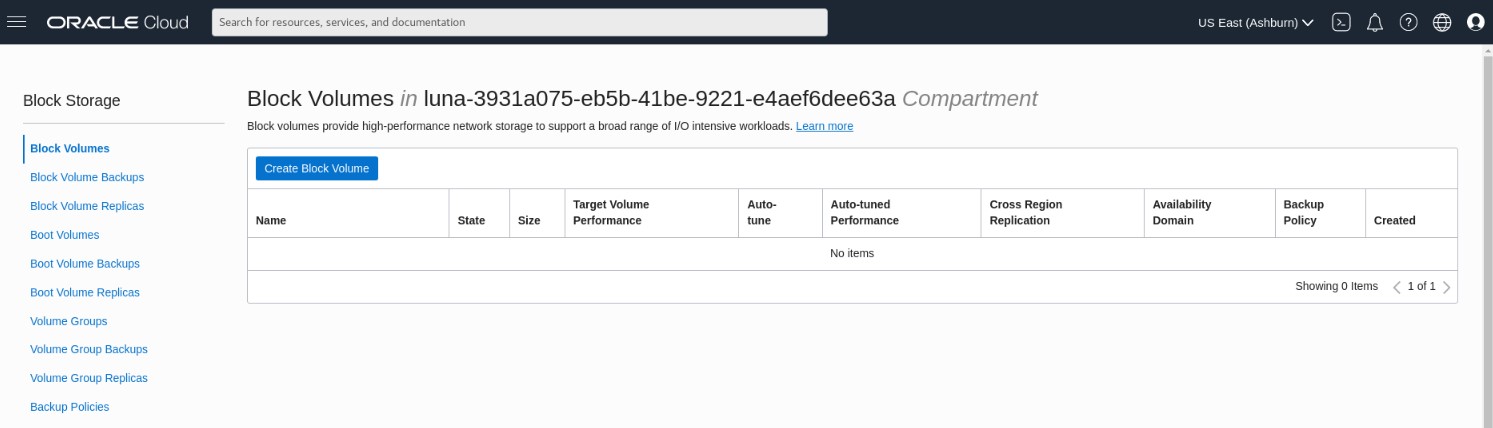
Click the Create Block Volume button.
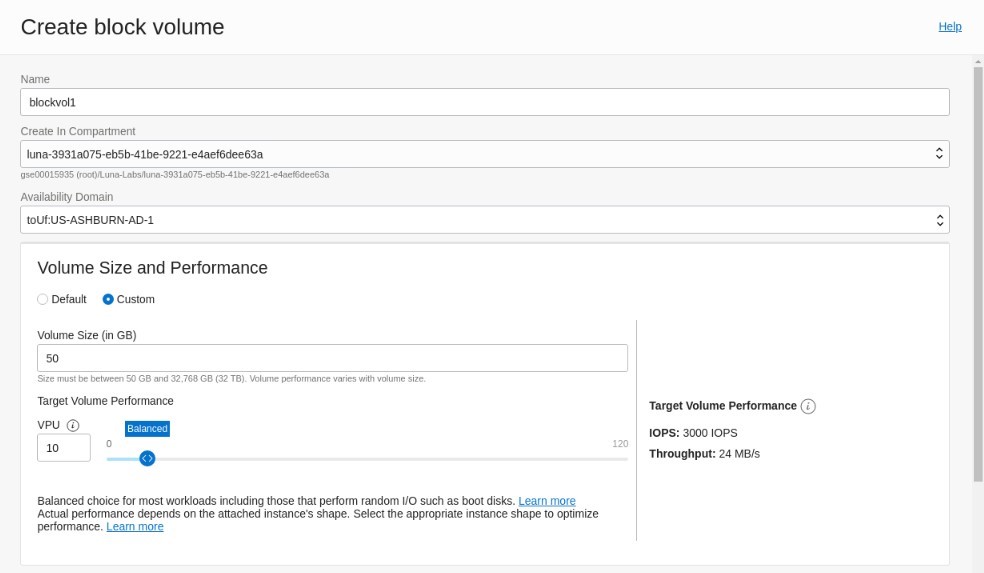
Name - Give a name to the volume (remember you will create two volumes and use their names to identify and attach them to the appliance instance).
Create in Compartment - Keep the default compartment already defined.
Availability Domain - Keep the default AD already set for your lab environment.
Note: For the block volume to be attached to the instance it must be associated with the same availability domain as the instance. If you choose a different AD, the block volume will not be presented to the instance when you try to attach it.
Volume Size and Performance - Select Custom and input 50GB for the Volume Size. Keep the VPU setting are the default 10.
Note: There is limited storage capacity assigned to your lab environment that can be associated to your block volumes. If you set the volume size too high, when you click to create the volume you will receive a message informing you do not have enough resources.
Keep all other sections as default.
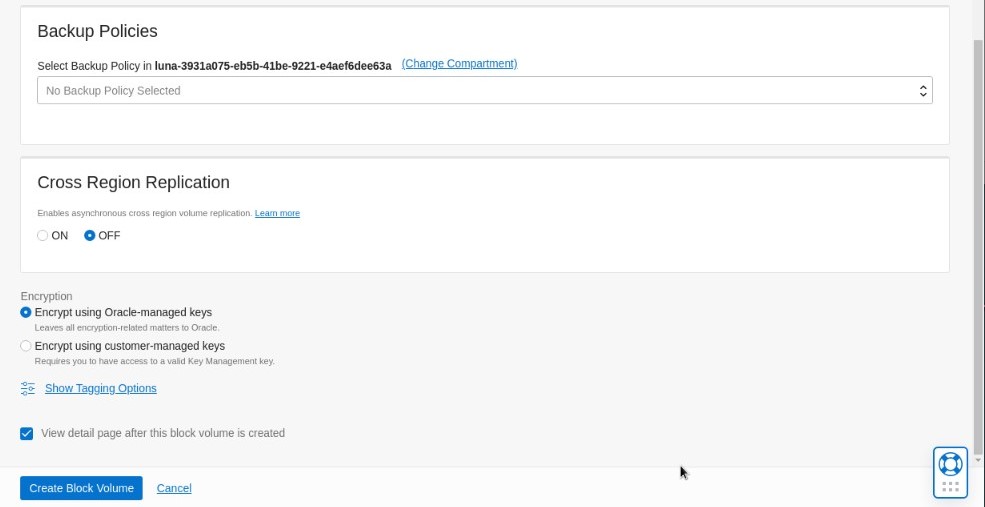
Uncheck the box for View detail page after this block volume is created. This will return you to the Block Volumes List after clicking the button to create the volume.
Click Create Block Volume.
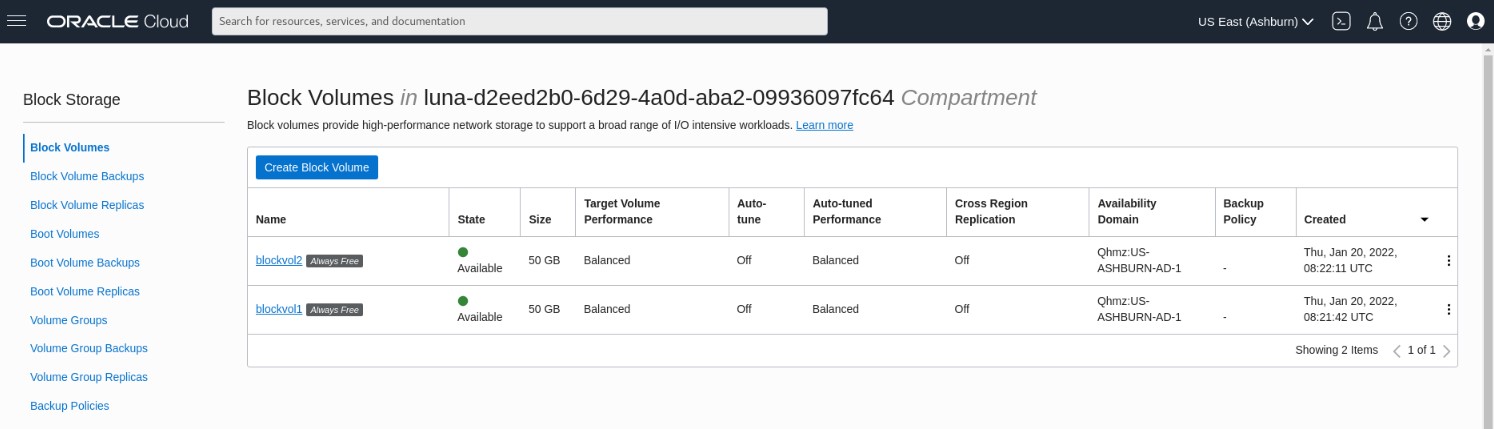
You are returned to the Block Volumes List.
Create a second block volume with the same capacity.
Return to your storage appliance instance details page.
Under Resources click Attached block volumes.

Click the Attach block volume button.
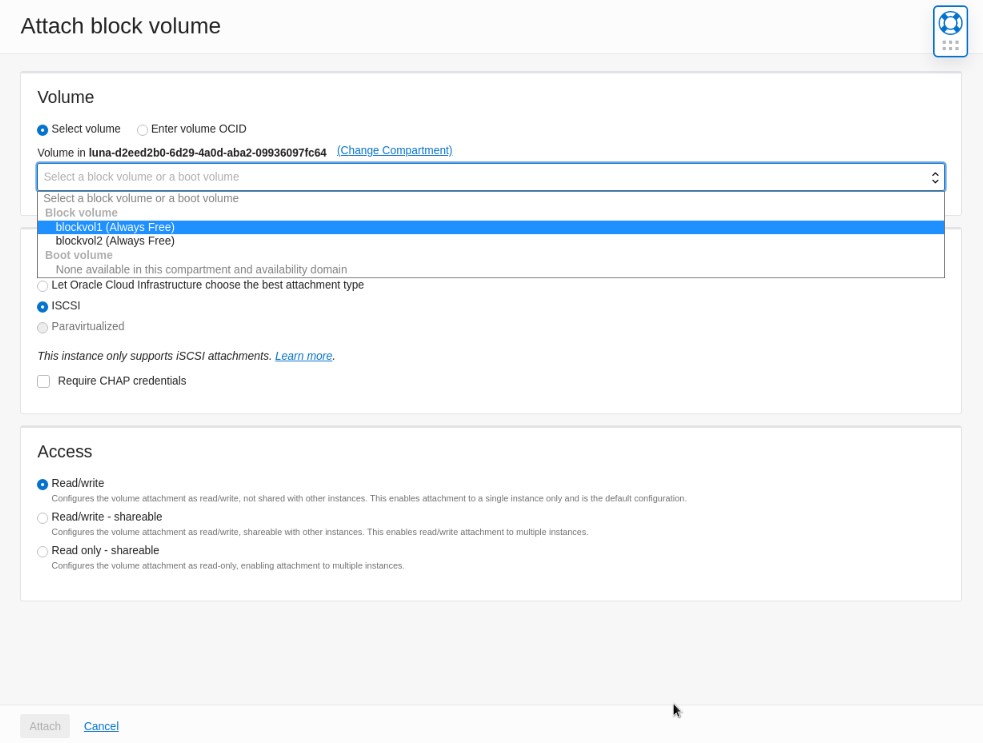
Volume - Click the Select volume dropdown and select your first block volume by its name.
Attachment Type - Select ISCSI.
Click the Attach button.
You are presented with a pop up window to inform you of the iSCSI ADM commands that may need to be run locally on an appliance. You do not need these, the Oracle Linux Storage Appliance automatically attaches the block volume devices to the instance.
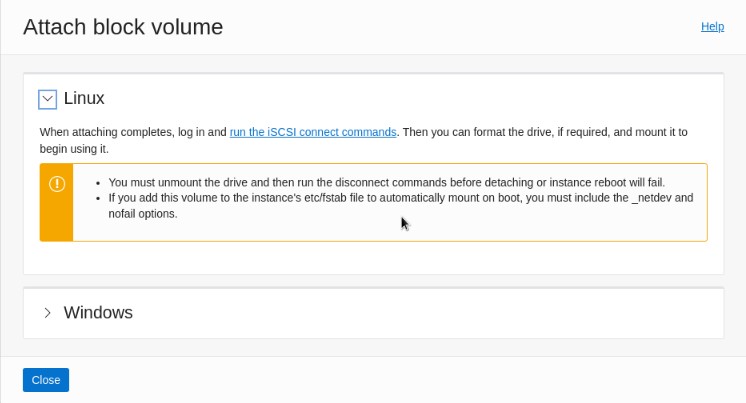
- Click Close to close this dialog.
Use the same steps to attach your second block volume to your storage appliance instance.
When completed, both volumes will be listed as Attached for the instance.

Create a Storage Pool
Return to the appliance web console browser window.
Refresh the browser window. The two 50GB attached block volumes are now be listed.
Note: If one or both volumes do not show up, refresh the browser again after a minute or two.
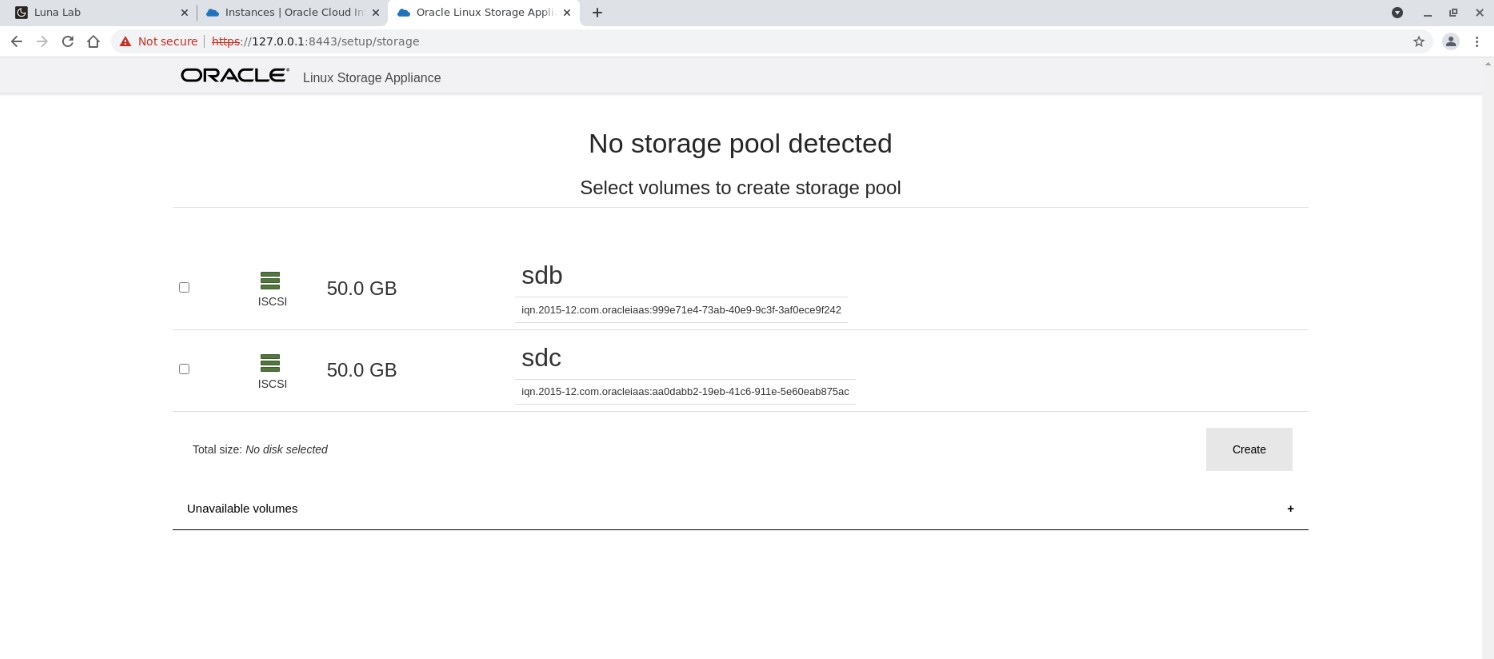
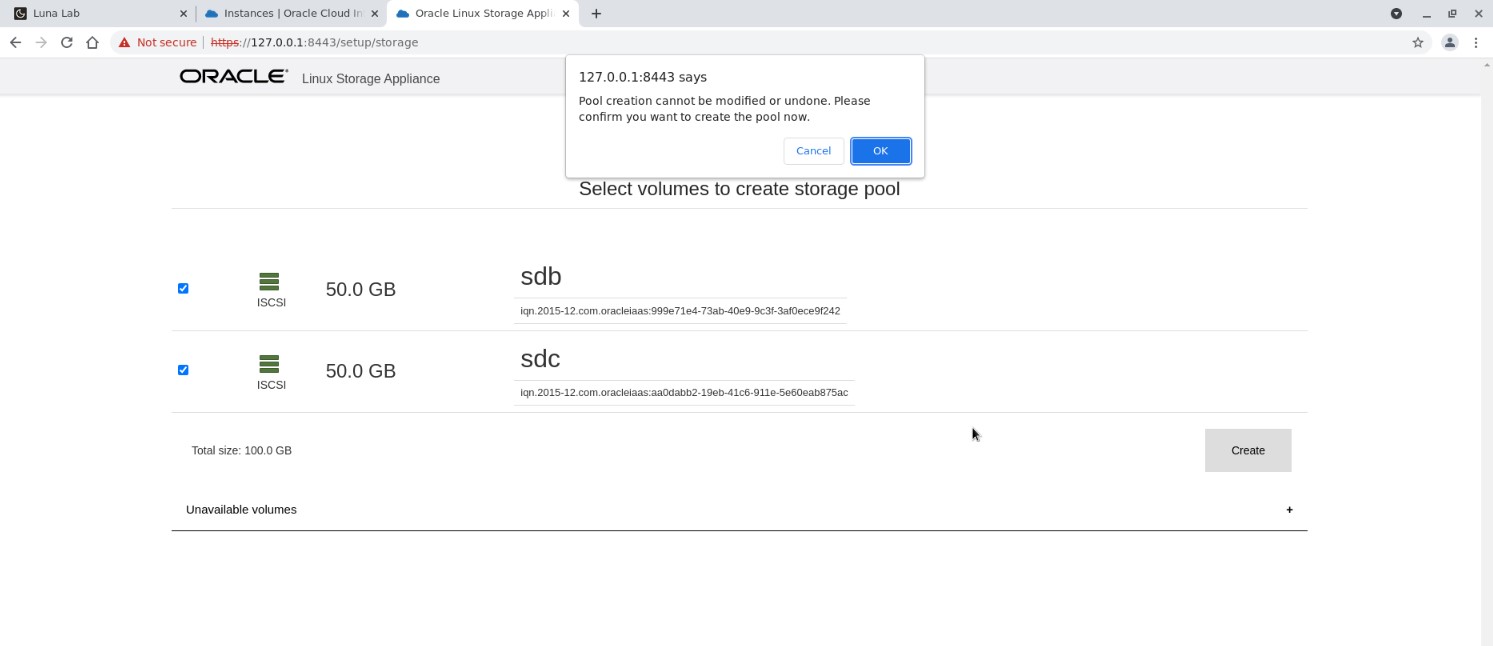
Tick the boxes beside both devices and click the Create button.
An information pop up states that the creation cannot be modified, click the OK button.
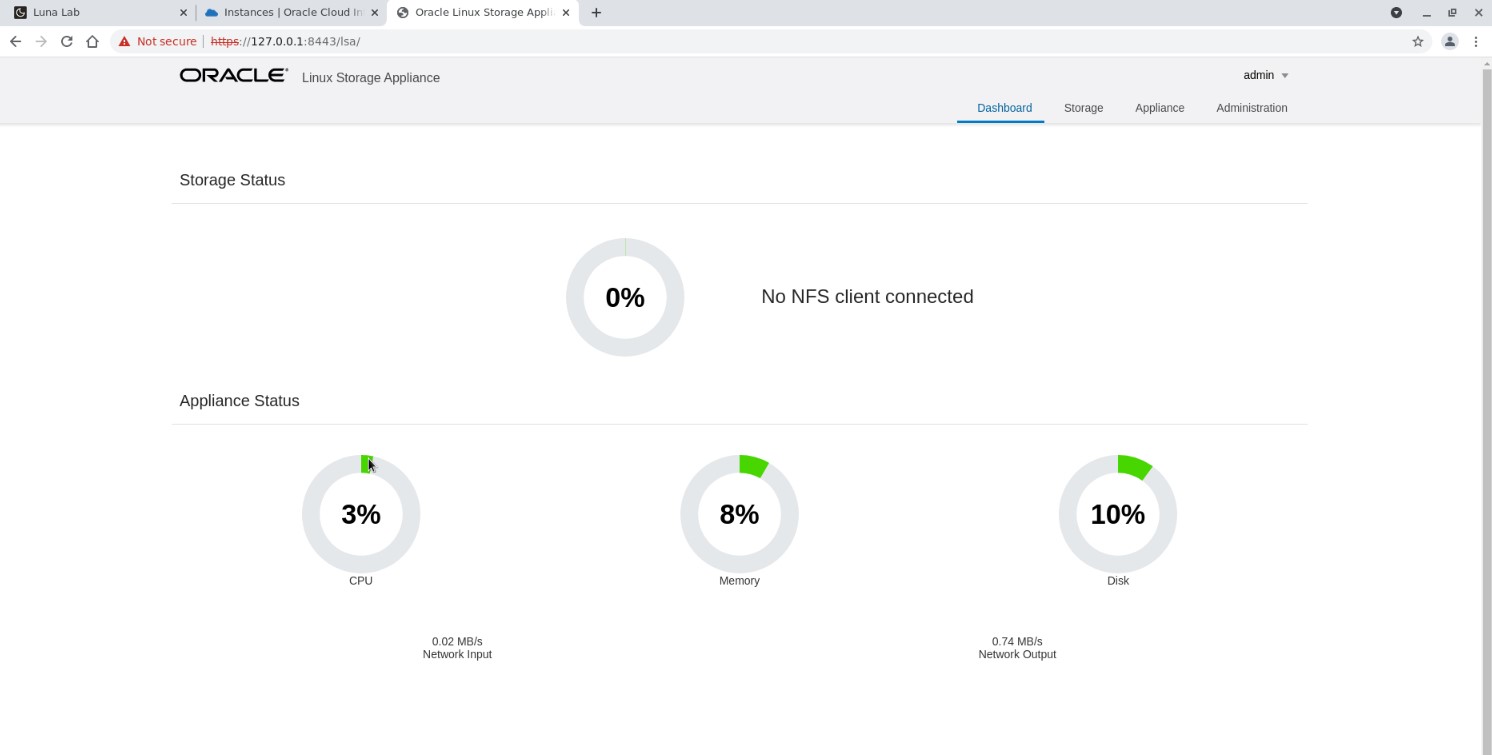
You are presented with a Storage Status and Appliance Status dashboard confirming your storage pool is available.
This completes this lab on creating an Oracle Linux storage Appliance and configuring a storage pool.
For More Information
Watch free training videos that cover the various steps in this lab content here:
Create an Oracle Linux Storage Appliance Instance on Oracle Cloud Infrastructure
Configure an Oracle Linux Storage Appliance Instance on Oracle Cloud Infrastructure
Find documentation to support your learning for Oracle Linux Storage Appliance here:
https://docs.oracle.com/en-us/iaas/oracle-linux/storage-appliance/index.htm
For many more free videos covering a wide range of topics about Oracle Cloud Infrastructure go here:
Linux on Oracle Cloud Infrastructure Training
Find extensive documentation to support your learning for Oracle Cloud Infrastructure here:
Create an Oracle Linux Storage Appliance in Oracle Cloud Infrastructure
Configure Security List Ingress Rules for the Virtual Cloud Network
Watch free training videos that cover the various steps in this lab content here:
Find documentation to support your learning for Oracle Linux Storage Appliance here:
For many more free videos covering a wide range of topics about Oracle Cloud Infrastructure go here:
Find extensive documentation to support your learning for Oracle Cloud Infrastructure here: