Use NetworkManager and IP Command on Oracle Linux
Introduction
In this tutorial you work with the Oracle Linux CLI utilities, nmcli and ip, to monitor and manage network devices and connections.
The lab's intent is to introduce you to these utilities and practice using their common features to simulate a work environment. Not all of the features are presented. The lab runs in a virtualized environment and therefore limits what can be presented and practiced.
Background
Linux handles network communications through software configuration files and the physical
networking devices in your system. Each physical network device has an associated configuration
file, named ifcfg-<interface>, located in the /etc/sysconfig/network-scripts directory.
NetworkManager includes a command-line utility, nmcli, which you can use to create, display, edit, delete, activate, and deactivate network connections, as well as control and display network device status.
The ip is another utility for displaying and manipulating network devices, network routing, and tunnels.
Objectives
- View network status information using command line utilities:
nmcliandip. - Change the system host name
- Change the logging level
- View connection information
- Add, edit and delete a connection profile
- View device status information
What Do You Need?
A client system with Oracle Linux installed with at least three disk devices.
Note: When using the free lab environment, see Oracle Linux Lab Basics for connection and other usage instructions.
Run nmcli general Object Commands
You use nmcli general object commands to show overall network status and to perform operations.
Run the command
nmcli helpand note the available options.nmcli helpNote: The different modes for displaying command output.
-t|--terse: This mode is designed and suitable for script processing.-p|--pretty: This mode produces easily readable output with a header.-m|--mode tabular|multiline: This mode produces output in table format or on multiple lines.
Refer to the
nmcliman page for a description for all available options.Run the command
nmcli general help.nmcli general helpNote: The
generaloption provides four command arguments:status,hostname,permissions, andlogging.Run the command
nmcli general status. Thestatusargument is the default.nmcli general statusFull connectivity means the host is connected to a network and has full access to the Internet.
Use the
systemctlcommand to stop the NetworkManager service.systemctl stop NetworkManagerRerun the command
nmcli general status.Running the command with the NetworkManager service stopped causes an error.
Use the
systemctlcommand to start the NetworkManager service.systemctl start NetworkManagerRun the command
nmcli general hostname.nmcli general hostnameThis argument reports the system hostname. You can also use
nmcli general hostnameto change the name of the host.Run the command
nmcli general hostnameand change the host name to “myhost”.nmcli general hostname myhostThe
/etc/hostnamefile stores the hostname information.Run the command
cat /etc/hostnameto confirm the name change.cat /etc/hostnameRerun the command
nmcli general hostnameand change the host name back to “ol-server”.nmcli general hostname ol-serverRerun the command
cat /etc/hostnameto verify the hostname change.Run the command
nmcli general permissions.nmcli general permissionsThe output shows all premissions are set to
yes, which means that you can enable and disable networking and modify all connections and settings.Run the
nmcli general loggingcommand.nmcli general loggingUse the
loggingargument to view and change NetworkManager logging levels and domains. Without any arguments, the current logging level and domains are shown. In this case, the logging level isINFOfor all domains. Refer to theNetworkManager.confman page for information about logging levels and domain descriptions.Use the
nmcli general loggingcommand to change the logging level toDEBUGfor theIP4domain.nmcli general logging level DEBUG domains IP4Rerun the
nmcli general loggingcommand to verify the logging level for theIP4domain changed toDEBUG.The logging level for the
IP4domain is now set toDEBUGUse the
nmcli general loggingcommand to change the logging level toINFOfor theALLdomains.nmcli general logging level INFO domains ALLThis command returns the logging level to the default setting.
Run nmcli networking Object Commands.
You use the nmcli networking object to manage networking connectivity and view networking status.
Run the
nmcli networking helpcommand.nmcli networking helpThe
networkingobject provides three commands:on,off,connectivity.Run the
nmcli networkingcommand with no arguments to show the networking status.nmcli networkingThe output shows the networking status is
enabled.Important Information LEAVE networking enabled. The instance on which you are working runs in a virtualized environment and becomes inaccessible if you disable networking. This causes you to loose connectivity to the instance and requires a restart of the lab.
- The command
nmcli networking offdisables networking to all enabled devices. - The command
nmcli networking onenables networking to all enabled devices.
- The command
Use the command
ip addrto display your available network interfaces.ip addressNote: Ethernet interface
ens5isUPand without an IP address.Run the command
nmcli networking connectivityto show the network connectivity state.- Include the
checkargument. - Without the
checkargument, the command displays the most recent known connectivity state without re-checking.
nmcli networking connectivity checkConnectivity state
fullmeans the host is connected to a network and has full access to the Internet.- Include the
Run nmcli radio Object Commands
Use nmcli radio object commands to manage wireless networking.
Run the command
nmcli radio help.nmcli radio helpNote: The three available command options:
all,wifi,wwan. Each command has two arguments.Run the command
nmcli radiowith no options or arguments to show radio switches status.nmcli radioThe output shows that all of the switches are
enabled.Run the command
nmcli radio wifi offcommand to disable the WI-FI radio switch.nmcli radio wifi offRerun the command
nmcli radioto verify the WI-FI radio switch status is nowdisabled.Run the command
nmcli radio wifi onto enable the WI-FI radio switch.nmcli radio wifi onRerun the command
nmcli radioto verify the WI-FI radio switch status is nowenabled.
Run nmcli connection Object Commands
Use the nmcli connection object to start, stop, and manage network connections.
Run the command
nmcli connection helpcommand.nmcli connection helpNote: The
nmcli connectionobject provides 13 commands, as shown:
Run the command
nmcli connection showto list all the connection profiles.nmcli connection showThe output lists device
ens3as the only connection profile.Run the command
nmcli connection showwith the--activeargument to list the active profiles.nmcli connection show --activeAgain, the output lists device
ens3as the only connection profile.Run the command
ls -l /etc/sysconfig/network-scripts/and pipe the output togrep ensto list the connection profiles for allensdevices.ls -l /etc/sysconfig/network-scripts/ | grep ensThe only
ensdevice with a connection profile isens3.Create a configuration profile for
ens5and bring the device online. By design, NetworkManager allows a single device to have multiple connections or profiles. These profiles allow for different network configurations such as DHCP or static IP address assignments.Obtain the Private IP of the second VNIC device attached to your lab instance.
Return to the Cloud Console > Compute > Instances page.
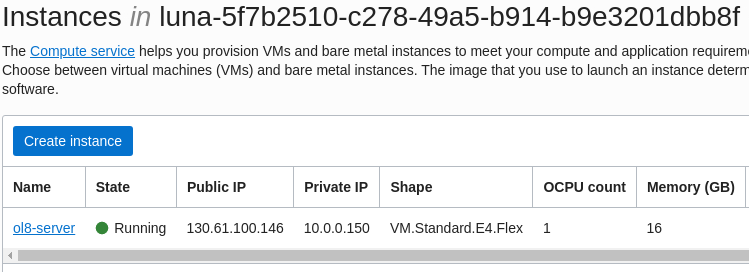
In the list of names, click the link to your instance (ol-server) to open its details page.
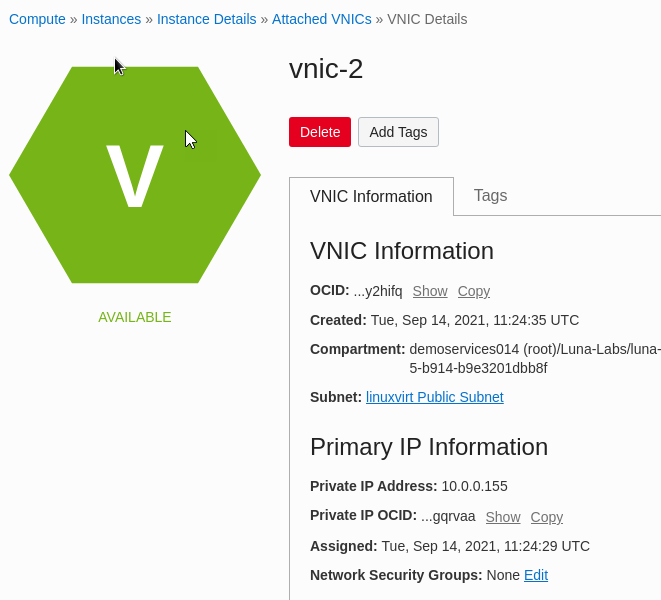
Scroll down the details page to the Resources section, and then click Attached VNICs from the list to view the VNICs.

From the list of VNICs, click the link to vnic-2 to view details about the VNIC.
In the Primary IP section of the page, copy the Private IP Address (e.g. 10.0.0.155) and return the the terminal window.
Run the command
nmcli connection add type ethernet con-name ens5 ifname ens5 ip4 <PRIVATE_IP_ADDRESS_OF_COMPUTE_INSTANCE>, for example:10.0.0.155/24to create the a configuration profile forens5.nmcli connection add type ethernet con-name ens5 ifname ens5 ip4 10.0.0.155/24The configuration defines a static IP address assignment and presents the ip4 address in CIDR notation. NetworkManager writes these values in a
/etc/sysconfig/network-scripts/ifcfg-<interface>file to keep the configuration persistent after reboots.Run the
catcommand to view theens5configuration file.cat /etc/sysconfig/network-scripts/ifcfg-ens5Run the command
nmcli conn showto view the updated list of connections.nmcli conn showThe command shows the new connection profile created for
ens5. NetworkManager allows the use of abbreviations fornmclicommands.Run the command
nmcli conn up ens5to bring the device online.nmcli conn up ens5Verify the connection started by typing
nmcli d status, where thedis an abbreviation for the device command.nmcli d statusThe command shows
ens5in theconnectedstate.Run the command
ping -c 3 -I ens5followed by the IP address used previously, for example10.0.0.155ping -c 3 -I ens5 <PRIVATE_IP_ADDRESS_OF_COMPUTE_INSTANCEThe
-csends out only three packets, and then-Iparameter ensures the packets go out on theens5interface.Run the command
nmcli connection show id ens5command and pipe the output togrep interconnectnmcli connection show id ens5 | grep autoconnectThe output shows the
autoconnectparameter is set toyes.
Run ip link Object Commands
You use the ip utility to configure network interfaces. You need elevated privileges to use the ip utility. It is important to note that any network changes made using the ip command do not persist across system reboots.
In the following tasks, you continue to use device ens5.
In this exercise, you use the ip link utility to add, edit, and delete a link.
Run the
ipcommand without any options or arguments.ipNote: The various options available. Refer to the
ip (8)man page for a description of all options.Run
ip linkobject commands. You use theip linkobject commands to display and configure network devices.Run the
ip link helpcommand to show the six available object commands.ip link helpThe commands are
add,delete,set,show,xstats,afstats,help.Run the
ip link showcommand to identify the existing network devices.ip link showThe
showcommand is the default for theip linkobject, so it is not required. The output identifies three network devices, two Ethernet devices (ens3andens5). There is also one loopback device (lo). The output lists the same devices as thenmcli device statusdid in the previous exercise.Run the
ip link addcommand to add a virtual link. Refer to theip-link(8)man page for more information about link types. Use the following parameters to add a new VLAN link:- Use physical device
ens5 - Assign the name
ens5.10 - Use
vlanfor the device type - Assigh the VLAN ID (
id) to10
ip link add link ens5 name ens5.10 type vlan id 10- Use physical device
Rerun the
ip linkto list the new device.The virtual link,
ens5.10@ens5, appears in the list.Run the
ip link setcommand to change the MTU device attribute to1400.ip link set ens5.10 mtu 1400Run the
ip link deletecommand to delete theens5.10device.ip link delete ens5.10- Rerun the
ip linkto list the verify the virtual device no longer exists.
- Rerun the
Run ip addr Object Commands
The ip addr command to displays and manages IP addresses on network devices.
Run the
ip addr helpcommand to show the available object commands.A partial list of available commands include
add,change,replace,del,show, andsave. Refer to theip-address(8)man page for a complete list ofip addrcommands.Run the
ip addr showcommand to identify existing networking devices.ip addrThe
showcommand is also the default forip addr. It shows the same information asip linkbut includes IP addresses.Run the
ip addr addcommand to add a second IP address toens5.ip addr add 10.1.1.1/24 dev ens5Run the
ip addr showcommand to show theens5device. Theshowcommand is required when specifying a device as an argument.ip addr show ens5The device now has two IP addresses.
Run the
ip addr delcommand to delete an IP address fromens5.ip addr del 10.1.1.1/24 dev ens5Run the
ip addr showcommand again to show theens5device.
Video demonstrations
The video demonstration provided at https://www.youtube.com/watch?v=EkI3RKl4loE may also be useful if you need more information on using nmcli commands.
Using NetworkManager CLI (nmcli) on Oracle Linux
The video demonstration provided at https://www.youtube.com/watch?v=JcipLuWymNc may also be useful if you need more information on using the ip command.