Configure Chrony on Oracle Linux
Introduction
The following tutorial provides step-by-step procedures to configure date and time, and enable Chrony. This tutorial is targeted at Oracle Linux 8 users, but the commands are also available on other Oracle Linux releases.
Objectives
In this lab, you'll:
- Configure date and time
- Enable
chrony
What Do You Need?
- A fully patched Oracle Linux system
Note: When using the free lab environment, see Oracle Linux Lab Basics for connection and other usage instructions.
Configure System Date and Time
In this practice, you use the date, hwclock, and timedatectl utilities to configure and display date and time information.
Open a terminal and connect to your Oracle Linux instance.
Become the root user.
sudo su -As the root user, run the
datecommand with no arguments to display the current date and time.date
The current date and time displays.
Run the
datecommand with the argument to view the weekday name.date +%A
Run the
datecommand with the argument to view the month name.date +%B
Use the
datecommand to change the date to another date, for example 14 December, 2021.You can substitute any date.
date +%D -s 2021-12-14
Use the
datecommand to change the date to the correct date, for example 03 February, 2021.date +%D -s 2021-02-03
Use the
datecommand to change the time to your current local time.For example, 08:57 AM.
date +%T%p -s 08:57:00AM
Run the
hwclockcommand with no arguments to display the hardware clock’s current date and time.hwclock
Use the
hwclockcommand with the–woption to set the hardware clock to the current system time.hwclock -wRun the
datecommand and thehwclockcommand to confirm that the date and time settings are the same.date hwclockThe variation in seconds is due to the delay between running the two commands.

Run the
timedatectlcommand with no arguments to display the system date and time information.timedatectl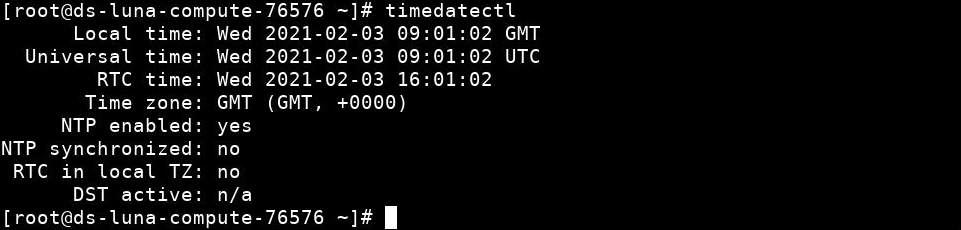
If the above output shows NTP service: active, disable it as follows and re-check it:
timedatectl set-ntp 0
timedatectl
Use the
timedatectlcommand to change the date to the correct date.- Substitute today’s correct date. The example changes the date to 27 January, 2021.
- Run the
timedatectlcommand afterwards with no arguments to verify that the date changed.
timedatectl set-time 2021-01-27
timedatectl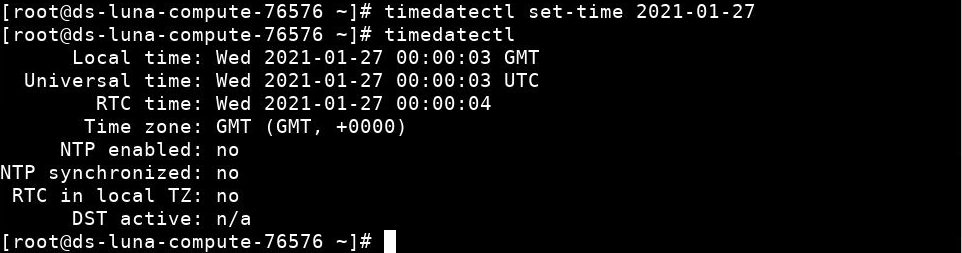
Use the
timedatectlcommand to change the time to the correct time.- Substitute the current local time. The example changes the time to 09:11:30 AM.
- Enter the hour using a 24-hour clock.
- Run the
timedatectlcommand afterwards with no arguments to verify that the time changed.
timedatectl set-time 09:11:30
timedatectl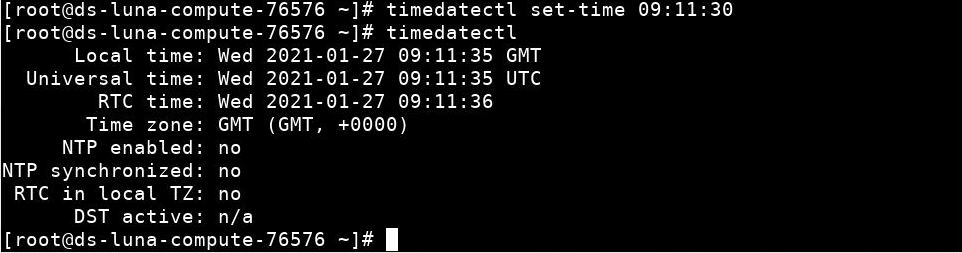
Configure NTP Using Chrony
In this section, you configure NTP using chrony.
As the root user, use the
dnfcommand to check thatchronyis installed.dnf list chrony
- If necessary, install
chronyusing thednfcommand.
dnf install chrony -y- If necessary, install
Use the
systemctlcommand to check the status the Chrony daemon,chronyd.systemctl status chronyd- Use the
systemctlcommand to startchronydif necessary.
systemctl start chronyd- Use the
Run the
chronyc -n trackingcommand to check Chrony tracking. The "n" option provides numeric host address output.- Alternatively, you could run
chronycto display achronyc>prompt, and then run thetrackingcommand from thechronyc>prompt. - Type
quitto exit thechroncycprompt. - Sample output is shown.
chronyc -n tracking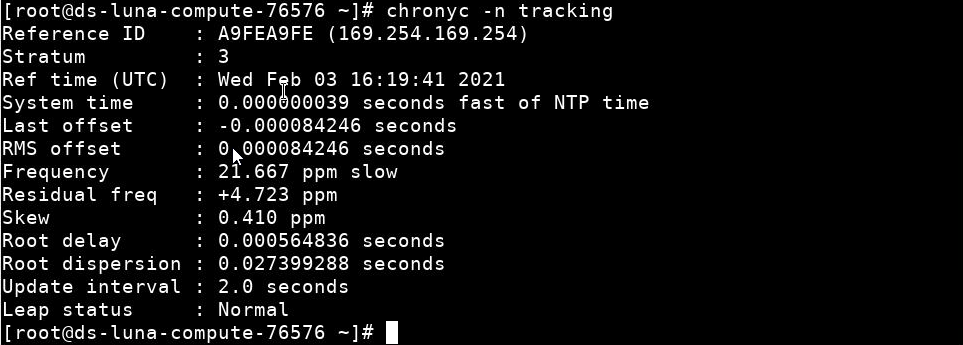
Key output fields:
Reference ID:Refers to the server providing synchronization.Stratum:The distance from a computer attached to a highly accurate reference clock.Ref time:The most recent time Chrony utilized a time measurement from the server providing synchronization (time is UTC).
- Alternatively, you could run
Run the
chronyc -n sourcescommand to show information aboutchronydtime sources. The "n" option provides numeric host address output.- Sample output is shown.
chronyc -n sources
- Sample output is shown.
Run the
chronyc -n sourcescommand with the "v" option (verbose) to provide column descriptions.- Sample output is shown.
chronyc -n sources -v
- For more information about Chrony, see the
chronycmain page.
- Sample output is shown.
Run the
chronyc -n sourcestatscommand.- This command provides statistics around calculations for time sources.
- Sample output is shown.
chronyc -n sourcestats
Run the command again but include the
–voption to obtain column descriptions.chronyc -n sourcestats -v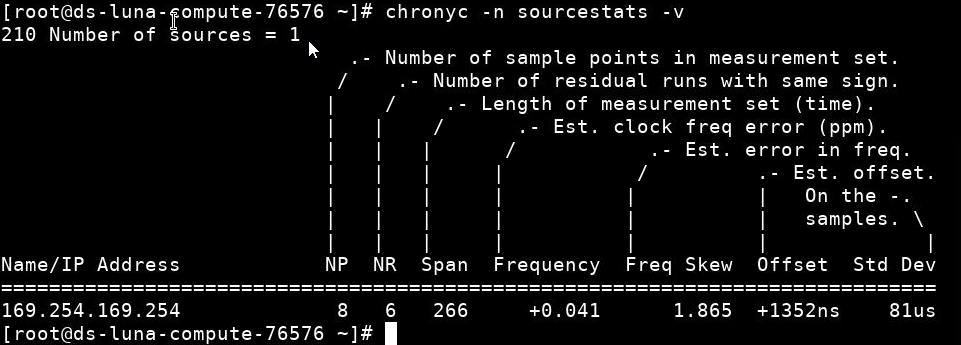
More Learning Resources
Explore other labs on docs.oracle.com/learn or access more free learning content on the Oracle Learning YouTube channel . Additionally, visit education.oracle.com/learning-explorer to become an Oracle Learning Explorer.
For product documentation, visit Oracle Help Center .