Setup HAProxy to Load Balance an Oracle Linux Automation Manager Cluster
Introduction
Oracle Linux Automation Manager supports a cluster deployment of multiple control and execution nodes. With the control nodes acting as the entry point into the cluster, how does an administrator manage the traffic across these nodes? That is where a load balancer becomes beneficial. A load balancer efficiently distributes incoming network traffic across a group of backend servers or, in this solution, the control nodes. A load balancer ensures that the Oracle Linux Automation Manager infrastructure is highly available, reliable, and performs without degradation.
The sample inventory below defines a multi-node cluster deployment in the free lab environment. To help automate the cluster installation on your hardware, check out the playbook in the Oracle Linux Automation Manager section of the ansible-playbooks project.
This sample inventory creates a cluster of three control plane nodes, two execution nodes, and a remote database.

This image shows the topology for this cluster.
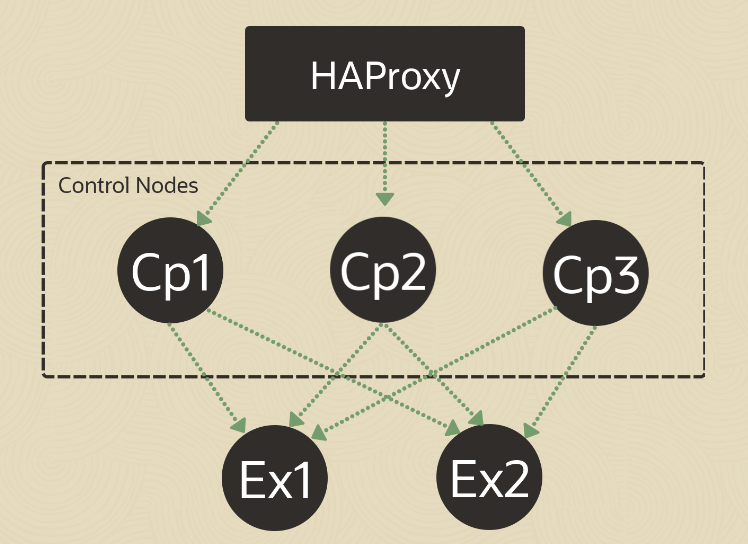
Although there are many load balancer options, this tutorial will leverage HAProxy. HAProxy, or High Availability Proxy, is an application layer (Layer 7) load balancer and high-availability solution that you can use to implement a reverse proxy for HTTP and TCP-based Internet services. An application layer load balancer often includes many features because it can inspect the traffic content it is routing and either modify content within each packet or make decisions about handling each packet based on its content. These features simplify the implementation of session persistence, TLS, ACLs, and HTTP rewrites and redirection.
Objectives
In this tutorial, you'll learn how to:
- Install HAProxy
- Configure HAProxy
- Configure Oracle Linux Automation Manager to work behind a load balancer or proxy
Prerequisites
A cluster with Oracle Linux Automation Manager installed and cluster configured
An Oracle Cloud Infrastructure (OCI) account
A user in the OCI account with permission to work with resources in a compartment
Access to that account's credentials and OCID information
For details on installing Oracle Linux Automation Manager, see the Oracle Linux Automation Manager Installation Guide .
Deploy Oracle Linux Automation Manager Instances
Note: If running in your own tenancy, read the linux-virt-labs GitHub project README.md and complete the prerequisites before deploying the lab environment.
Open a terminal on the Luna Desktop.
Clone the
linux-virt-labsGitHub project.git clone https://github.com/oracle-devrel/linux-virt-labs.gitChange into the working directory.
cd linux-virt-labs/olamInstall the required collections.
ansible-galaxy collection install -r requirements.ymlUpdate the Oracle Linux instance configuration.
cat << EOF | tee instances.yml > /dev/null
compute_instances:
  1:
    instance_name: "olam-control-01"
    type: "control"
  2:
    instance_name: "olam-control-02"
    type: "control"
  3:
    instance_name: "olam-control-03"
    type: "execution"
  4:
    instance_name: "olam-execution-01"
    type: "execution"
  5:
    instance_name: "olam-execution-02"
    type: "execution"
  6:
    instance_name: "olam-db"
    type: "db"
  7:
    instance_name: "haproxy"
    type: "server"
passwordless_ssh: true
olam_type: none
add_cluster_ports: true
add_haproxy_ports: true
EOF
Create an inventory file.
cat << EOF | tee hosts > /dev/null
localhost ansible_connection=local ansible_connection=local ansible_python_interpreter=/usr/bin/python3.6
EOF
Deploy the lab environment.
ansible-playbook create_instance.yml -i hosts -e "@instances.yml"The free lab environment requires the extra variable
ansible_python_interpreterfor localhost because it installs the RPM package for the Oracle Cloud Infrastructure SDK for Python. The location for installing this package is under the system's default Python modules based on your version of Oracle Linux. Using an inventory variable avoids impacting plays running on hosts other than localhost.The default deployment shape uses the AMD CPU. You can change the shape of the instances by passing a new shape variable definition on the command line.
For example:
-e instance_shape="VM.Standard3.Flex"Similarly, the default version of the Oracle Linux image uses the variable
os_versiondefined in the `default_vars.yml file. You can modify this value by passing the Oracle Linux major version on the command line.For example:
-e os_version="9"Important: Wait for the playbook to run successfully and reach the pause task. At this stage of the playbook, the installation of Oracle Linux is complete, and the instances are ready. Note the previous play, which prints the public and private IP addresses of the nodes it deploys.
Deploy the Oracle Linux Automation Manager Cluster
Open a new terminal.
Ensure you are in the olam directory of the linux-virt-labs project.
Convert the basic inventory file.
This conversion script creates a cluster-compatible inventory file from the basic inventory generated by the instance deployment playbook.
chmod +x convert_ansible_inventory.sh
./convert_ansible_inventory.sh hosts > hosts.cluster
Run the cluster deployment playbook.
ansible-playbook -i hosts.cluster deploy_olam_cluster.yml
Install and Configure HAProxy
Open a terminal and SSH into the haproxy instance.
ssh oracle@<hostname_or_ip_address>Install the HAProxy package
sudo dnf install -y haproxyCreate an HAProxy configuration file.
The sample configuration file enables haproxy statistics and end-to-end SSL encryption with the three control node backends.
Oracle Linux 8:
cat << EOF | tee ~/haproxy.cfg > /dev/null
#---------------------------------------------------------------------
# Example configuration for a possible web application. See the
# full configuration options online.
#
#   https://www.haproxy.org/download/1.8/doc/configuration.txt
#
#---------------------------------------------------------------------

#---------------------------------------------------------------------
# Global settings
#---------------------------------------------------------------------
global
    # To have these messages end up in /var/log/haproxy.log, you will
    # need to:
    #
    # 1) configure syslog to accept network log events. This is done
    #    by adding the '-r' option to the SYSLOGD_OPTIONS in
    #    /etc/sysconfig/syslog
    #
    # 2) configure local2 events to go to the /var/log/haproxy.log
    #   file. A line like the following can be added to
    #   /etc/sysconfig/syslog
    #
    #    local2.*                       /var/log/haproxy.log
    #
    log         127.0.0.1 local2

    chroot      /var/lib/haproxy
    pidfile     /var/run/haproxy.pid
    maxconn     4000
    user        haproxy
    group       haproxy
    daemon

    # turn on stats unix socket
    stats socket /var/run/haproxy.sock mode 600 level admin
    stats timeout 2m

    # utilize system-wide crypto-policies
    ssl-default-bind-ciphers PROFILE=SYSTEM
    ssl-default-server-ciphers PROFILE=SYSTEM

#---------------------------------------------------------------------
# common defaults that all the 'listen' and 'backend' sections will
# use if not designated in their block
#---------------------------------------------------------------------
defaults
    mode                    http
    log                     global
    option                  httplog
    option                  dontlognull
    option http-server-close
    option forwardfor       except 127.0.0.0/8
    option                  redispatch
    option contstats
    retries                 3
    timeout http-request    10s
    timeout queue           1m
    timeout connect         10s
    timeout client          1m
    timeout server          1m
    timeout http-keep-alive 10s
    timeout check           10s
    maxconn                 3000

#---------------------------------------------------------------------
# stats frontend
#---------------------------------------------------------------------

listen stats                            # Define a listen section called "stats"
    bind *:8404                          # Listen on localhost:<port-number>
    mode http
    stats enable                        # Enable stats page
#   stats hide-version                  # Hide HAProxy version
#   stats realm Haproxy\ Statistics     # Title text for popup window
    stats uri /                         # Stats URI
#   stats auth Username:Password        # Authentication credentials


#---------------------------------------------------------------------
# main frontend which proxys to the backends
#---------------------------------------------------------------------

frontend main
    # Receive HTTP traffic on all IP addresses assigned to the server on Port 80
    bind *:8480
    bind *:8443 ssl crt /etc/haproxy/server.pem

    option http-server-close
    option forwardfor
    http-request add-header X-Forwarded-Proto https
    http-request add-header X-Forwarded-Port 443

    # set HTTP Strict Transport Security (HTST) header
    http-response add-header Strict-Transport-Security max-age=15768000

    # Choose the default pool of backend servers (important if several pools are defined)
    default_backend olam

#---------------------------------------------------------------------
# static backend for serving up images, stylesheets and such
#---------------------------------------------------------------------
#
# backend static
#     balance     roundrobin
#     server      static 127.0.0.1:4331 check

#---------------------------------------------------------------------
# round robin balancing between the various backends
#---------------------------------------------------------------------

backend olam
    balance   roundrobin
    option    httpchk /nginx-health
    http-check expect status 200

    cookie SERVER_USED insert indirect nocache dynamic
    server $(ssh olam-control-01 hostname -s) $(ssh olam-control-01 hostname -i):443 check port 8080 ssl verify none
    server $(ssh olam-control-02 hostname -s) $(ssh olam-control-02 hostname -i):443 check port 8080 ssl verify none
    server $(ssh olam-control-03 hostname -s) $(ssh olam-control-03 hostname -i):443 check port 8080 ssl verify none
    dynamic-cookie-key secretphrase123

EOF
Oracle Linux 9:
cat << EOF | tee ~/haproxy.cfg > /dev/null
global
  # Bind the Runtime API to a UNIX domain socket, and/or an IP address
  stats socket /var/run/api.sock user haproxy group haproxy mode 660 level admin expose-fd listeners
  log stdout format raw local0 info

defaults
  # Set the Proxy mode to http (Layer 7) or tcp (Layer 4)
  mode http
  option redispatch
  option contstats
  retries 3
  timeout connect 10s
  timeout server 1m
  timeout client 1m
  option forwardfor
  timeout http-request 10s
  log global

frontend stats
  bind *:8404
  stats enable
  stats uri /
  stats refresh 10s

frontend myfrontend
  # Receive HTTP traffic on all IP addresses assigned to the server on Port 80
  bind :8480
  bind :8443 ssl crt /usr/local/etc/haproxy/haproxy.pem

  option http-server-close
  option forwardfor
  http-request add-header X-Forwarded-Proto https
  http-request add-header X-Forwarded-Port 443

  # set HTTP Strict Transport Security (HTST) header
  http-response add-header Strict-Transport-Security max-age=15768000

  # Choose the default pool of backend servers (important if several pools are defined)
  default_backend olam

backend olam
  # By default requests are sent to the server pool using round-robin load-balancing
  balance   roundrobin

  # Enable HTTP health checks (see 'check' at the end of each server definition)
  option httpchk
  http-check send meth GET uri /nginx-health

  # Define the servers where HTTP traffic will be forwarded. Note that the format used is:
  #
  # server <name> <hostname>:<listening port> check
  # Note:  is only required if the  directive is enabled.
  #
  erver $(ssh olam-control-01 hostname -s) $(ssh olam-control-01 hostname -i):443 check port 8080 ssl verify none
  server $(ssh olam-control-02 hostname -s) $(ssh olam-control-02 hostname -i):443 check port 8080 ssl verify none
  server $(ssh olam-control-03 hostname -s) $(ssh olam-control-03 hostname -i):443 check port 8080 ssl verify none

EOF
The following output illustrates the differences between the package's default configuration and the values used in the tutorial.
sudo diff /etc/haproxy/haproxy.cfg ~/haproxy.cfgSee the HAProxy configuration documentation for more details on using these options.
Copy the custom HAProxy configuration file to the package's default configuration file location.
sudo cp ~/haproxy.cfg /etc/haproxy/haproxy.cfgCheck if the HAProxy configuration syntax is valid.
sudo haproxy -f /etc/haproxy/haproxy.cfg -cThe output alerts that it's unable to load the defined SSL certificate file.
Create a self-signed certificate with OpenSSL.
The Oracle Linux Automation Manager control nodes use SSL, so the load balancer must also use SSL. The other option is to have SSL terminate at the load balancer.
openssl req -x509 -nodes -days 365 -newkey rsa:2048 \
-keyout ~/haproxy.key -out ~/haproxy.crt
Enter the requested information or just hit the
ENTERkey to take each of the defaults.This command generates the domain certificate (in the .crt file format) and the corresponding private key.
Create a single PEM file for HAProxy.
HAProxy requires the chain hierarchy of the certificates to be in the following order in a single PEM file.
- The Certificate for your domain
- The intermediates in ascending order to the Root CA
- A Root CA, if any (usually none)
- Private Key
cat ~/haproxy.crt ~/haproxy.key | sudo tee -a /etc/haproxy/server.pem > /dev/nullRecheck the HAProxy syntax.
sudo haproxy -f /etc/haproxy/haproxy.cfg -cThe self-signed certificate alert is gone, but a new warning regarding the default Diffie-Hellman parameters appears. Although HAProxy will automatically handle this warning, the upstream documentation recommends specifying custom Diffie-Hellman parameters, as this approach is more secure.
Generate the custom DH parameters.
sudo openssl dhparam -out /etc/haproxy/dhparams.pem 2048Add the DH parameters configuration to HAProxy.
sudo sed -i -E 's|^(\s*)ssl-default-server-ciphers(.*)$|& \n\1ssl-dh-param-file /etc/haproxy/dhparams.pem|' /etc/haproxy/haproxy.cfgRecheck the HAProxy syntax.
sudo haproxy -f /etc/haproxy/haproxy.cfg -cThe results show a valid configuration.
Attempt to start and enable the HAProxy service.
sudo systemctl enable --now haproxyThe haproxy.service fails to start and exists with an error code.
Use the journald logs to review the error.
sudo journalctl -u haproxy.service -l --no-pagerExample Output:
[oracle@haproxy ~]$ sudo journalctl -u haproxy.service -l --no-pager
-- Logs begin at Tue 2023-05-16 15:44:36 GMT, end at Tue 2023-05-16 19:08:15 GMT. --
May 16 19:04:57 haproxy systemd[1]: Starting HAProxy Load Balancer...
May 16 19:04:57 haproxy haproxy[83949]: [ALERT] 135/190457 (83949) : Starting proxy stats: cannot bind socket [0.0.0.0:8404]
May 16 19:04:57 haproxy systemd[1]: haproxy.service: Main process exited, code=exited, status=1/FAILURE
May 16 19:04:57 haproxy systemd[1]: haproxy.service: Failed with result 'exit-code'.
May 16 19:04:57 haproxy systemd[1]: Failed to start HAProxy Load Balancer.
The error occurs because SELinux restricts HAProxy from binding to the defined port, as Oracle Linux enables SELinux in
enforcingmode by default.Enable the SELinux boolean that allows HAProxy to bind on any ports defined within the configuration file.
sudo setsebool -P haproxy_connect_any=1Restart the HAProxy service.
sudo systemctl restart haproxyOpen the Linux firewall to allow access to HAProxy using HTTPS.
sudo firewall-cmd --permanent --add-port=8480/tcp
sudo firewall-cmd --permanent --add-port=8443/tcp
sudo firewall-cmd --reload
Add Proxy Support to Oracle Linux Automation Manager
A proxy/load balancer acts as an arbitrator for client requests seeking resources from other servers. When establishing a session, the control node associates an IP address while requesting access to Oracle Linux Automation Manager. Per policy, using that session requires matching the original associated IP address.
Whether using HAProxy, Nginx, or an OCI Load Balancer in front of Oracle Linux Automation Manager to proxy requests, the REMOTE_HOST_HEADERS list variable provides the necessary support. Administrators can manage this setting by altering the default value of ['REMOTE_ADDR', 'REMOTE_HOST'].
Open a terminal and connect using SSH to the olam-control-01 instance.
ssh oracle@<hostname_or_ip_address>Enable the proxy server support on each of the control nodes.
This command adds a new settings file to Oracle Linux Automation Manager, enabling support for a proxy server or load balancer.
for host in olam-control-01 olam-control-02 olam-control-03; do
  ssh "$host" 'sudo -u awx bash -c '\''cat << EOF | tee /etc/tower/conf.d/remote_host_headers.py > /dev/null
REMOTE_HOST_HEADERS = ["HTTP_X_FORWARDED_FOR", "REMOTE_ADDR", "REMOTE_HOST"]
EOF'\'''
done
Restart the Oracle Linux Automation Manager service.
for host in olam-control-01 olam-control-02 olam-control-03; do
  ssh "$host" 'sudo systemctl restart ol-automation-manager'
done
Create an nginx configuration with the haproxy health check URLs.
# Create a temporary nginx.conf file
cat > /tmp/nginx_tmp.conf << 'EOF'
# For more information on configuration, see:
#   * Official English Documentation: http://nginx.org/en/docs/
#   * Official Russian Documentation: http://nginx.org/ru/docs/

user nginx;
worker_processes auto;
error_log /var/log/nginx/error.log;
pid /run/nginx.pid;

# Load dynamic modules. See /usr/share/doc/nginx/README.dynamic.
include /usr/share/nginx/modules/*.conf;

events {
    worker_connections 1024;
}

http {
    log_format  main  '$remote_addr - $remote_user [$time_local] "$request" '
                      '$status $body_bytes_sent "$http_referer" '
                      '"$http_user_agent" "$http_x_forwarded_for"';

    access_log  /var/log/nginx/access.log  main;

    sendfile            on;
    tcp_nopush          on;
    tcp_nodelay         on;
    keepalive_timeout   65;
    types_hash_max_size 2048;

    include             /etc/nginx/mime.types;
    default_type        application/octet-stream;

    # Load modular configuration files from the /etc/nginx/conf.d directory.
    # See http://nginx.org/en/docs/ngx_core_module.html#include
    # for more information.
    include /etc/nginx/conf.d/*.conf;

    server {
        listen      8080 default_server;
        listen      [::]:8080 default_server;
        server_name _;
        root        /usr/share/nginx/html;

        # Load configuration files for the default server block.
        include /etc/nginx/default.d/*.conf;

        # OCI LB health check
        location /nginx-health {
            access_log off;
            add_header 'Content-Type' 'text/plain';
            return 200 "healthy\n";
        }

        location /health {
            access_log off;
            add_header 'Content-Type' 'application/json';
            return 200 '{"status":"UP"}';
        }
    }
}
EOF
Copy the new Nginx configuration file to each of the control nodes.
servers=(olam-control-01 olam-control-02 olam-control-03)
for srv in "${servers[@]}"; do
  echo "Copying to $srv ..."
  scp /tmp/nginx_tmp.conf "$srv:/tmp/nginx.conf" && \
  ssh "$srv" 'sudo mv /tmp/nginx.conf /etc/nginx/nginx.conf && sudo chown root:root /etc/nginx/nginx.conf && sudo chmod 644 /etc/nginx/nginx.conf'
done
Remove the temporary Nginx configuration file.
rm /tmp/nginx_tmp.confRestart the Nginx service.
for host in olam-control-01 olam-control-02 olam-control-03; do
  ssh "$host" 'sudo systemctl restart nginx'
done
Open the Linux firewall to allow the health check port.
for host in olam-control-01 olam-control-02 olam-control-03; do
  ssh "$host" 'sudo firewall-cmd --permanent --add-port=8080/tcp; sudo firewall-cmd --reload'
done
Verify Access to the Cluster Through the Load Balancer
Open a web browser and enter the URL.
https://<haproxy_ip_address>:8443Note: Approve the security warning based on the browser used. Click the **Advanced button for Chrome and then the Proceed to localhost (unsafe) link.
Log in to the Oracle Linux Automation Manager Web UI. Use the Username
adminand the Passwordadmincreated during the automated deployment.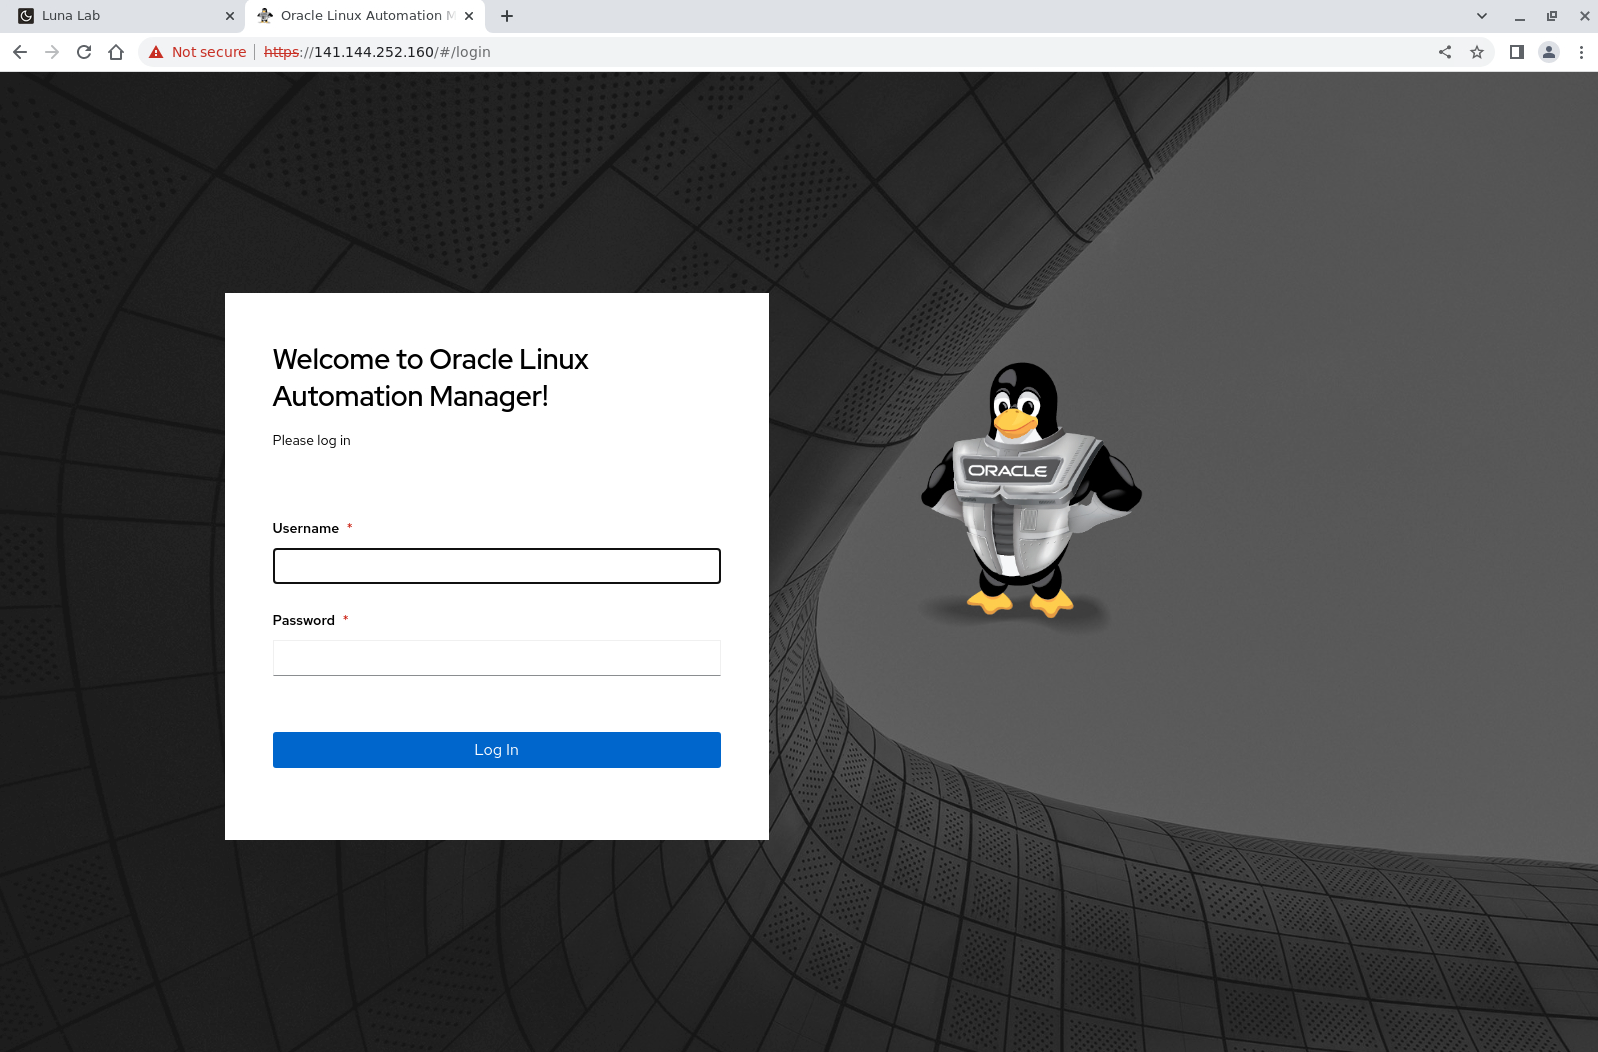
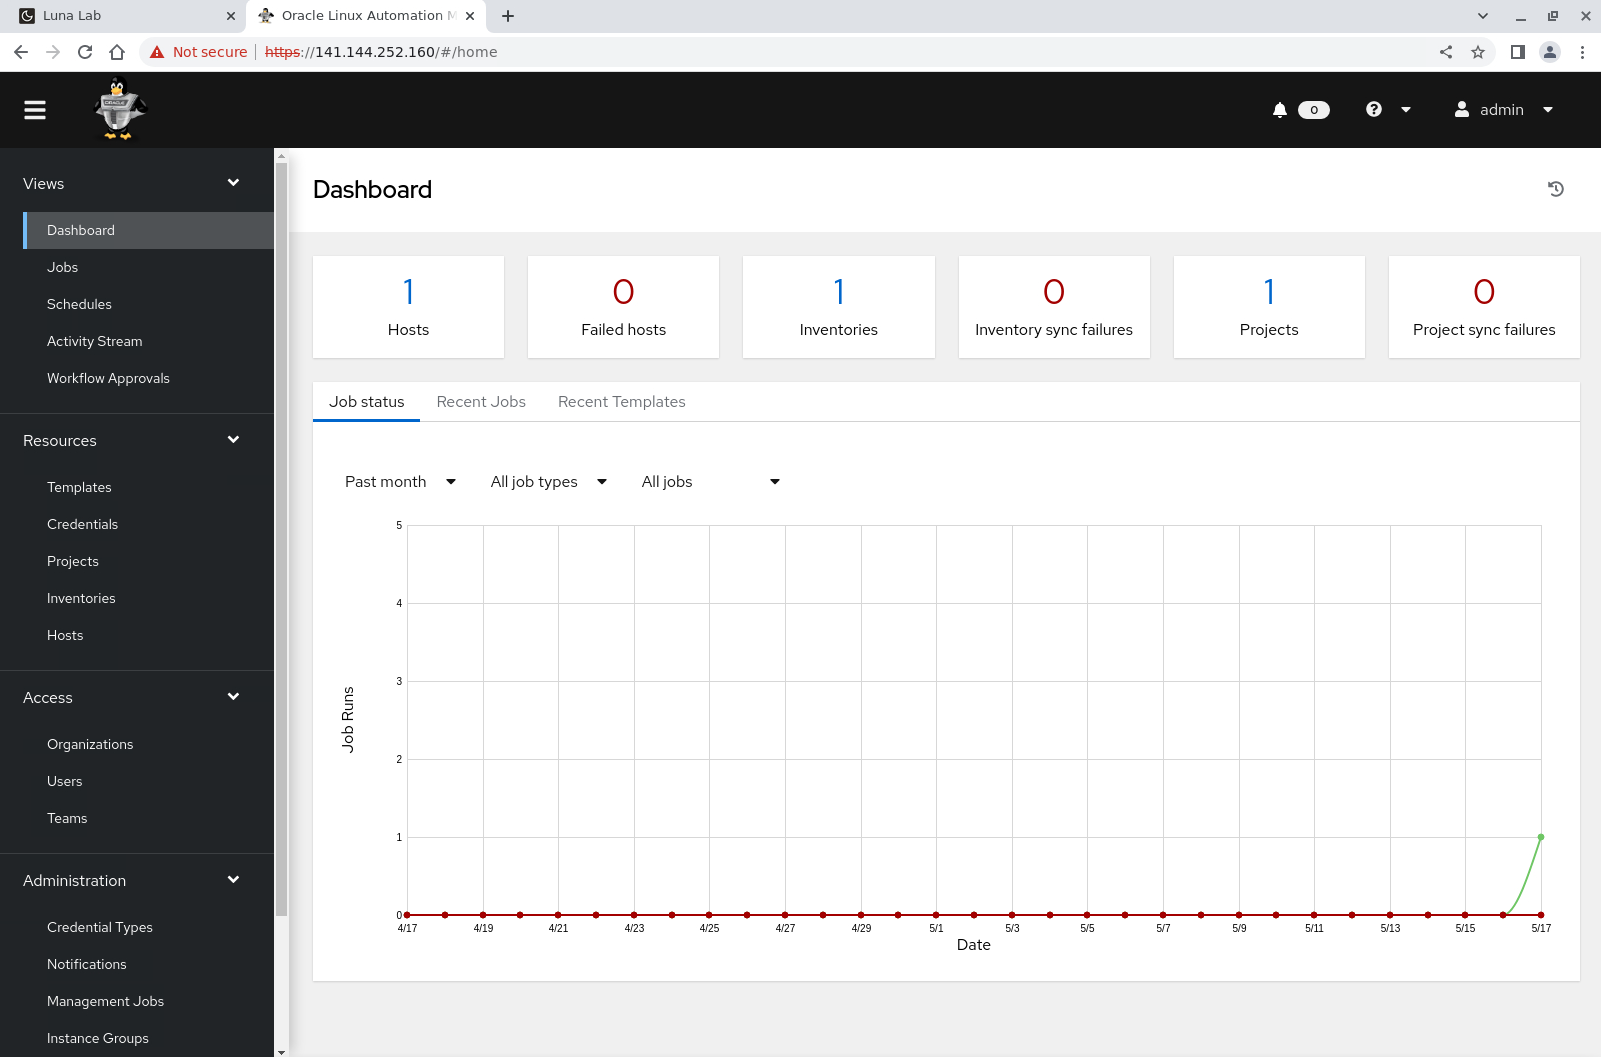
The Web UI displays after a successful login.
(Optional) View the HAProxy Statistics Web UI
Open a terminal and configure an SSH tunnel to the haproxy instance.
ssh -L 8404:localhost:8404 oracle@<hostname_or_ip_address>Access to the statistics page requires an SSH tunnel as firewalld blocks its port.
Open a web browser and enter the URL.
http://localhost:8404The statistics indicate that the initial login traffic routes through HAProxy to the olam-control-01 backend. As the login sessions receive a
csrftokenas part of the session, any additional traffic also routes to olam-control-01 until the session ends.
Next Steps
The successful login using the HAProxy URL shows a running Oracle Linux Automation Manager cluster behind a load balancer.
Related Links
Oracle Linux Automation Manager Documentation
Oracle Linux Automation Manager Training
Oracle Linux Training Station