Reduce and Relocate Volume Groups on Oracle Linux
Introduction
Logical Volume Management allows for removing unused physical volumes (PVs) and moving an entire volume group (VGs). The removal of a PV shrinks the overall size of the VG.
This tutorial will work with the Oracle Linux Volume Manager utilities to shrink a volume group by removing a physical volume and then transferring the volume group to another system.
Objectives
In this tutorial, you will learn how to:
- Move a logical volume
- Shrink a volume group
- Transfer a volume group to another system
Prerequisites
Minimum of two Oracle Linux systems
Each system should have Oracle Linux installed and configured with:
- A non-root user account with sudo access
- Additional block volumes for use with LVM
Deploy Oracle Linux
Note: If running in your own tenancy, read the linux-virt-labs GitHub project README.md and complete the prerequisites before deploying the lab environment.
Open a terminal on the Luna Desktop.
Clone the
linux-virt-labsGitHub project.git clone https://github.com/oracle-devrel/linux-virt-labs.gitChange into the working directory.
cd linux-virt-labs/olInstall the required collections.
ansible-galaxy collection install -r requirements.ymlUpdate the Oracle Linux instance configuration.
cat << EOF | tee instances.yml > /dev/null
compute_instances:
  1:
    instance_name: "ol-node-01"
    type: "server"
  2:
    instance_name: "ol-node-02"
    type: "server"
passwordless_ssh: true
add_block_storage: true
block_count: 3
EOF
Deploy the lab environment.
ansible-playbook create_instance.yml -e localhost_python_interpreter="/usr/bin/python3.6" -e "@instances.yml"The free lab environment requires the extra variable
local_python_interpreter, which setsansible_python_interpreterfor plays running on localhost. This variable is needed because the environment installs the RPM package for the Oracle Cloud Infrastructure SDK for Python, located under the python3.6 modules.The default deployment shape uses the AMD CPU and Oracle Linux 8. To use an Intel CPU or Oracle Linux 9, add
-e instance_shape="VM.Standard3.Flex"or-e os_version="9"to the deployment command.Important: Wait for the playbook to run successfully and reach the pause task. At this stage of the playbook, the installation of Oracle Linux is complete, and the instances are ready. Take note of the previous play, which prints the public and private IP addresses of the nodes it deploys and any other deployment information needed while running the lab.
Configure the LVM Storage
Open a terminal and connect via SSH to the ol-node-01 instance.
ssh oracle@<ip_address_of_instance>Install the Ansible package and dependencies.
sudo dnf install -y ansible-coreCreate a requirements file for collections.
cat << EOF | tee ~/requirements.yml > /dev/null
---
collections:
- ansible.posix
- community.general
EOF
Install the collections.
ansible-galaxy install -r requirements.ymlCreate an Ansible configuration file.
cat << EOF | tee ~/ansible.cfg > /dev/null
[defaults]
nocows = 1
host_key_checking = false
interpreter_python = auto_silent
inventory = host
EOF
Create an inventory file.
cat << EOF | tee ~/host > /dev/null
---
server:
  hosts:
    ol-node-01:
EOF
Verify you can connect to each host in the inventory.
ansible all -m pingThe output should list each host with a SUCCESS ping: pong response.
Create a playbook to deploy and configure LVM storage.
cat << EOF | tee ~/deploy_lvm.yml > /dev/null
- name: Gather host facts
  hosts: all

  tasks:

    - name: Run facts module
      ansible.builtin.setup:

- name: Configure LVM storage
  hosts: server
  become: true

  tasks:

    - name: Create a volume group
      community.general.lvg:
        vg: labvolume
        pvs: /dev/sdb
        pesize: '16'

    - name: Create a logical volume of 2048m with disks /dev/sdb and /dev/sdc
      community.general.lvol:
        vg: labvolume
        lv: data
        size: 2g
        force: yes

    - name: Create directory u01 if it does not exist
      ansible.builtin.file:
        path: /u01
        state: directory
        mode: '0755'

    - name: Format the xfs filesystem
      community.general.filesystem:
        fstype: ext4
        dev: /dev/labvolume/data

    - name: Mount the lv on /u01
      ansible.posix.mount:
        path: /u01
        src: /dev/labvolume/data
        fstype: ext4
        state: mounted
EOF
Run the deploy_lvm playbook.
ansible-playbook deploy_lvm.yml -e username="oracle"Verify the block volumes exist.
sudo lsblkThe output should show the
/dev/sdafor the root file system,/dev/sdbfor the demo volume group, and the available disks/dev/sdcand/dev/sdd.Show the consistent device name mappings.
Note: Oracle Linux running in Oracle Cloud Infrastructure (OCI) uses consistent device name paths for the attached block volumes.
ll /dev/oracleoci/oraclevd*Example Output:
[oracle@ol-node01 ~]$ ll /dev/oracleoci/oraclevd*
lrwxrwxrwx. 1 root root 6 Jun  9 13:27 /dev/oracleoci/oraclevda -> ../sda
lrwxrwxrwx. 1 root root 7 Jun  9 13:27 /dev/oracleoci/oraclevda1 -> ../sda1
lrwxrwxrwx. 1 root root 7 Jun  9 13:27 /dev/oracleoci/oraclevda2 -> ../sda2
lrwxrwxrwx. 1 root root 7 Jun  9 13:27 /dev/oracleoci/oraclevda3 -> ../sda3
lrwxrwxrwx. 1 root root 6 Jun  9 13:27 /dev/oracleoci/oraclevdb -> ../sdd
lrwxrwxrwx. 1 root root 6 Jun  9 13:45 /dev/oracleoci/oraclevdd -> ../sdc
Notice that the consistent name endings defined in OCI do not match one-for-one with the device names provided by the Linux OS. These mappings will be essential later when detaching and attaching block volumes in the Cloud Console.
Remove PV from VG
Before removing an active physical volume from a volume group, move any data and logical volumes on the physical volume to some other free PV.
Check the disk space used by the physical volumes.
sudo pvs -o+pv_usedExample Output:
[oracle@ol-node01 ~]$ sudo pvs -o+pv_used
  PV         VG        Fmt  Attr PSize  PFree  Used
  /dev/sda3  ocivolume lvm2 a--  45.47g     0  45.47g
  /dev/sdb   labvolume lvm2 a--  49.98g 47.98g  2.00g
The output shows the
/dev/sdbPV uses 2g.Extend the volume group.
Add another physical volume by extending the volume group.
sudo vgextend labvolume /dev/sdcAdding
/dev/sbcprovides a free physical volume to accept the transfer of data and logical volumes from the original/dev/sdbphysical volume.Verify the addition of the
/dev/sdcphysical volume.sudo pvsExample Output:
[oracle@ol-node01 ~]$ sudo pvs
  PV         VG        Fmt  Attr PSize  PFree
  /dev/sda3  ocivolume lvm2 a--  45.47g     0
  /dev/sdb   labvolume lvm2 a--  49.98g 47.98g
  /dev/sdc   labvolume lvm2 a--  49.98g 49.98g
Move the existing data and logical volumes to the newly added free PV.
sudo pvmove /dev/sdb /dev/sdcThe
pvmovecommand allows moving the allocated physical extents (PEs) on a source PV to one or more other PVs. The transfer uses the normal allocation rules for the volume group if a destination PV is not specified. The task is completed online without interruption, and the command line output shows progress.See the
pvmove(8)manual for more details.Verify the move completed.
sudo pvs -o+pv_usedExample Output:
[oracle@ol-node01 ~]$ sudo pvs -o+pv_used
  PV         VG        Fmt  Attr PSize  PFree  Used
  /dev/sda3  ocivolume lvm2 a--  45.47g     0  45.47g
  /dev/sdb   labvolume lvm2 a--  49.98g 49.98g     0
  /dev/sdc   labvolume lvm2 a--  49.98g 47.98g  2.00g
The output shows the
/dev/sdcPV uses 2g and/dev/sdbis unused.Release the original physical volume.
sudo vgreduce labvolume /dev/sdbConfirm that the original physical volume is completely free.
sudo pvs -o+pv_usedExample Output:
[oracle@ol-node01 ~]$ sudo pvs -o+pv_used
  PV         VG        Fmt  Attr PSize  PFree  Used
  /dev/sda3  ocivolume lvm2 a--  45.47g     0  45.47g
  /dev/sdb             lvm2 ---  50.00g 50.00g     0
  /dev/sdc   labvolume lvm2 a--  49.98g 47.98g  2.00g
Notice the volume group name labvolume is no longer associated with the physical volume
/dev/sdband is now associated with/dev/sdc.Remove the original physical volume.
sudo pvremove /dev/sdbThe physical volume
/dev/sdbis now free to use in another volume group or be removed physically from the system.
Move PV Between Systems
LVM allows moving an entire volume group from one system to another. The example moves the volume group named labvolume with a logical volume mounted at /u01 from ol-node-01 to ol-node-02.
Unmount the file system on ol-node-01.
sudo umount /u01Make the volume group inactive.
Marking the volume group inactive means the logical volumes in the group are inaccessible and cannot be changed. This deactivation of the volume group further makes it unknown to the kernel.
sudo vgchange -an labvolumePrepare to remove the volume.
sudo vgexport labvolumeDetermine the block volume device path.
The next step removes the physical volume
/dev/sdcassociated with the volume group labvolume from instance ol-node-01. To select the correct block device within the Cloud Console to detach, get the block device path nameoraclevd*associated with the PV/dev/sdc.ll /dev/oracleoci/oraclevd* | grep sdcRemove the disk from the ol-node-01 instance.
With a physical server, shut down the system and unplug the disk. However, in OCI, we must detach the volume from the instance.
Although there are several ways to accomplish this task, we'll use the Cloud Console.
Log in to the Cloud Console.
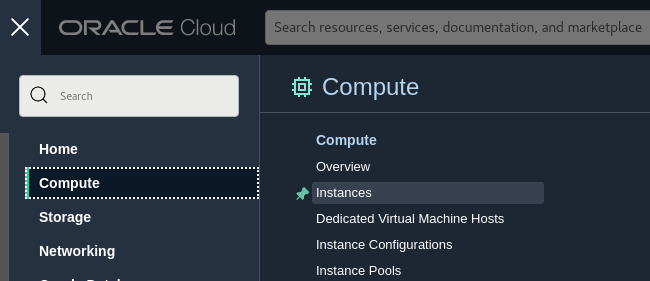
Open the navigation menu and click Compute. Under Compute, click Instances.
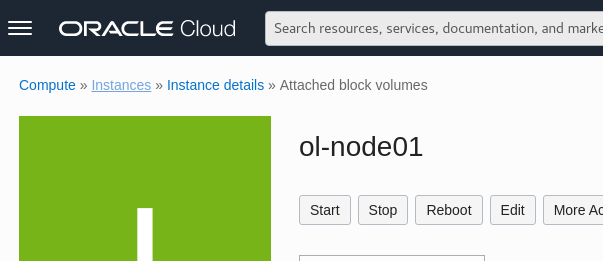
Click on the ol-node-01 instance in the list.
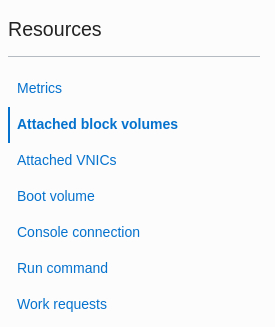
Under Resources in the lower left of the page, select Attached block volumes.
Use the three-dot menu next to the block device Name associated with the physical volume
/dev/sdcand select Detach.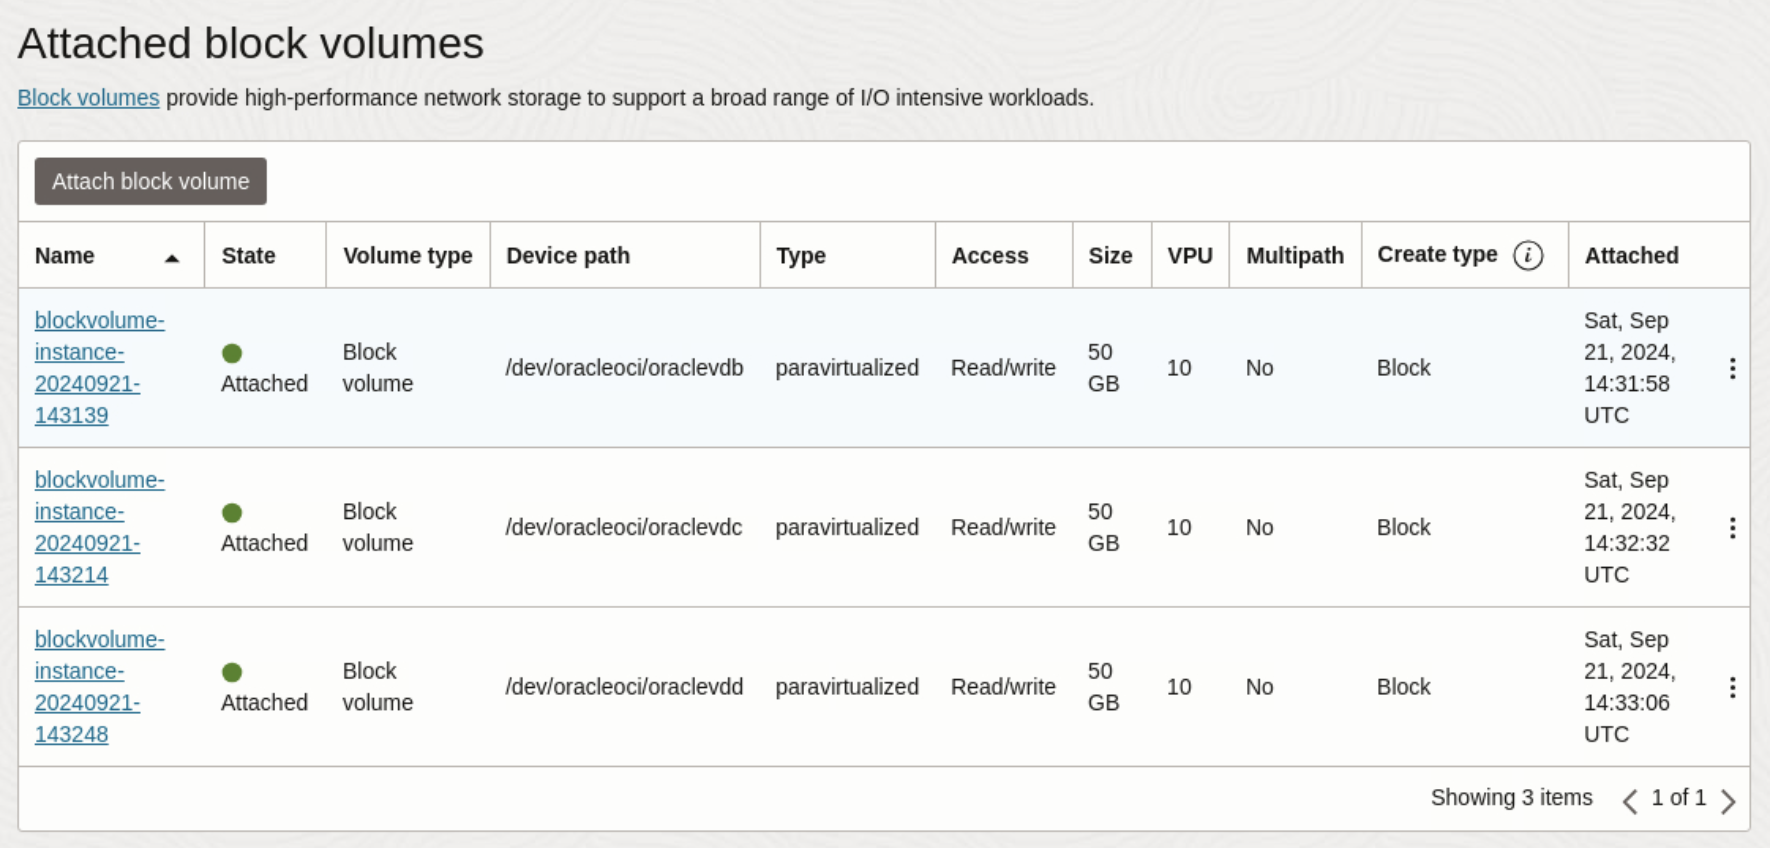
Important: The block device Name to choose is the one matching the Device path reported by
ll /dev/oracleoci/oraclevd* | grep sdc.Select the Ok button in the pop-up window, and wait for the volume to detach.
Use the breadcrumbs at the top of the page and select Instances.
Select the ol-node-02 instance in the list.
Under Resources on the lower left, select Attached block volumes.
Click the Attach block volume button.
In the pop-up window, attach the block volume removed from the ol-node-01 instance.
Select the block device Name previously detached from the ol-node-01 instance for the Volume.
Then select a oraclevdb Device path, Paravirtualized for Attachment type, and Read/write for Access.
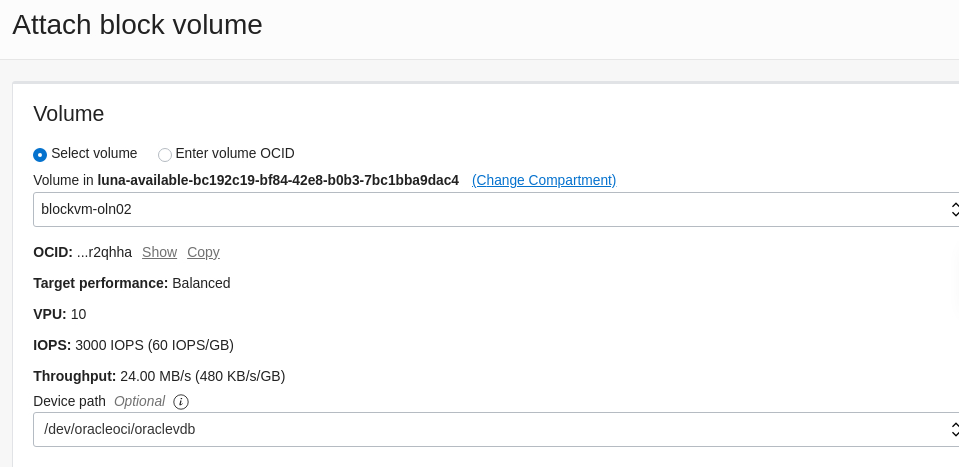
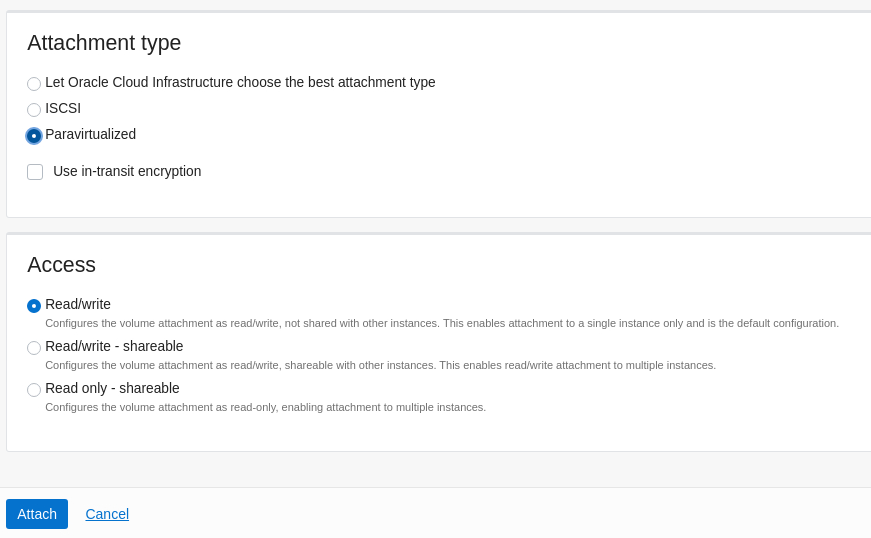
Click the Attach button and wait for the volume to attach.
Open a new terminal and connect via SSH to the ol-node-02 instance.
ssh oracle@<ip_address_of_instance>Verify the new block volume exists.
sudo lsblkScan the attached volume.
Run an initial scan to recognize the attached LVM physical volumes.
sudo pvscanExample Output:
[oracle@ol-node-02 ~]$ sudo pvscan
  PV /dev/sde     is in exported VG labvolume [49.98 GiB / 47.98 GiB free]
  PV /dev/sda3   VG ocivolume       lvm2 [45.47 GiB / 0    free]
  Total: 2 [<95.46 GiB] / in use: 2 [<95.46 GiB] / in no VG: 0 [0   ]
The scan shows the PV device contains the volume group export from ol-node-01.
Import the volume group.
sudo vgimport labvolumeActivate the volume group.
sudo vgchange -ay labvolumeMount the file system.
sudo mkdir /u01
sudo mount /dev/labvolume/data /u01
Verify the space on the file system.
df -hExample Output:
[oracle@ol-node-02 ~]$ df -h
Filesystem                  Size  Used Avail Use% Mounted on
...
/dev/mapper/labvolume-data  2.0G  6.0M  1.8G   1% /u01
Next Steps
You should now be able to use the Oracle Linux Logical Volume Manager utilities to reduce and relocate volume groups. Check out our other content on the Oracle Linux Training Station.