GraalVM Native Build Tools - for Maven
Introduction
This lab takes you step by step through the process of building cloud native Java applications with GraalVM Native Image , using Maven. It is aimed at developers with some knowledge of Java.
GraalVM Native Image compiles Java code ahead-of-time into a binary—a self-contained executable. Only the code that is required at run time by the application gets added to the executable.
An executable produced by Native Image has several advantages, in that it:
- Uses a fraction of the resources required by the JVM, so is cheaper to run
- Starts in milliseconds
- Delivers peak performance immediately, with no warmup
- Can be packaged into a lightweight container image for faster and more efficient deployment
- Presents a reduced attack surface
Many of the leading microservice frameworks support ahead-of-time compilation with GraalVM Native Image, including Micronaut, Spring, Helidon, and Quarkus.
In addition, there are Maven and Gradle plugins for Native Image to make building, testing, and running Java applications as native executables easy.
Note: Oracle Cloud Infrastructure (OCI) provides Oracle GraalVM at no cost.
Estimated lab time: 45 minutes
Lab Objectives
In this lab you will:
- Use the Maven plugin for GraalVM Native Image to build, test, and run a demo application.
- Use the plugin to run unit tests on your native executable.
- Use the plugin to create the reflection configuration for your native executable.
STEP 1: Connecting to a Remote Host
Your development environment is provided by a remote host: an OCI Compute Instance with Oracle Linux 9, 4 cores, and 48GB of memory. The Luna Labs desktop environment will display before the remote host is ready: this can take up to two minutes.
Visual Studio Code (VS Code) will launch automatically and connect to your remote development environment.
A VS Code window will open and automatically connect to the VM instance that has been provisioned for you. Click Continue to accept the machine fingerprint.
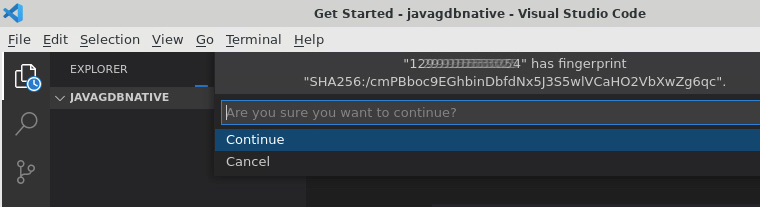
If you don't click Continue, VS Code will present you with a dialogue box, shown below. Click Retry--VS Code will ask you to accept the machine fingerprint. Then click Continue.
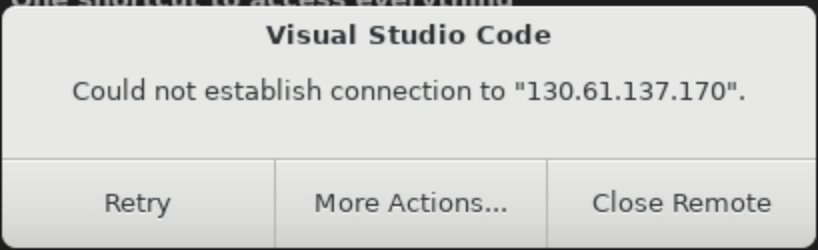
Issues With Connecting to the Remote Development Environment
If you encounter any other issues in which VS Code fails to connect to the remote development environment that are not covered above, try the following:
- Close VS Code
- Double-click the "Luna-Lab.html" icon on your desktop
- Copy the "Configure Script" from the Resources tab and paste it into the Luna Desktop Terminal again
- Repeat the above instructions to connect to the Remote Development environment
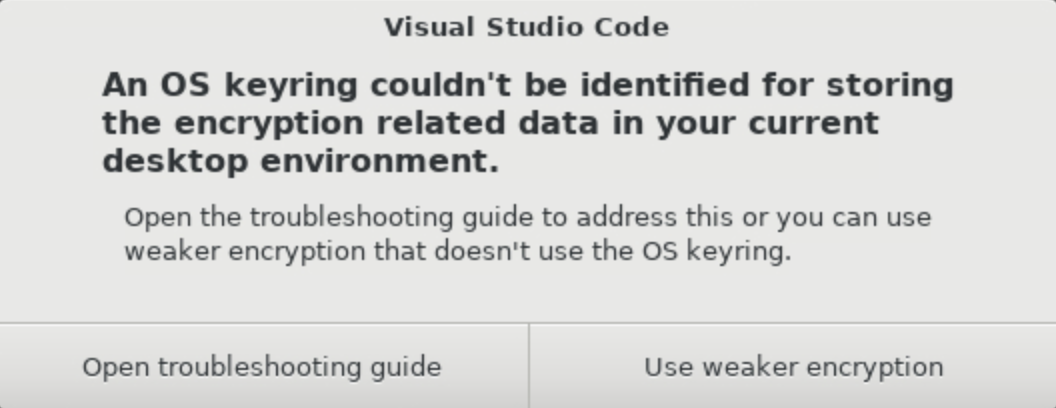
When you see the OS Keyring message for storing the encryption related data not being identified, choose "Use weaker encryption":
You are done! Congratulations, you are now successfully connected to a remote host in Oracle Cloud!
Next, open a Terminal within VS Code. The Terminal enables you to interact with the remote host. A terminal can be opened in VS Code via the menu: Terminal > New Terminal.
You will use this terminal to perform the steps described in the lab.
Note on the Development Environment
You will use Oracle GraalVM 25 as the Java environment for this lab. Oracle GraalVM is an advanced JDK with ahead-of-time Native Image compilation built on the trusted and secure Oracle Java SE.
You can easily check that by running these commands in your terminal:

java -version
native-image --versionSTEP 2: Understanding the Native Image Building
In this lab you will run a Java application that uses some dynamic features of Java.
When you use the native-image tool to create a native executable from a Java application, it relies on being able to discover, at build time, everything that can be referenced within your application code.
This is what is known as the "closed-world assumption".
Everything that needs to be included in the native executable must be known when it is built.
Anything that is not found by static analysis, or not explicitly specified in the configuration supplied to the native-image tool, will not be included in the executable.
The build / run model for GraalVM Native Image is the following:
- Compile your Java source code into Java bytecode using
javacormvn package. - Use the
native-imagetool to build those Java classes into a native executable. - Run the native executable.
What happens during step 2?
The native-image tool analyses your Java application to determine which classes are reachable.
But, for classes that native-image can't determine as required, but may be required at run time, you need to add configuration.
The demo application for this lab requires configuration, and the following steps illustrate how the Maven plugin for GraalVM Native Image can help generate it for you.
STEP 3: Building, Testing, and Running the Application Using Reflection
Imagine you have the following Java application (this demo is provisioned for you in VS Code, src/main/java/com/example/demo/DemoApplication.java):
package com.example.demo;

import java.lang.reflect.Method;

class StringReverser {
    static String reverse(String input) {
        return new StringBuilder(input).reverse().toString();
    }
}

class StringCapitalizer {
    static String capitalize(String input) {
        return input.toUpperCase();
    }
}

public class DemoApplication {
    public static void main(String[] args) throws ReflectiveOperationException, IllegalArgumentException {
        DemoApplication demo = new DemoApplication();
        System.out.println(demo.doSomething(args));
    }

    public DemoApplication() {
    }

    public String doSomething(String[] args) throws ReflectiveOperationException, IllegalArgumentException {
        if (args == null || args.length != 3) {
            //
            throw new IllegalArgumentException("Usage : Class Method InputString");
        }
        String className = args[0];
        String methodName = args[1];
        String input = args[2];

        Class<?> clazz = Class.forName(className);
        Method method = clazz.getDeclaredMethod(methodName, String.class);
        String result = (String)method.invoke(null, input);
        return result;
    }
}
The above code will reflectively load one of the classes, StringReverser or StringCapitalizer, and use their methods to transform a String argument.
Class<?> clazz = Class.forName(className);
Method method = clazz.getDeclaredMethod(methodName, String.class);
String result = (String)method.invoke(null, input);
There are also unit tests (that cover the various test cases) in src/test/java/com/example/demo DemoApplicationTests.java.
In the terminal, run the following command. This will test the demo application by running the unit tests:
mvn testYou should see the output message that five unit tests ran successfully.
Now build the application on the JVM:
mvn packageThis creates a runnable JAR file, with all dependencies, in the target directory.
Run the JAR file, which also contains a file named META-INF/MANIFEST.MF to define the main class, as follows:
java -jar ./target/demo-0.0.1-SNAPSHOT-jar-with-dependencies.jar com.example.demo.StringReverser reverse JavaIt should produce the following output:
avaJ
Now that you understand the application, learn how the Maven plugin for GraalVM Native Image enables ahead-of-time compilation with Maven.
STEP 4: Introducing the Native Build Tools, for Maven
You will use a Maven profile (for more information, see Maven profiles ) to separate the building of the native executable from the standard building and packaging of your Java application.
Open the project configuration file, pom.xml, and review it.
Find the profile with the ID native.
The profile is included below:
<profiles>
    <profile>
        <id>native</id>
        <build>
            <plugins>
                ...
                <plugin>
                    <groupId>org.graalvm.buildtools</groupId>
                    <artifactId>native-maven-plugin</artifactId>
                    <version>${native.maven.plugin.version}</version>
                    <!-- Enables Junit Test Support -->
                    <extensions>true</extensions>
                    <executions>
                        <!-- Binds to the package phase - causes the native executable to be created when you run, mvn -Pnative package -->
                        <execution>
                            <id>build-native</id>
                            <goals>
                                <goal>build</goal>
                            </goals>
                            <phase>package</phase>
                        </execution>
                        <!-- Binds to the test phase - causes the JUnit tests to be run as native code when you run, mvn -Pnative test -->
                        <execution>
                            <id>test-native</id>
                            <goals>
                                <goal>test</goal>
                            </goals>
                            <phase>test</phase>
                        </execution>
                    </executions>
                    <!-- This section is used to configure the native image build -->
                    <configuration>
                        <!-- Tracing agent configuration -->
                        <agent>
                            <options>
                                <accessFilterFiles>
                                    <filterFile>access-filter-file=${basedir}/src/test/resources/access-filter.json</filterFile>
                                </accessFilterFiles>
                            </options>
                        </agent>
                    </configuration>
                </plugin>
            </plugins>
        </build>
    </profile>
</profiles>
The important things to note here are:
- The
native-maven-pluginis contained within a profile with ID,native, which means that the plugin won't be run unless you activate the profile. - You must enable the extensions to the plugin with
<extensions>true</extensions>to enable the Tracing agent and JUnit support. - You can configure the native image build steps in the
configurationsection. - You can configure the Tracing agent in the
agentsection. - You must define an
access-filterwithin the configuration for use by the Tracing agent.
Notes on Using the Tracing Agent to Generate Configuration
Because the application uses reflection, you have to tell the native-image tool about instances of reflection through a special configuration file.
The configuration is written in JSON.
You can write the configuration by hand, but the most convenient and recommended way is to generate the configuration file using the assisted technology: the Tracing agent . This Java agent will generate the configuration for you, automatically, when you run your application on the JVM.
You can:
- Run the unit tests and use the Native Image Maven plugin to inject the Tracing agent into the JVM. This is described in the next section.
- Run your application and use the Native Image Maven plugin to inject the Tracing agent into the JVM. For more information, see the documentation .
Note: You need to exercise as many paths in your code as you can.
Copying Generated Tracing Agent Configuration to Your Source Tree
You may have noticed that the pom.xml file includes another plugin in the native profile section.
When you run the Tracing agent on your unit tests, the configuration file is generated in a location within the target directory, target/native/agent-output/test.
To ensure the native-image tool picks it up when you build a native executable, the file needs to be relocated to the location that the tool expects it to be in: src/main/resources/META-INF/native-image.
The maven-resources-plugin automates this task, so that the configuration file automatically get copied into the source tree when they are available.
The following code is required to achieve this:
<plugin>
    <artifactId>maven-resources-plugin</artifactId>
    <version>3.0.2</version>
    <executions>
        <execution>
            <id>copy-agent-config</id>
            <phase>generate-sources</phase>
            <goals>
                <goal>copy-resources</goal>
            </goals>
            <configuration>
                <!-- The tracing agent config needs to be placed here to be picked up by the native-image tool -->
                <outputDirectory>src/main/resources/META-INF/native-image</outputDirectory>
                <resources>
                    <resource>
                        <!-- The location that the native build tools will write the tracing agent config out to -->
                        <directory>${basedir}/target/native/agent-output/test</directory>
                    </resource>
                </resources>
            </configuration>
        </execution>
    </executions>
</plugin>
An alternative solution would be to tell the native-image that it should look into the directory named /target/native/agent-output/test for any configuration.
This can be achieved using the -H:ConfigurationFileDirectories option.
At the end of this workshop you will see how to pass extra options to native-image using the native-maven-plugin.
STEP 5: Running the Tracing Agent
Having seen the details of how the plugin works, now use it to generate the configuration.
From the terminal, run the following command. It will run your unit tests while at the same time enabling the Tracing agent and generating the necessary configuration:
mvn -Pnative -DskipNativeTests=true -DskipNativeBuild=true -Dagent=true testThis will run unit tests, and activate the default
nativeprofile. The command includes three additional options:-DskipNativeTests=true: The plugin can build a native executable from your unit tests and then run that, in order to check that your unit tests work for the natively compiled code. By setting this option totrue, these tests are not run. (This option is used again later in the lab.)-DskipNativeBuild=true: This option stops the plugin from building a native executable of this demo application. (Likewise, this option is used again later in the lab.)-Dagent=true: This causes the Tracing agent to be "injected" into the application as it runs the unit tests.
Now take a look at the newly created configuration file reachability-metadata.json in the target/native/agent-output/test:
cat target/native/agent-output/test/reachability-metadata.json{ "reflection": [ { "type": "com.example.demo.DemoApplicationTests", "allDeclaredFields": true, "methods": [ { "name": "<init>", "parameterTypes": [] }, { "name": "testCapitalise", "parameterTypes": [] }, { "name": "testNoParams", "parameterTypes": [] }, { "name": "testNonExistantClass", "parameterTypes": [] }, { "name": "testNonExistantMethod", "parameterTypes": [] }, { "name": "testReverse", "parameterTypes": [] } ] }, { "type": "com.example.demo.IDontExist" }, { "type": "com.example.demo.StringCapitalizer", "methods": [ { "name": "capitalize", "parameterTypes": [ "java.lang.String" ] } ] }, { "type": "com.example.demo.StringReverser", "methods": [ { "name": "reverse", "parameterTypes": [ "java.lang.String" ] } ] }, { "type": "org.apiguardian.api.API" }, { "type": "org.junit.internal.AssumptionViolatedException" }, { "type": "org.junit.jupiter.api.Test" }, { "type": "org.junit.jupiter.engine.JupiterTestEngine" }, { "type": "sun.security.provider.NativePRNG", "methods": [ { "name": "<init>", "parameterTypes": [ "java.security.SecureRandomParameters" ] } ] }, { "type": "sun.security.provider.SHA", "methods": [ { "name": "<init>", "parameterTypes": [] } ] } ], ...You can see the names of the classes loaded via reflection at the top of the file.
Notes on Using an Access Filter
To use the Tracing agent to generate the configuration when running the unit tests, create an access filter to ensure that the agent excludes certain classes. For more information, see Agent Advanced Usage .
STEP 6: Running the Unit Tests as Native Code
With the Maven plugin for GraalVM Native Image you can also compile your unit tests into a native executable. It gives you confidence that your code will run as expected as a native executable.
You can enable this behavior by adding <extensions>true</extensions> in the plugin configuration.
In Step 5 you overrode it (the -DskipNativeTests=true command-line option disables building a native executable of the tests).
Now try building natively compiled versions of your unit tests and run them.
From the terminal, run the following command:
mvn -Pnative -DskipNativeBuild=true -Dagent=true testThis does the following:
- Compiles your code, if needed.
- Injects the Tracing agent and then runs unit tests on the JVM (not native).
- Compiles a native executable that will run the unit tests, to which it will pass in the newly created configuration.
- Runs the native executable version of your tests.
You should see the following output:
Test run finished after 3 ms
[         2 containers found      ]
[         0 containers skipped    ]
[         2 containers started    ]
[         0 containers aborted    ]
[         2 containers successful ]
[         0 containers failed     ]
[         5 tests found           ]
[         0 tests skipped         ]
[         5 tests started         ]
[         0 tests aborted         ]
[         5 tests successful      ]
[         0 tests failed          ]
[INFO] ------------------------------------------------------------------------
[INFO] BUILD SUCCESS
[INFO] ------------------------------------------------------------------------
If you look within the target directory, you should see the native executable of your unit tests native-tests. Run it:
./target/native-tests
STEP 7: Building the Native Executable
So far you have seen that the -Dagent=true command-line option injects the Tracing agent into your unit tests.
You have also seen that you can generate a native executable of the unit tests, which you can run independently without using Maven.
Now it is time to build a native executable of your application itself.
This time, run the same command as before, but remove the option that switched off native image builing of the application (not tests),
-DskipNativeBuild=true:mvn -Pnative -Dagent=true packageThis builds a native executable in the target directory. The default name for the generated executable is the name of the
artifactIDdefined in the Maven pom.xml file.Now run the executable to confirm that it works:
./target/demo com.example.demo.StringReverser reverse helloIt should produce the following output:
olleh
STEP 8: Passing Options to the native-image Tool
In this last step, you learn how pass options to the native-image tool while using the Maven plugin for GraalVM Native Image.
Take another look at the Maven pom.xml file. Below is a snippet that is commented out within the plugin configuration:
<!--
<imageName>DeMo</imageName>
<buildArgs>
    <buildArg>-Ob</buildArg>
    <buildArg>-H:+ReportExceptionStackTraces</buildArg>
</buildArgs>
-->
This enables you to pass extra configuration options to the
native-imagebuild. Take a look at each of them in turn.Firstly, you can specify the name of the output native executable file, as shown in this snippet:
<imageName>DeMo</imageName>If you want to pass additional options to
native image, use<buildArgs>. Any of thenative-imagecommand-line options can be passed in using this mechanism. For example:<buildArgs> <buildArg>-Ob</buildArg> </buildArgs>The
-Oboption enables quick build mode. For a full list of the available options available with GraalVM Native Image, run the following command:native-image --help
Now uncomment that section in pom.xml and rebuild the application. First, edit the file and remove the comments, then, from the terminal, run the following command:
mvn -Pnative -Dagent=true clean packageTake a look inside the target directory. You can see that the native executable file has been created with its new name
DeMo.
Conclusion
In this lab, you have tried out several GraalVM Native Image features:
- How to generate a native executable for a Java command line application.
- How to use Maven to build a native executable.
- How to use the Tracing agent to automate the process of tracking and registering reflection calls.
Note that there is also the Gradle plugin for Native Image Building .