Install Project Quay Using Podman on Oracle Linux
Introduction
Project Quay is an open-source repository that stores and manages artifacts such as containers for use on cloud-native platforms. Project Quay also offers additional functionality such as (in no particular order):
- Registry - High availability
- Security - Vulnerability scanning, Logging & Auditing, Notifications & Alerts
- Access Control - Role-based access control (RBAC)
- Integration - OAuth support
- Build Automation - Git/GitHub/GitLab integration
It can be deployed on a Kubernetes cluster using an Operator or as a standalone container or high-availability cluster on Podman.
Objectives
In this tutorial, you'll learn how to:
- Install and run Project Quay using Podman
- Verify basic Quay functionality is working
Note: The steps provided do not include configuring the registry using certificates. Therefore, it's recommended for non-production purposes or an internal/air-gapped environment.
Prerequisites
Minimum of a single Oracle Linux system
Each system should have Oracle Linux installed and configured with:
- A non-root user account with sudo access
- Podman and cURL packages
- Access to the Internet
Deploy Oracle Linux
Note: If running in your own tenancy, read the linux-virt-labs GitHub project README.md and complete the prerequisites before deploying the lab environment.
Open a terminal on the Luna Desktop.
Clone the
linux-virt-labsGitHub project.git clone https://github.com/oracle-devrel/linux-virt-labs.gitChange into the working directory.
cd linux-virt-labs/olInstall the required collections.
ansible-galaxy collection install -r requirements.ymlDeploy the lab environment.
ansible-playbook create_instance.yml -e localhost_python_interpreter="/usr/bin/python3.6" -e use_podman=true -e update_all=trueThe free lab environment requires the extra variable
local_python_interpreter, which setsansible_python_interpreterfor plays running on localhost. This variable is needed because the environment installs the RPM package for the Oracle Cloud Infrastructure SDK for Python, located under the python3.6 modules.The default deployment shape uses the AMD CPU and Oracle Linux 8. To use an Intel CPU or Oracle Linux 9, add
-e instance_shape="VM.Standard3.Flex"or-e os_version="9"to the deployment command.Important: Wait for the playbook to run successfully and reach the pause task. At this stage of the playbook, the installation of Oracle Linux is complete, and the instances are ready. Take note of the previous play, which prints the public and private IP addresses of the nodes it deploys and any other deployment information needed while running the lab.
Confirm Podman Works
The container-tools package in Oracle Linux provides the latest versions of Podman, Buildah, Skopeo, and associated dependencies.
Open a terminal and connect via SSH to the ol-node-01 instance.
ssh oracle@<ip_address_of_instance>Confirm the Podman CLI is working.
podman run quay.io/podman/helloExample Output:
[oracle@ol-server ~]$ podman run quay.io/podman/hello
Trying to pull quay.io/podman/hello:latest...
Getting image source signatures
Copying blob f82b04e85914 done
Copying config dbd85e09a1 done
Writing manifest to image destination
Storing signatures
!... Hello Podman World ...!

         .--"--.
       / -     - \
      / (O)   (O) \
   ~~~| -=(,Y,)=- |
    .---. /`  \   |~~
 ~/  o  o \~~~~.----. ~~
  | =(X)= |~  / (O (O) \
   ~~~~~~~  ~| =(Y_)=-  |
  ~~~~    ~~~|   U      |~~

Project:   https://github.com/containers/podman
Website:   https://podman.io
Documents: https://docs.podman.io
Twitter:   @Podman_io
Configure Networking
Set Firewall Rules
Edit the system's firewall rules to open the ports Project Quay requires.
Update Firewall Rules
sudo firewall-cmd --permanent --add-port=80/tcp
sudo firewall-cmd --permanent --add-port=443/tcp
sudo firewall-cmd --permanent --add-port=5432/tcp
sudo firewall-cmd --permanent --add-port=6379/tcp
sudo firewall-cmd --reload
The deployment uses these ports in the following manner:
Ports 80 and 443: default webui listeners for the Quay containerPort 5432: default database listener port for the PostgreSQL containerPort 6379: default port for the client-server communication into the Redis container
Setup Host File
You can configure the Project Quay container's network communication in several ways. For more details, see the Project Quay documentation .
One of these options is to ensure the Oracle Linux system's hostname is resolvable. If deploying in Oracle Cloud Infrastructure, this requirement is handled during deployment by updating the instances /etc/hosts file and through OCI DNS service.
Check the current content of the
/etc/hostsfile.cat /etc/hostsThe output shows the instance's IP address pointing to its hostname and fully qualified domain name (FQDN).
(Optional) Install the PostgreSQL Client
This step allows access to the PostgreSQL database from the command line outside the container. It is not required to configure and set up the container.
Install the PostgreSQL client.
sudo dnf -y install postgresql
Setup the Project Quay Datastore
Project Quay uses a database to store metadata. This tutorial uses PostgreSQL as the default option. Users can also use MySQL as an alternative, but it is outside this tutorial's scope.
Create the directory for the database container data storage.
sudo mkdir -p /var/lib/pgsql/dataSet the correct permissions on the data storage.
sudo chmod 0755 /var/lib/pgsql/datasudo setfacl -m u:26:-wx /var/lib/pgsql/dataDefine the environment variables.
These define the PostgreSQL variables that Podman uses to start the container.
export POSTGRESQL_CONTAINER_NAME=postgres export POSTGRESQL_DB=quay export POSTGRESQL_USER=quayuser export POSTGRESQL_PASSWORD=quay-testPOSTGRESQL_CONTAINER_NAME: refers to the name used by the PostgreSQL container.POSTGRESSQL_DB, POSTGRES_USER, and POSTGRES_PASSWORD: refer to PostgreSQL specific values.
Start the PostgreSQL container specifying details such as the User Name, Password, Database name, Port #, and the Volume mount point for the database datastore.
sudo podman run --detach --name ${POSTGRESQL_CONTAINER_NAME} \
  --env POSTGRES_USER=${POSTGRESQL_USER} \
  --env POSTGRES_PASSWORD=${POSTGRESQL_PASSWORD} \
  --env POSTGRES_DB=${POSTGRESQL_DB} \
  --publish 5432:5432 \
  --volume /var/lib/pgsql/data:/var/lib/postgresql/data:Z \
  docker.io/library/postgres:latest
The
:Zat the end of the--volumesetting enables the storage volume to work with SELinux enabled, which Oracle Linux enables by default.
Add the Trigram Module to PostgreSQL
(Optional) Use the PostgreSQL Client
Skip this step if you choose not to perform the optional installation of the PostgreSQL client packages.
Connect to the database.
psql -h $(hostname -i) quay quayuserThe password for user quayuser is
quay-test, as defined in the export and container creation above.Create the trigram module.
CREATE EXTENSION IF NOT EXISTS pg_trgm;Exit the PostgreSQL client by typing
\qand then theRETURNkey.
Run Directly in the Container
Create the trigram module.
sudo podman exec -it postgres /bin/bash -c 'echo "CREATE EXTENSION IF NOT EXISTS pg_trgm" | psql -d quay -U quayuser'
Verify the PostgreSQL Container Status
Confirm the database has started.
sudo podman psExample Output:
[oracle@ol-server ~]$ sudo podman ps
CONTAINER ID  IMAGE                             COMMAND               CREATED         STATUS             PORTS                   NAMES
1ec4a57b792d  docker.io/library/postgres:latesy  postgres              55 seconds ago  Up 55 seconds ago  0.0.0.0:5432->5432/tcp  postgresql
Check the container logs.
sudo podman logs -f postgresThe los should display that the database system is ready to accept connections.
Use
CTRL+Cto return to the command prompt.Get the IP address of the PostgreSQL container, as we'll use it later.
sudo podman inspect -f "{{.NetworkSettings.IPAddress}}" postgresThe container name used here should match the
--namevalue you use in the Podman command to create the PostgreSQL container.Alternatively, you can use
grepto get the IP address.sudo podman inspect postgres | grep IPAddress
Setup Redis
Project Quay requires Redis to store ephemeral information.
Create the directory for the Redis container's data storage.
sudo mkdir -p /var/lib/redisSet the permissions.
sudo chmod 0755 /var/lib/redisStart the Redis container.
sudo podman run --detach --name redis \
  --restart=always \
  --publish 6379:6379 \
  --privileged=true \
  --volume /var/lib/redis:/var/lib/redis:Z \
  docker.io/library/redis:latest
Confirm the Redis container is running.
sudo podman psCheck the Redis container's logs.
sudo podman logs -f redisType
CTRL+Cto return to the command prompt.Get the IP address for the Redis container.
sudo podman inspect -f "{{.NetworkSettings.IPAddress}}" redis
Configure Project Quay
Project Quay includes a web-based tool for entering details to set up the PostgreSQL database and generate the Quay configuration files. The Quay configuration files are generated as a tar/zipped YAML file that needs to be expanded after being moved.
Launch the Project Quay ConfigTool.
sudo podman run -d --name quay-config -p 80:8080 -p 443:8443 quay.io/projectquay/quay config secret-passThis process pulls the latest
quayimage and runs theconfigscript.Open a new terminal and connect using SSH to the ol-node-01 instance to configure an SSH tunnel.
ssh -L 8080:localhost:80 oracle@<ip_address_of_instance>An SSH tunnel is required when securely accessing a non-SSL WebUI running on a headless remote system. In the SSH tunnel, port
8080is opened on your local machine, and port80is on the remote system. In this specific case, port80is the externally mapped port for the Project Quay container.Open a new browser and enter the URL
http://localhost:8080to open the Project Quay ConfigTool.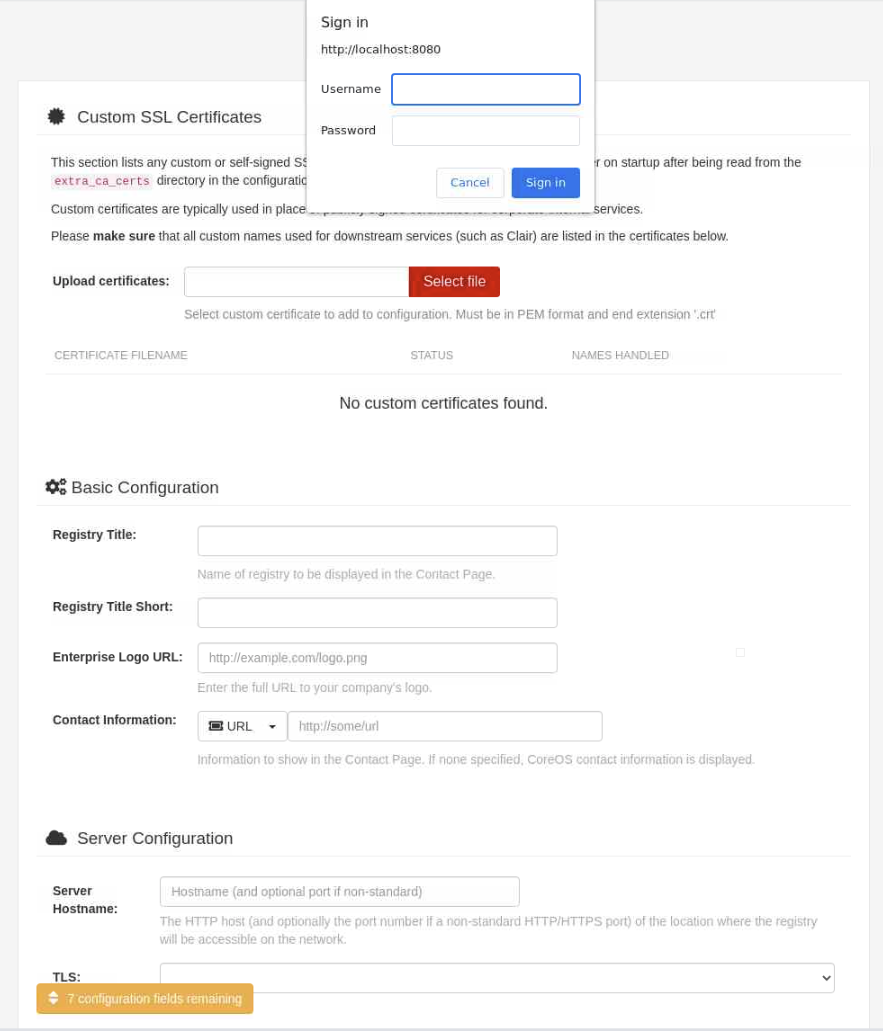
Log in to the Quay Configuration editor using the provided values.
- Username -
quayconfig - Password -
secret-pass(Note: This matches the last parameter passed when starting the Quay config container.)
- Username -
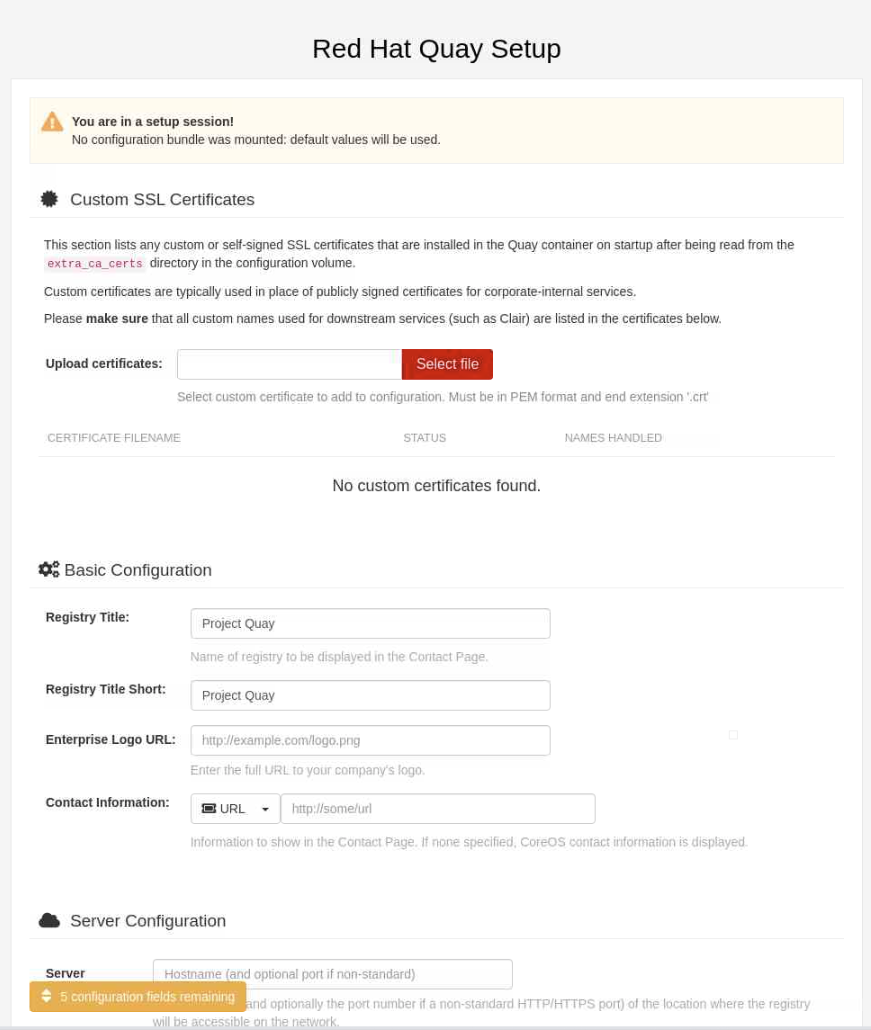
Enter Quay Configuration Information
The following steps involve entering new details, while others use some of the information collected/noted in the earlier steps to set up PostgreSQL, Redis, etc.
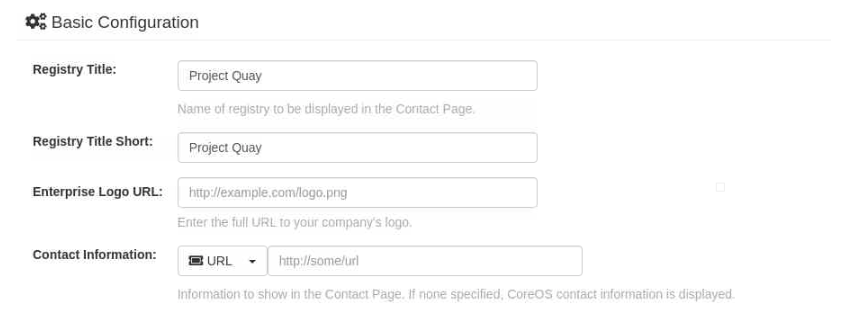
If not visible after logging in, scroll down to the Basic Configuration section. Notice you have the ability to populate several fields.
- Registry Title
- Registry Title Short
- Enterprise Logo URL
- Contact Information
We'll not make any changes as part of this tutorial.
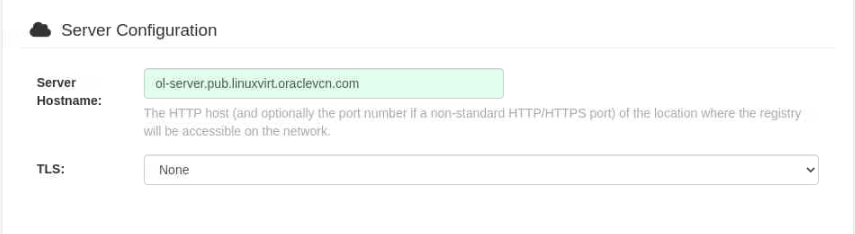
Scroll down to the Server Configuration section and enter the server's hostname (as seen earlier in the
/etc/hostsfile).Server Hostname: ol-node-01.lv.vcn.oraclevcn.com
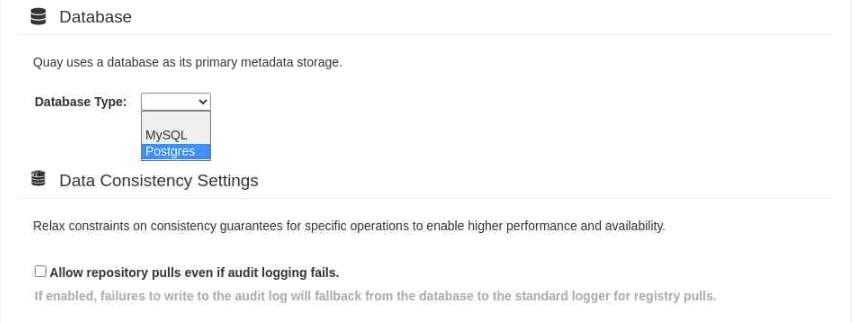
Next, scroll down to the Database section.

Click on the drop-down box next to the Database Type field and select Postgres.
We select the PostgreSQL database type to allow us to choose the Clair scanning tool later in this tutorial. The Clair scanning tool currently does not work with a MySQL Quay database.
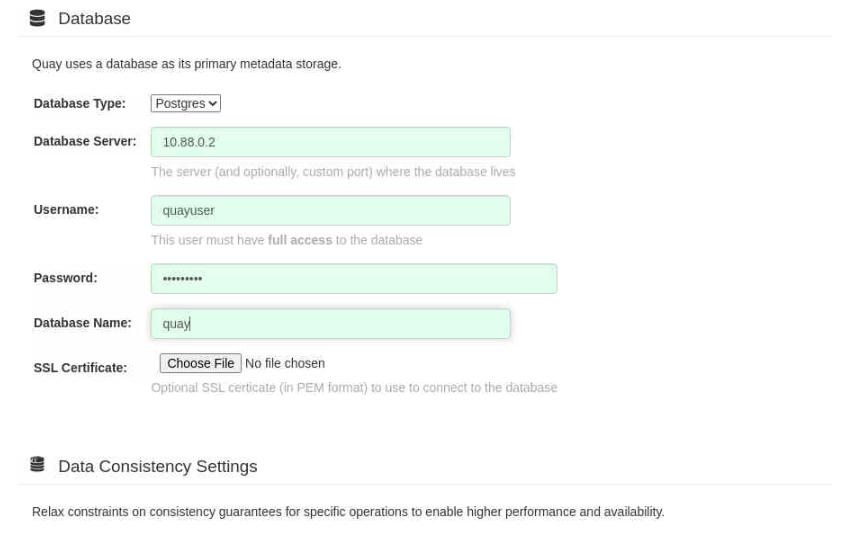
Enter the details into the PostgreSQL-specific fields.
Database Server: Choose either the $HOSTNAME or FQDN as entered in the/etc/hostsfile or the container's IP addressUername: quayuserPassword: quay-testDatabase Name: quay
All of these values MUST match those you used when starting the PostgreSQL container.
Continue scrolling down to the Redis section.
Enter the IP address of the Redis container.

Notice a floating dialogue box labeled Validate Configuration Changesat the bottom of the browser screen.
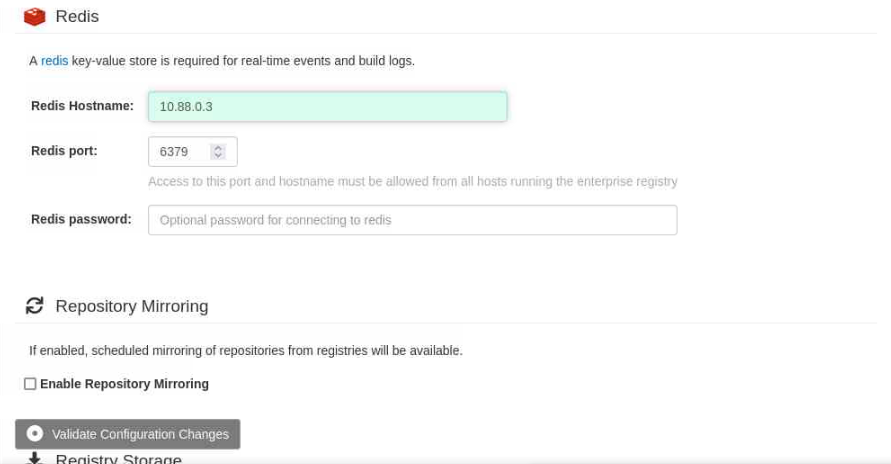
Click on the floating dialogue box.
This action confirms you've met the minimum requirements for the Project Quay server to function.
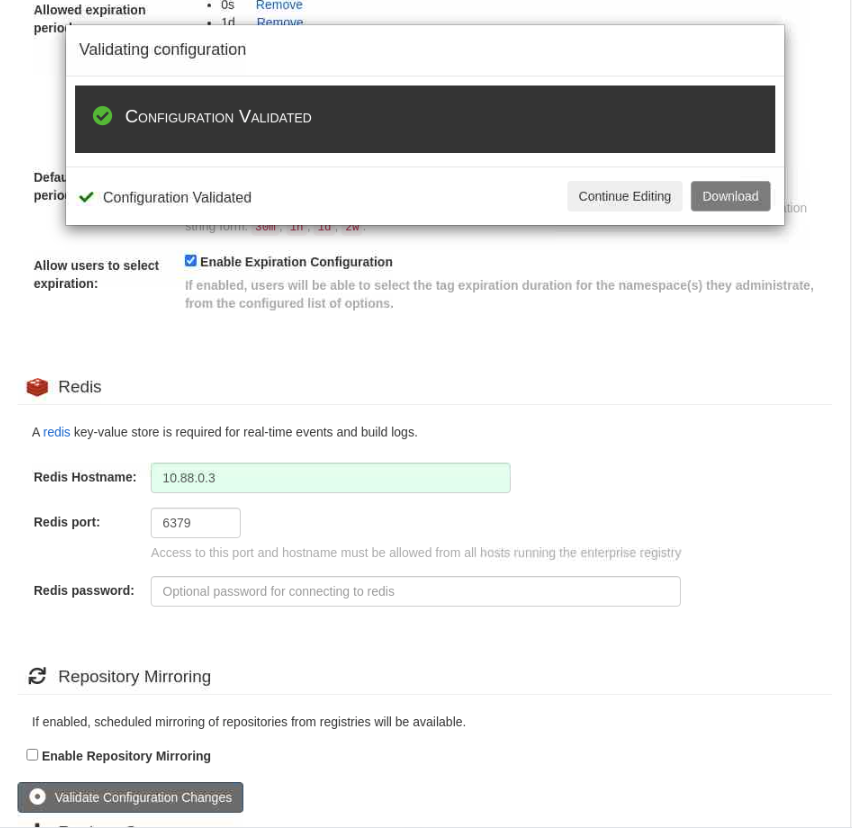
Click on the button to Download the
quay-config.tar.gzconfiguration file.The file downloads to your local systems
~/Downloadsdirectory where you run the browser.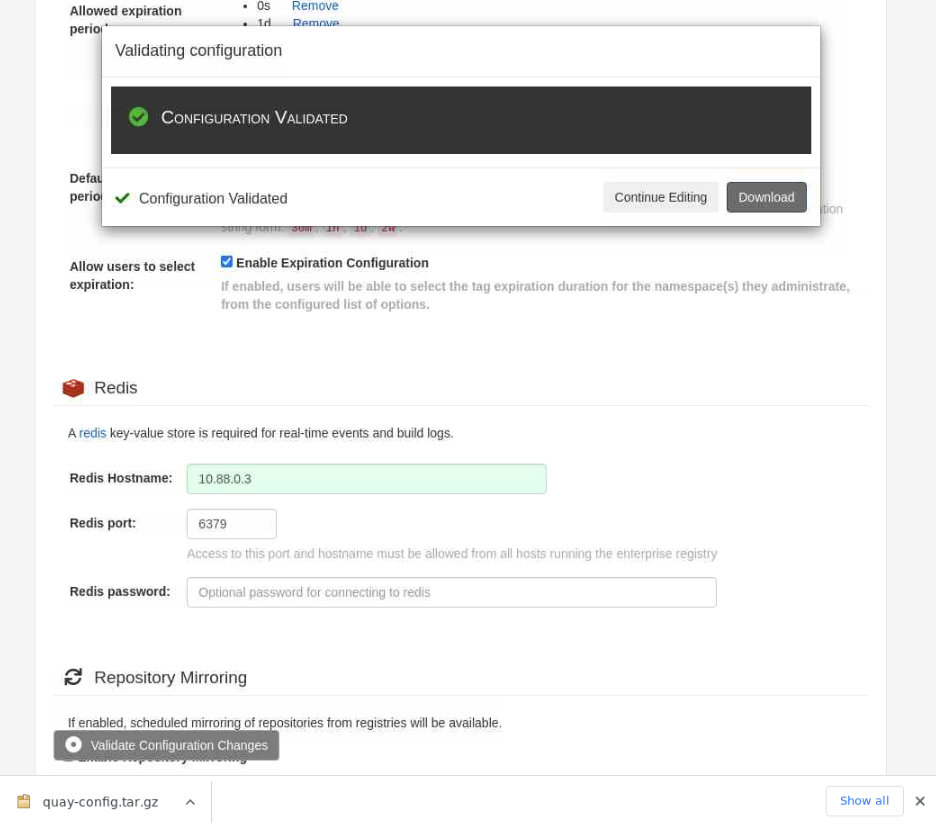
Open a new terminal and verify the configuration file exists.
ls -lsa ~/DownloadsThe output should display the
quay-configtar file.Copy the file to the ol-node-01 server where the Project Quay container runs.
scp ~/Downloads/quay-config.tar.gz oracle@<ip_address_of_instance>:~The
~at the end of the command indicates that we're copying the file to the home directory on the ol-node-01 instance.Close the terminal window you used to copy the
quay-config.tar.gzfile by typingexit.Switch to the terminal window used to open the SSH tunnel.
Close the SSH tunnel by typing
CTRL-C.Keep the terminal window open, as we'll use it again in upcoming steps.
NOTE: Closing the SSH tunnel session is required because the connected container session on port 80 has been closed.
Switch to the original terminal window we used to connect to the ol-node-01 instance.
Check for the
quay-config.tar.gzfile in the Oracle user's home directory.ls ~Stop the Project Quay configuration container process.
sudo podman stop quay-configConfirm the
quay-configcontainer has stopped.sudo podman ps
Prepare to Start Quay
You can alter the location of the Project Quay config and storage directories as needed as long as the correct permissions are applied and the directories are accessible.
Using the original terminal window connected to ol-node-01, create a location to hold the Project Quay configuration.
mkdir -p ~/quay/configCreate a location where Project Quay can store its artifacts.
mkdir -p ~/quay/storageExpand the gzipped tar file into the Quay configuration directory.
tar -xzvf quay-config.tar.gz -C ~/quay/config/Update the Quay configuration file.
These changes are required to resolve a startup problem related to the
keepalivescountsetting. The followingsedcommand clears out theDB_CONNECTION_ARGSsection.sed -in "s/DB_CONNECTION_ARGS:/DB_CONNECTION_ARGS: {}/g" ~/quay/config/config.yaml sed -ine '/\s\s\skeepalives/,/\s\s\stcpusertimeout/d' ~/quay/config/config.yamlConfirm the YAML configuration file exists.
cat ~/quay/config/config.yamlGrant
rootread access to the Project Quayconfigdirectory.sudo setfacl -R -m u:1001:r ~/quay/configGrant
rootread, write, and execute access to the Project Quaystoragedirectory.sudo setfacl -R -m u:1001:rwx ~/quay/storage
Start Project Quay
Start the Project Quay server.
sudo podman run --name quay \
--restart=always \
--publish 443:8443 \
--publish 80:8080 \
--privileged=true \
--volume ~/quay/config:/conf/stack:Z \
--volume ~/quay/storage:/datastorage:Z \
--detach quay.io/projectquay/quay:latest
Confirm it started.
sudo podman psCheck the Project Quay logs.
Note: Getting log output can take 15-20 minutes to complete the first time Project Quay starts.
sudo podman logs -f quaySwitch to the terminal window previously used to configure an SSH tunnel and reestablish the SSH tunnel.
ssh -L 8080:localhost:80 oracle@<ip_address_of_instance>Open a Browser window and connect to the Project Quay registry login screen using
http://localhost:8080.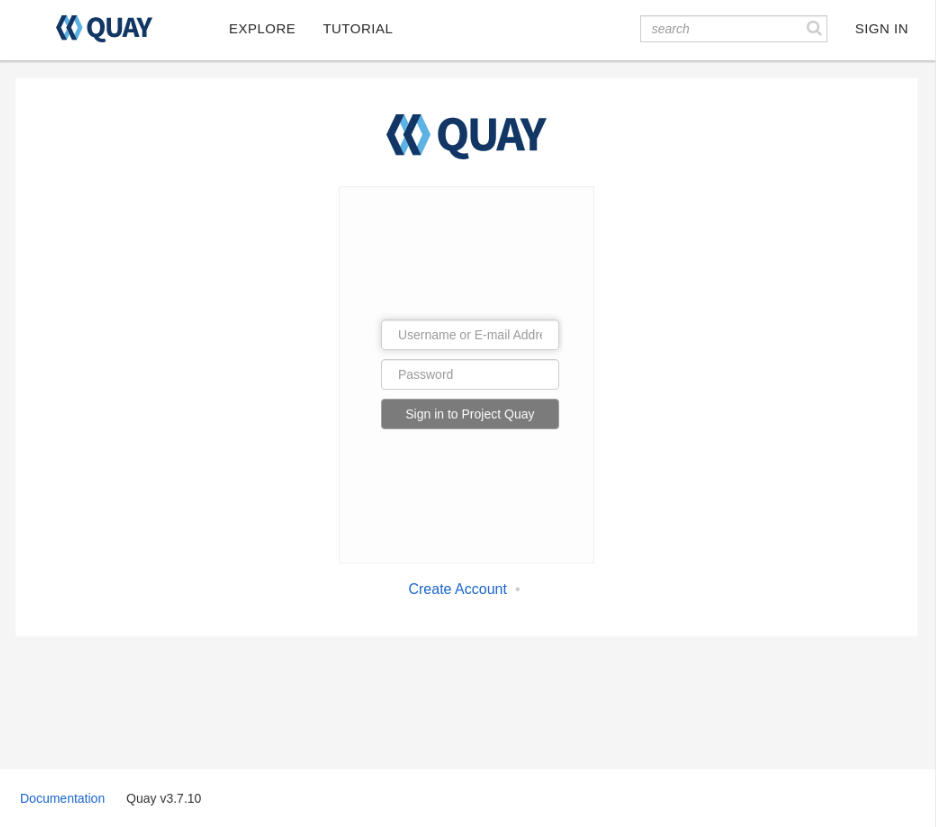
Note: If the browser window returns an error message (often indicating an inability to load config), the Project Quay server is still configuring itself for this initial startup. Please wait and retry in a few minutes.
Create a New Project Quay User and Login
The first step is to create a new user. At the Quay login screen, click the
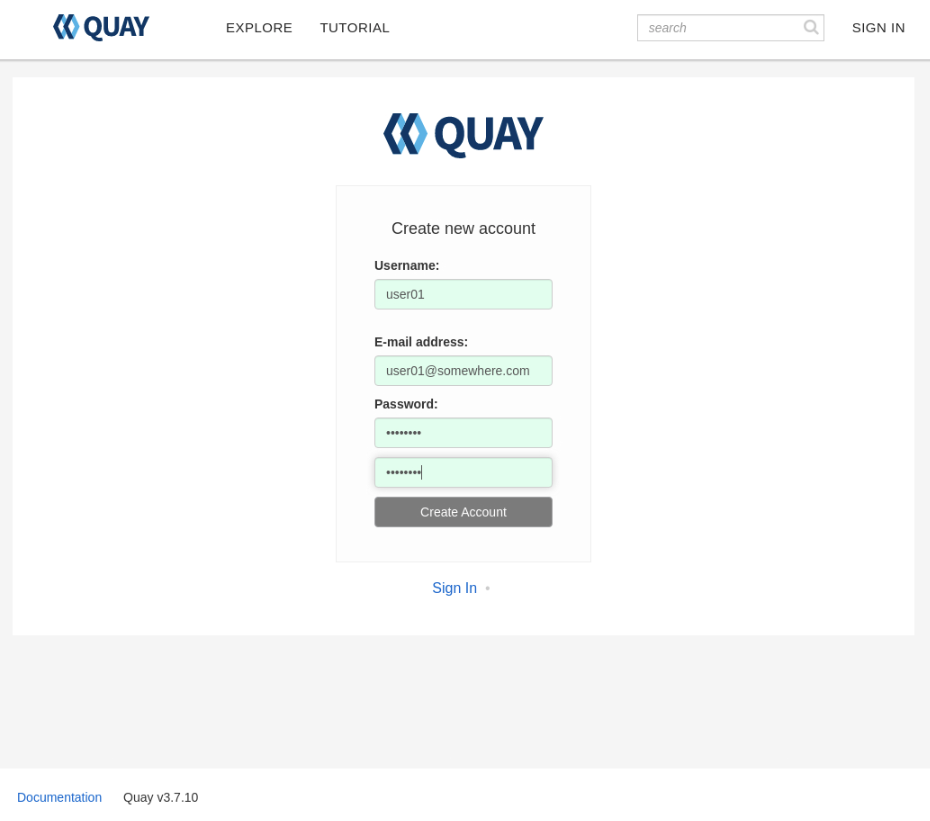
Create Accountlink below the Username and Password fields.The Create New Account page will display, allowing you to enter your credentials.
Username- This will be the username displayed within the Quay Registry.E-mail Address- This should be a valid e-mail address (not used in this tutorial for verification)Password- Enter a password that's a minimum of 8 characters long
Note: The fields will display a red background if any field contains an unexpected or invalid value. A green background indicates the entered values are valid.
Important: How to create a super user is documented here . A super user is a normal user with extended privileges, which include the ability to perform the following actions:
- Manage Users
- Manage Organizations
- Query Usage logs
- View the Change log
Once all the entry fields have a green background, click the Create Account button. Project Quay creates the new account and logs in automatically.
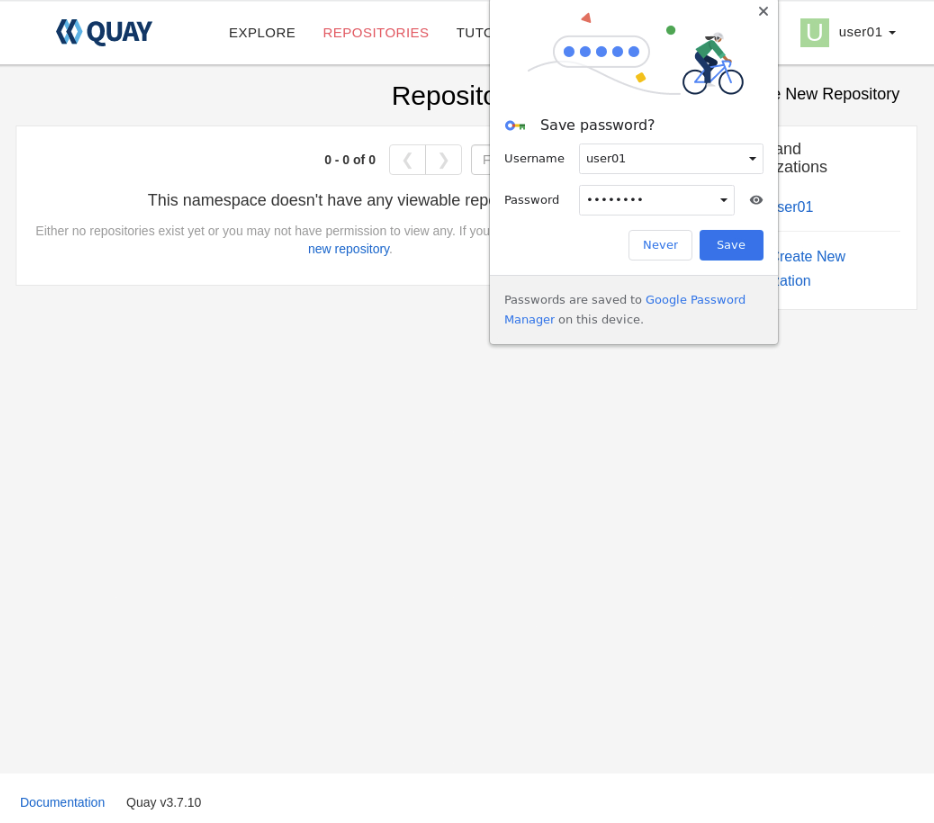
With the first user able to log in, that confirms Project Quay is running.
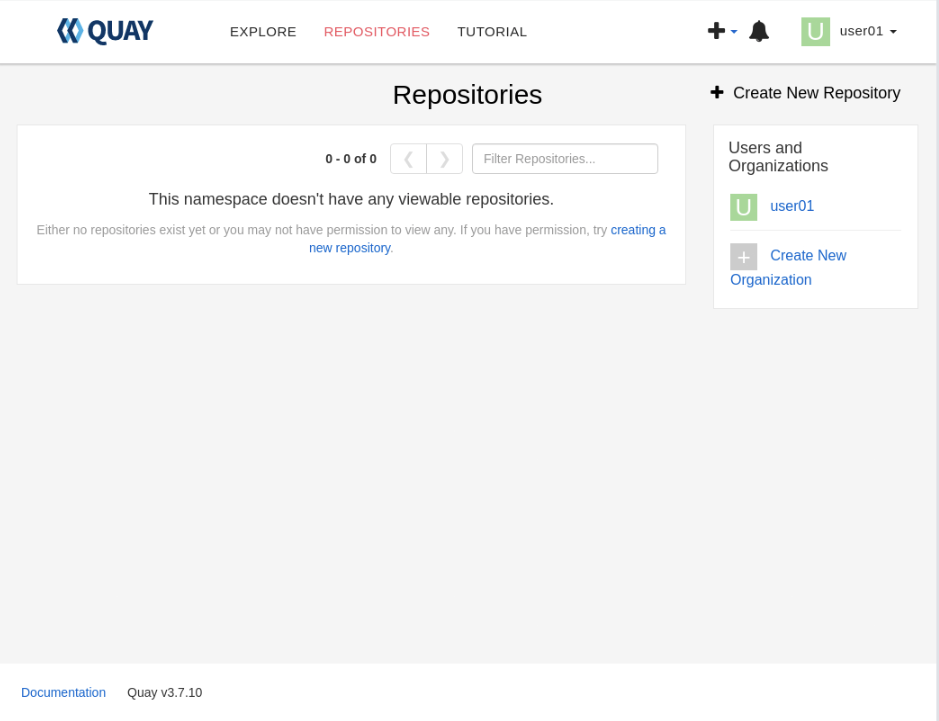
Create a New Project Quay Registry Repository
A repository in Project Quay is usually named the same as the container image that will be stored or pushed to it once it is set up. This naming convention makes locating container images from this locally hosted container registry much more straightforward. However, the tutorial steps are not required to comply with this, hence why the screenshots show the repository name as test01.
Click on the Create New Repository link in the top right corner of the Repositories panel to display the Create New Repository panel.
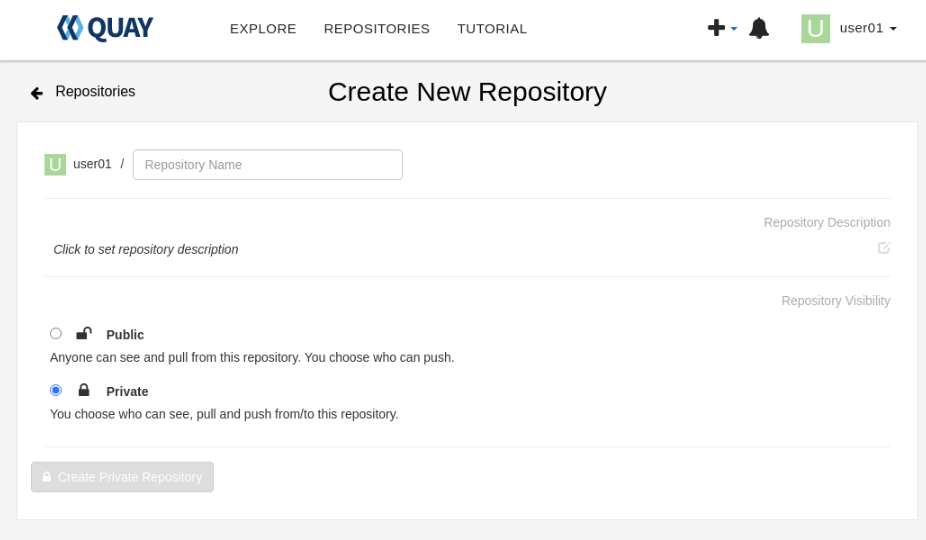
Input the required values.
Repository Name- Repository names must match [a-z0-9][.a-z0-9_-](/[a-z0-9][.a-z0-9_-])* (Note: Capital letters are invalid)Repostory Description- This is optional.- Choose to make the Repository Public or Private depending on the intended purpose.
You can alter both the Repository Description and Public/Private settings later.
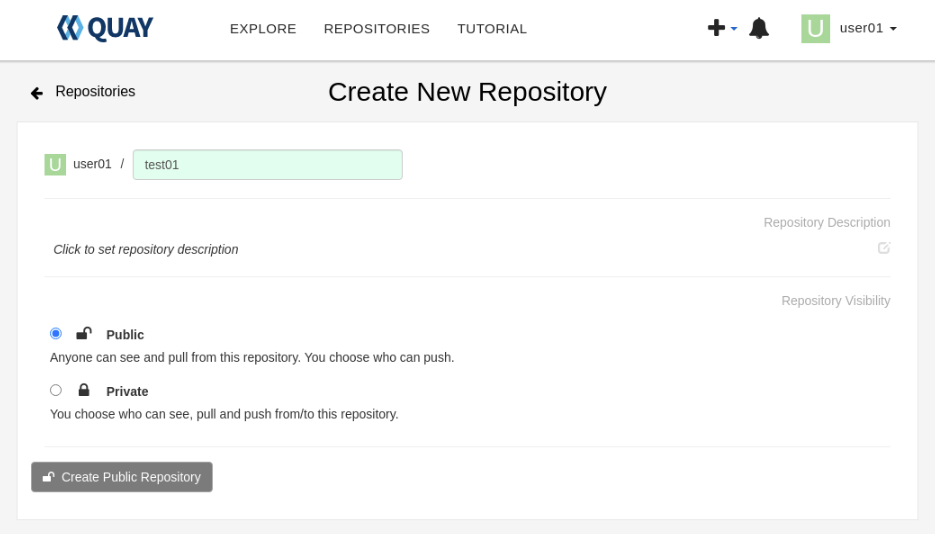
Click the Create Repository button to create the new repository.
The button will contain either Private or Public depending upon which repository type you select.
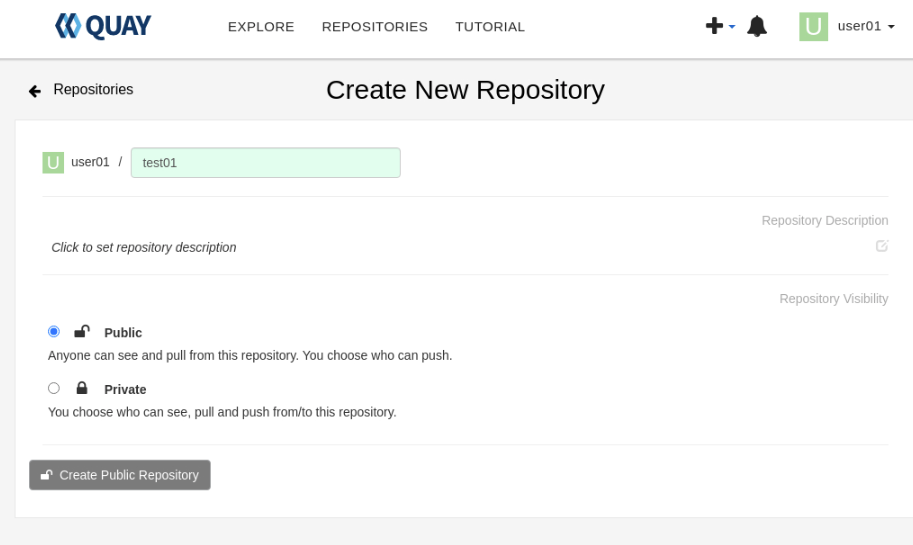
The user interface shows the newly created repository.
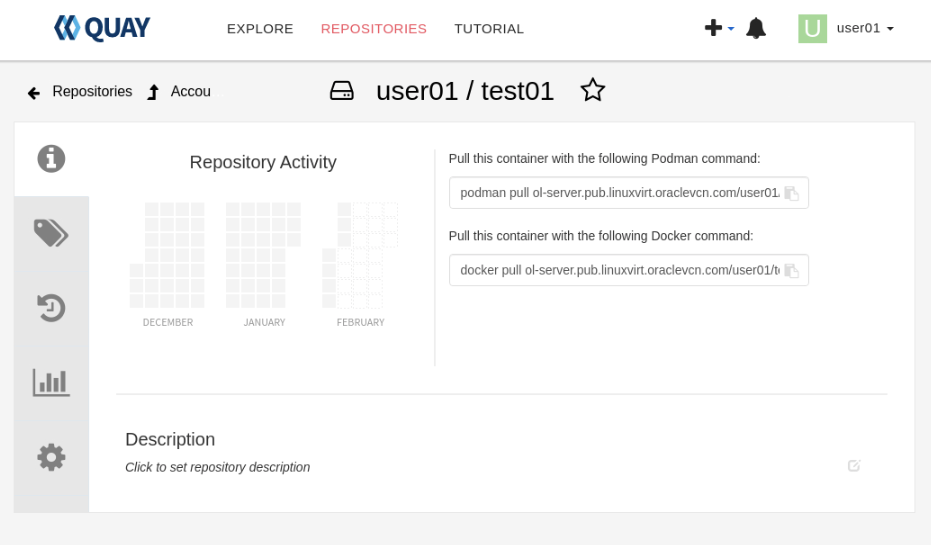
At this point, the Project Quay registry has been started, a new user has been created and logged in, and a new repository has been created within the container registry. The next step is to return to the command line and upload a container to this newly created container registry.
Using Project Quay
These steps demonstrate pulling an image from an external registry, then tagging it, logging on to the newly created Project Quay registry, and finally pushing the image into the freshly created test01 repository.
Note: Because we did not configure this install of Project Quay using SSL certificates, the log in and push operations need to use the
--tls-verify=falseflag; otherwise, they will fail. It's recommended that Project Quay be configured with proper SSL certificates in a production environment.
From an existing terminal already connected to the ol-node-01 instance, pull the Oracle Linux 9 image.
podman pull ghcr.io/oracle/oraclelinux:9Tag the pulled image with destination details of the newly created Project Quay registry.
The tag used can be any value preferred, such as latest.
podman tag ghcr.io/oracle/oraclelinux:9 ol-node-01.lv.vcn.oraclevcn.com/user01/test01:latestWhere
user01is the name of your username in the registry, andtest01is the name of the registry.Log in to the repository.
podman login --tls-verify=false ol-node-01.lv.vcn.oraclevcn.com/user01/test01Note: Use the Username and Password values used when creating the Project Quay user in the previous steps.
Example Output:
[oracle@ol-server ~]$ podman login --tls-verify=false ol-node-01.lv.vcn.oraclevcn.com/user01/test01
Username: user01
Password:
Login Succeeded!
Push the image.
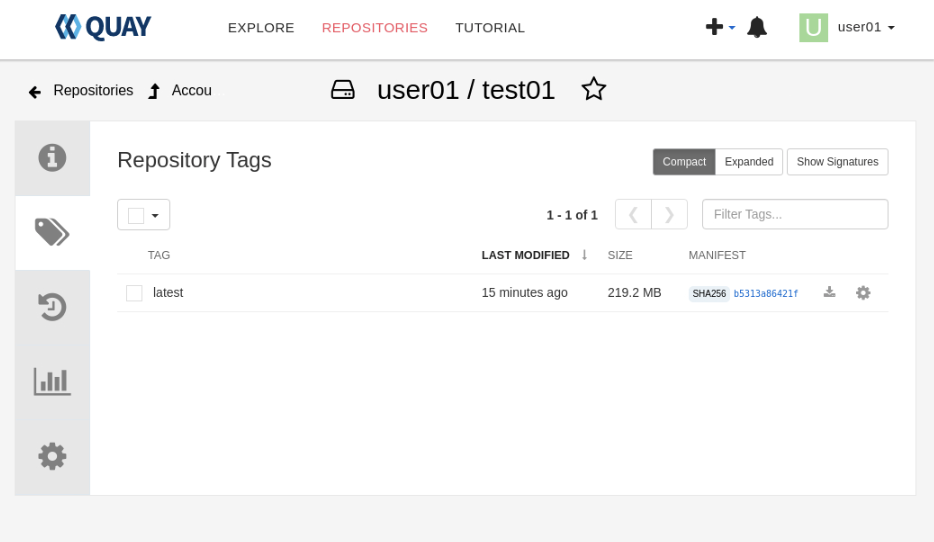
podman push --tls-verify=false ghcr.io/oracle/oraclelinux:9 ol-node-01.lv.vcn.oraclevcn.com/user01/test01:latestSwitch to the open browser and navigate to the Repository Tags section of the user-1/test01 repository.
The tagged image should appear in the list.
Delete the local copy of the
test01image.We must perform this step before testing the ability to pull the image from the Project Quay registry.
podman rmi ol-node-01.lv.vcn.oraclevcn.com/user01/test01:latest
podman rmi ghcr.io/oracle/oraclelinux:9
Pull the
test01image from the Project Quay registry.podman pull --tls-verify=false ol-node-01.lv.vcn.oraclevcn.com/user01/test01:latest
Next Steps
This final step confirms that the local Project Quay registry can store and serve container images kept within its repositories.
Although we've completed this tutorial, Project Quay has many more features and abilities, as shown below:
- Deploy for High Availability (via Podman or Kubernetes)
- Deploy to Kubernetes via an Operator or Helm
- Can be integrated with OAuth & Email systems
- Support for Repository mirroring
- Enable Clair-based image security scanning
- Support for Dockerfile builds
In the meantime, many thanks for taking the time to try this Lab.