Multi-Cloud with GraalVM: Building and Deploying Optimized Applications
Introduction
This workshop focuses on how to build size-optimized native applications using GraalVM Native Image and how to leverage containerization to optimize the runtime environment.
You are going to discover ways to minimize application footprint by taking advantage of different Native Image linking options, and packaging a size-compact application into various containers, focusing on two main strategies: Distroless and static, discussing the trade-offs. Every step is a multistage build using the Oracle GraalVM container image for the builder and different containers for the runner.
For the demo part, you will run a Spring Boot web server application, hosting the GraalVM website latest release documentation. Spring Boot 3 has integrated support for GraalVM Native Image, making it easier to set up and configure a project. Compiling a Spring Boot application ahead of time can significantly improve the performance and reduce its footprint.
Workshop Objectives
In this workshop you will:
- Leverage containerization approach to optimize the runtime environment.
- Compile a Spring Boot application ahead of time into a native image and optimize it for file size using either GraalVM or Paketo Buildpacks.
- See how to use the Maven plugin for Native Image .
- Reduce containers size by taking advantage of different Native Image static linking options.
- Compare the deployed container images sizes and discuss the trade offs, focusing on two main strategies: Distroless and static.
Estimated workshop time is 90 minutes.
Workshop Environment
You are not required to install any software for the workshop. The session runs on an interactive workshop platform in the Oracle Cloud Infrastructure (OCI): https://luna.oracle.com/ . Some key facts:
- You are provided with an ephemeral account and necessary OCI resources for the time.
- The development environment comes pre-configured.
- All resources will be cleaned up after completing this workshop.
- Remote control over users' sessions is possible in case of trouble.
NOTE: If you see the laptop icon in the lab, this means you need to do something such as enter a command. Keep an eye out for it.

# This is where you will need to do somethingSTEP 1: Connect to a Virtual Host and Check the Development Environment
Your development environment is provided by a remote host: an OCI Compute Instance with Oracle Linux 9, 4 cores, and 48GB of memory.
Start by connecting to your remote host.
Double-click the Luna Lab icon on the desktop to open the browser:
Check if the host is ready under the Resources tab. The cog shown next to the Resources title spins while the compute host is being provisioned in the cloud. When the host is provisioned (this may take up to 2 minutes), you will see a checkmark:

A Visual Studio (VS) Code window will open and automatically connect to your remote host that has been provisioned for you. Click Continue to accept the machine fingerprint.
The VS Code window opens, connected to your remote host, with the source code for this lab.
If you don't hit
ContinueVS Code will show you a dialogue, shown below. HitRetryand VS Code will ask you to accept the machine fingerprint. Hit Continue, as in the above step.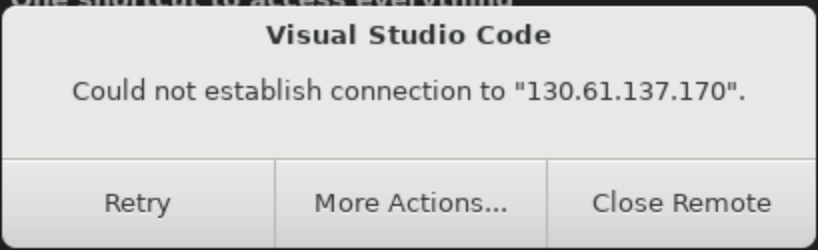
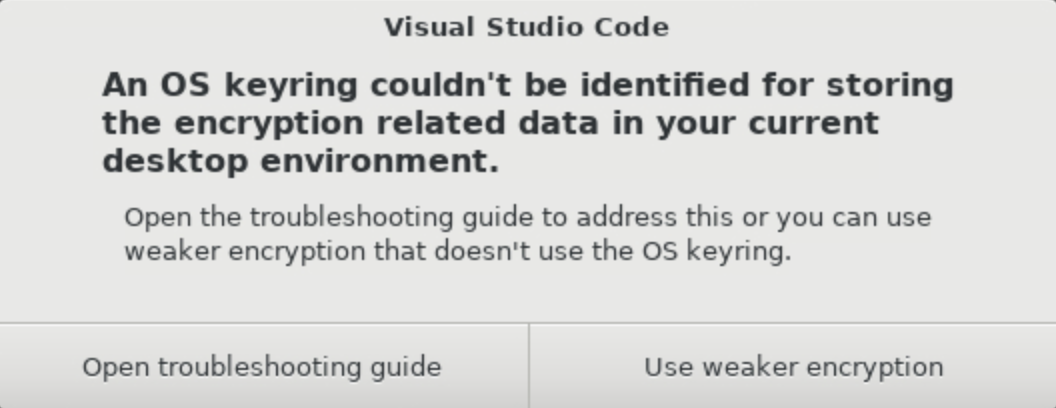
When you see the OS Keyring message for storing the encryption related data not being identified, choose "Use weaker encryption":
You are now successfully connected to your remote host in Oracle Cloud!
Next, open a terminal within VS Code.
You will interact with the remote host using this terminal. A terminal can be opened in VS Code through the menu: Terminal > New Terminal. Use this terminal in the rest of the lab.
VS Code may prompt you to install plugins and extensions. Ignore/close the notification prompts as this lab doesn't need any plugins and extensions.
Issues With Connecting to the Remote Development Environment
If you encounter any issues with connecting to the remote development environment in VS Code, that are not covered above, we suggest that you try the following:
- Close VS Code
- Copy the Configure Script from the Resources tab and paste it into the Luna Desktop Terminal again
- Repeat the above instructions to connect to the Remote Development environment
Note on the Development Environment
Your Java runtime environment comes preconfigured with Oracle GraalVM 25 . Docker is also installed and running.
You can easily check that by running these commands in the terminal:
java -version
native-image --versionSTEP 2: Compile and Run the Application from a JAR File Inside a Container
Start by compiling and running the application from a JAR file inside a Docker container. It requires a container image with a full JDK and runtime libraries.
Explanation
The Dockerfile provided for this step pull container-registry.oracle.com/graalvm/jdk:25 for the builder, and then gcr.io/distroless/java21-debian12 for the runtime.
The entrypoint for this image is equivalent to java -jar, so only a path to a JAR file is specified in CMD.
Action
Run the build-jar-java-base.sh script from the application directory:
./build-jar-java-base.shOnce the script finishes, a container image distroless-java-base.jar should be available. Start the application using
docker run:docker run --rm -p8080:8080 webserver:distroless-java-base.jarThe container started in hundreds of milliseconds, 1.081 seconds.
Go to the Luna window that you opened in the browser, and get a complete URL for the workshop user under Resources. Copy and paste in a browser. You see the GraalVM documentation pages served.
If you are running the example locally, not on a remote host, just open http://localhost:8080 .
Return to VS Code and stop the running container by clicking CTRL+C. (The Docker runs in an attached mode.)
Check the container size:
docker imagesThe expected size is ~240MB.
REPOSITORY   TAG                        IMAGE ID       CREATED          SIZE
webserver    distroless-java-base.jar   3794608e7fd5   21 minutes ago   235MB
Note that the website pages added 44MB to the container size.
STEP 3: Build and Run a Jlink Custom Runtime Image Inside a Container
In this step, you will create a custom runtime of this Spring Boot web server with Jlink and run it inside a container image. See how much reduction in size you can gain.
Explanation
Jlink, or jlink, is a tool to generate a custom Java runtime image containing only the platform modules that are required for your application. This is one of the approaches to create cloud native applications introduced in Java 11.
The Dockerfile Dockerfile.distroless-java-base.jlink contains a multistage build: first it generates a Jlink custom runtime on a full JDK; then copies the runtime image folder along with static website pages into a Java base container image, and sets the entrypoint.
The application does not have to be modular, but you need to figure out which modules the application depends on to be able to jlink it.
In the builder stage, running on a full JDK, after compiling the project, Docker generates a file cp.txt containing the classpath with all the dependencies:
RUN ./mvnw dependency:build-classpath -Dmdep.outputFile=cp.txtThen, Docker runs the jdeps command with the classpath to check required modules for this Spring Boot application:
RUN jdeps --ignore-missing-deps -q --recursive --multi-release 21 --print-module-deps --class-path $(cat cp.txt) target/webserver-0.0.1-SNAPSHOT.jarFinally, Docker runs jlink to create a custom runtime in the specified output directory jlink-jre.
The ENTRYPOINT for the application would be java from that custom runtime.
Action
Run the script:
./build-jlink.shOnce the script finishes, a container image distroless-java-base.jlink should be available. Run it, mapping the ports:
docker run --rm -p8080:8080 webserver:distroless-java-base.jlinkThe container started in 1.102 seconds.
Go to the browser window and check if the website is running at http://<SERVER_IP>:8080/.
Return to VS Code and stop the running container by clicking CTRL+C.
Compare the file size of container images:
docker imagesThe expected output is:
REPOSITORY   TAG                          IMAGE ID       CREATED          SIZE
webserver    distroless-java-base.jlink   72ceaa8a8dfd   9 minutes ago    188MB
webserver    distroless-java-base.jar     3794608e7fd5   47 minutes ago   235MB
Jlink shrinked the
distroless-java-base.jarcontainer by 47MB.
STEP 4: Build and Run a Native Image Inside a Container Using Paketo Buildpacks
In this step, you will compile this Spring Boot application ahead of time with GraalVM Native Image and run it using Paketo Buildpacks container images.
Explanation
Spring Boot supports building a native image inside a container using the Paketo Buildpack for Oracle which provides GraalVM Native Image.
The mechanism is that the Paketo builder pulls the Jammy Tiny Stack image (Ubuntu distroless-like image) which contains no buildpacks. Then you point the builder image to the creator image. For this workshop, you point to the Paketo Buildpack for Oracle explicitly requesting the Native Image tool.
If you open the pom.xml file, you see the buildpacks configuration within the spring-boot-maven-plugin declaration added for you:
<configuration>
    <image>
    <builder>paketobuildpacks/builder-jammy-buildpackless-tiny</builder>
    <buildpacks>
        <buildpack>paketobuildpacks/oracle</buildpack>
        <buildpack>paketobuildpacks/java-native-image</buildpack>
    </buildpacks>
    </image>
</configuration>
When java-native-image is requested, the buildpack downloads Oracle GraalVM, which includes Native Image.
The Paketo documentation provides several examples that show you how to build applications with Native Image using buildpacks.
Note that if you do not specify Oracle's buildpack, it will pull the default buildpack, which can result in reduced performance.
Action
Build a native executable for this Spring application using the Paketo buildpack:
./mvnw -Pnative spring-boot:build-imageOnce the build completes, the container webserver.buildpacks:latest should be available. Run it, mapping the ports:
docker run --rm -p8080:8080 docker.io/library/webserver.buildpacks:latestThe application is running from the native image inside a container. The container started in just several milliseconds 0.03 seconds!
Go to the browser window and check if the website is running at http://<SERVER_IP>:8080/.
Return to VS Code and stop the running container by clicking CTRL+C.
Check the size of this container image:
docker imagesThe expected output is:
REPOSITORY            TAG                          IMAGE ID       CREATED            SIZE
webserver             distroless-java-base.jlink   72ceaa8a8dfd   30 minutes ago     188MB
webserver             distroless-java-base.jar     3794608e7fd5   About an hour ago  235MB
webserver.buildpacks  latest                       10f1045f485b   45 years ago       161MB
The new container, tagged as webserver.buildpacks:latest, is 161MB, smaller than the Jlink and distroless Java base versions.
STEP 5: Build a Native Image and Run Inside a Container (Default Configuration)
In this step, you will create a native image with the default configuration and execute it inside a container.
Explanation
Spring Boot 3 has already integrated support for GraalVM Native Image, making it easier to set up and configure your project. For even better results, you can enable Native Build Tools in your application, which provide Maven and Gradle plugins specifically for building native images.
This project configuration already contains all necessary plugins, including Native Image Maven plugin :
<plugin>
    <groupId>org.graalvm.buildtools</groupId>
    <artifactId>native-maven-plugin</artifactId>
</plugin>
You can build this web server application ahead of time into a native executable, on your host machine, just like this: ./mvnw -Pnative native:compile.
The command will compile the application and create a fully dynamically linked native image, webserver, in the target/ directory.
However, there is a Dockerfile, Dockerfile.distroless-java-base.dynamic, that runs the native image step inside the builder container, and then copies this native executable into a distroless base container with just enough to run the application. No Java Runtime Environment (JRE) is required!
Distroless container images contain only your application and its runtime dependencies. They do not contain package managers, shells or any other programs you would expect to find in a standard Linux distribution. Learn more in "Distroless" Container Images .
Action
Run the script:
./build-dynamic-image.shOnce the build completes, a container image distroless-java-base.dynamic should be available. Run it, mapping the ports:
docker run --rm -p8080:8080 webserver:distroless-java-base.dynamicThe application is running from the native image inside a container. The container started in 0.032 seconds.
Go to the browser window and check if the website is running at http://<SERVER_IP>:8080/.
Return to VS Code and stop the running container by clicking CTRL+C.
Check the size of this container image:
docker imagesThe expected output is:
REPOSITORY            TAG                            IMAGE ID       CREATED         SIZE
webserver             distroless-java-base.dynamic   d7c449b9373d   45 seconds ago  160MB
webserver             distroless-java-base.jlink     191efb04958d   2 hours ago     188MB
webserver             distroless-java-base.jar       846971900174   2 hours ago     235MB
webserver.buildpacks  latest                         615deed5b89c   45 years ago    161MB
The new container image size, 160MB, almost matches the size of the container built with Paketo Buildpacks. It is expected because it is the same native executable packaged into a different base container.
The size of the native executable itself is 122M. Note that the static resources are "baked" into this native executable and added 44M to its size.
STEP 6: Build a Size-Optimized Native Image and Run Inside a Container
This is where the fun begins.
In this step, you will build a fully dynamically linked native image with the file size optimization on and run it inside a container.
Explanation
GraalVM Native Image provides the option -Os which optimizes the resulting native image for file size.
-Os enables -O2 optimizations except those that can increase code or executable size significantly.
Learn more in the Native Image documentation .
For that, a separate Maven profile is provided to differentiate this run from the default build, and gives a different name for the output file:
<profile>
    <id>dynamic-size-optimized</id>
    <build>
        <plugins>
            <plugin>
                <groupId>org.graalvm.buildtools</groupId>
                <artifactId>native-maven-plugin</artifactId>
                <configuration>
                    <imageName>webserver.dynamic-optimized</imageName>
                    <buildArgs>
                        <buildArg>-Os</buildArg>
                    </buildArgs>
                </configuration>
            </plugin>
        </plugins>
    </build>
</profile>
The Dockerfile for this step, Dockerfile.distroless-java-base.dynamic-optimized, creates a native image which is fully dynamically linked and optimized for size inside the builder container, and then packages it in a distroless base container with just enough to run the application. No Java Runtime Environment (JRE) is required.
The
-Osoptimization will be on for all the subsequent builds.
Action
Run the script to build a size-optimized native executable and package it into a container:
./build-dynamic-image-optimized.shOnce the build completes, a container image distroless-java-base.dynamic-optimized should be available. Run it, mapping the ports:
docker run --rm -p8080:8080 webserver:distroless-java-base.dynamic-optimizedThe application is running from the native image inside a container. The container started in 0.049 seconds.
Go to the browser window and check if the website is running at http://<SERVER_IP>:8080/.
Return to VS Code and stop the running container by clicking CTRL+C.
Check the size of this container image:
docker imagesThe expected output is:
REPOSITORY            TAG                                      IMAGE ID       CREATED         SIZE
webserver             distroless-java-base.dynamic-optimized   5e16a58b1649   23 seconds ago  125MB
webserver             distroless-java-base.dynamic             d7c449b9373d   45 seconds ago  160MB
webserver             distroless-java-base.jlink               191efb04958d   2 hours ago     188MB
webserver             distroless-java-base.jar                 846971900174   2 hours ago     235MB
webserver.buildpacks  latest                                   615deed5b89c   45 years ago    161MB
The size of
distroless-java-base.dynamic-optimizedcontainer is cut down from 160MB to 125MB. This is because the native executable reduced in size.The size of the native executable decreased from 122M to 88MB by applying the file size optimization!
STEP 7: Build a Size-Optimized Mostly Static Native Image and Run Inside a Container
In this step, you will build a mostly static native image, with the file size optimization on, and then package it into a container image that provides glibc, and run.
Explanation
A mostly static native image links all the shared libraries on which it relies (zlib, JDK-shared static libraries) except the standard C library, libc.
This type of native image is useful for deployment on a distroless base container image.
You can build a mostly statically linked image by passing the --static-nolibc option at build time.
A separate Maven profile exists for this step:
<profile>
    <id>mostly-static</id>
    <build>
        <plugins>
            <plugin>
                <groupId>org.graalvm.buildtools</groupId>
                <artifactId>native-maven-plugin</artifactId>
                <configuration>
                    <imageName>webserver.mostly-static</imageName>
                    <buildArgs>
                        <buildArg>--static-nolibc</buildArg>
                        <buildArg>-Os</buildArg>
                    </buildArgs>
                </configuration>
            </plugin>
        </plugins>
    </build>
</profile>
Action
Run the script:
./build-mostly-static-image.shOnce the build completes, a container image distroless-base.mostly-static should be available. Run it, mapping the ports:
docker run --rm -p8080:8080 webserver:distroless-base.mostly-staticThe application is running from the mostly static native image inside a container. The container started in 0.052 seconds.
Go to the browser window and check if the website is running at http://<SERVER_IP>:8080/.
Return to VS Code and stop the running container by clicking CTRL+C.
Check the size of this container image:
docker imagesThe expected output is:
REPOSITORY            TAG                                      IMAGE ID       CREATED         SIZE
webserver             distroless-base.mostly-static            2096b9d21750   6 seconds ago   112MB
webserver             distroless-java-base.dynamic-optimized   5e16a58b1649   23 seconds ago  125MB
webserver             distroless-java-base.dynamic             d7c449b9373d   45 seconds ago  160MB
webserver             distroless-java-base.jlink               191efb04958d   2 hours ago     188MB
webserver             distroless-java-base.jar                 846971900174   2 hours ago     235MB
webserver.buildpacks  latest                                   615deed5b89c   45 years ago    161MB
The size of the new distroless-base.mostly-static container is 112MB. The reduction in size is related to the fact that a smaller base image was pulled: gcr.io/distroless/base-debian12. Distroless images are very small, and the one used is only 48.3 MB. That's about 50% of the size of java-base-debian12(125MB) used before, and 3 times less than java21-debian12 (235MB) containing a full JDK.
The size of the mostly static native image has not changed, and is 88MB.
STEP 9: Build a Size-Optimized Fully Static Native Image and Run Inside a Container
In this step, you will build a fully static native image, with the file size optimization on, and then package it into a scratch container.
Explanation
A fully static native image is a statically linked binary that you can use without any additional library dependencies.
You can create a static native image by statically linking it against musl-libc, a lightweight, fast, and simple libc implementation.
To build a fully static executable, pass the --static --libc=musl options at build time.
A fully static image does not rely on any libraries in the operating system environment and can be packaged in the tiniest container.
It is easy to deploy on a slim or distroless container, even a scratch container . A scratch container is a Docker official image , only 2MB in size, useful for building super minimal images.
A separate Maven profile exists for this step:
<profile>
    <id>fully-static</id>
    <build>
        <plugins>
            <plugin>
                <groupId>org.graalvm.buildtools</groupId>
                <artifactId>native-maven-plugin</artifactId>
                <configuration>
                    <imageName>webserver.static</imageName>
                    <buildArgs>
                        <buildArg>--static --libc=musl</buildArg>
                        <buildArg>-Os</buildArg>
                    </buildArgs>
                </configuration>
            </plugin>
        </plugins>
    </build>
</profile>
Action
Run the script to build a fully static native executable and package it into a scratch container:
./build-static-image.shOnce the build completes, a container image scratch.static should be available. Run it, mapping the ports:
docker run --rm -p8080:8080 webserver:scratch.staticThe starup time is the same as before, 0.049 seconds, and, as a result, you get a tiny container with a fully functional and deployable server application!
Go to the browser window and check if the website is running at http://<SERVER_IP>:8080/.
Return to VS Code and stop the running container by clicking CTRL+C.
Now check the size of this container image:
docker imagesThe expected output is:
REPOSITORY            TAG                                      IMAGE ID       CREATED         SIZE
webserver             scratch.static                           6cac69852631   3 minutes ago   91.8MB
webserver             distroless-base.mostly-static            2096b9d21750   6 seconds ago   112MB
webserver             distroless-java-base.dynamic-optimized   5e16a58b1649   23 seconds ago  125MB
webserver             distroless-java-base.dynamic             d7c449b9373d   45 seconds ago  160MB
webserver             distroless-java-base.jlink               191efb04958d   2 hours ago     188MB
webserver             distroless-java-base.jar                 846971900174   2 hours ago     235MB
webserver.buildpacks  latest                                   615deed5b89c   45 years ago    161MB
The container size shrinked to 91.8MB! A scratch base image weights only 2MB.
(Optional). As an alternative to a scratch container, you can use a base image built with Alpine Linux: alpine:3 . It is an official Docker image with a little more utilities and only 5 MB in size. The build script and the Dockerfile for this step are provided for you. Run it:
./build-alpine-static-image.shRepeat the steps 2-5 from above to compare the final container sizes.
Side Note for Local Building
If you build a native image locally, on a Linux machine, it requires the musl toolchain with zlib installed on your machine.
In the lab directory, you can find the script setup-musl.sh, copy it and run locally to download and configure the musl toolchain, and install zlib into the toolchain:
Also, in this local setup, you can verify that is indeed fully static with ldd:
ldd target/webserver.staticYou should see "not a dynamic executable" for the response.
STEP 10: Compress a Static Native Image with UPX and Run Inside a Container
Not convincing? What can you do next to reduce the size even more?
In this step, you compress your fully static native image with UPX, then package into the same scratch container, and run.
Explanation
UPX - an advanced executable file compressor. It can significantly reduce the executable size, but note, that UPX loads the executable into the memory, unpackages it, and then recompresses.
The Dockerfile for this step, Dockerfile.scratch.static-upx, builds a fully static native image inside the builder container and installs UPX in it. Then Docker runs UPX which unpackages and recompresses this native executable. Finally, the compressed executable is copied over to the scratch container, and executed.
Run the script to build a fully static native executable, compress it, and package it into a scratch container:
./build-static-upx-image.shOnce the build completes, a container image scratch.static-upx should be available. Run it, mapping the ports:
docker run --rm -p8080:8080 webserver:scratch.static-upxThe container started in 0.048 seconds.
Go to the browser window and check if the website is still running at http://<SERVER_IP>:8080/.
Return to VS Code and stop the running container by clicking CTRL+C.
Now check the size of all container images:
docker imagesThe expected output is:
REPOSITORY            TAG                                      IMAGE ID       CREATED         SIZE
webserver             scratch.static-upx                       becd77f9ea1a   1 second ago    34.5MB
webserver             scratch.static                           6cac69852631   3 minutes ago   91.3MB
webserver             scratch.static-alpine                    4b96b9d21798   4 minutes ago   100MB
webserver             distroless-base.mostly-static            2096b9d21750   6 seconds ago   112MB
webserver             distroless-java-base.dynamic-optimized   5e16a58b1649   23 seconds ago  125MB
webserver             distroless-java-base.dynamic             d7c449b9373d   45 seconds ago  160MB
webserver             distroless-java-base.jlink               191efb04958d   2 hours ago     188MB
webserver             distroless-java-base.jar                 846971900174   2 hours ago     235MB
webserver.buildpacks  latest                                   615deed5b89c   45 years ago    161MB
The container size reduced dramatically to just 34.5MB! The
upxtool compressed the static native image by almost 57MB. The application and container image's size were now shrinked to the minimum.
Conclusions
A fully functional and, at the same time, minimal, webserver application was compiled into a native Linux executable and packaged into base, distroless, and scratch containers thanks to GraalVM Native Image's support for various linking options. All the versions of this Spring Boot application are functionally equivalent.
Sorted by size, it is clear that the fully static native image, compressed with upx, and then packaged on the scratch container is the smallest at just 34.5MB. Note that the website static pages added 44M to the container images size. Static resources are "baked” into the native image.
| Container | Size of a build artefact (JAR, Jlink runtime, native executable) | Base image | Container |
|---|---|---|---|
| distroless-java-base.jar | webserver-0.0.1-SNAPSHOT.jar 42MB | java21-debian12 192MB | 235MB |
| distroless-java-base.jlink | jlink-jre custom runtime 68MB | java-base-debian12 128MB | 188MB |
| distroless-java-base.dynamic | webserver.dynamic 122MB | java-base-debian12 128MB | 161MB |
| webserver.buildpacks:latest | 161MB | ||
| distroless-java-base.dynamic-optimized | webserver.dynamic-optimized 88MB | java-base-debian12 128MB | 125MB |
| distroless-base.mostly-static | webserver.mostly-static 88MB | base-debian12 48.3MB | 112MB |
| scratch.static-alpine | webserver.static 88MB | alpine:3 5MB | 100MB |
| scratch.static | webserver.static 88MB | scratch 2MB | 91.8MB |
| scratch.static-upx | webserver.scratch.static-upx 33MB | scratch 2MB | 34.5MB |
Learn More
Multi-Cloud with GraalVM: Building and Deploying Optimized Applications
STEP 1: Connect to a Virtual Host and Check the Development Environment
STEP 2: Compile and Run the Application from a JAR File Inside a Container
STEP 3: Build and Run a Jlink Custom Runtime Image Inside a Container
STEP 4: Build and Run a Native Image Inside a Container Using Paketo Buildpacks
STEP 5: Build a Native Image and Run Inside a Container (Default Configuration)
STEP 6: Build a Size-Optimized Native Image and Run Inside a Container
STEP 7: Build a Size-Optimized Mostly Static Native Image and Run Inside a Container
STEP 9: Build a Size-Optimized Fully Static Native Image and Run Inside a Container
STEP 10: Compress a Static Native Image with UPX and Run Inside a Container