Provision File System Storage for Compute Instances
Introduction
Oracle Cloud Infrastructure File Storage Service provides a durable, scalable, distributed, enterprise-grade network file system. You can connect to a file storage service file system from any bare metal, virtual machine, or container instance in your virtual cloud network (VCN). You can also access a file system from outside the VCN using Oracle Cloud Infrastructure FastConnect and Internet Protocol security (IPSec) virtual private network (VPN).
Objectives
- Create and mount a file storage system to a compute instance.
- Verify the availability of the file storage system.
Note: Screenshots in the instructions may be different from the actual UI.
Step 1: Sign in to OCI Console and Create VCN
Sign in to Oracle Cloud Infrastructure Console using your cloud tenant name, user name, and password.
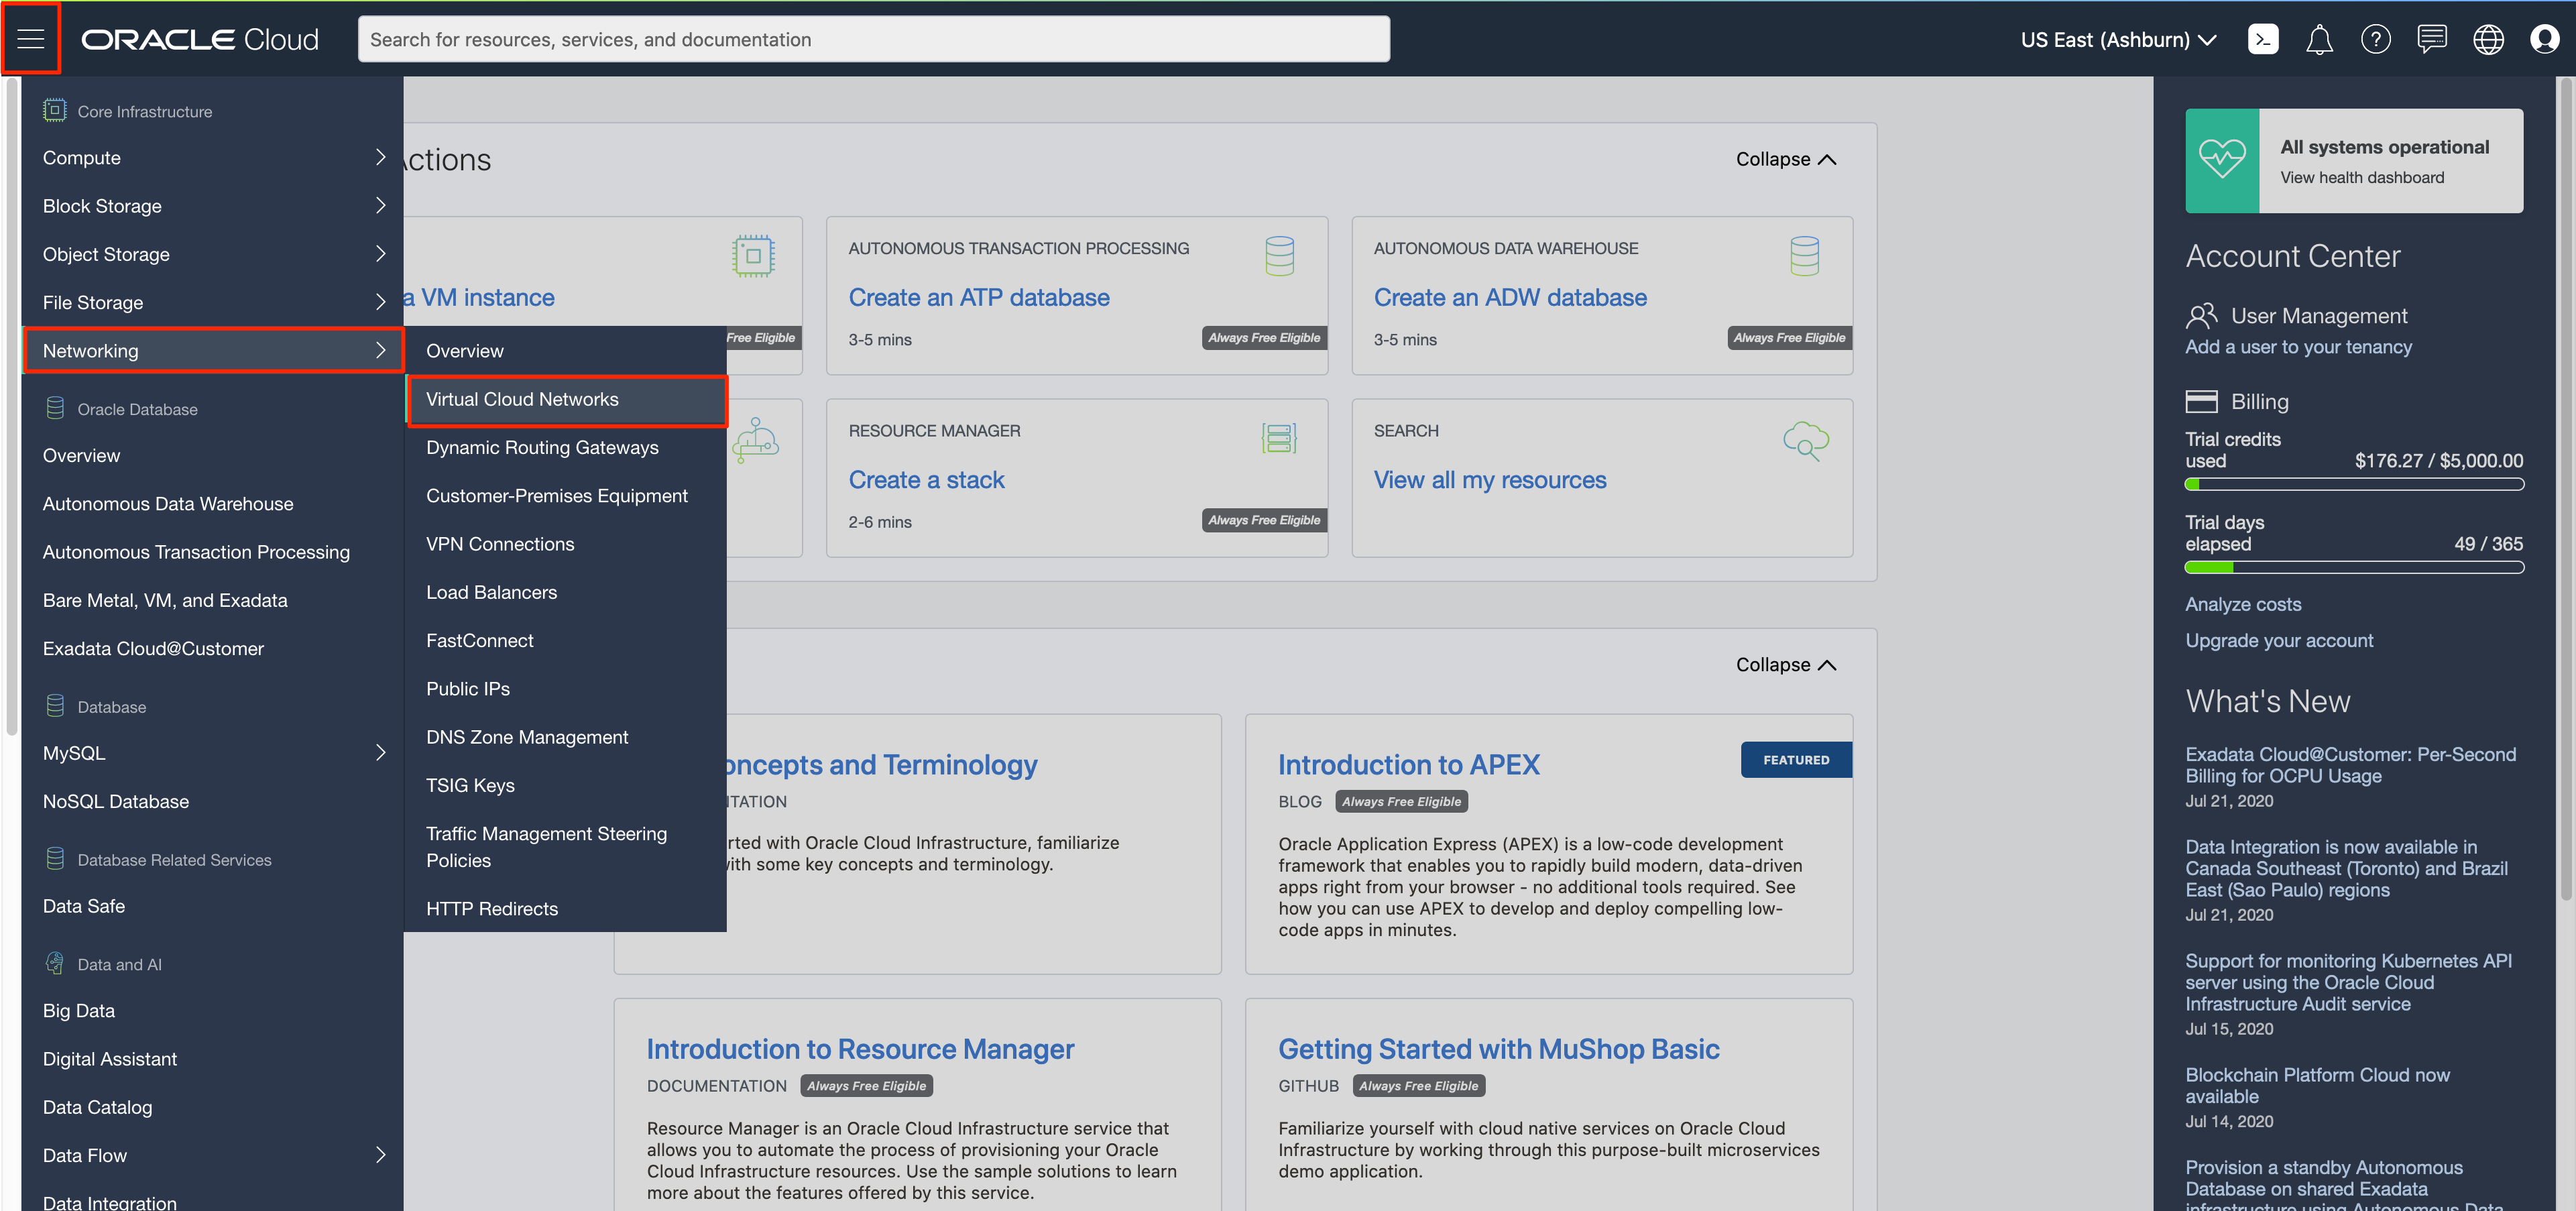
In your OCI Console (homepage), click the navigation button in the top-left corner. From the OCI services menu, under Networking, click Virtual Cloud Networks.
Choose your current compartment under List Scope in the left navigation pane and click Start VCN Wizard.
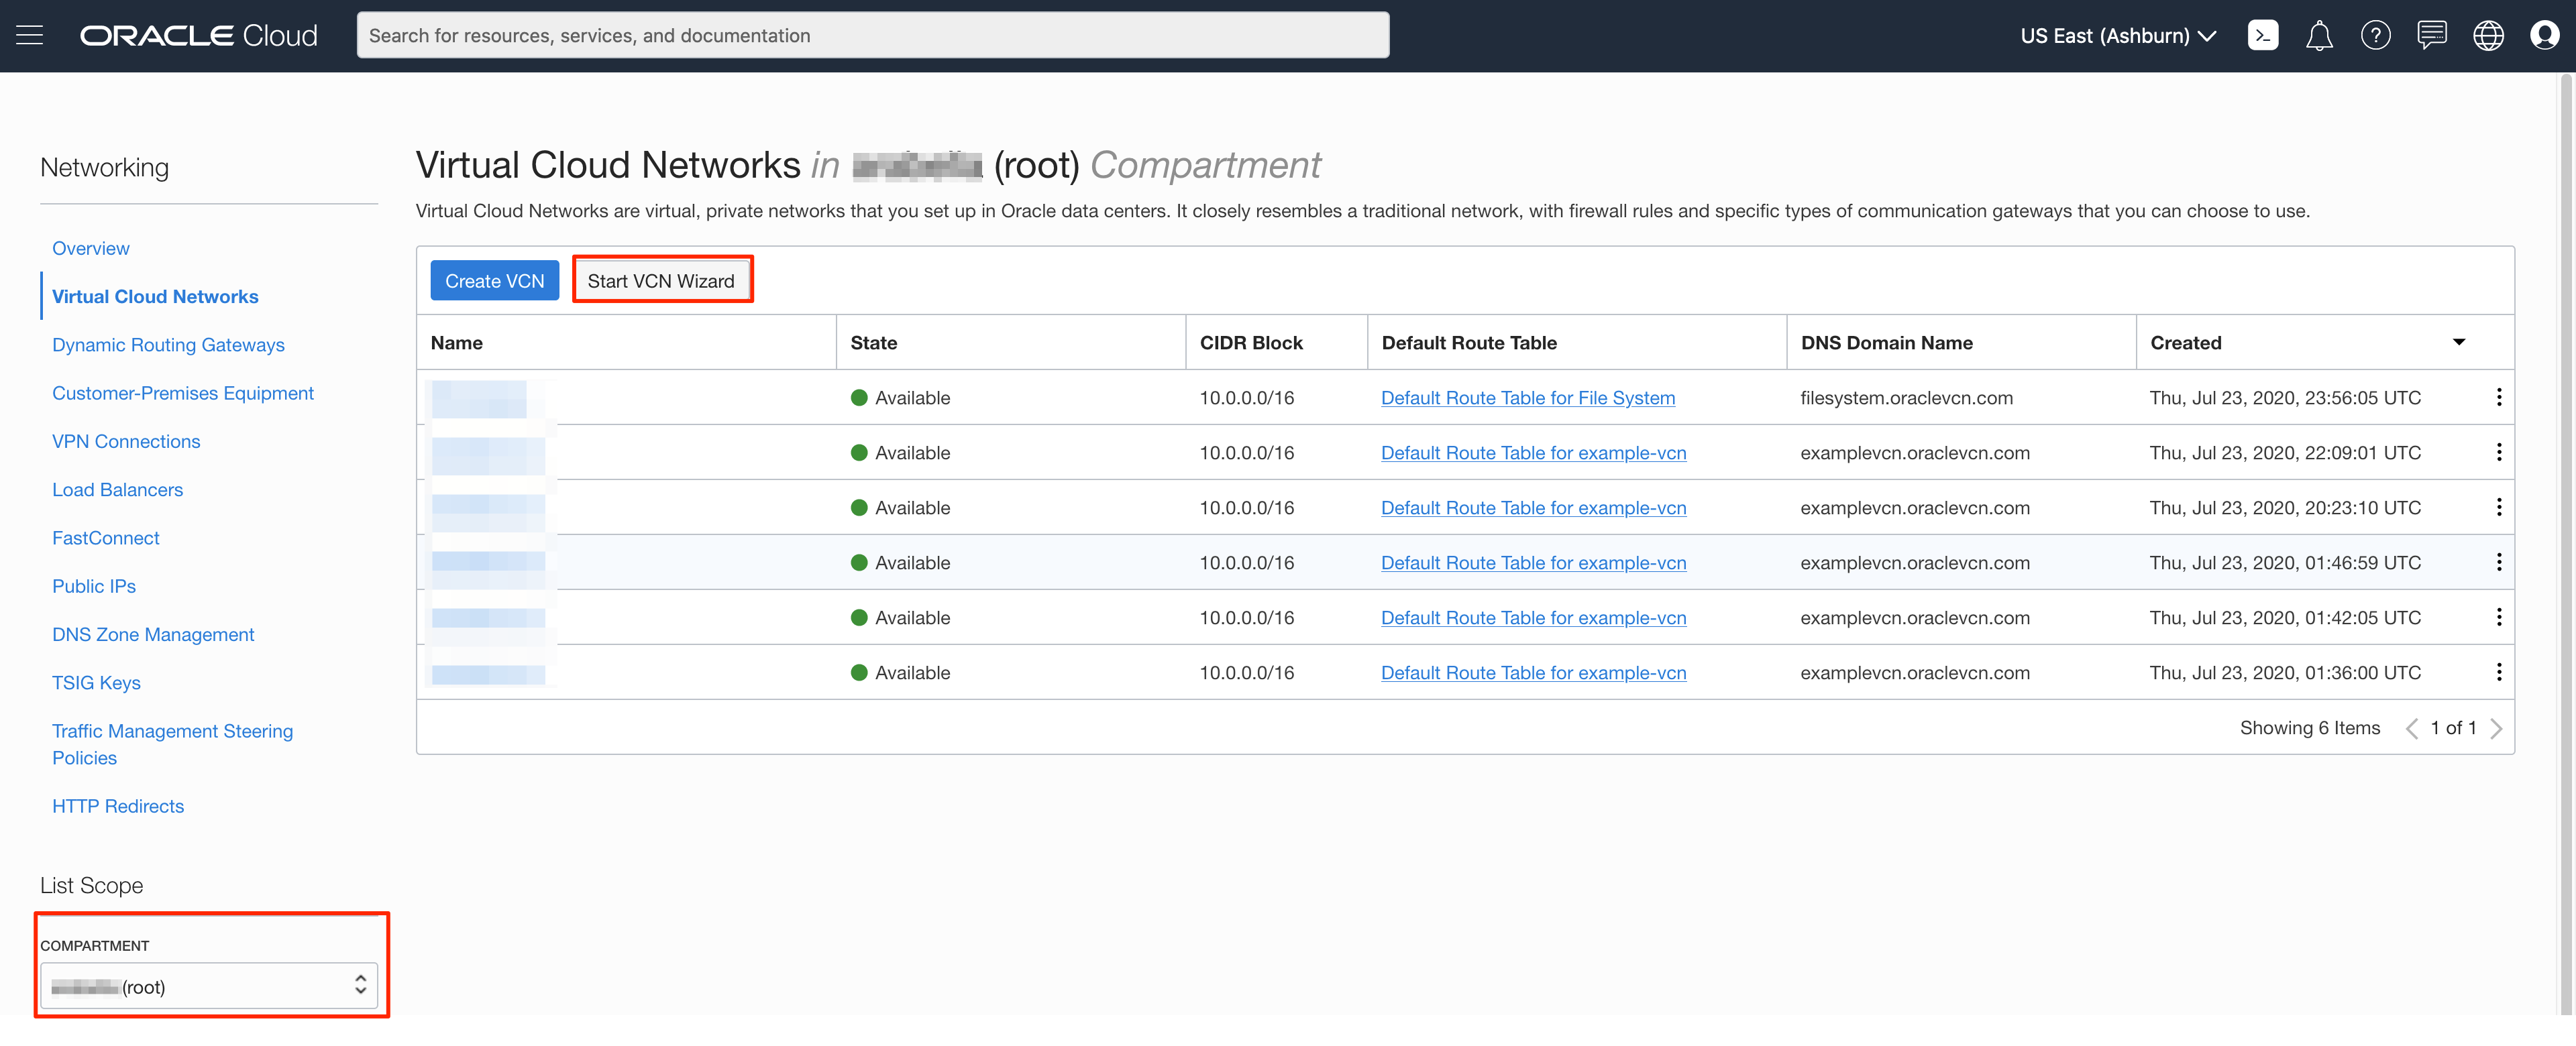
Note: Ensure that the correct compartment is selected under COMPARTMENT list.
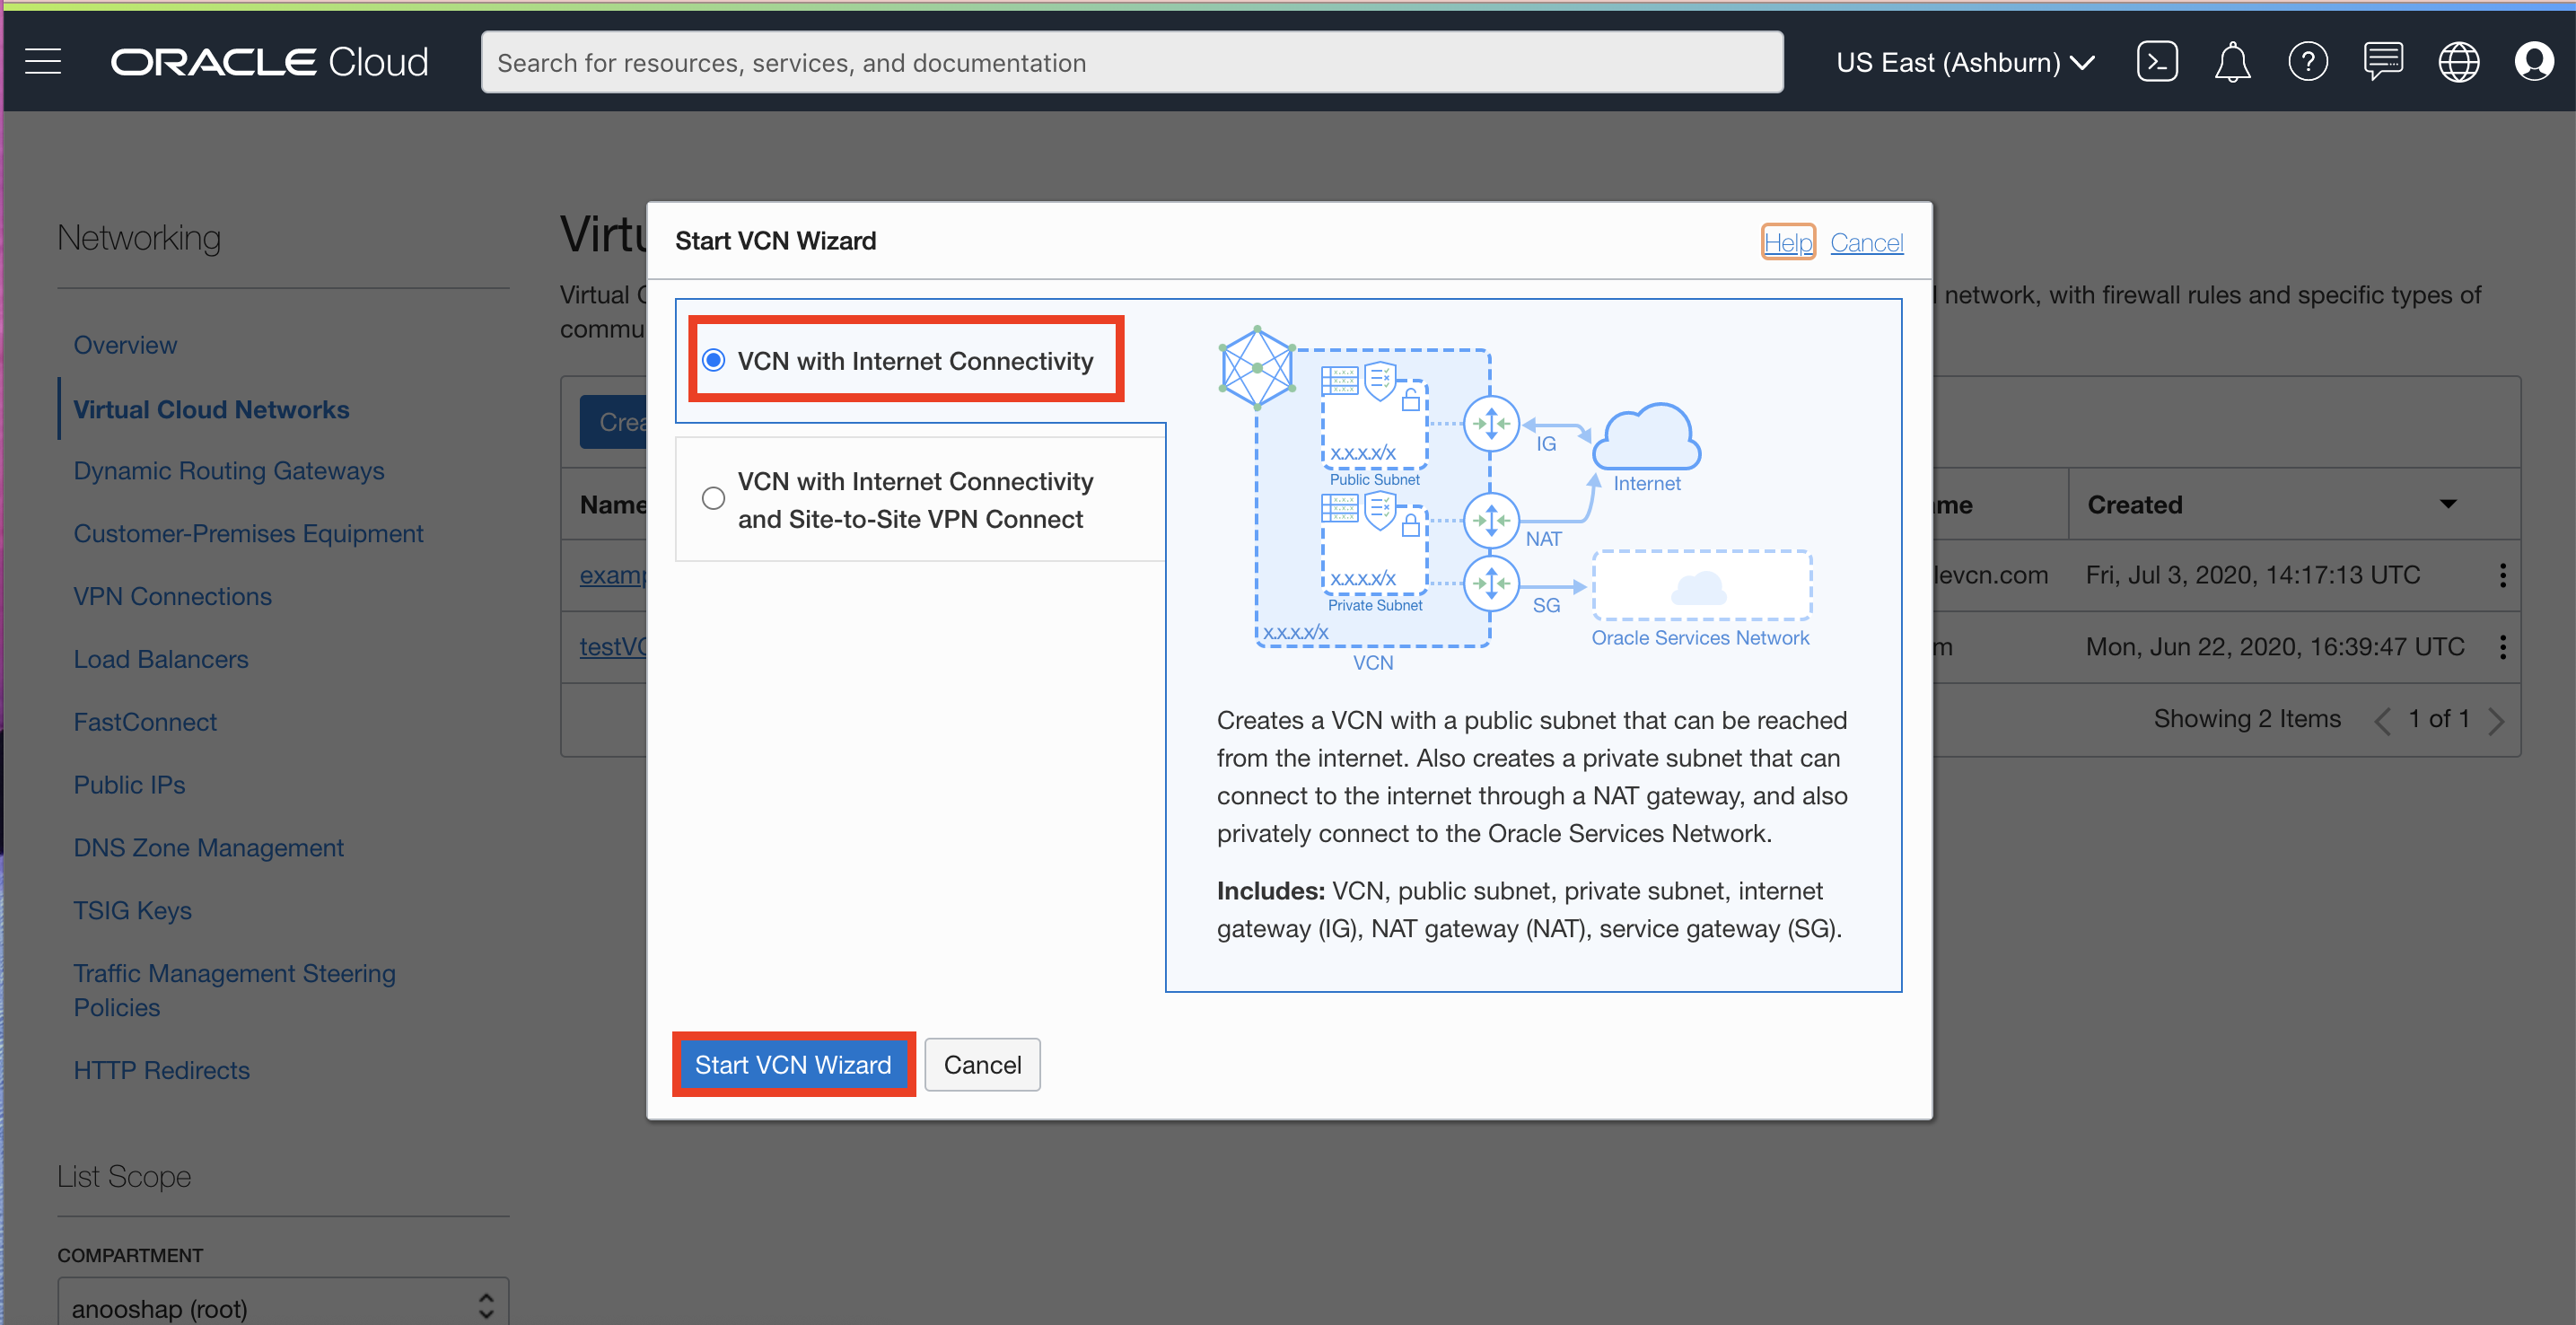
Click VCN with Internet Connectivity and click Start VCN Wizard.
Fill out the dialog box and click Next:
- VCN NAME: Provide a name
- COMPARTMENT: Ensure your compartment is selected
- VCN CIDR BLOCK: Provide a CIDR block (10.0.0.0/16)
- PUBLIC SUBNET CIDR BLOCK: Provide a CIDR block (10.0.1.0/24)
- PRIVATE SUBNET CIDR BLOCK: Provide a CIDR block (10.0.2.0/24)
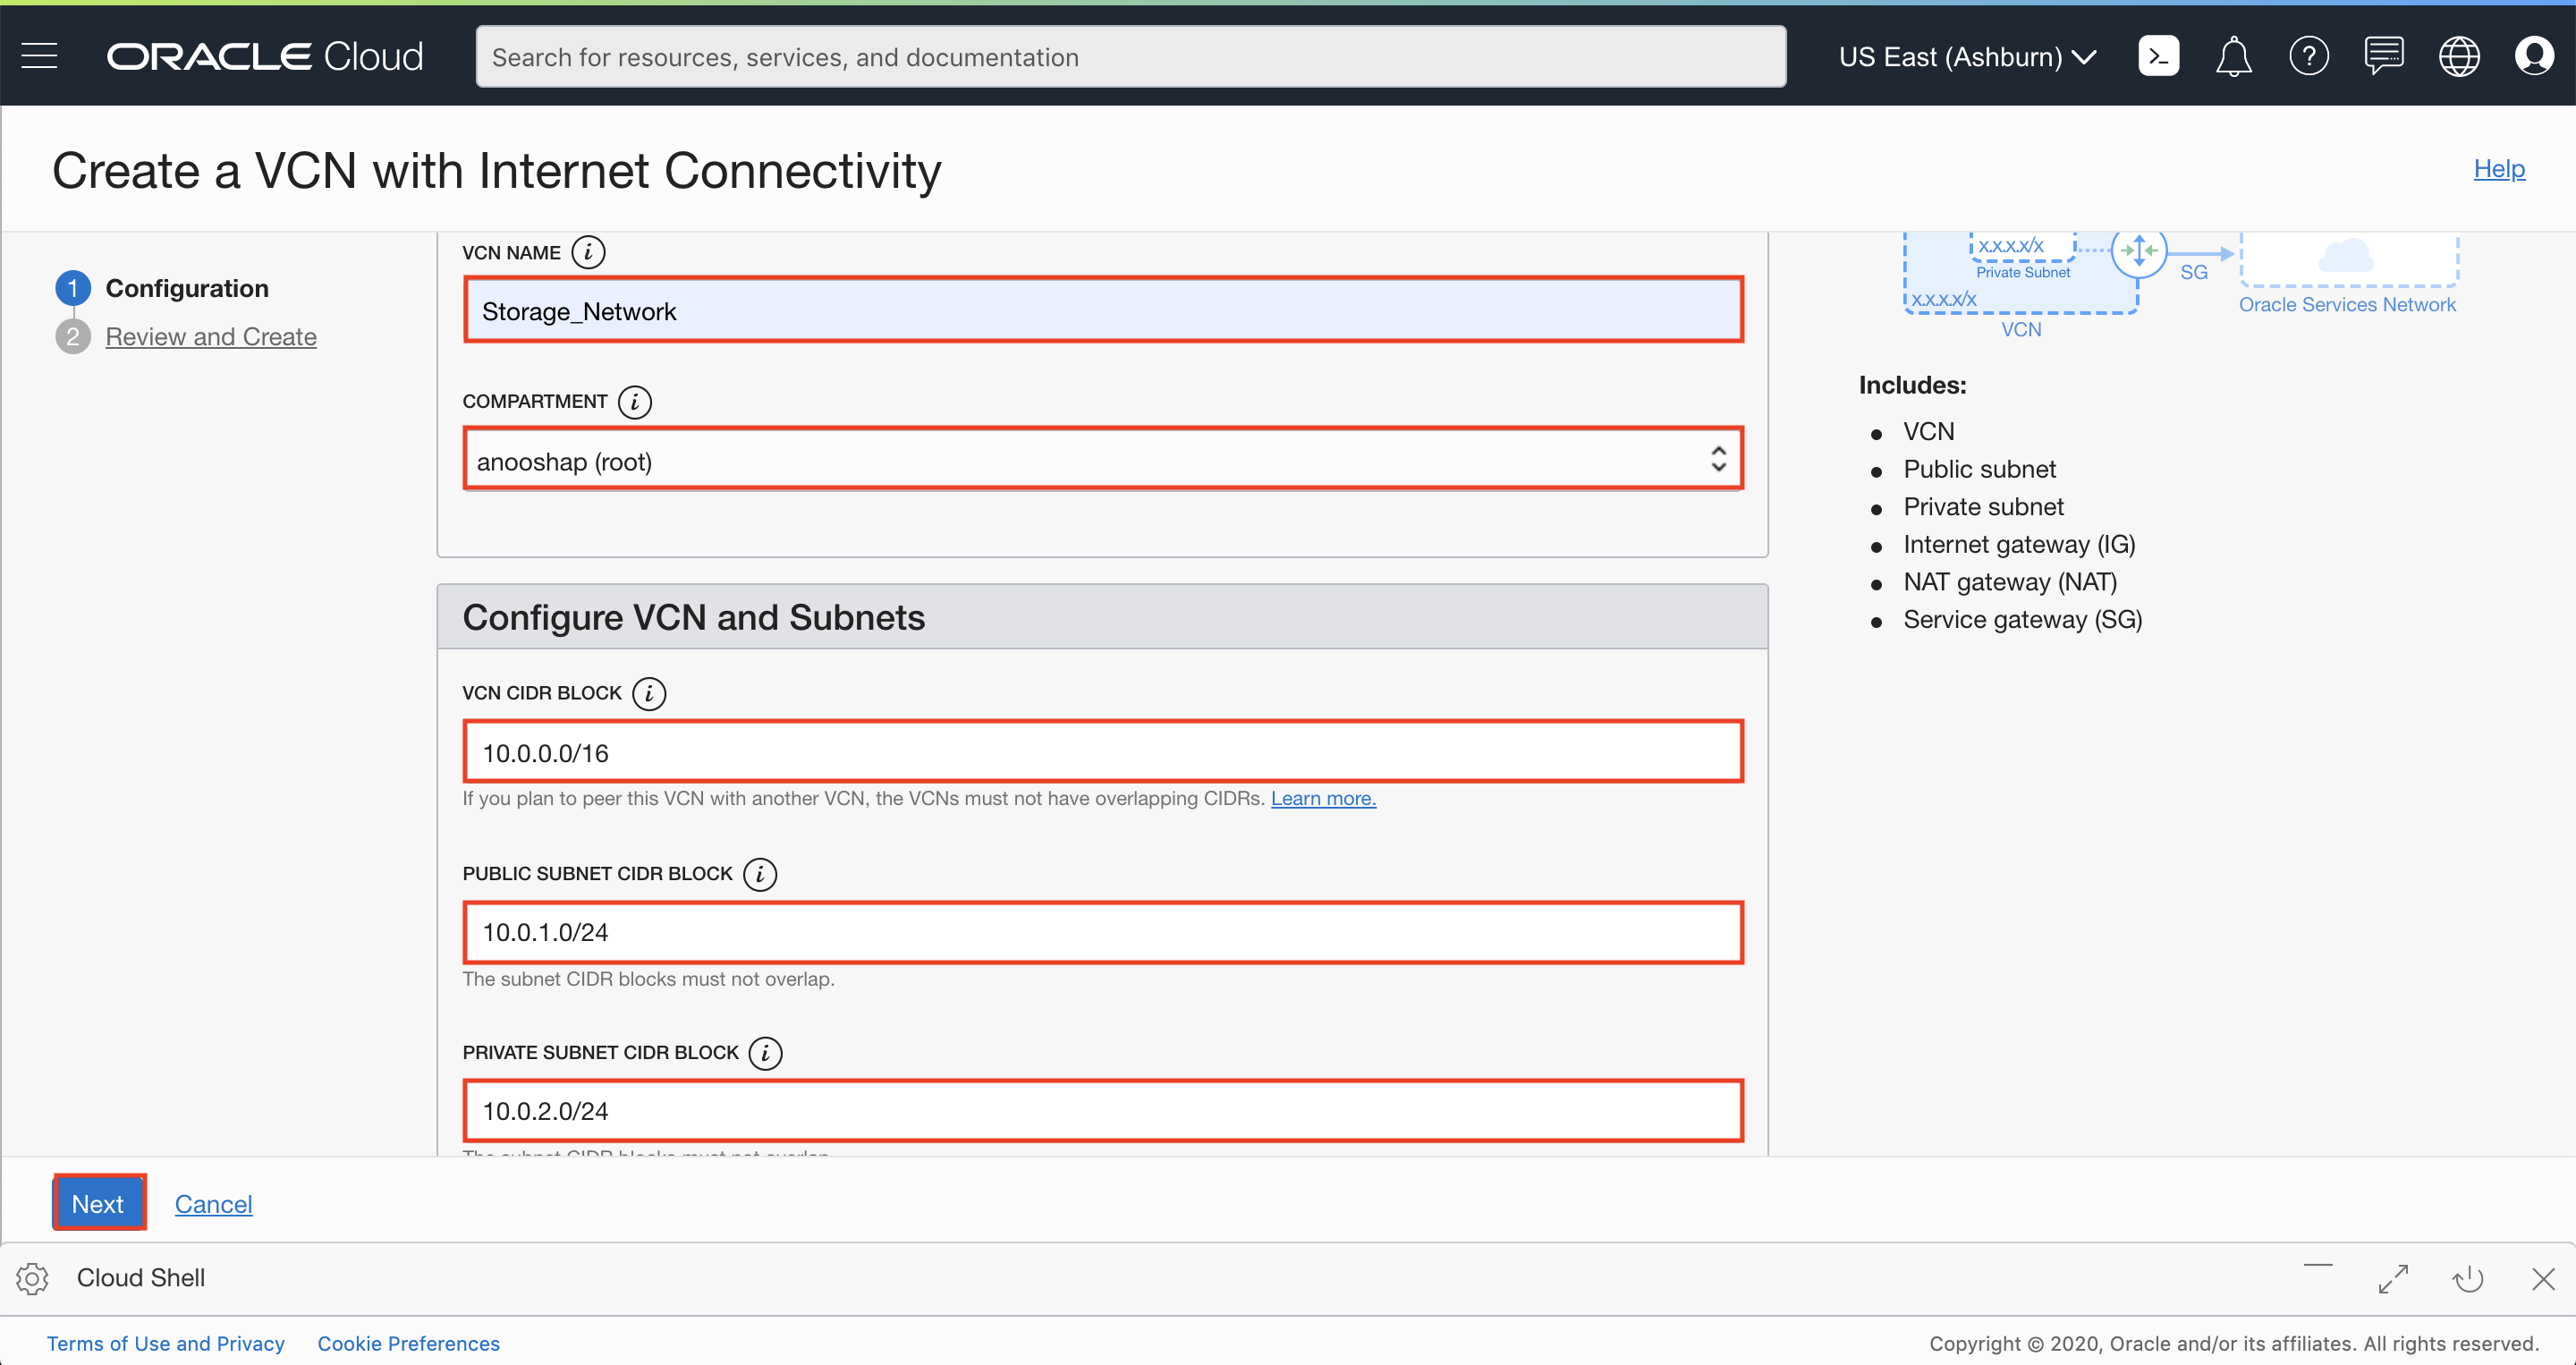
Verify all the information and click Next.
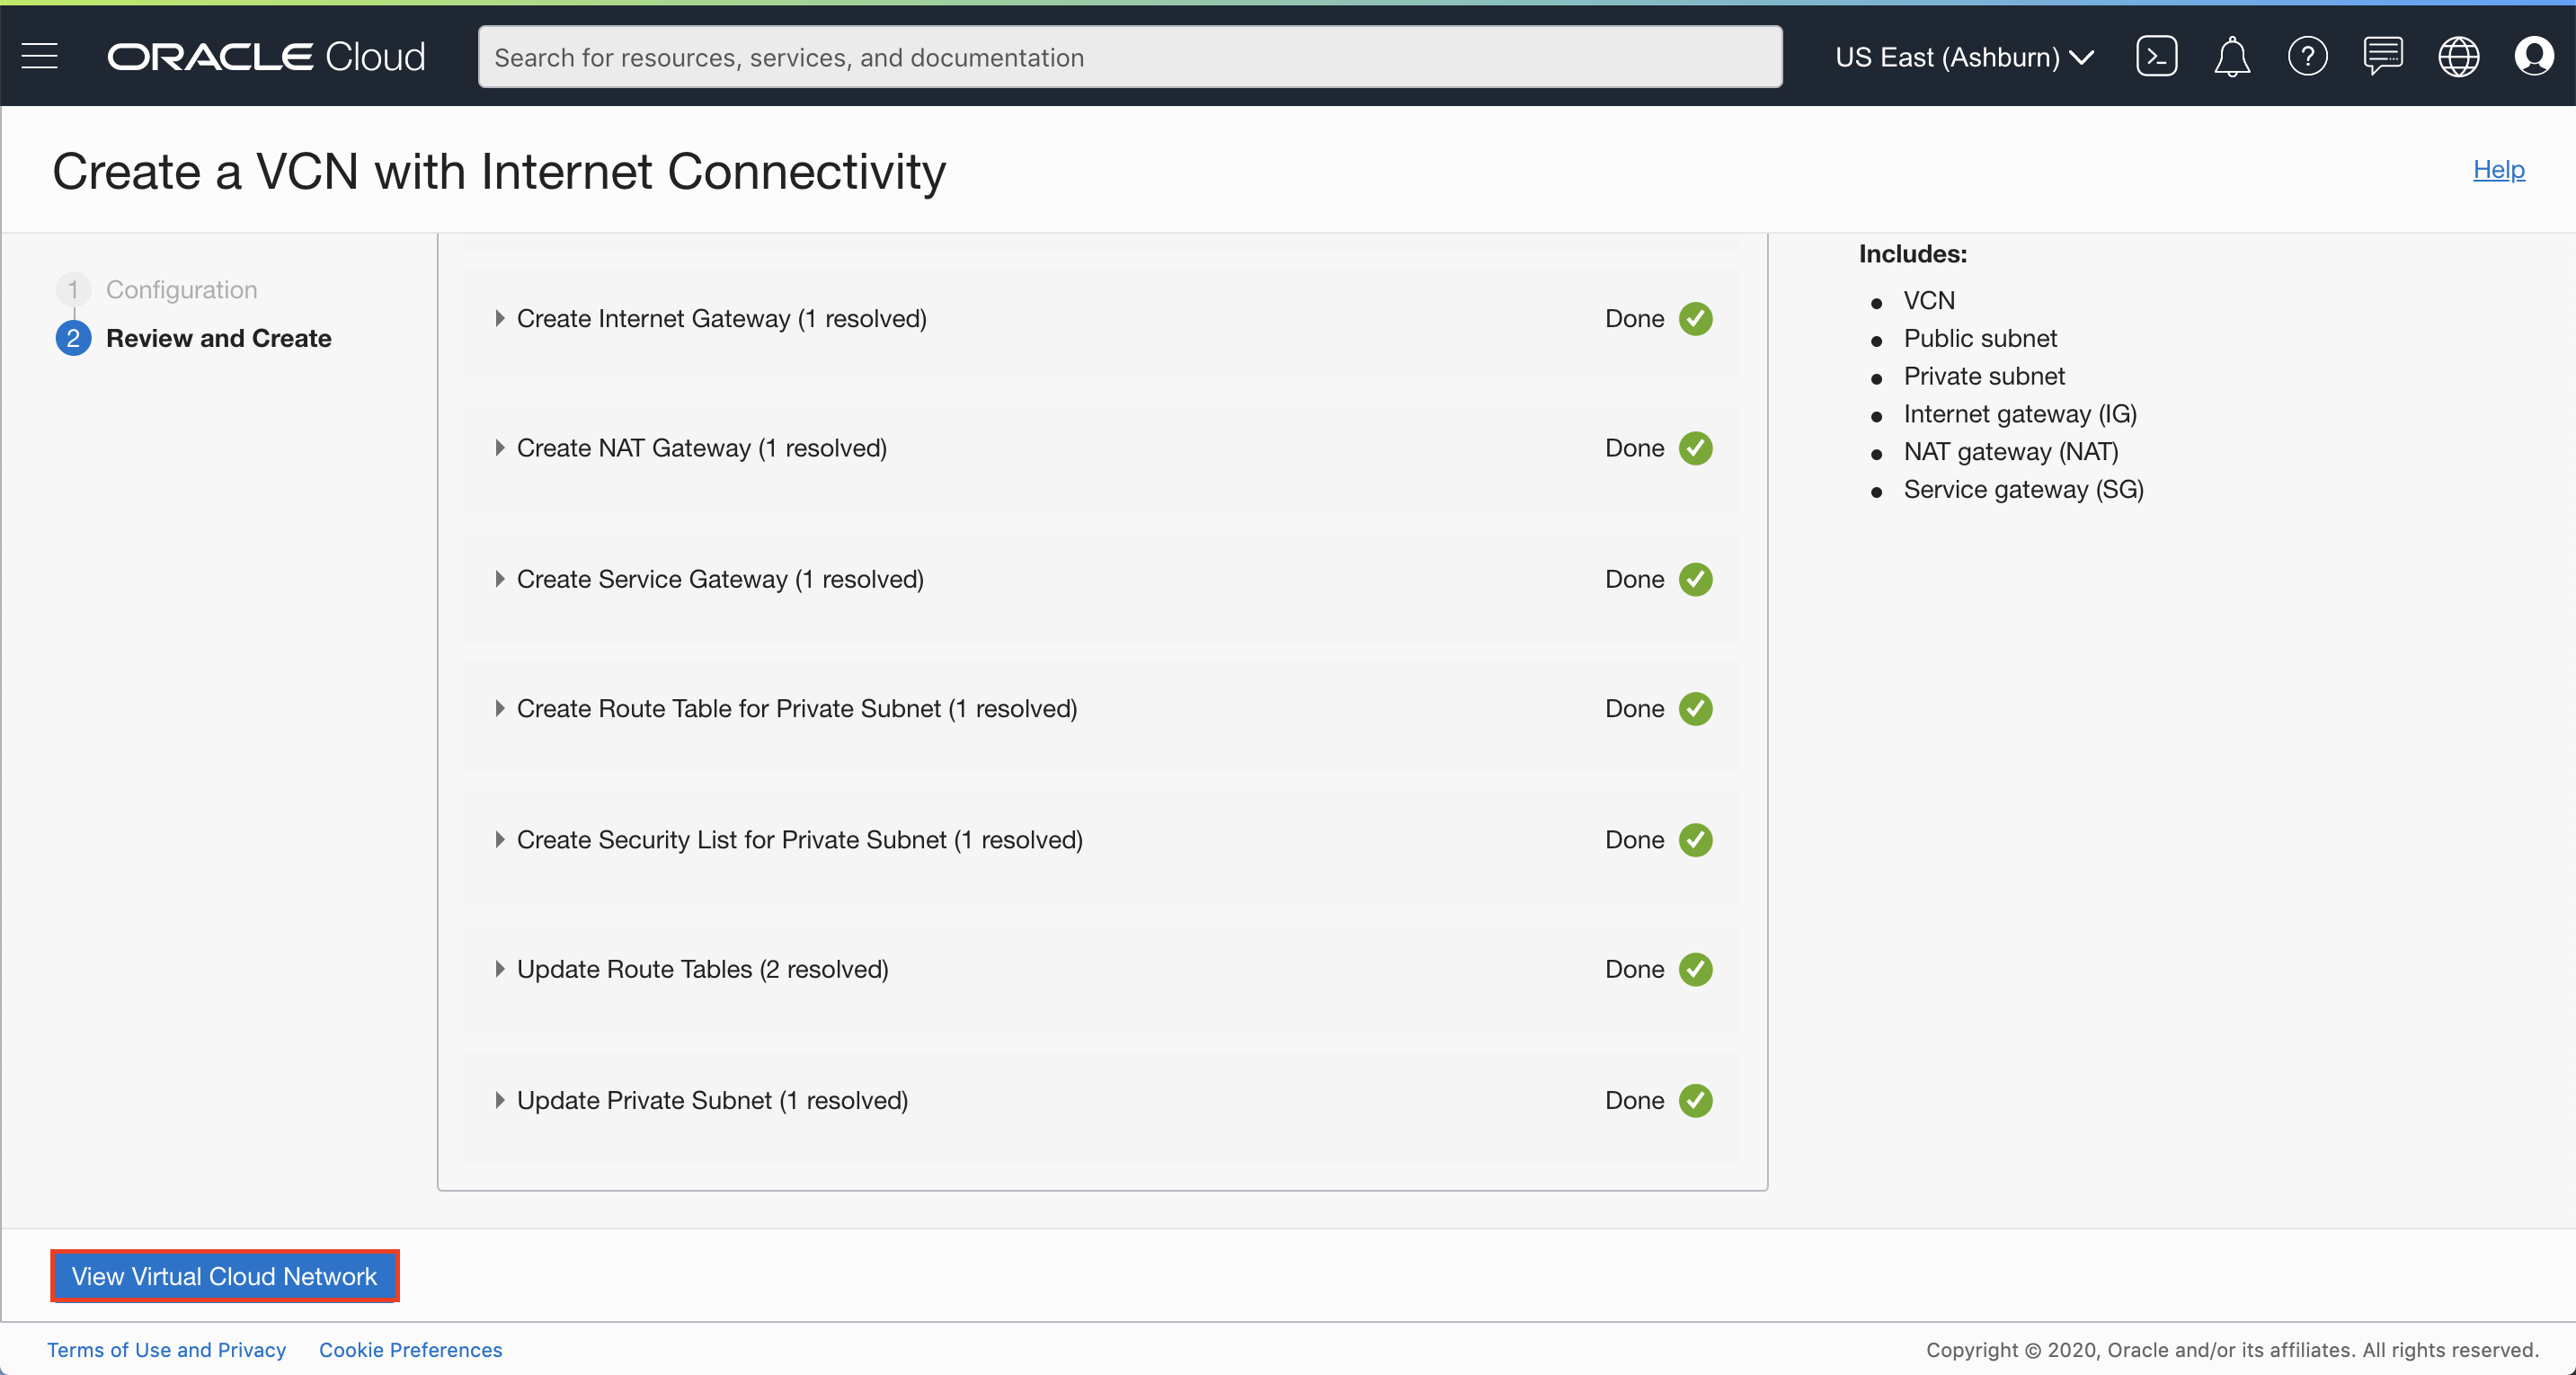
This will create a VCN with the following components: VCN, Public subnet, Private subnet, Internet gateway (IG), NAT gateway (NAT), Service gateway (SG).
Click Create.
Click View Virtual Cloud Network to display your VCN details.
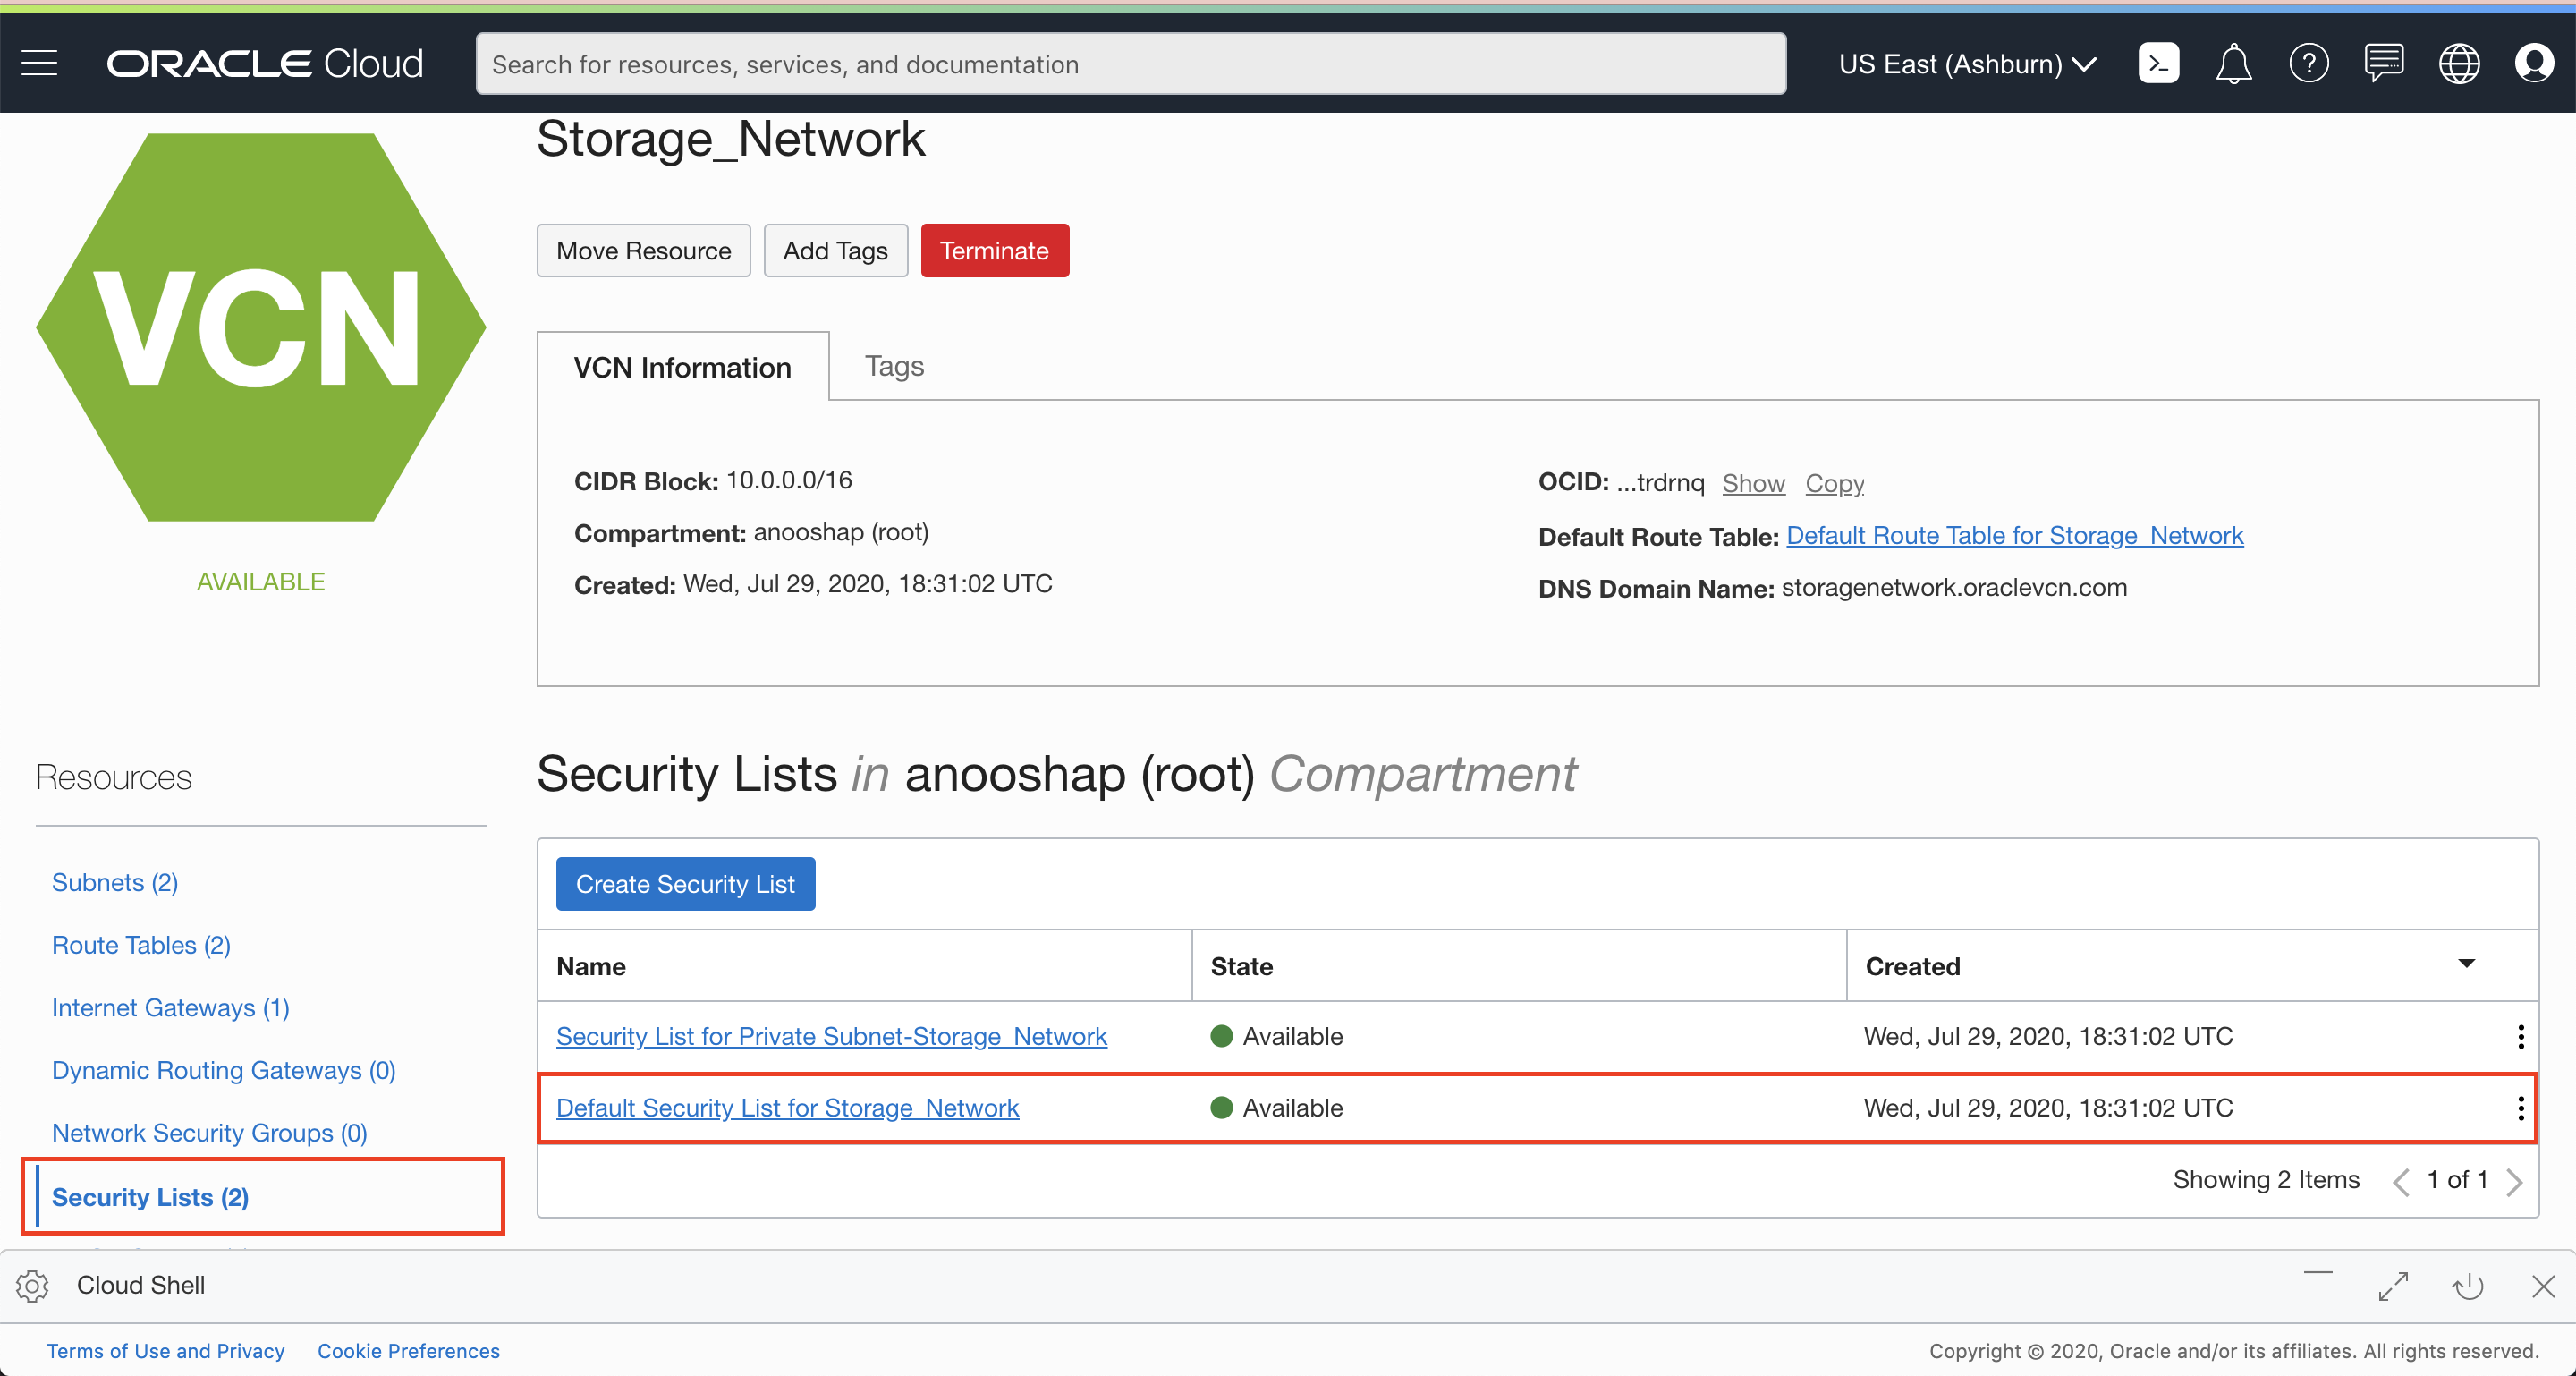
In your VCN Details page, click Security Lists and then Default Security list for YOUR_VCN_NAME.
In Security List Details page, click Add Ingress Rules.
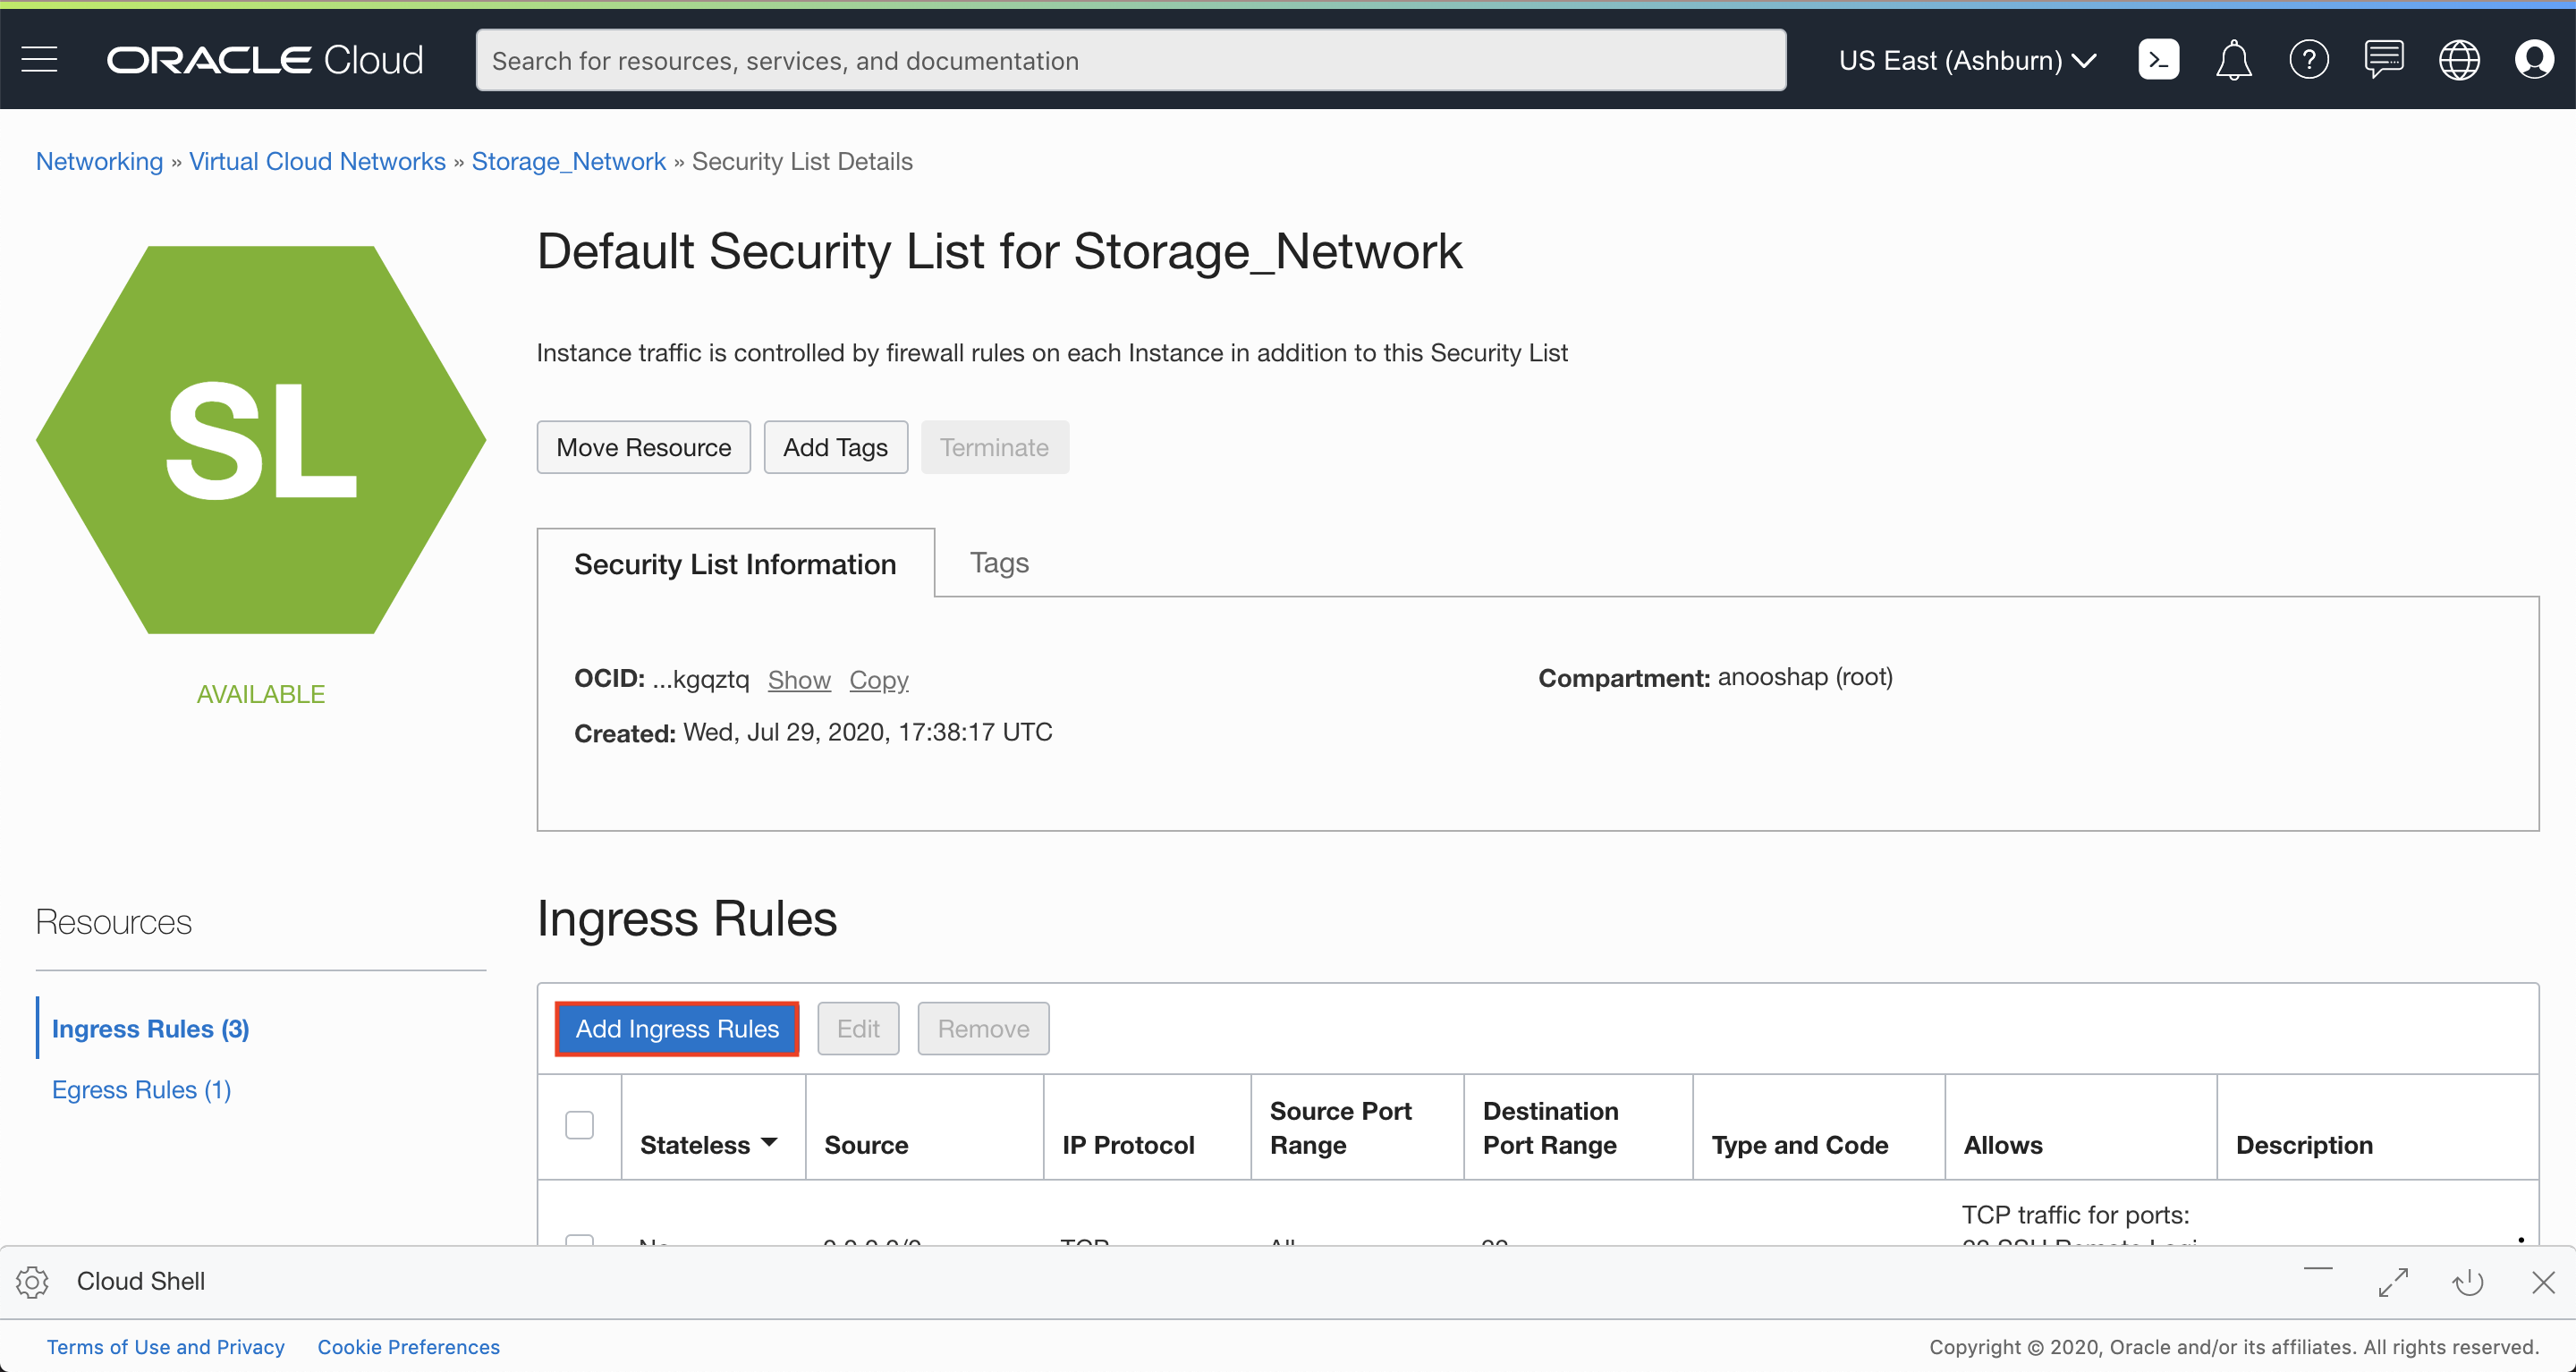
Click + Additional Ingress Rule and add the two rules below:
Note: You will be adding TWO Ingress Rules so do not click the blue confirm Add Ingress Rule button until you finish adding both rules.
Rule #1 for access of NFS and NLM traffic with Destination Port Range of 2048-2050. Type the values:
- Make sure STATELESS Flag in un-checked
- SOURCE TYPE: CIDR
- SOURCE CIDR: 10.0.0.0/16
- IP PROTOCOL: TCP
- SOURCE PORT RANGE: All
- DESTINATION PORT RANGE: 2048-2050
Rule #2 for allowing traffic to a Destination Port Range of 111 for the NFS
rpcbindutility.- Make sure STATELESS Flag in un-checked
- SOURCE TYPE: CIDR
- SOURCE CIDR: 10.0.0.0/16
- IP PROTOCOL: TCP
- SOURCE PORT RANGE: All
- DESTINATION PORT RANGE: 111
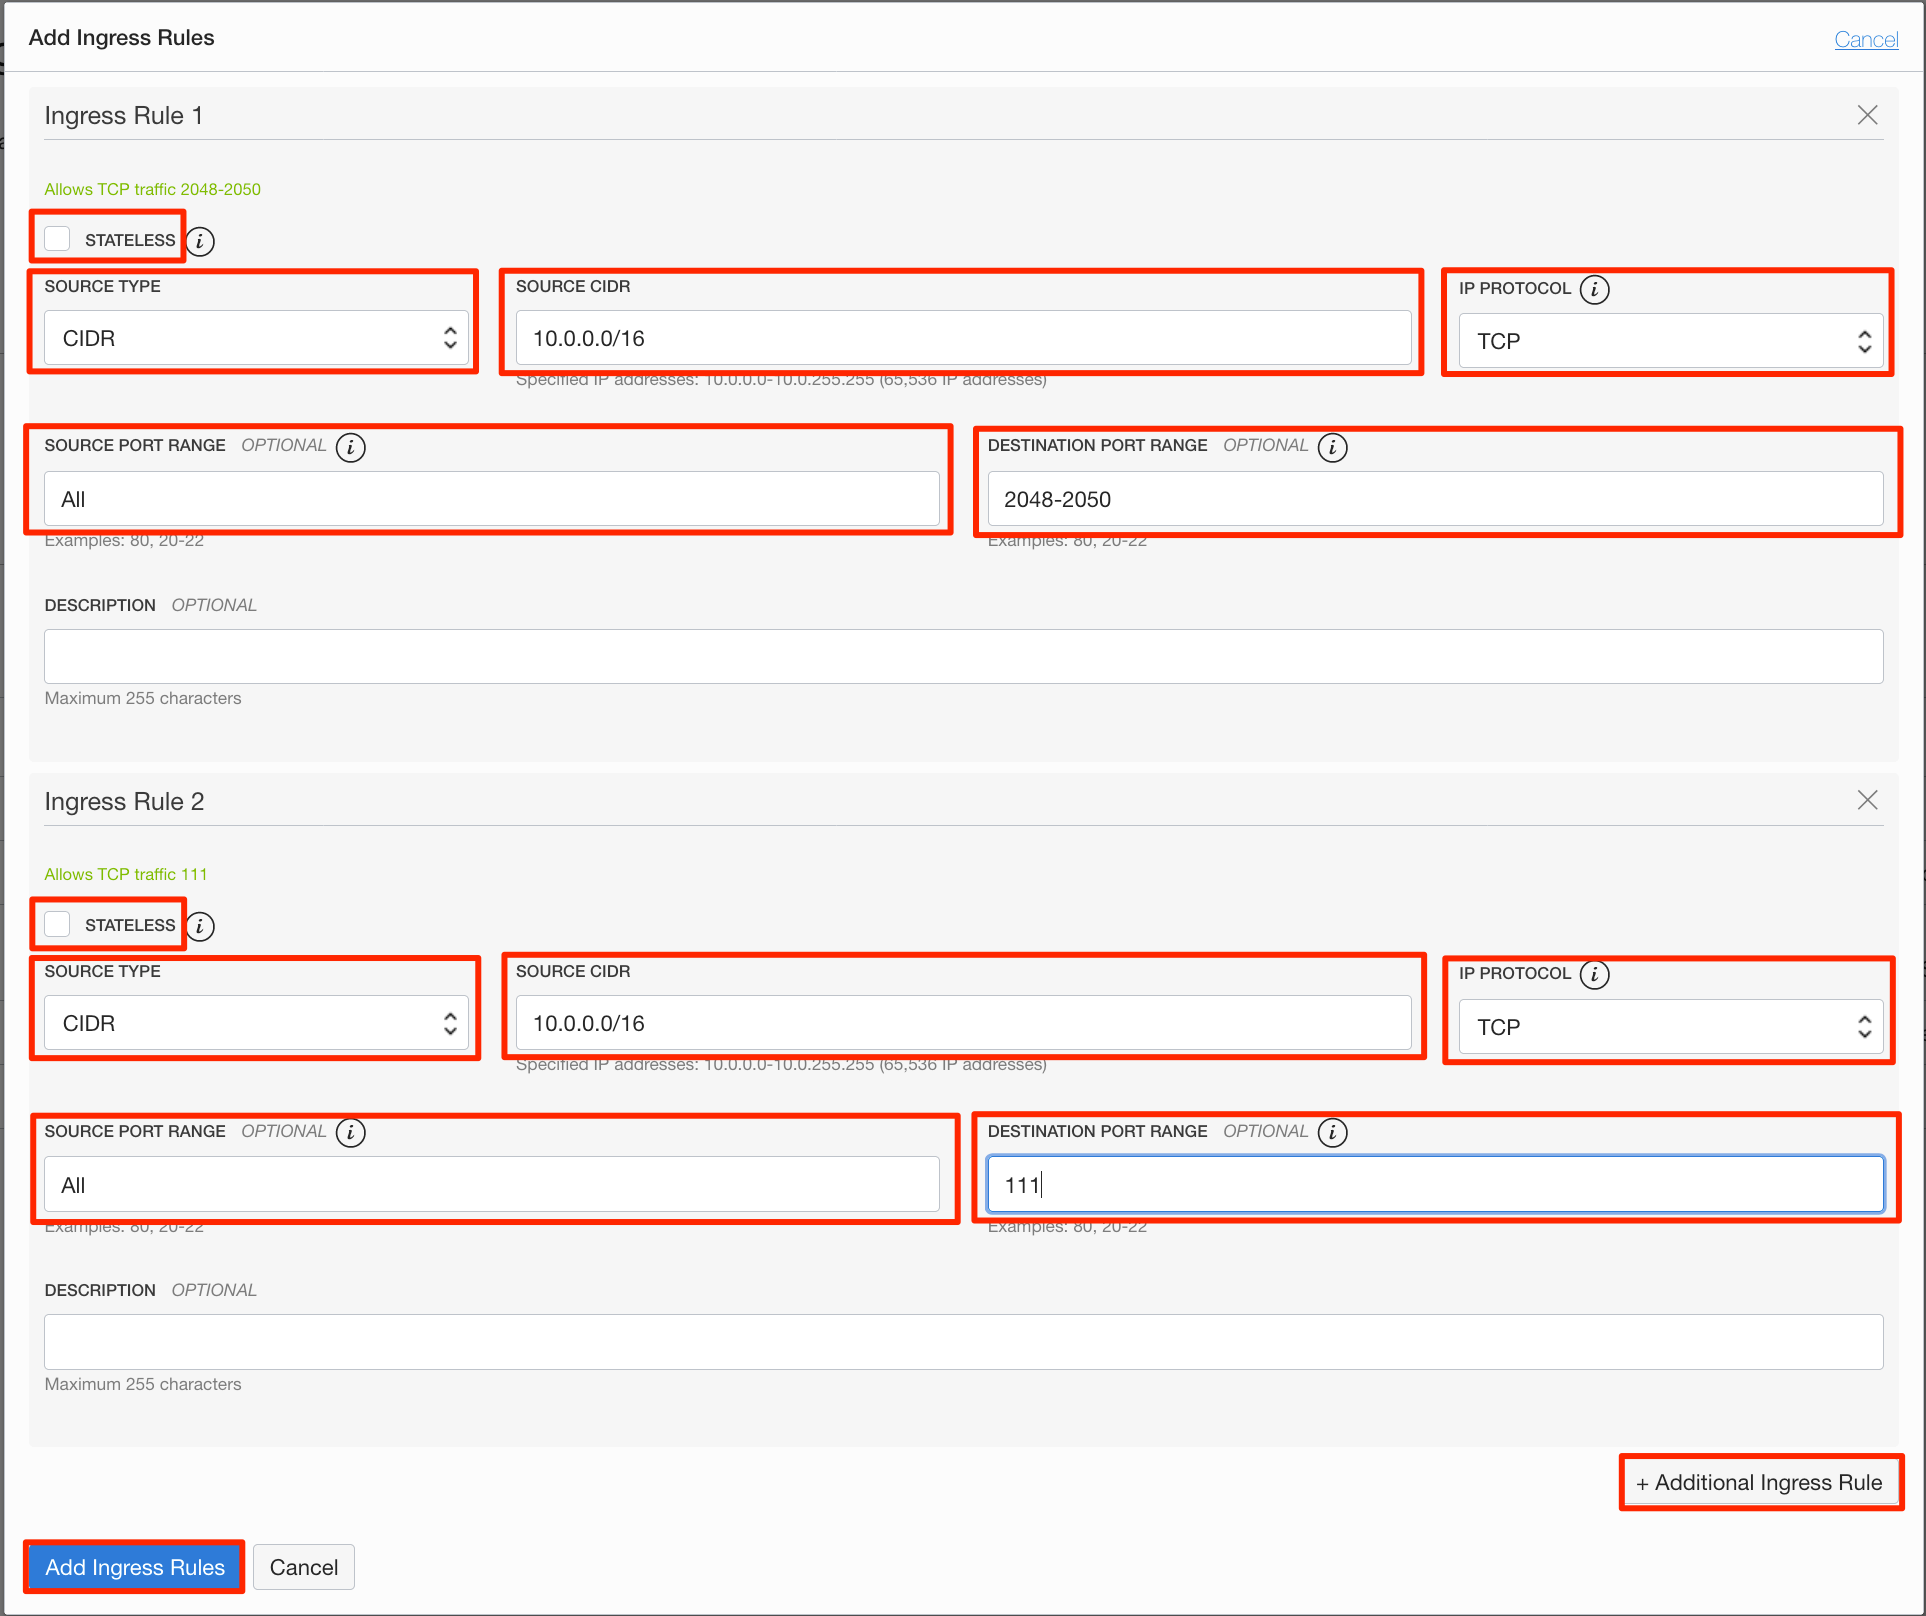
Click Add Ingress Rules.
Step 2: Create File System Storage
In this section, we will create a file system storage.
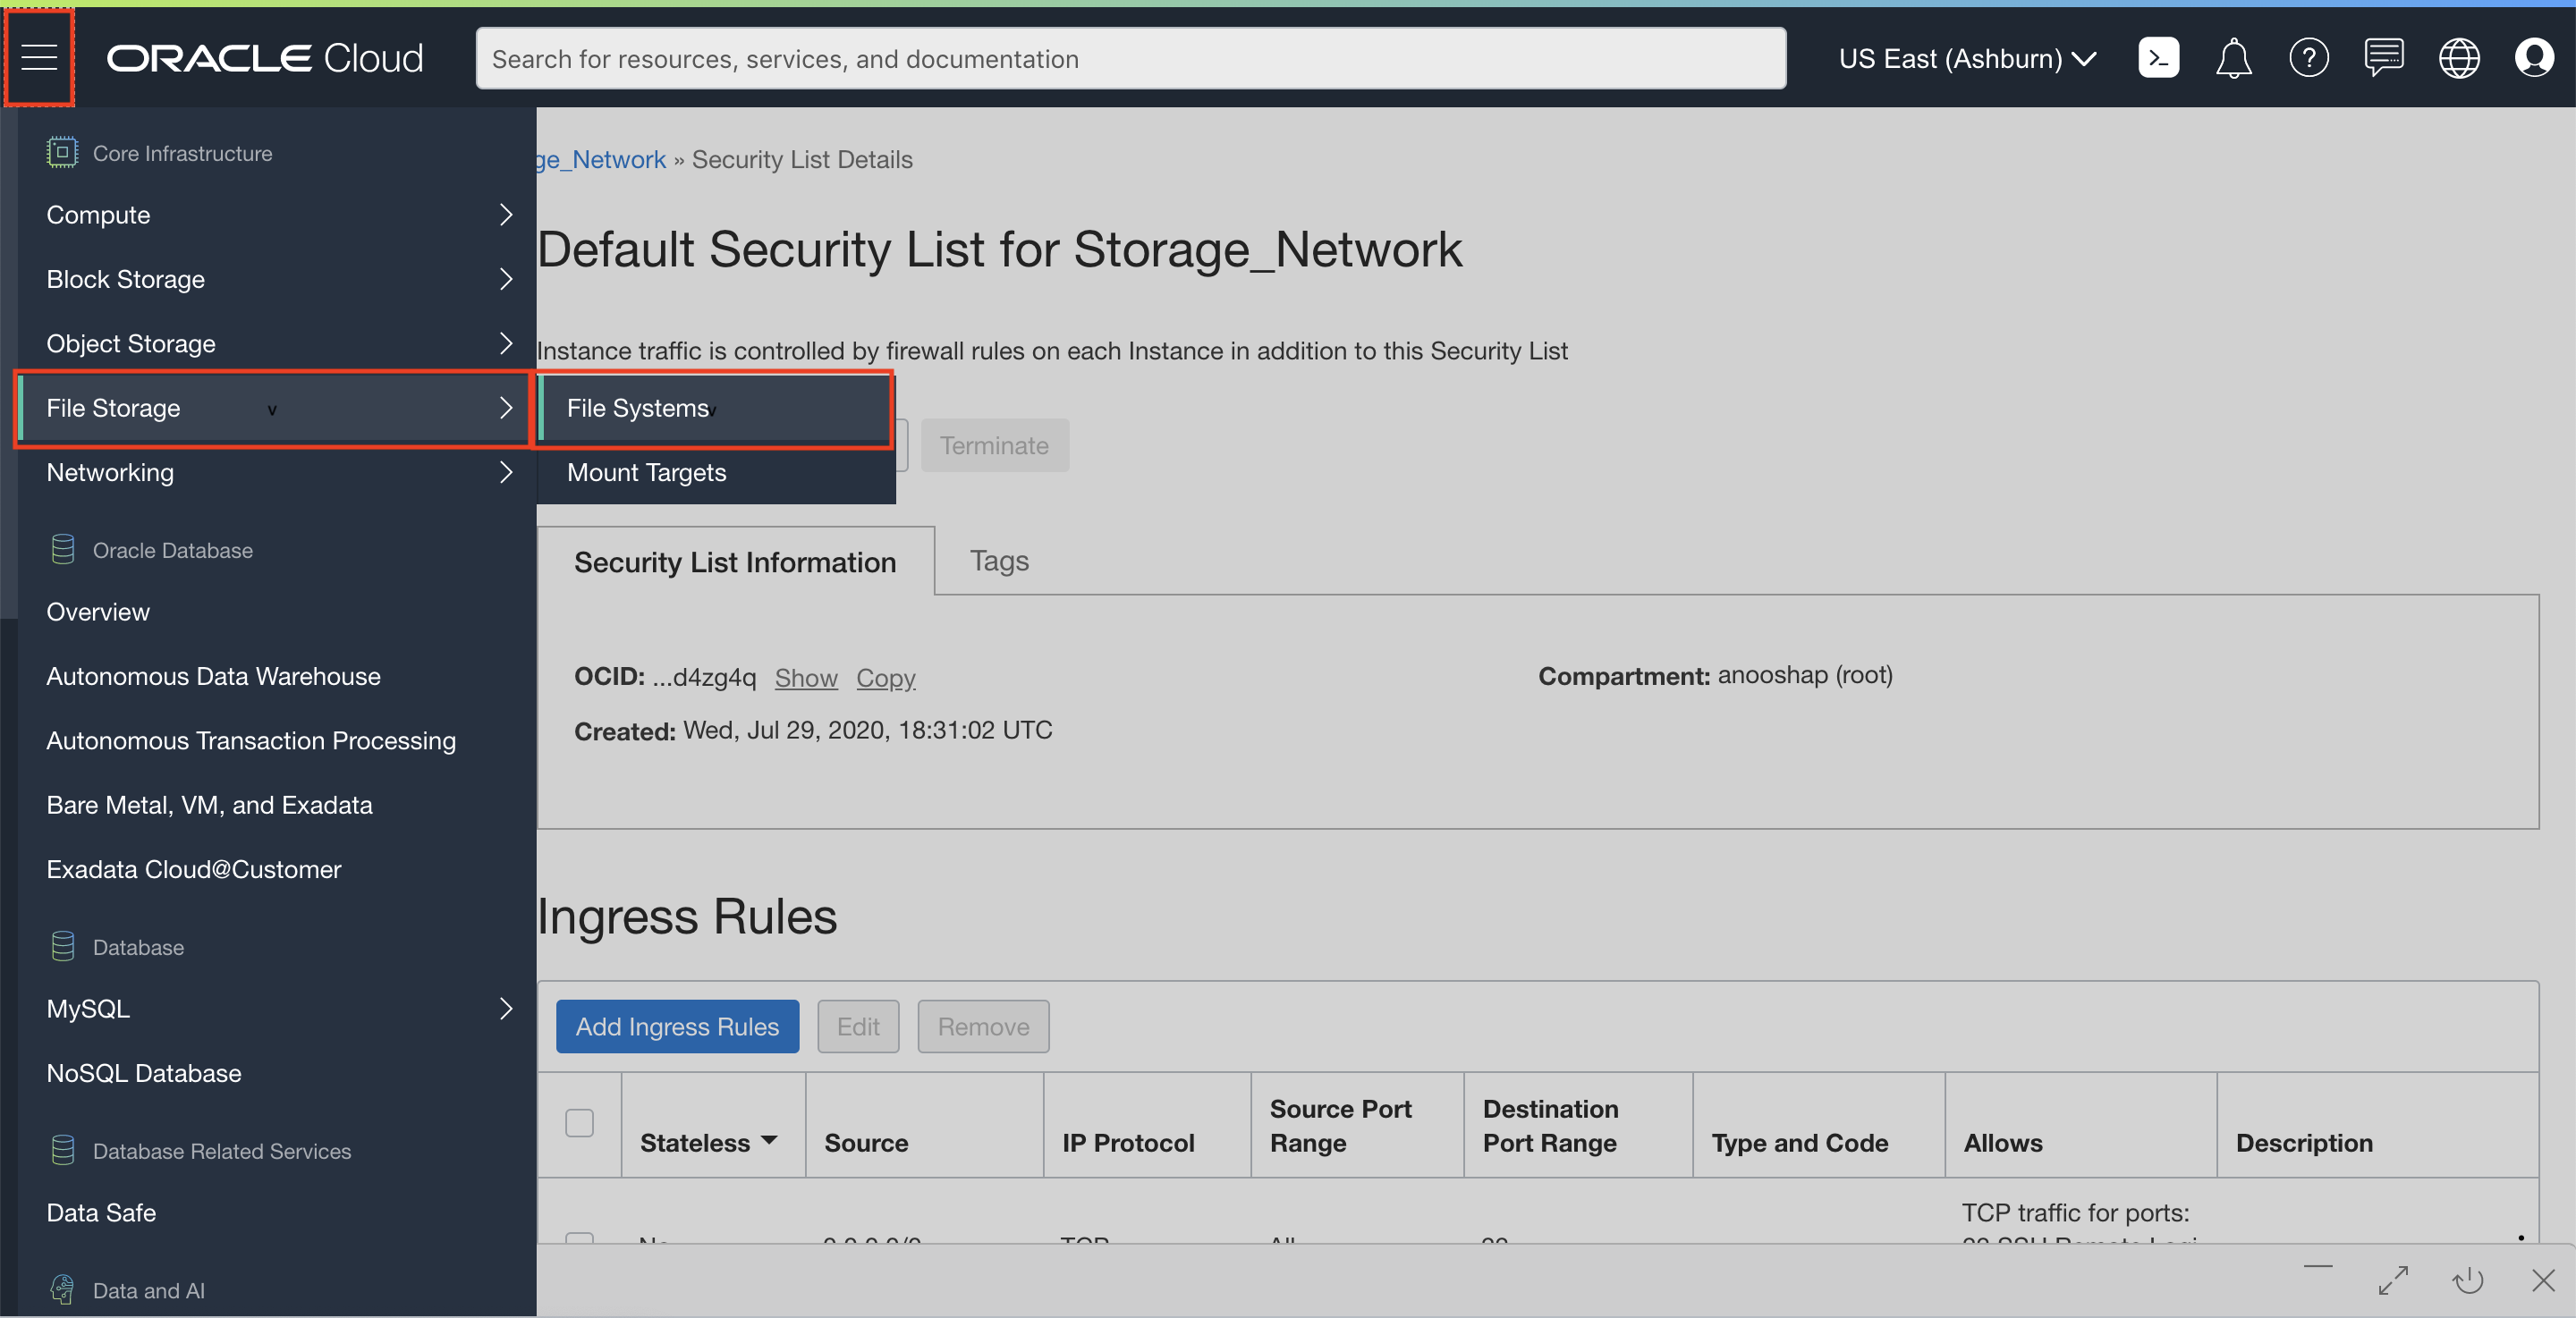
In OCI Console, click the navigation button to open the OCI services menu. Under File Storage, click File Systems.
Click Create File System.

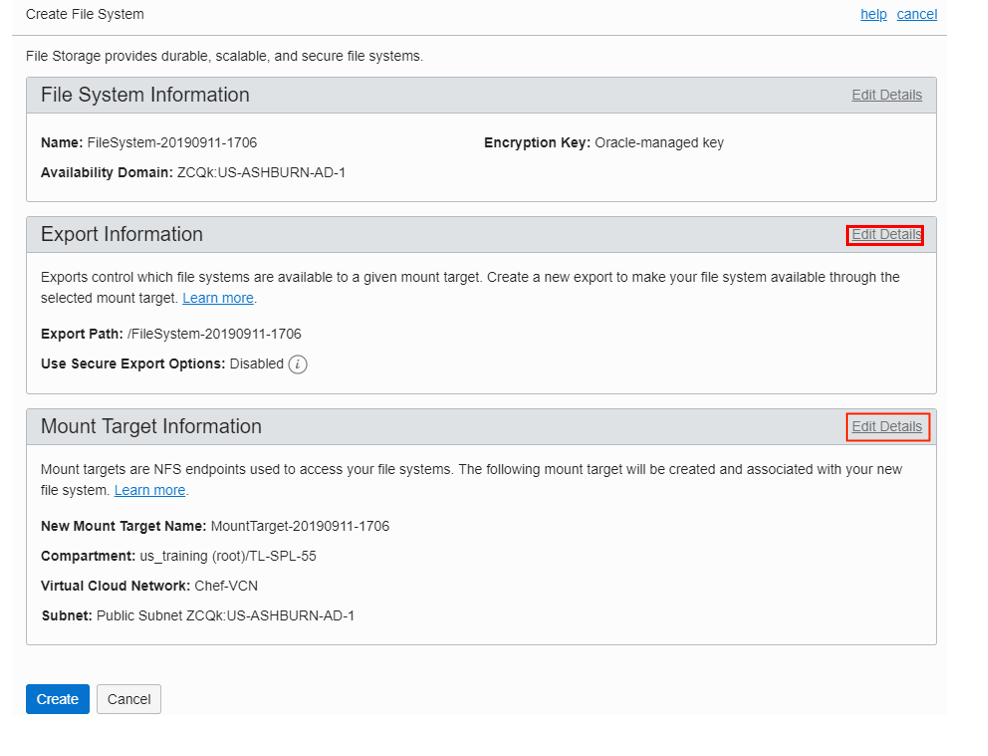
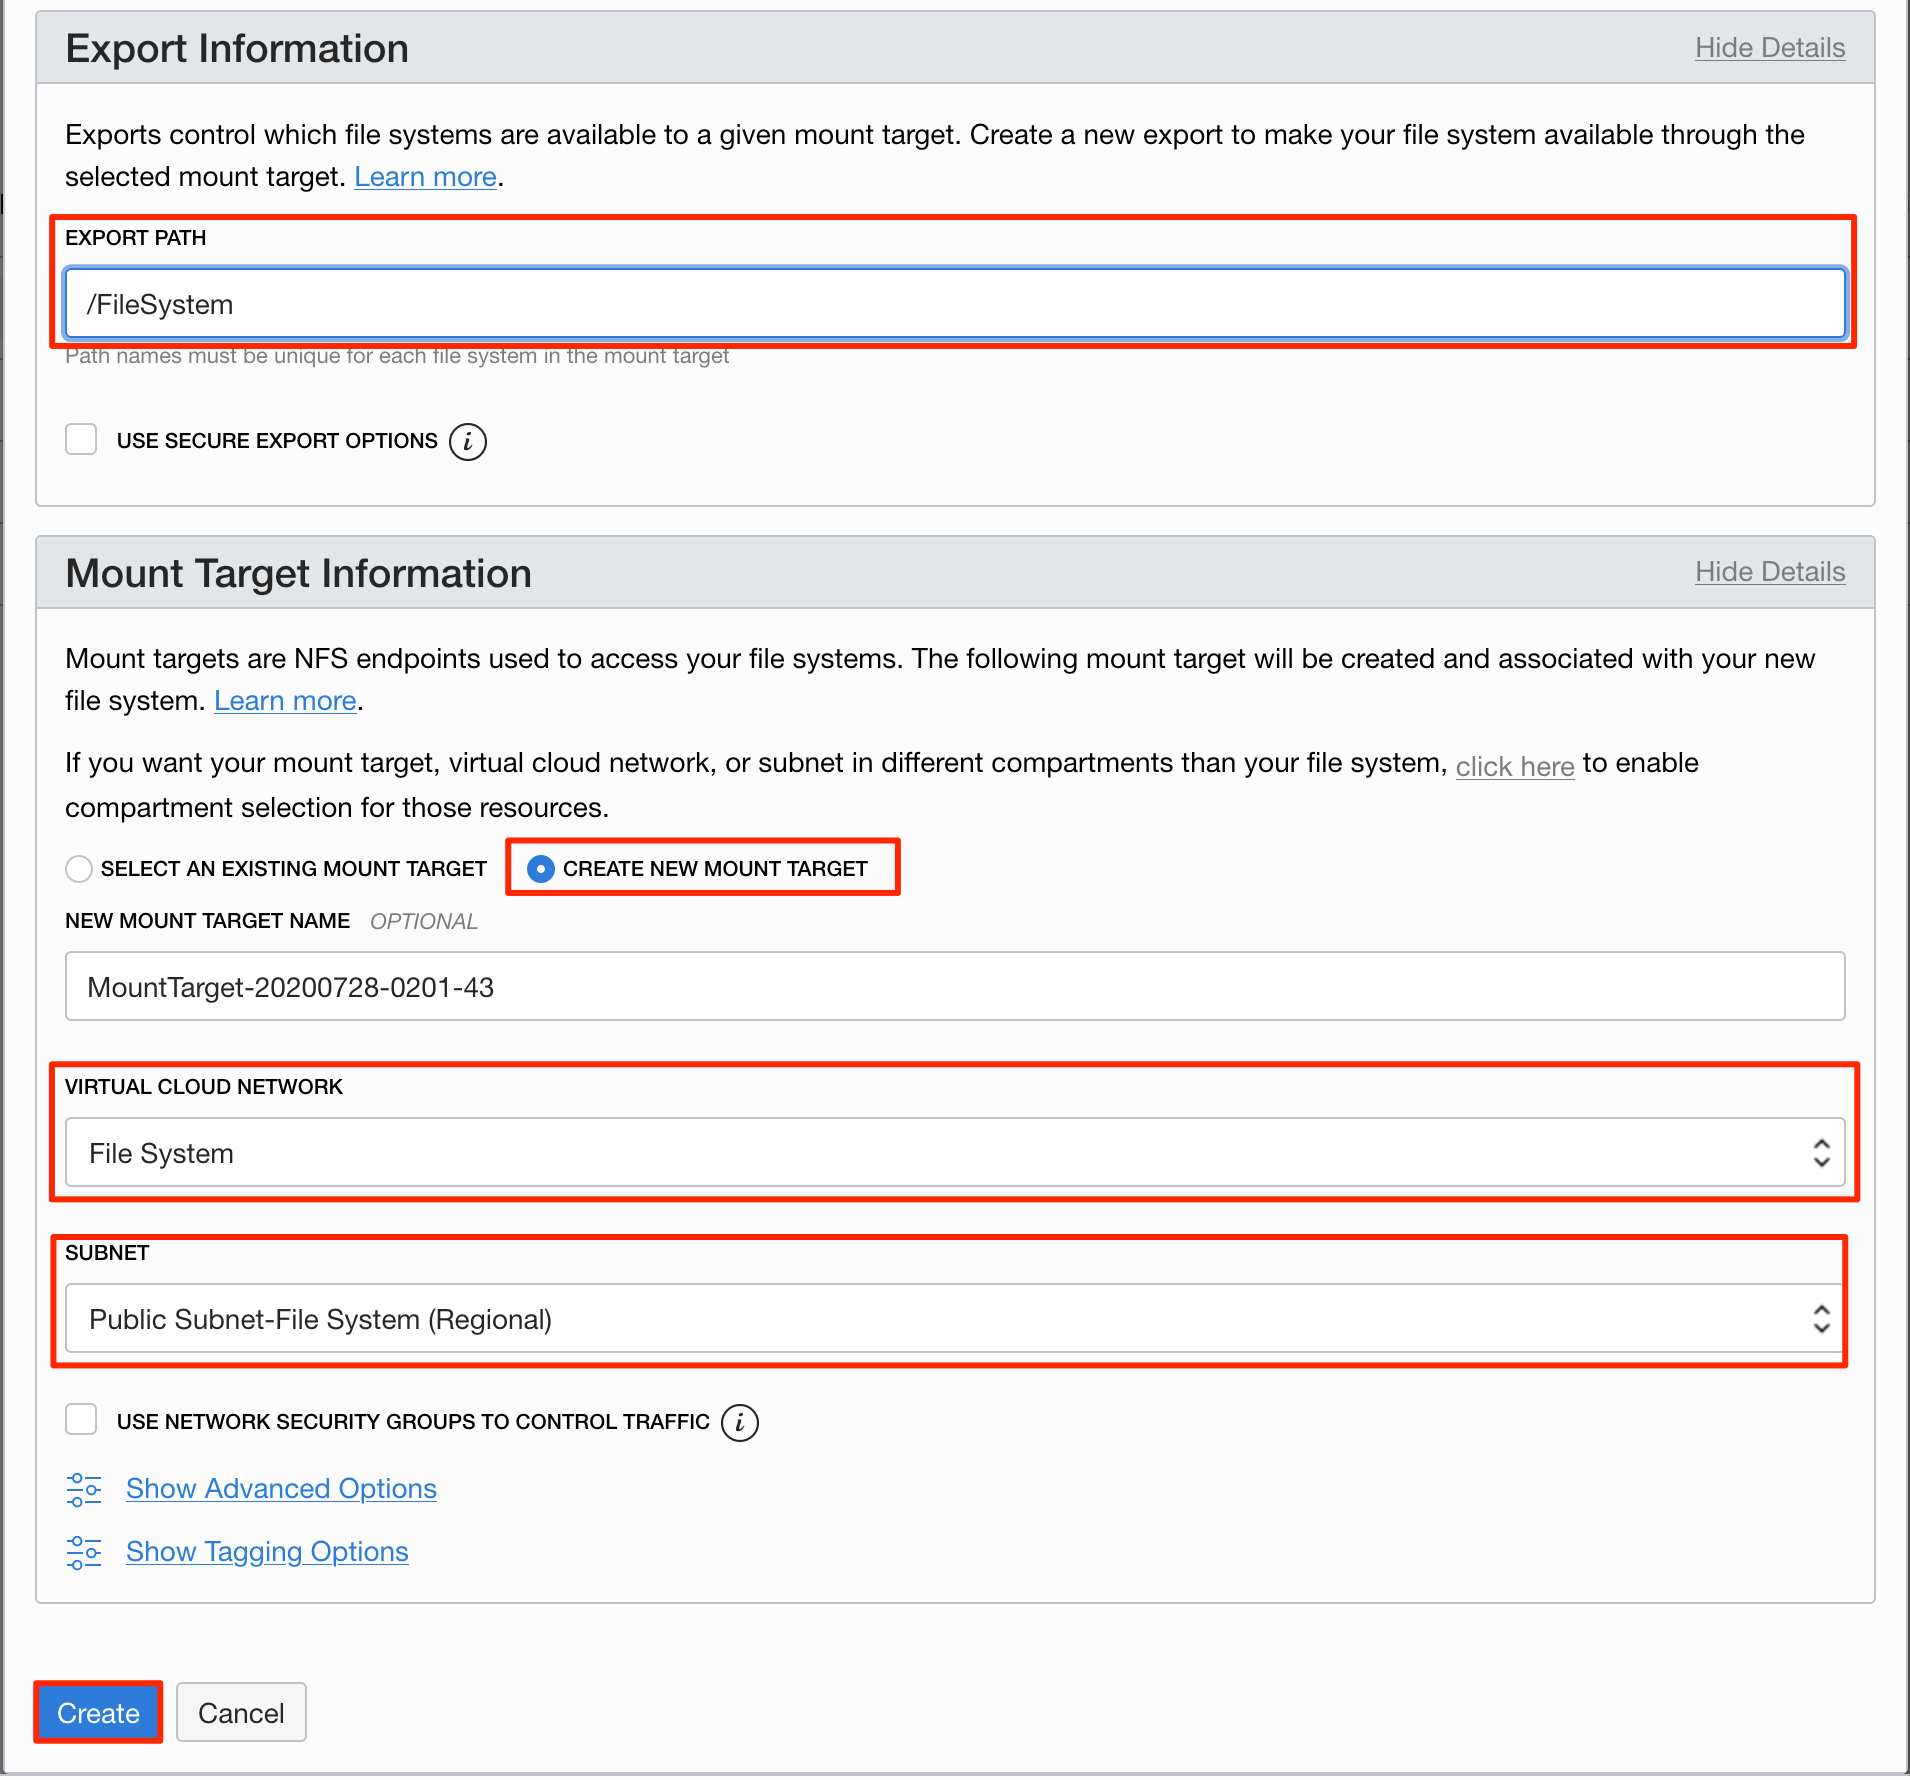
Under Export Information, click Edit Details:
- Change EXPORT PATH to an easy-to-remember name.
Under Mount Target Information, click Edit Details:
- Click CREATE NEW MOUNT TARGET, select the VCN you justed created for VIRTUAL CLOUD NETWORK.
- Choose Public Subnet-YOUR_VCN_NAME (Regional) for SUBNET.
Click Create.
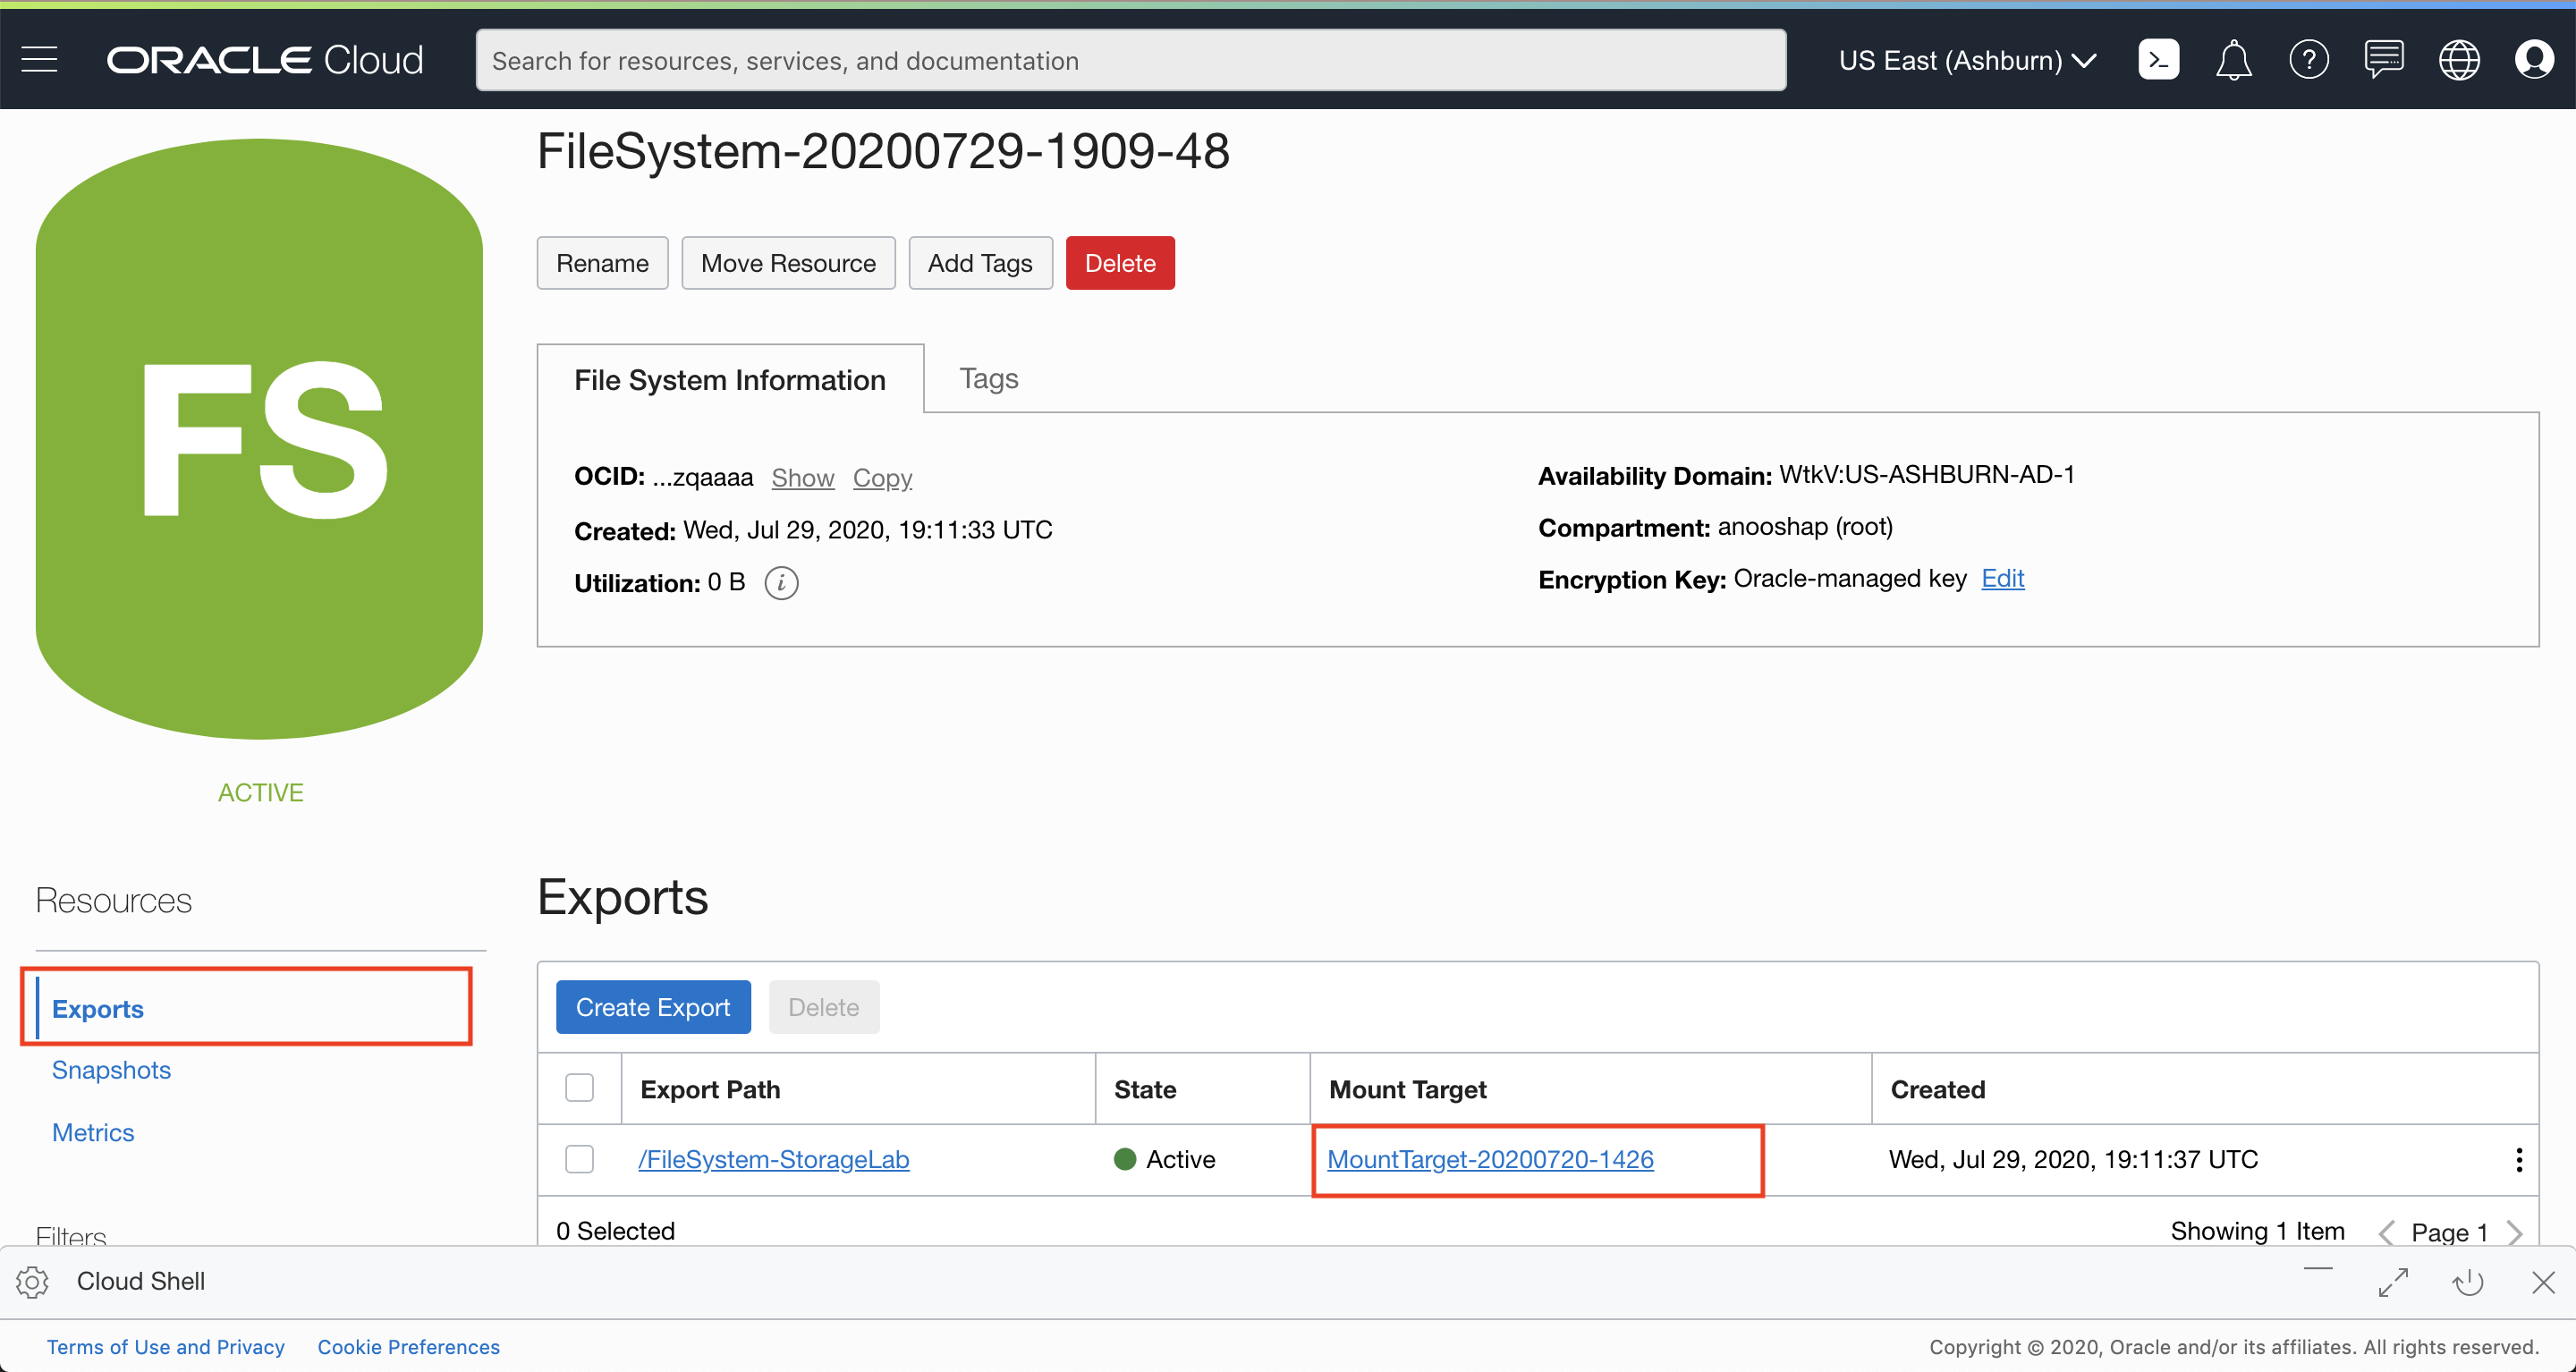
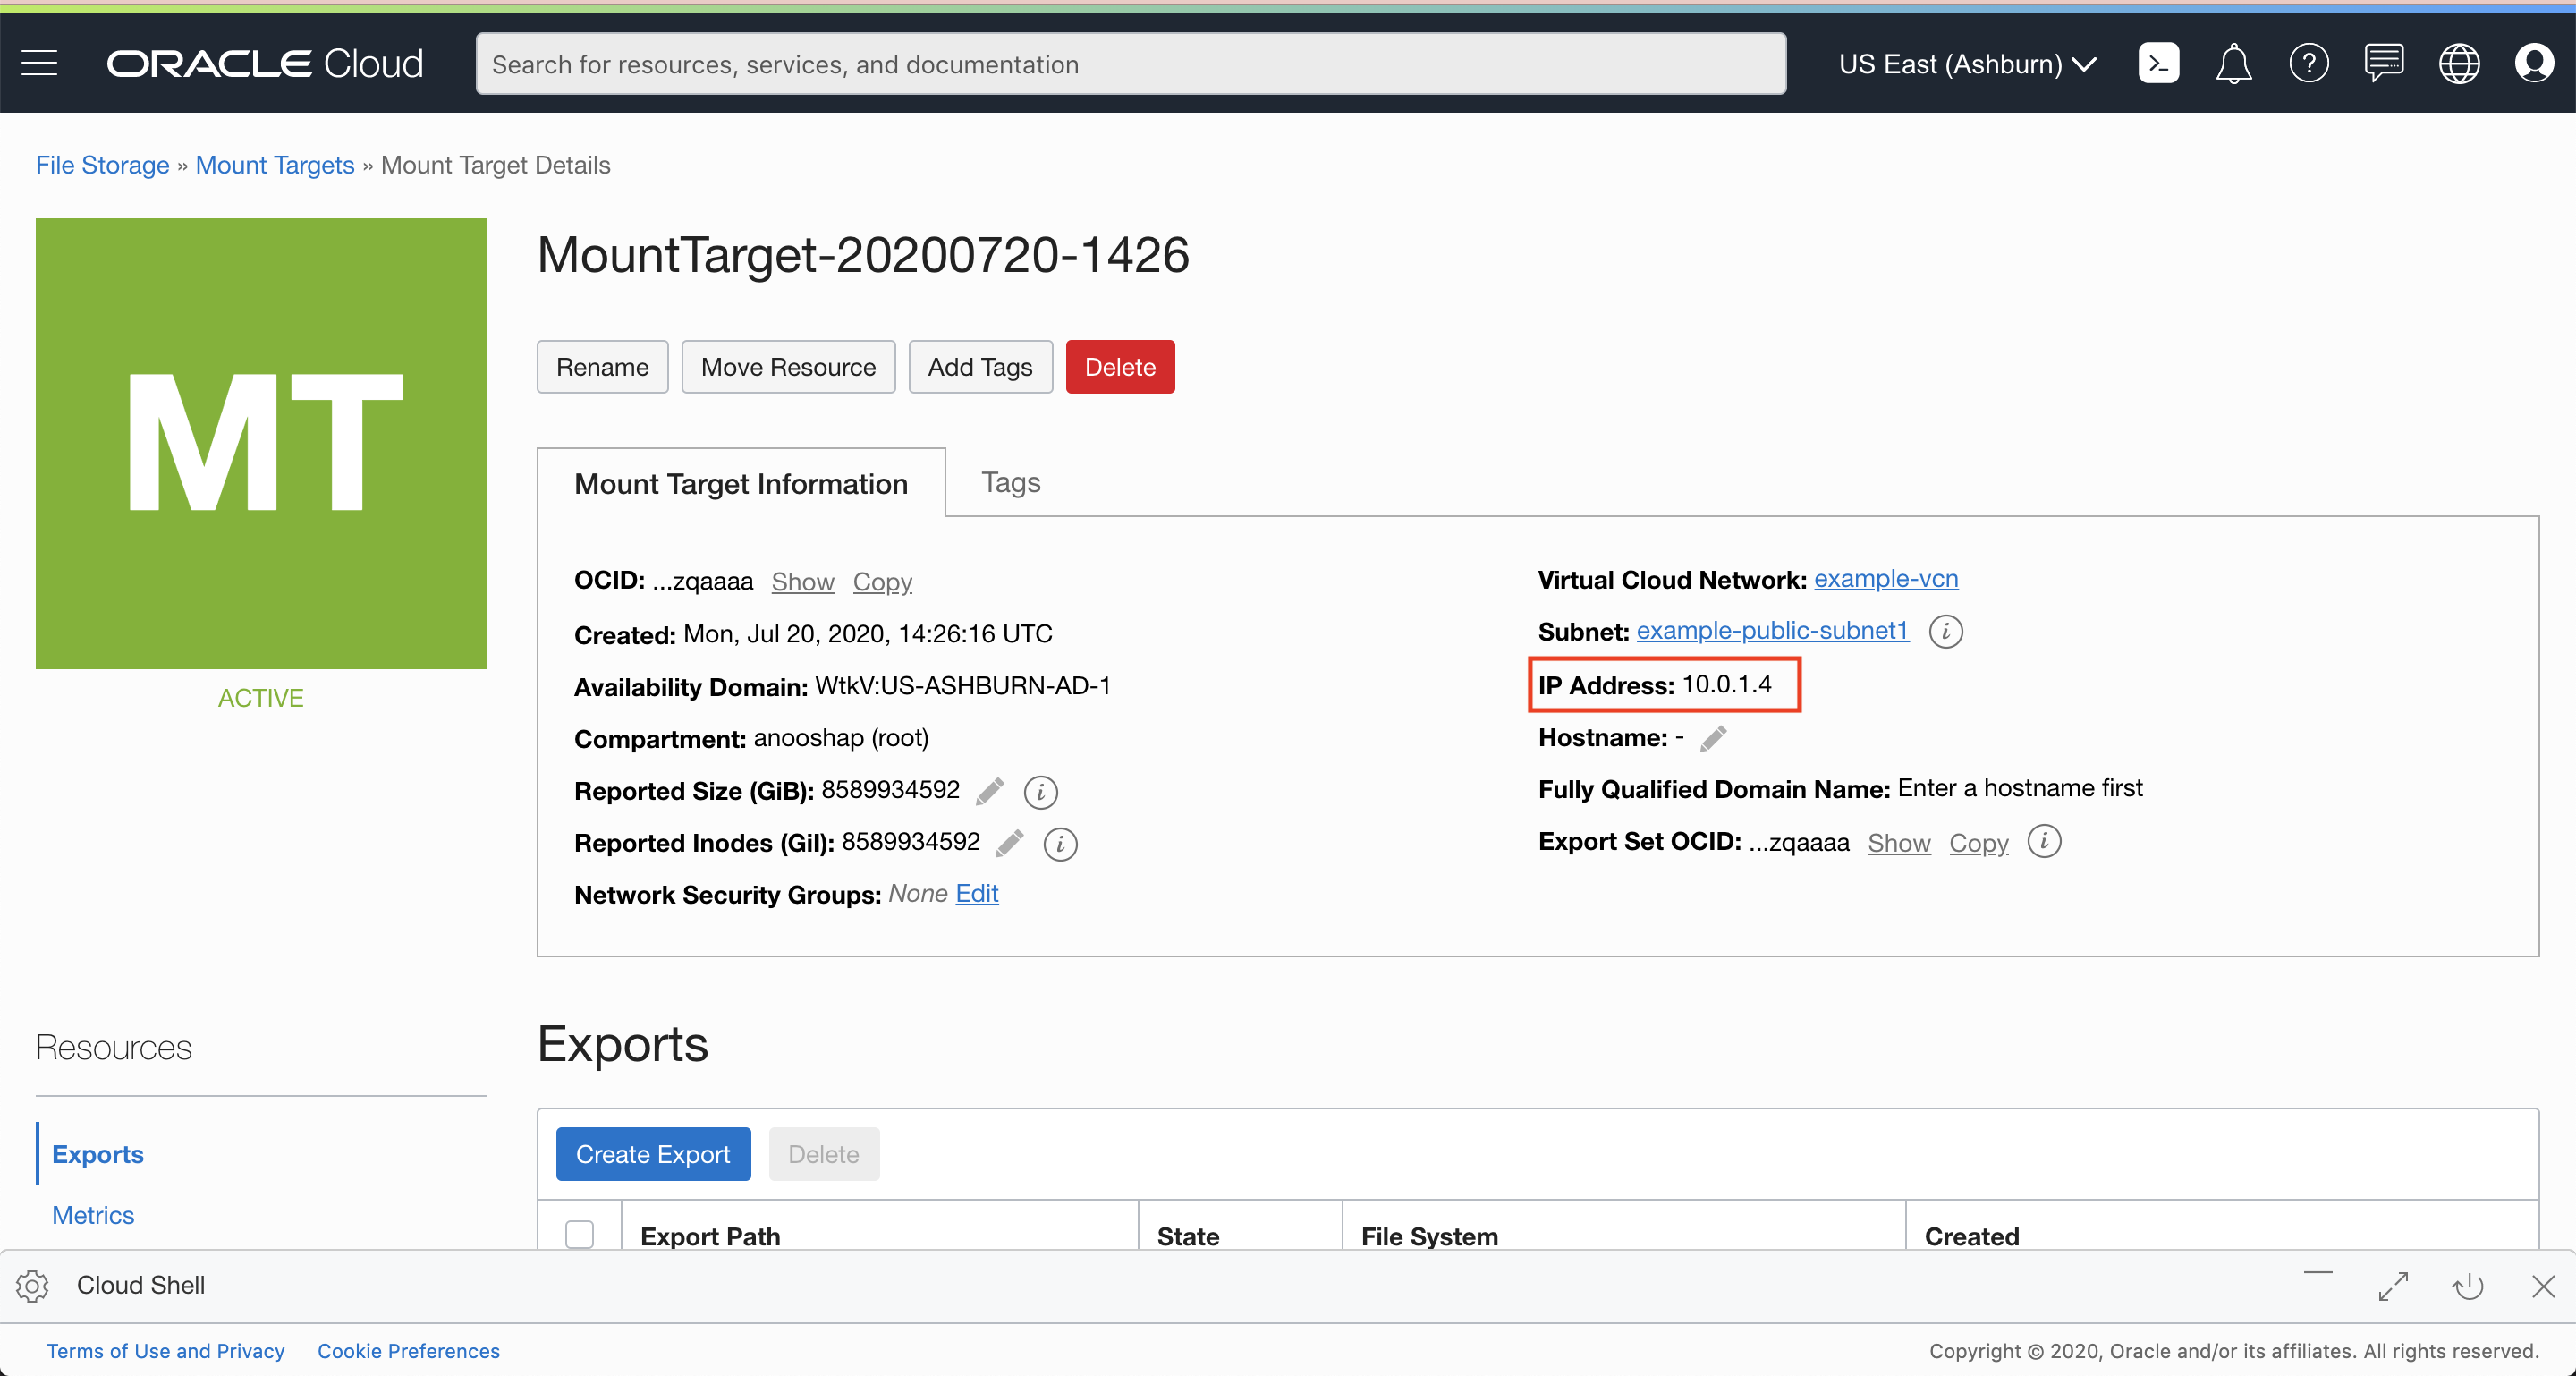
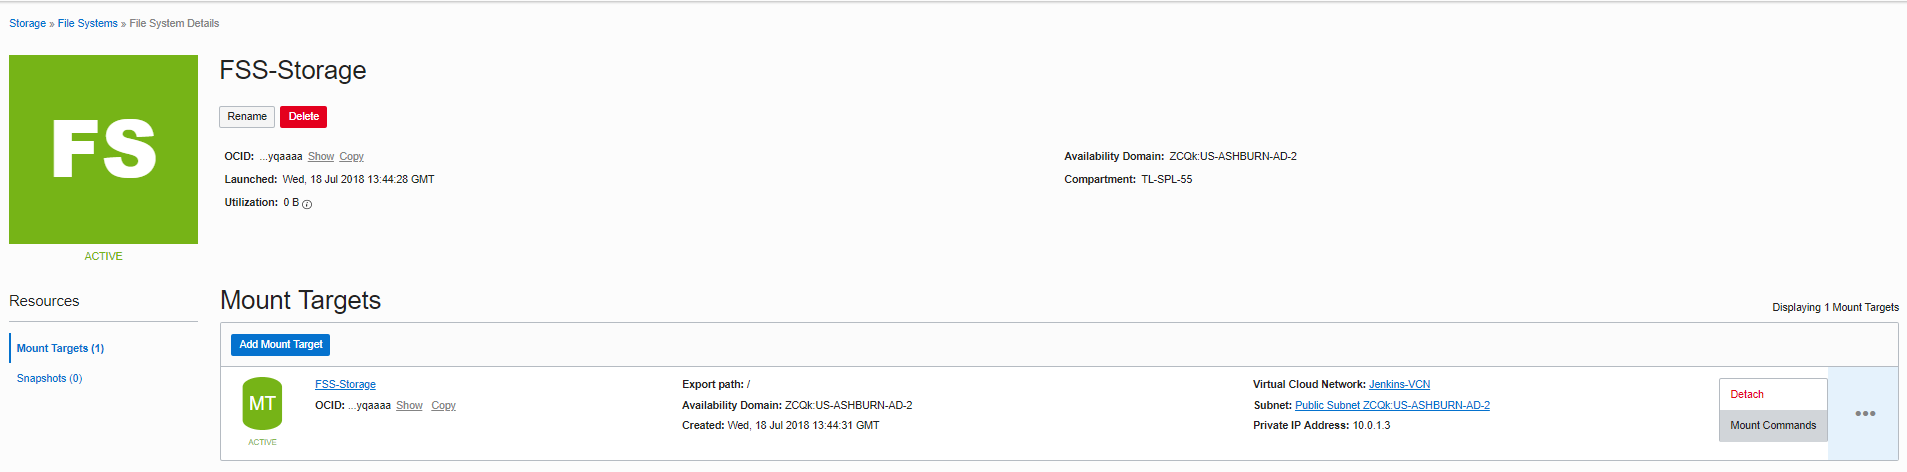
The OCI Console will show your file system details. Under Exports, click your mount target name under Mount Target. In Mount Target Details page, note down the IP address.
We now have a file system storage created. Next, we will use your SSH key pair to connect to a compute instance and mount the file system.
Step 3: Create and Connect to Compute Instance
Create SSH encryption keys you can use to log into your VM by opening a terminal window in the directory where you want to store your keys and issuing the following OpenSSH command, where <my-key> is your desired key name:
ssh-keygen -t rsa -N "" -b 2048 -C <my-key> -f <my-key>The command generates random text art used to generate the keys. When complete, you should have two files:
- The private key file: <my-key>
- The public key file: <my-key>.pub
You use these files to connect to your compute instance.
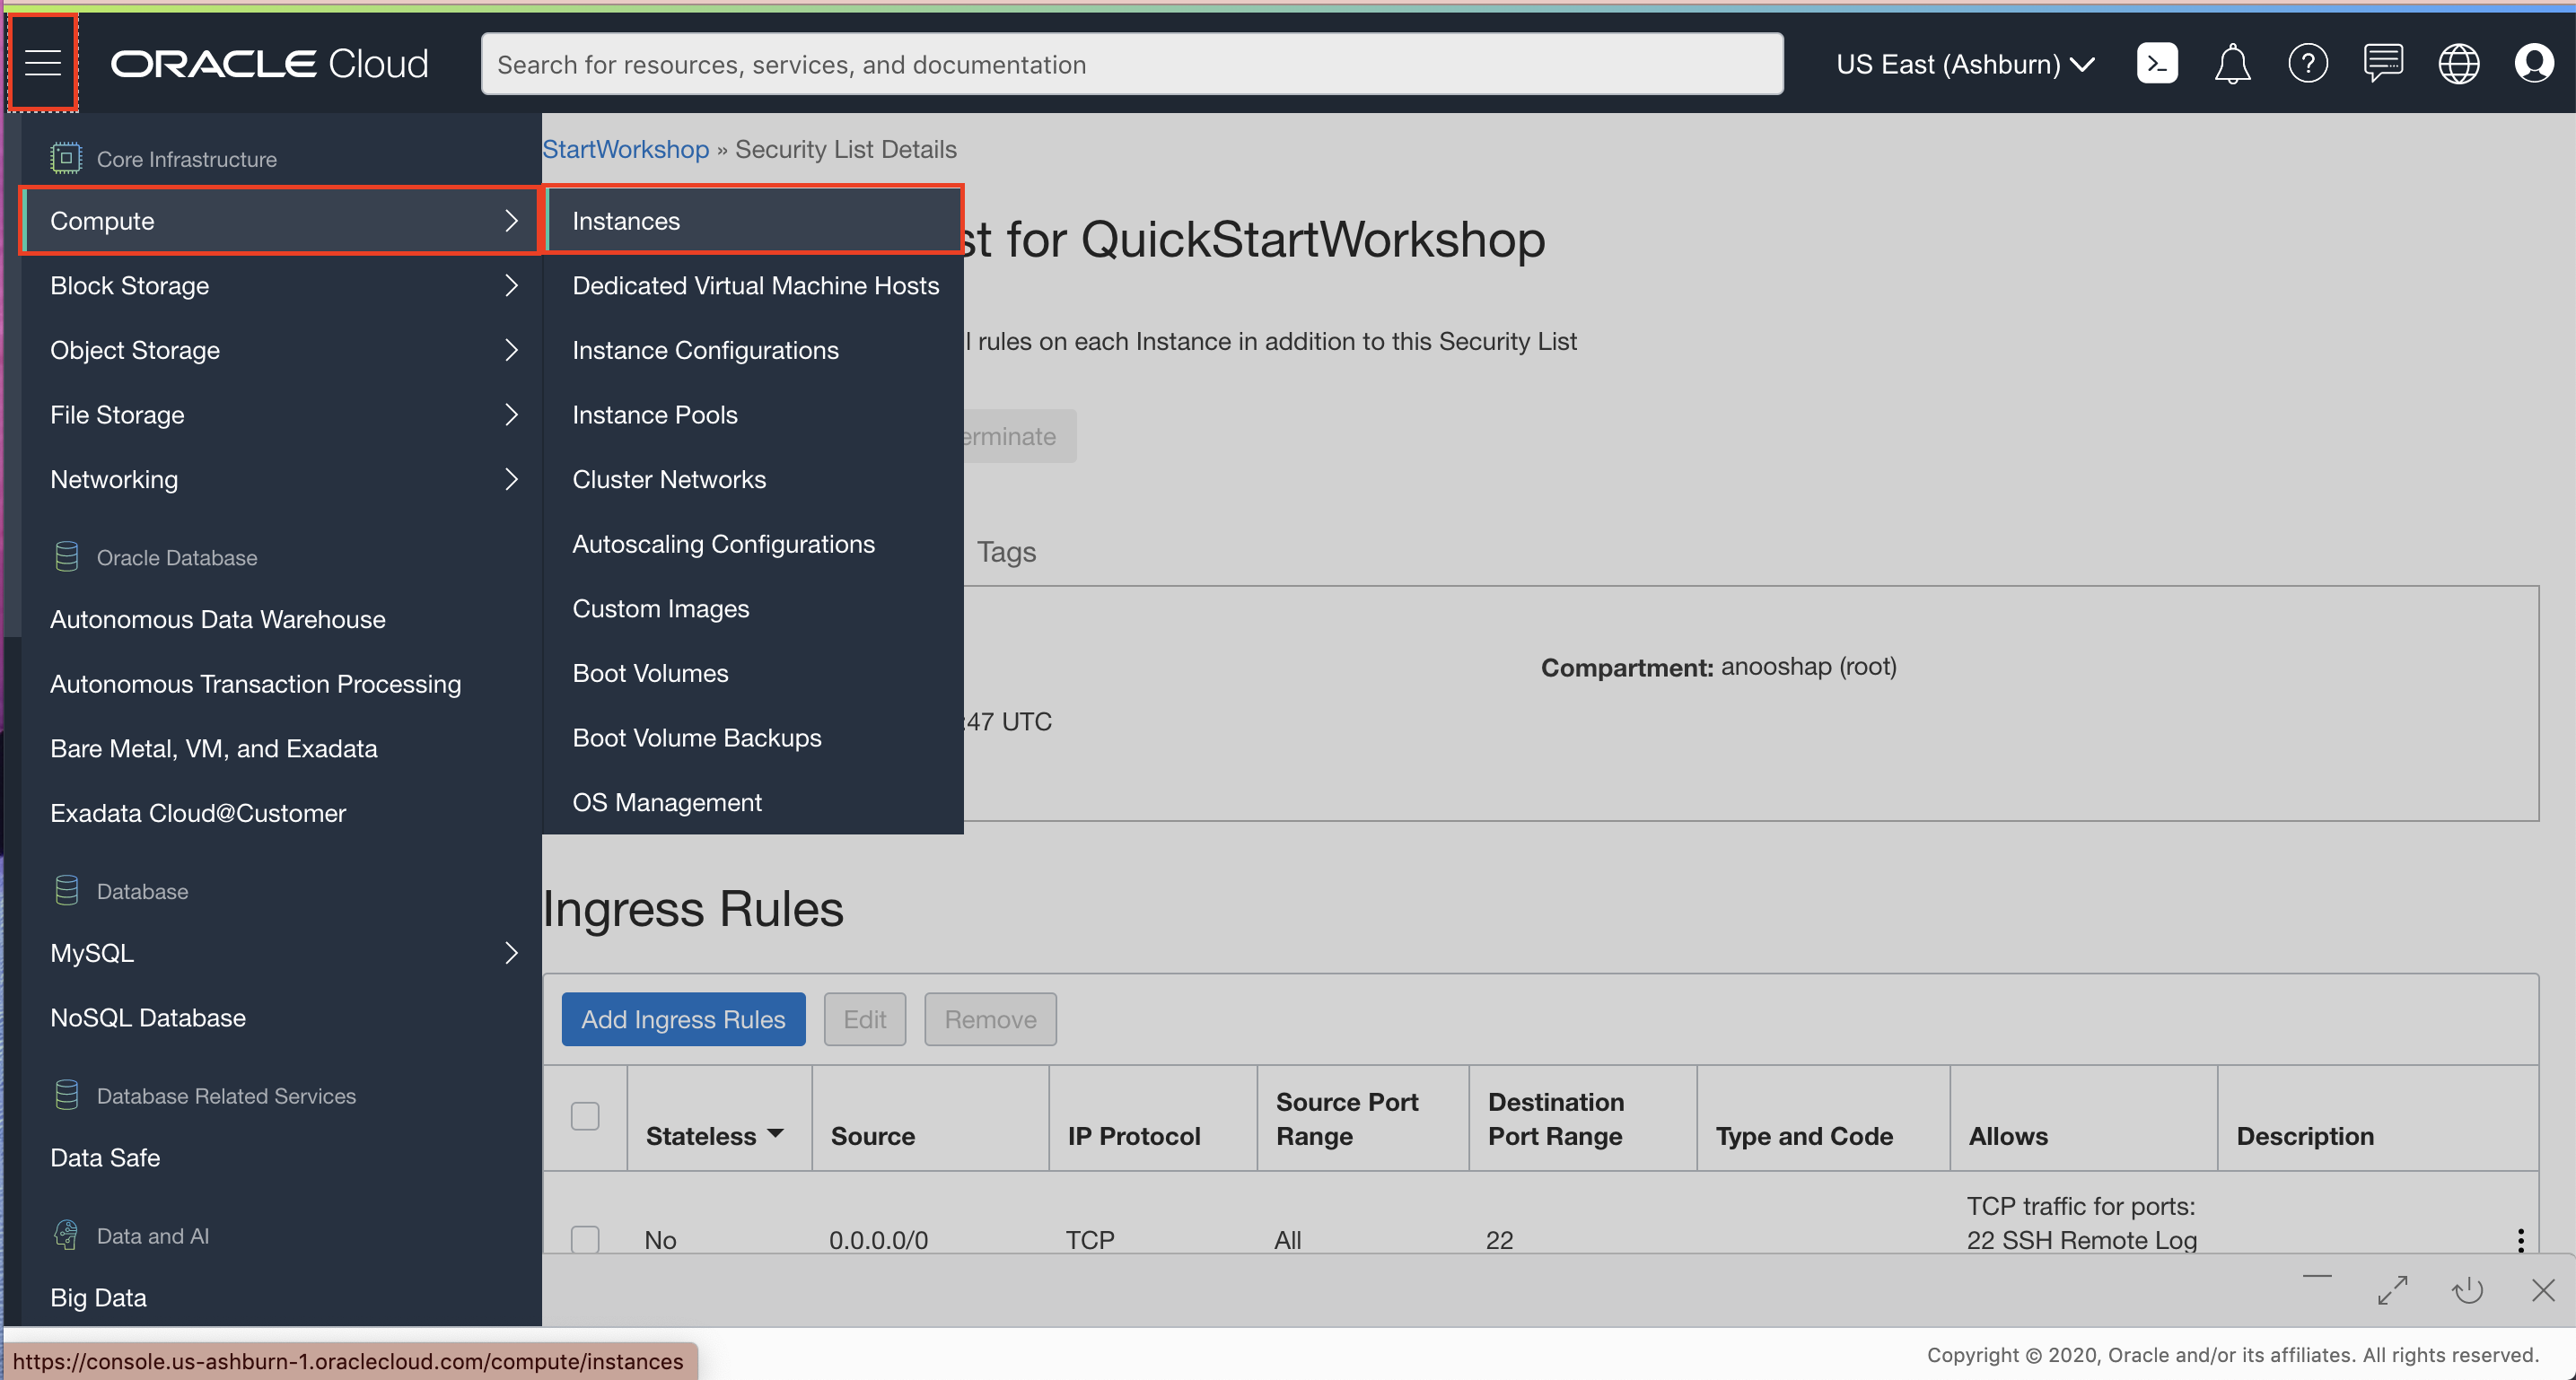
In OCI Console, click the navigation button to open the OCI services menu. Under Compute, click Instances.
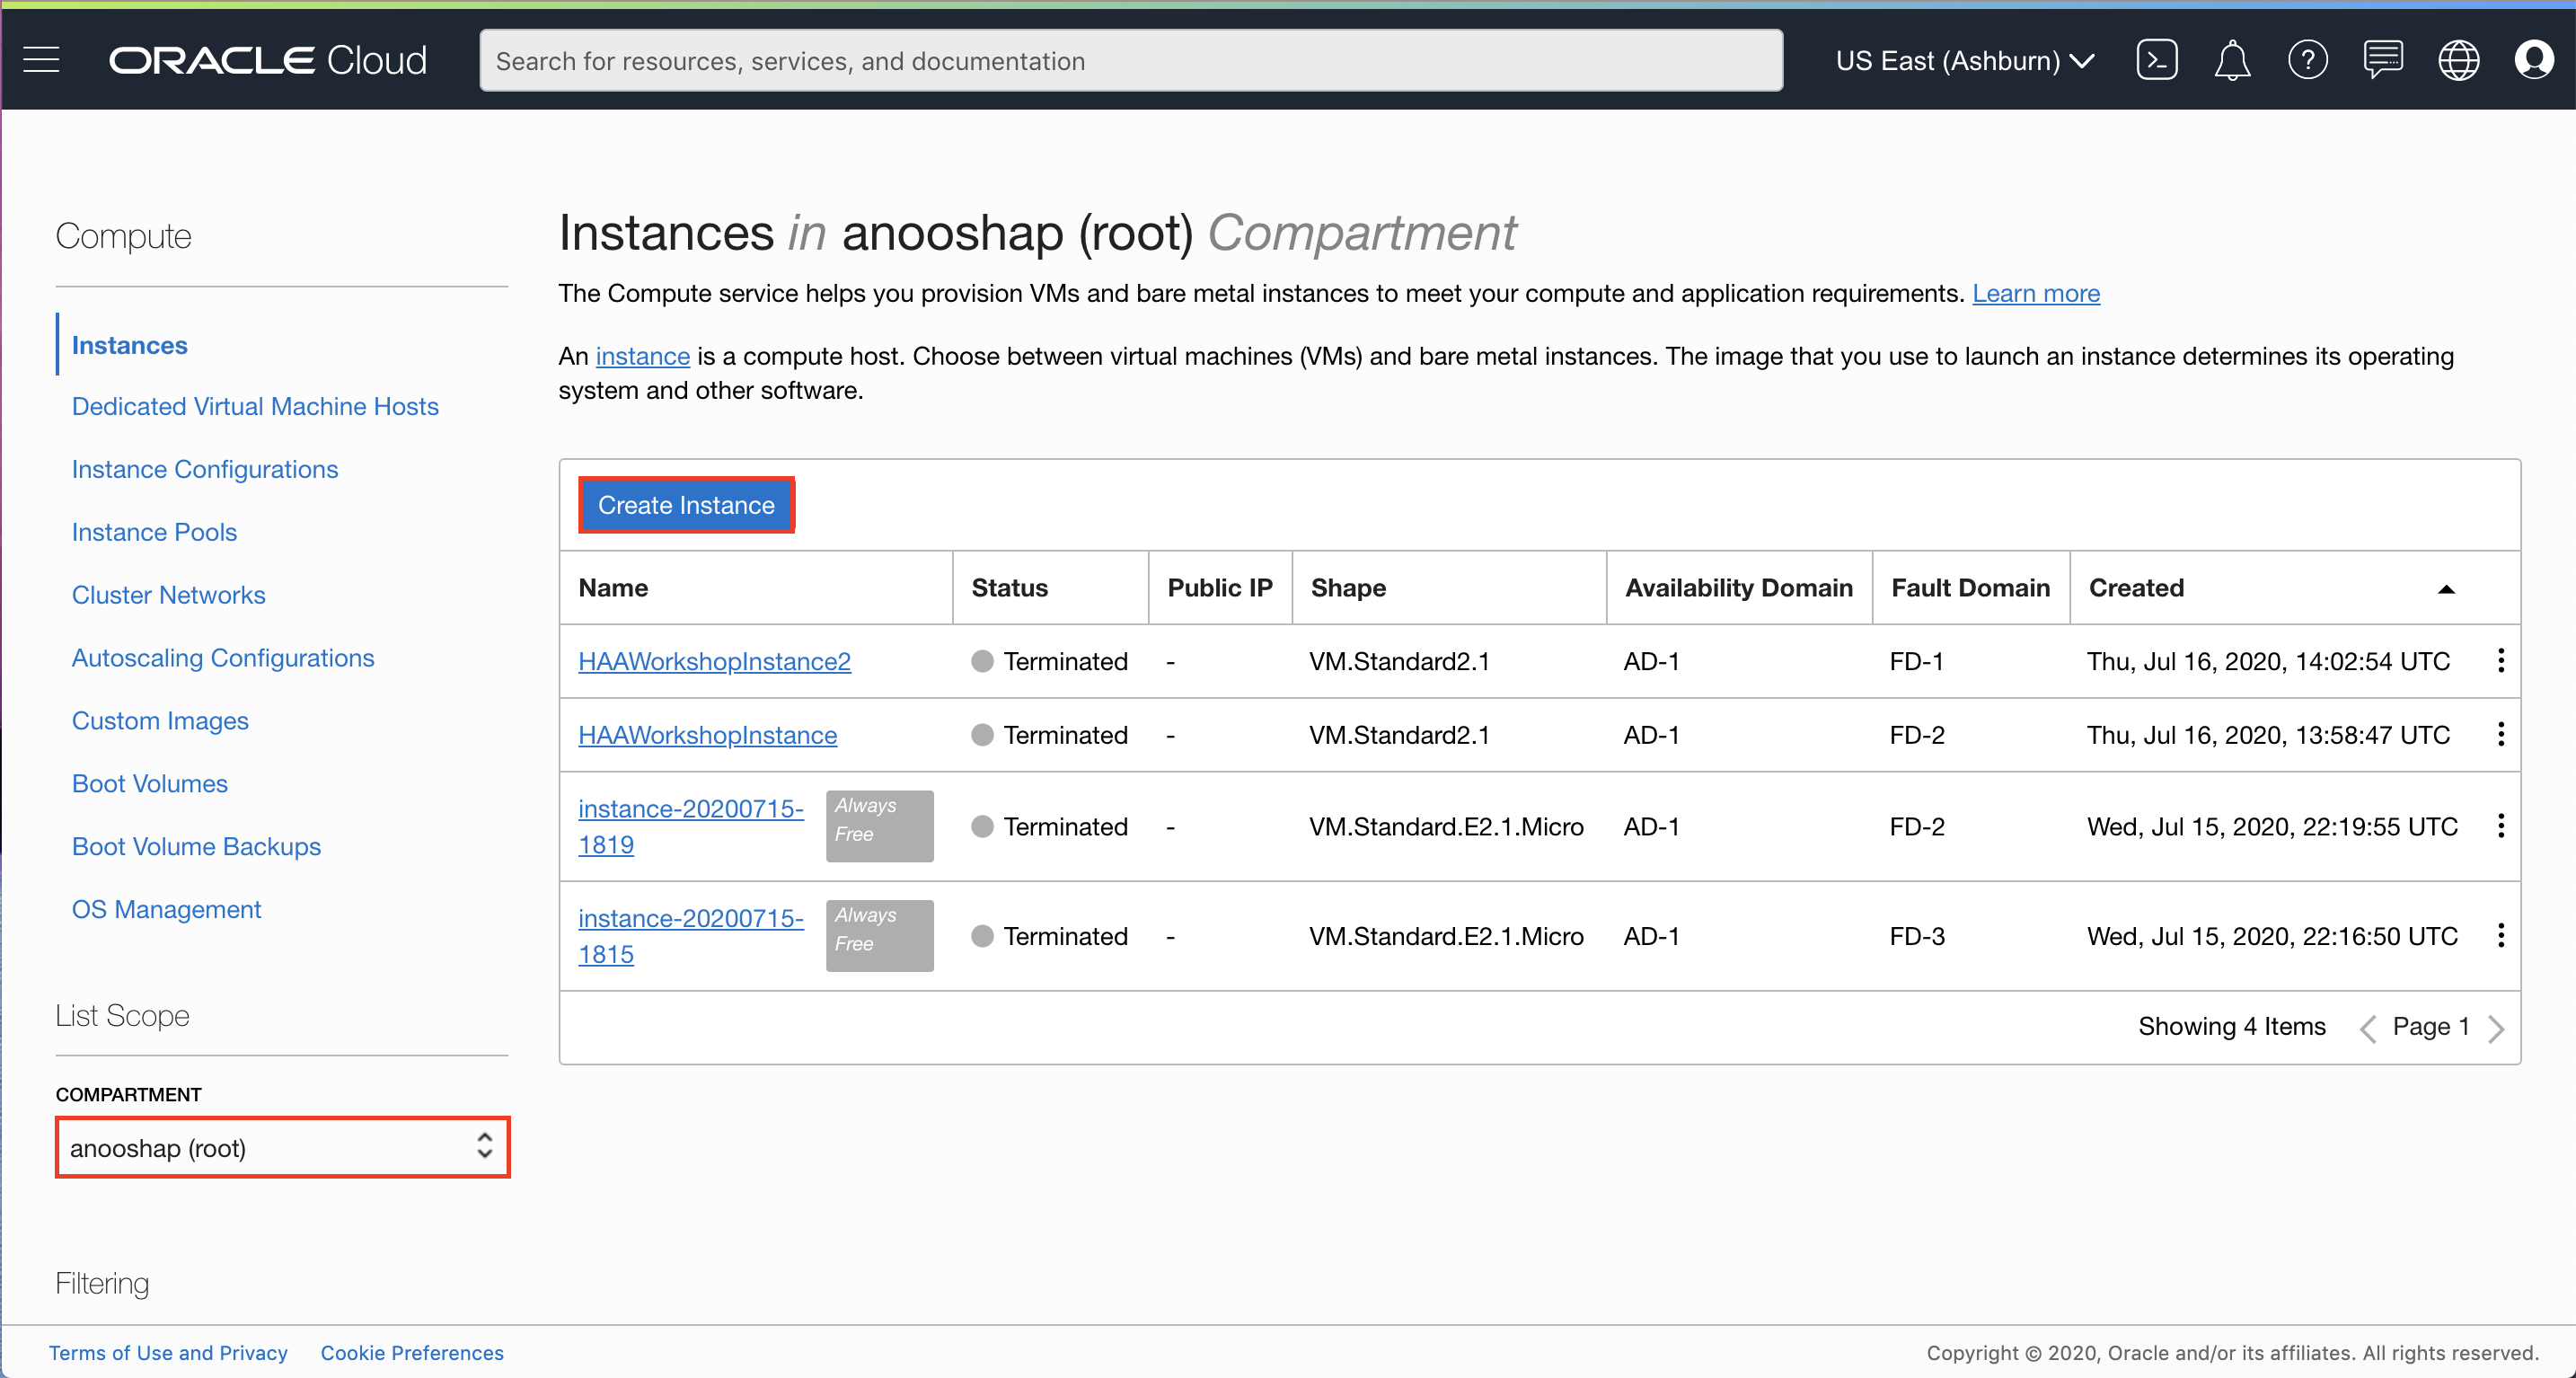
On the left sidebar, select the Compartment in which you placed your VCN under List Scope. Click Create Instance.
Fill out the dialog box:
- NAME: Enter a name.
- Compartment: Select the compartment in which you placed your VCN.
- Image or operating system: For the image, we recommend using the latest Oracle Linux available. Click Change Image to see details of available images.
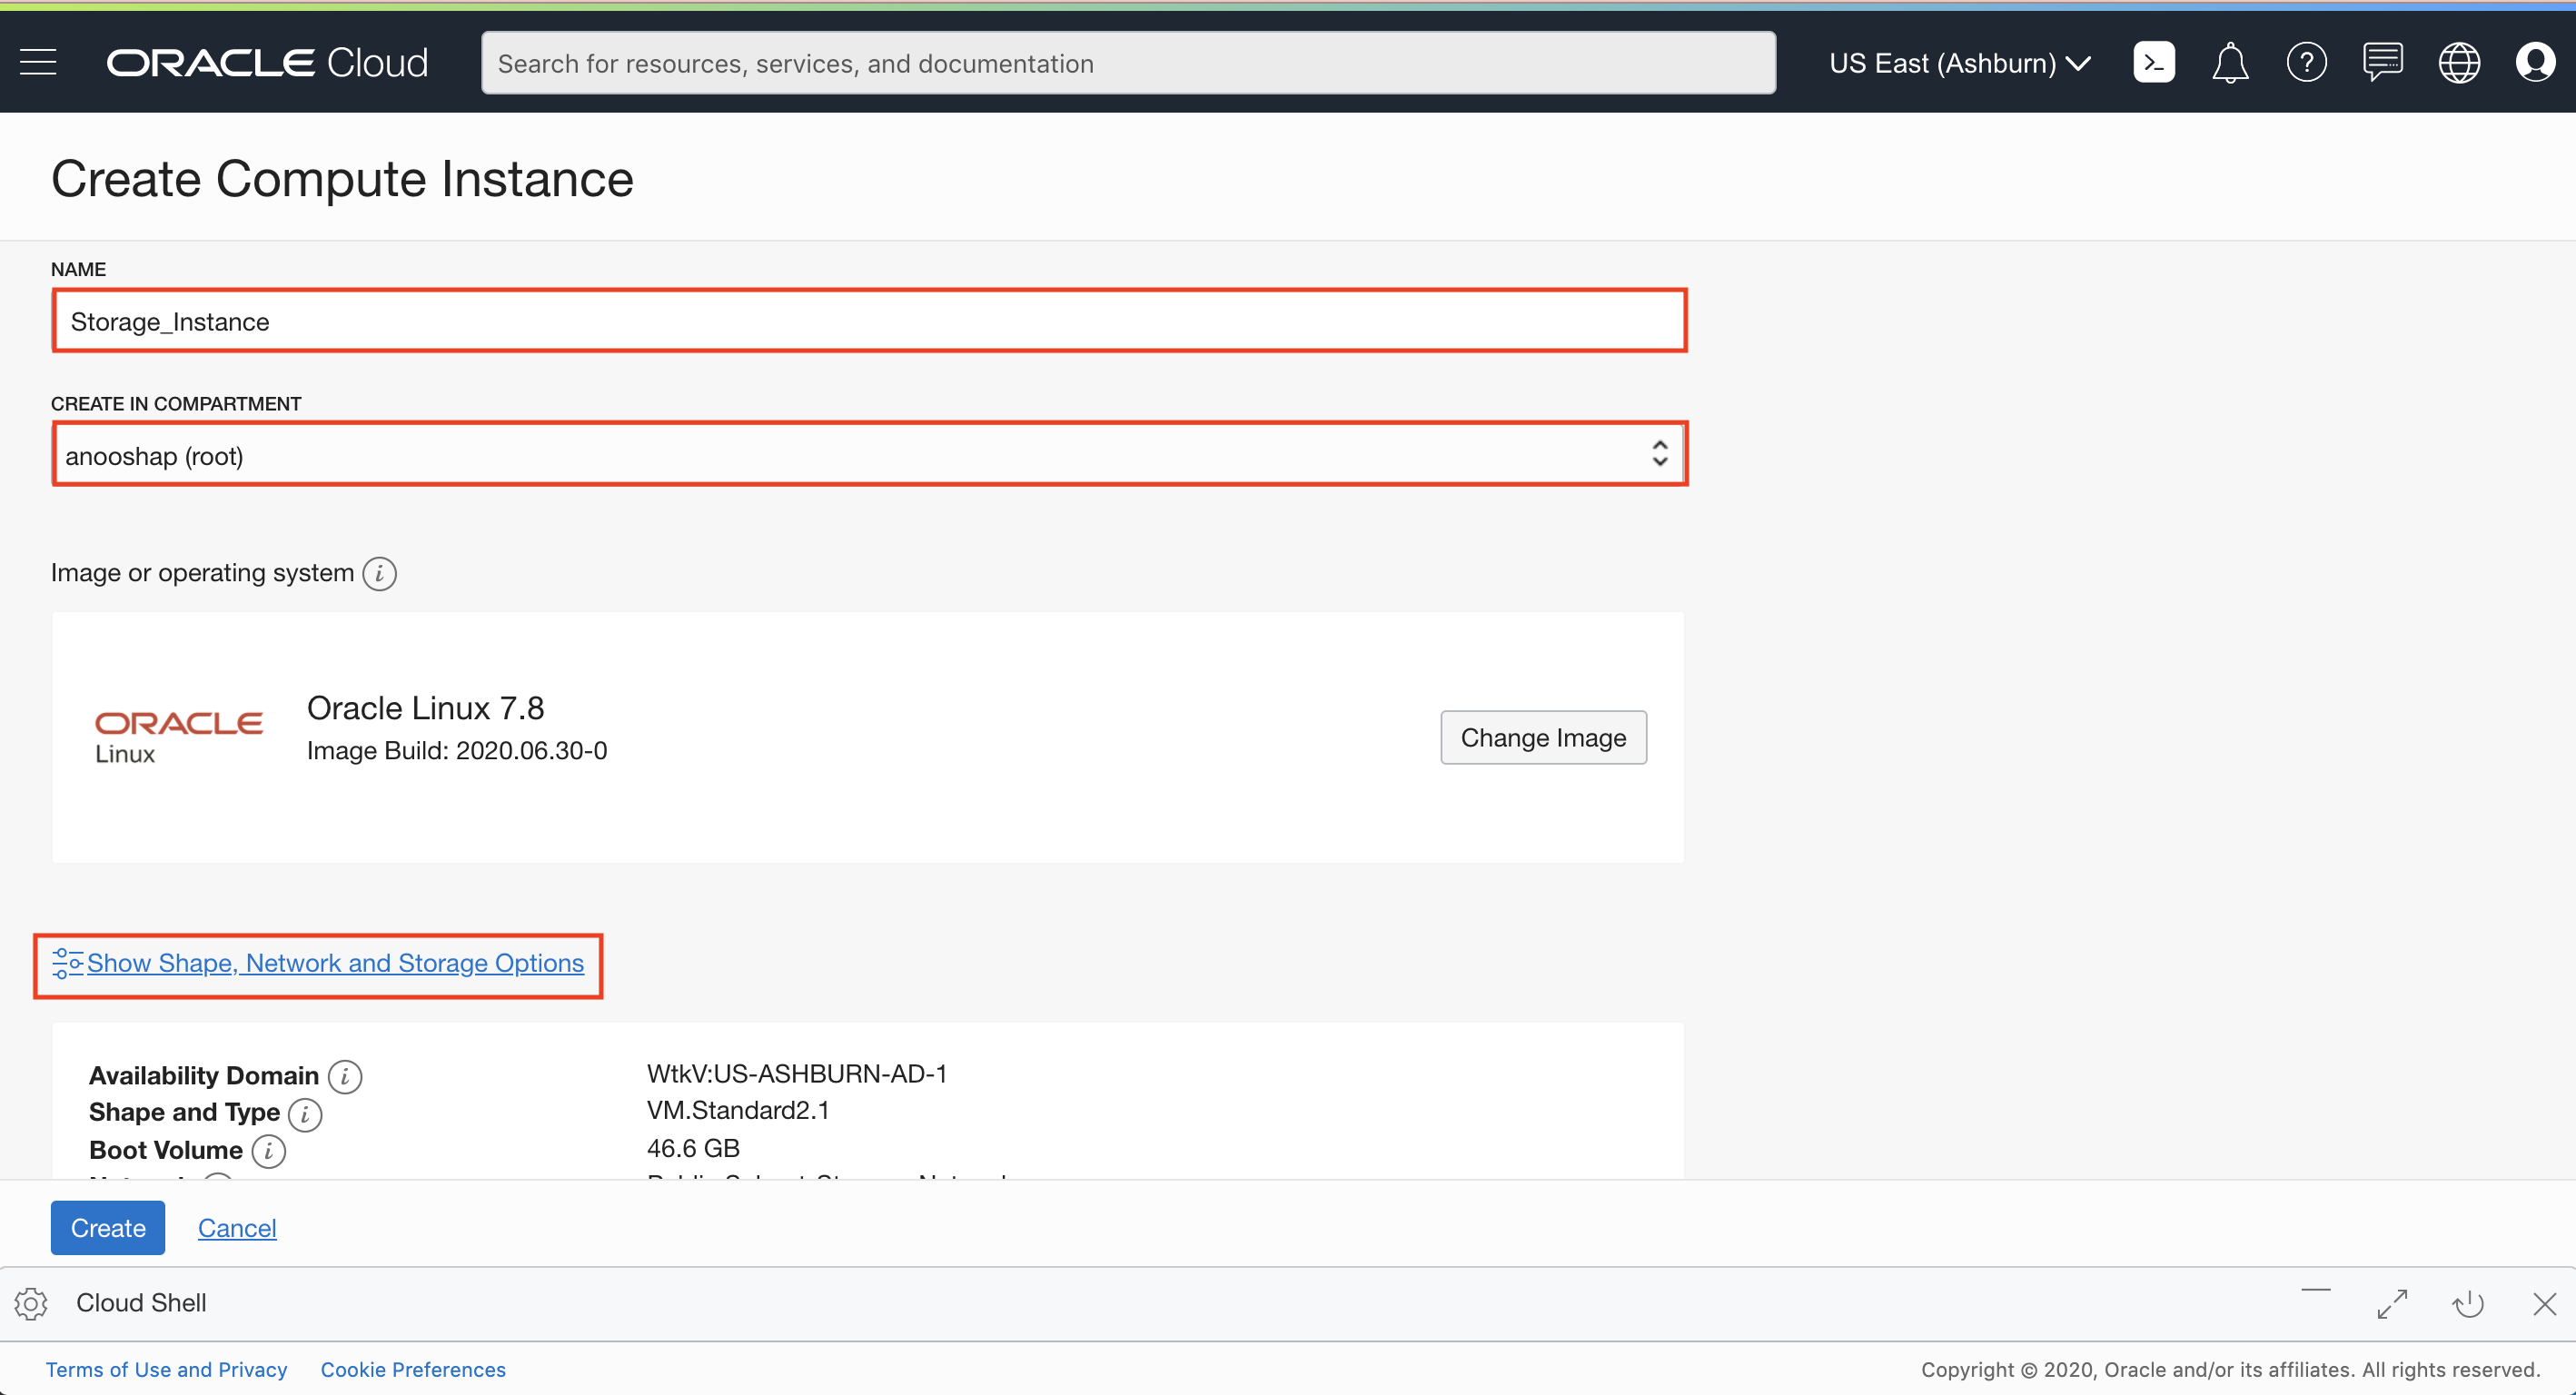
Click Show Shape, Network and Storage Options:
- Availability Domain: Select an availability domain.
Click Change Shape then select the following:
- Instance Type: Select Virtual Machine.
- Instance Shape: Select a VM shape.
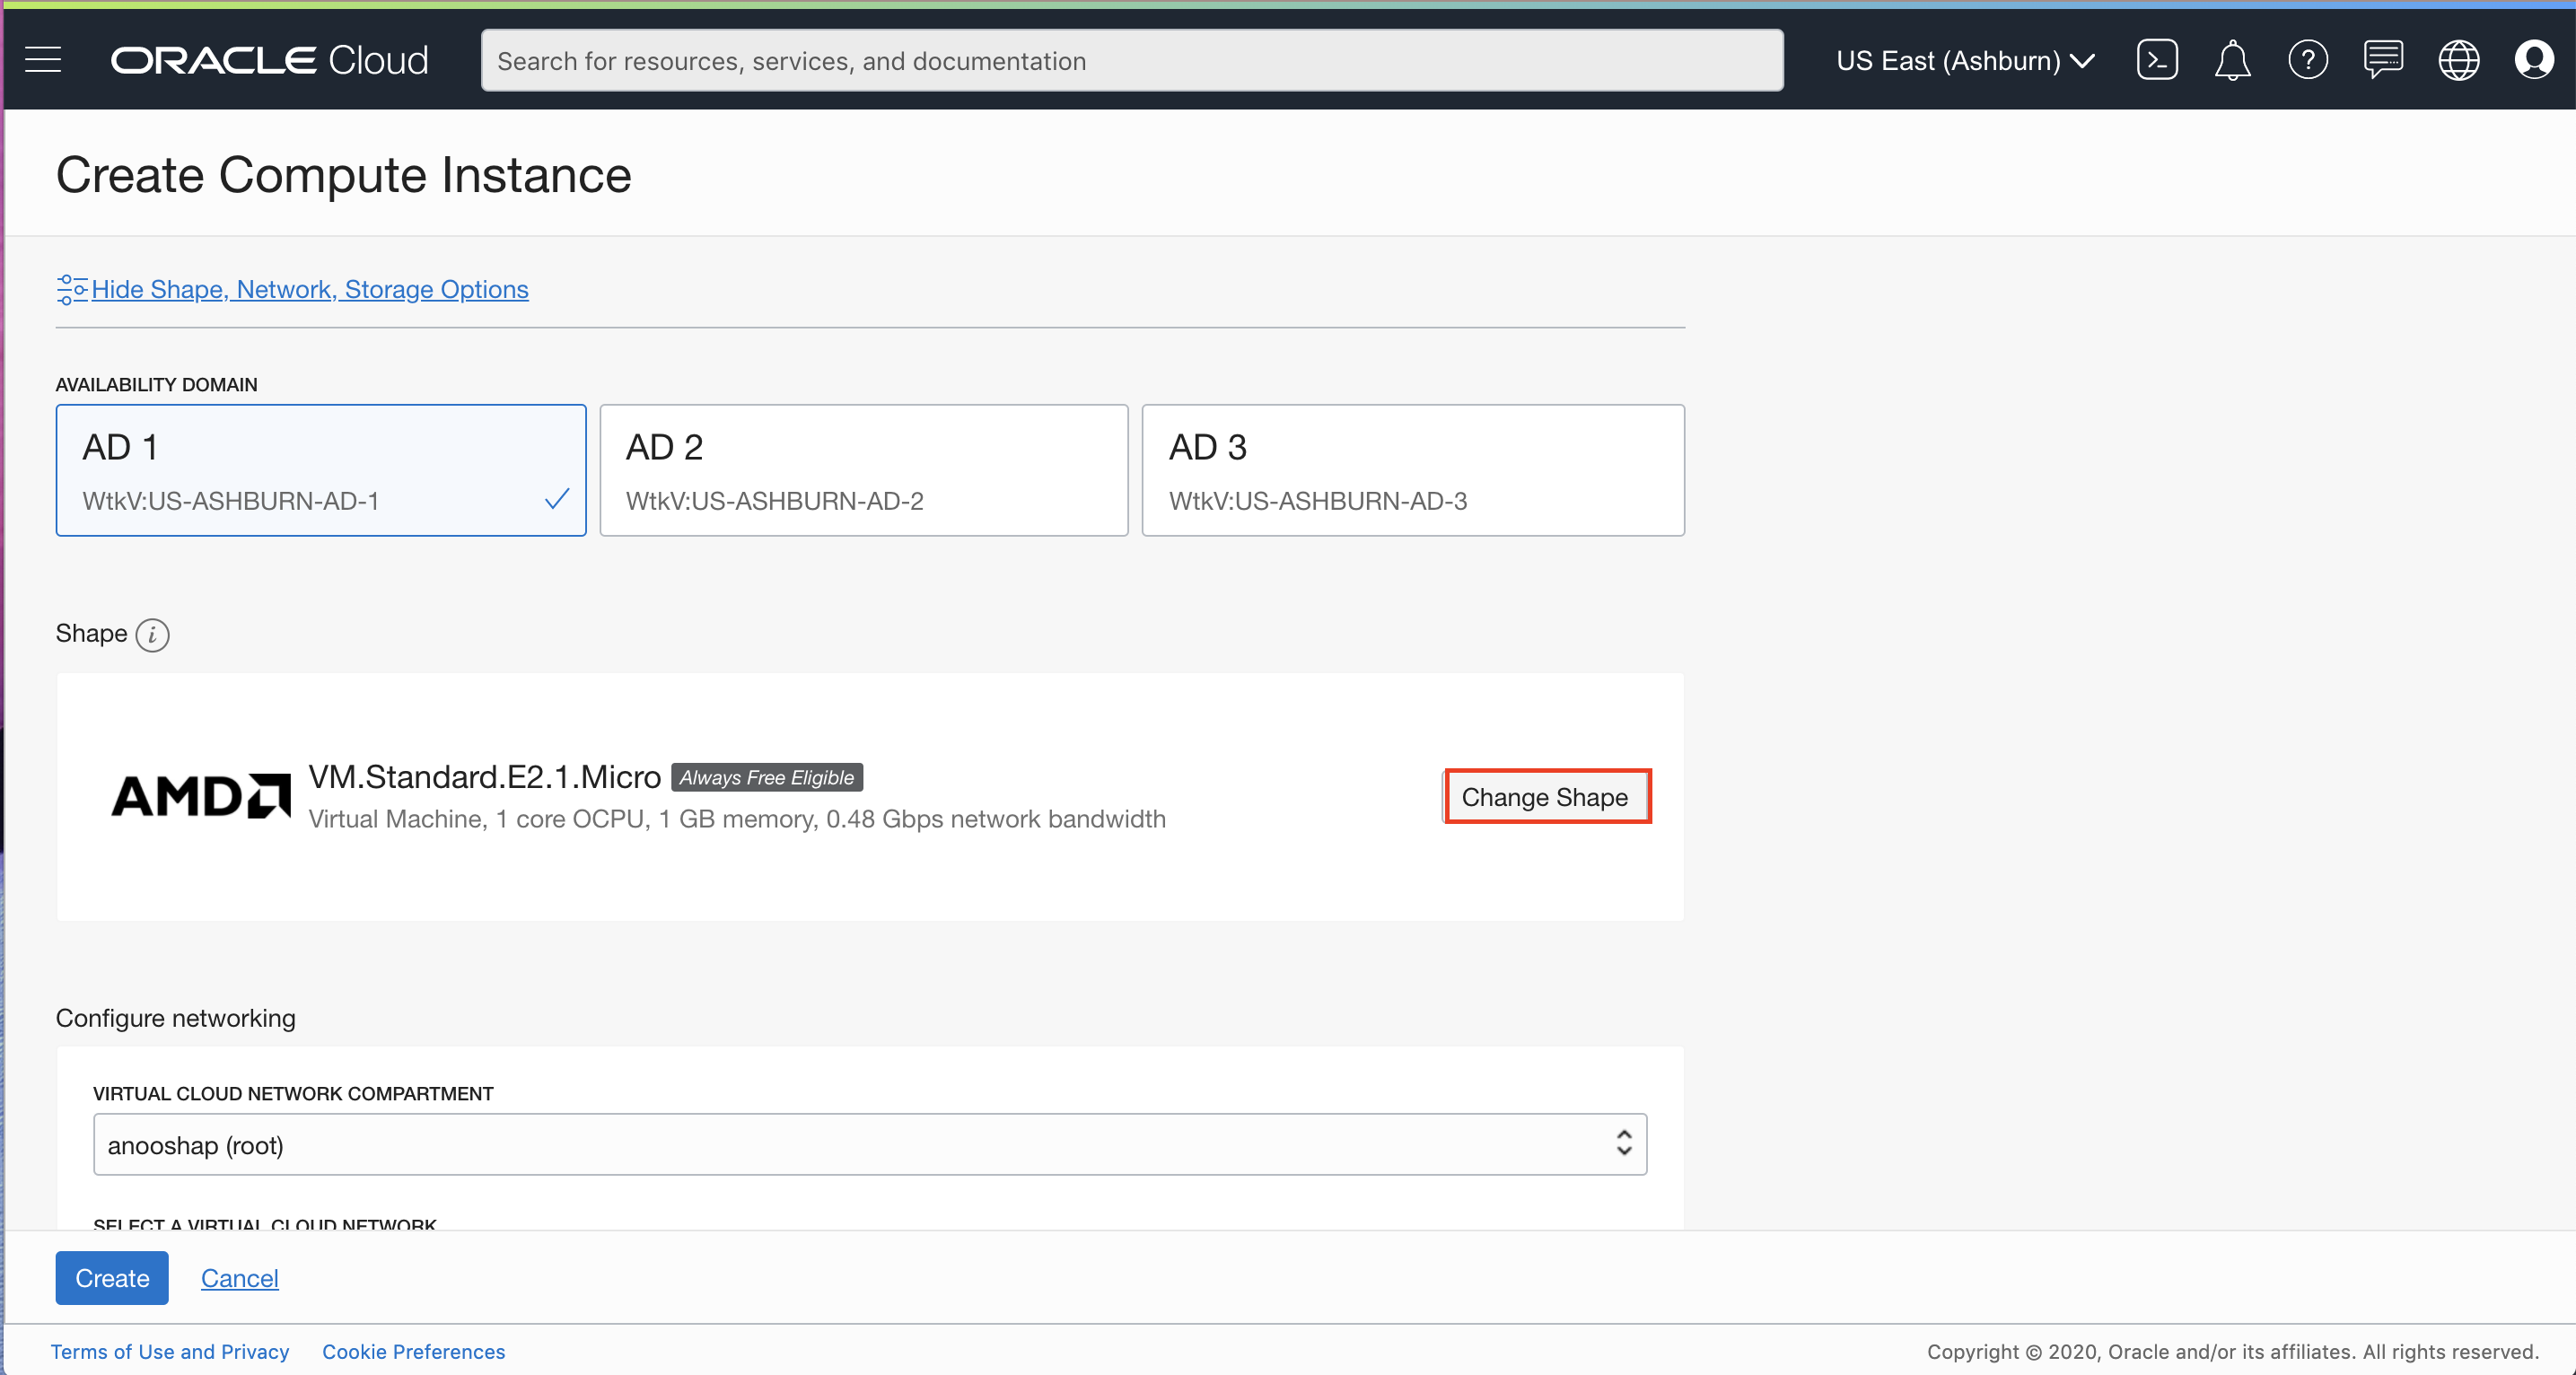
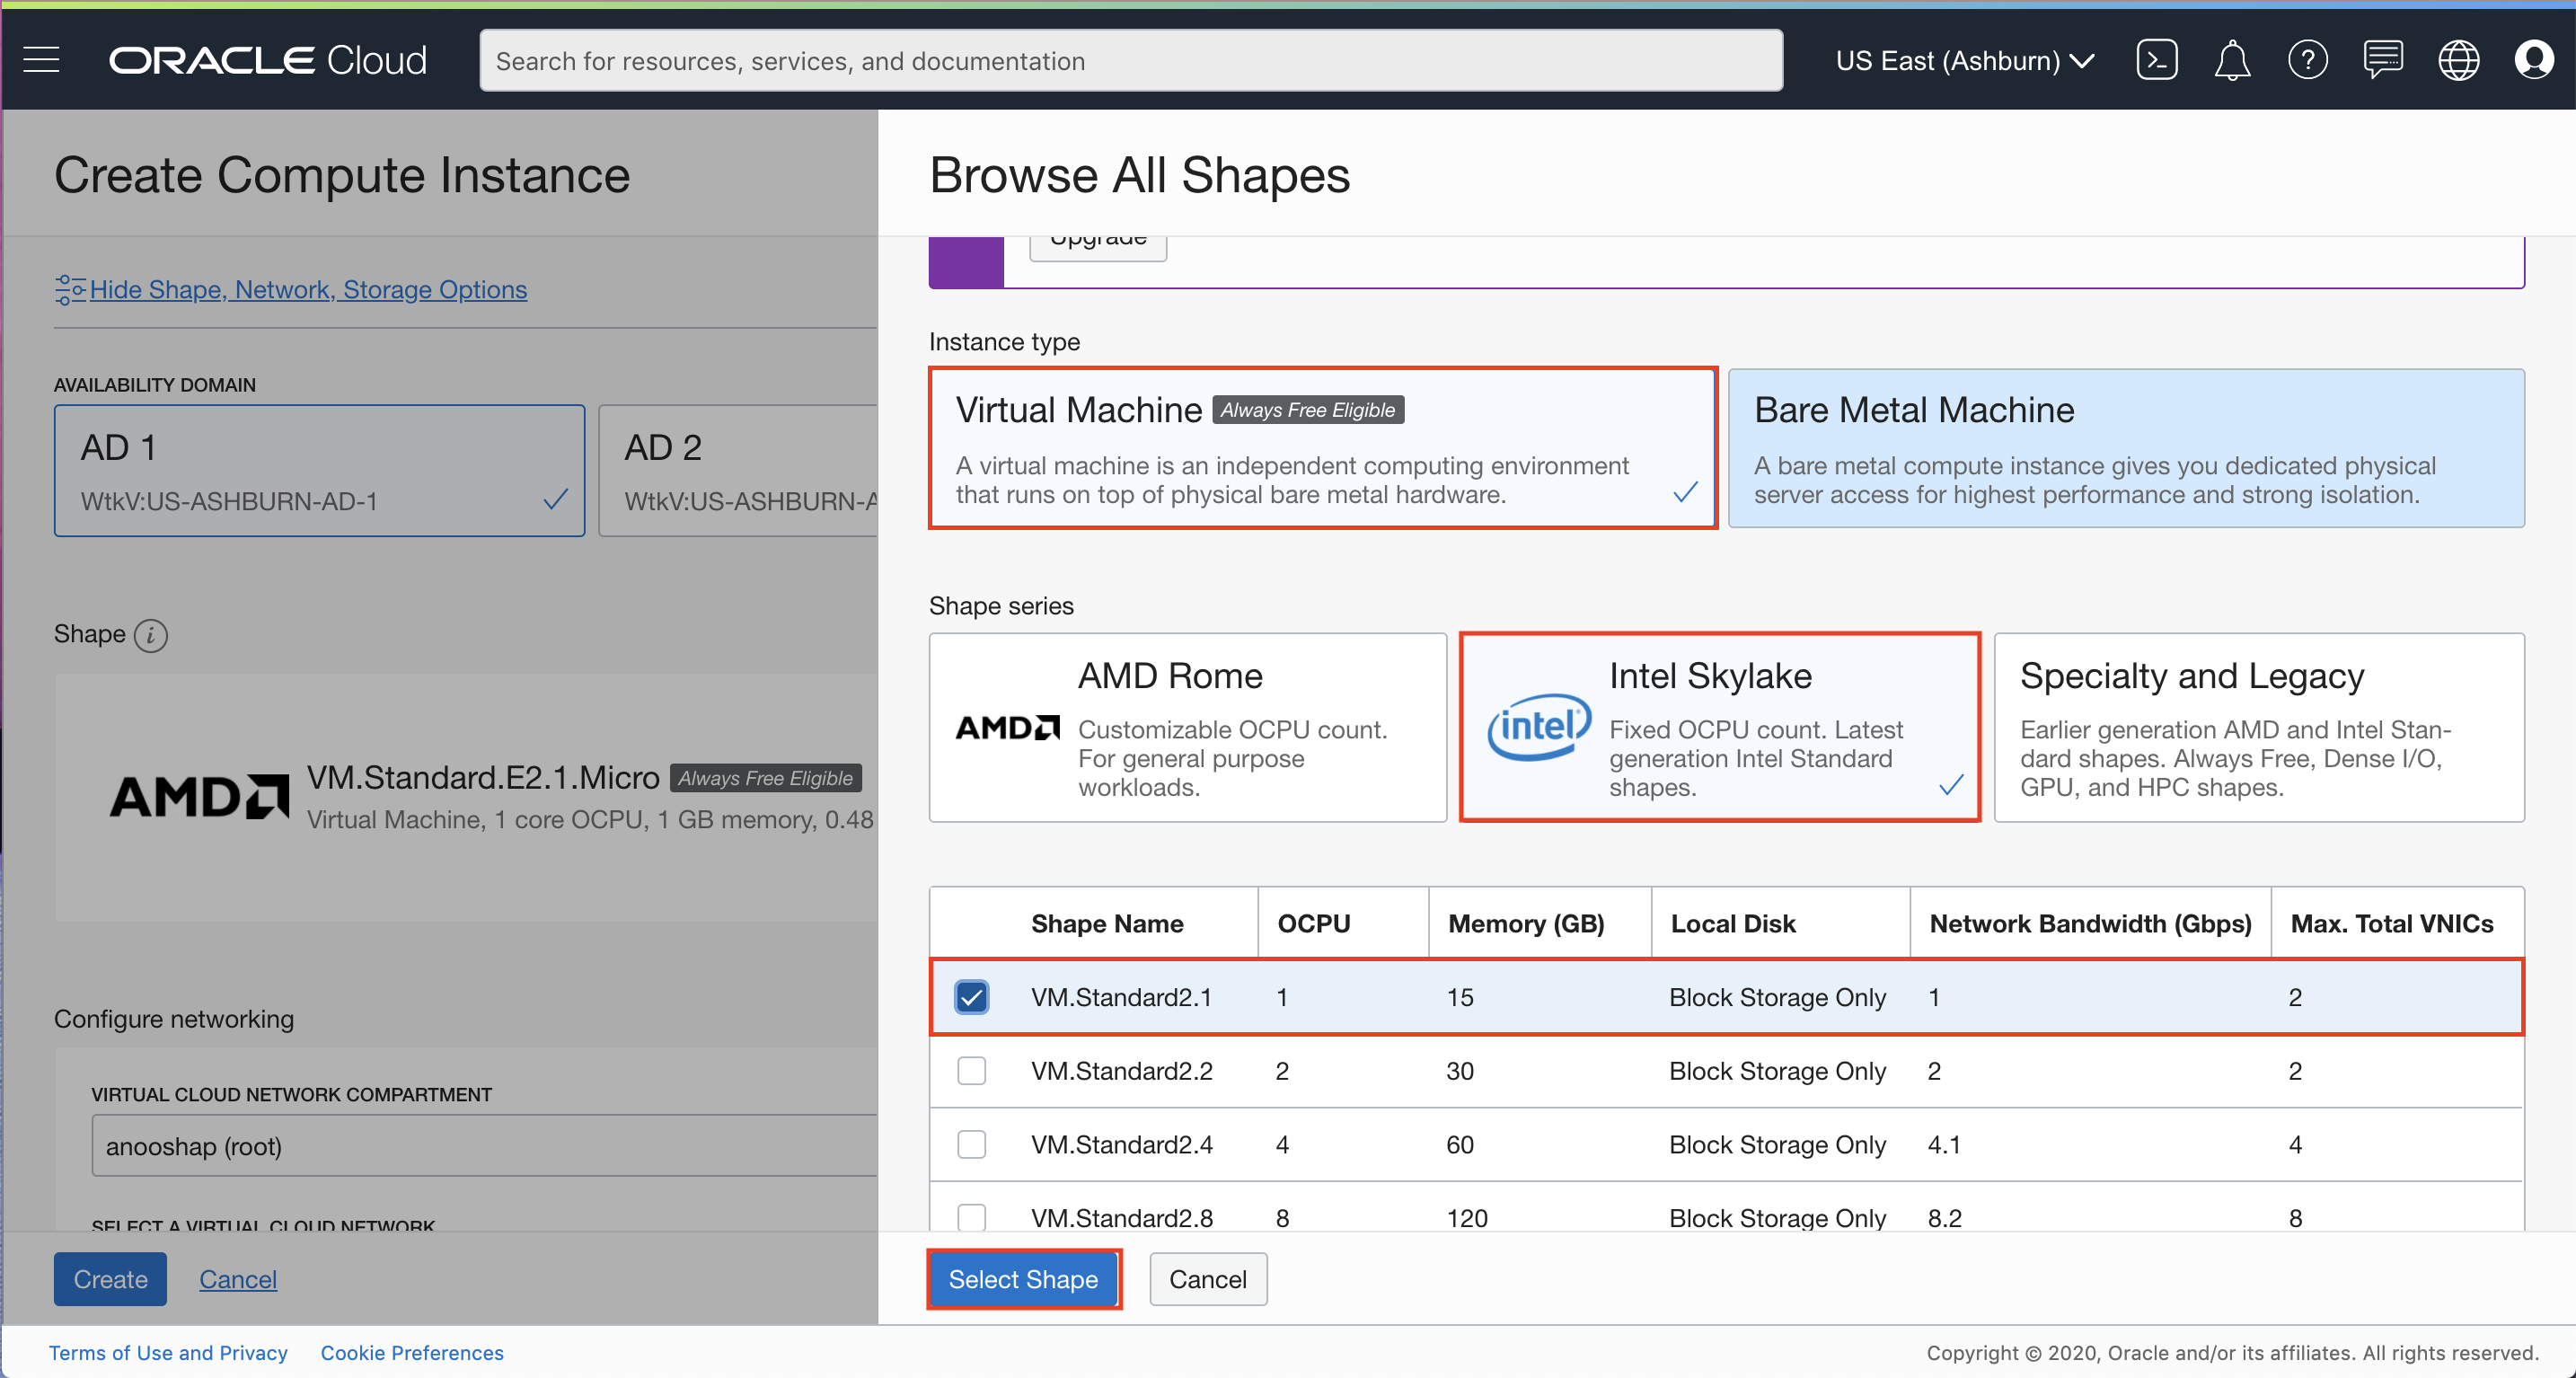
Click Select Shape.
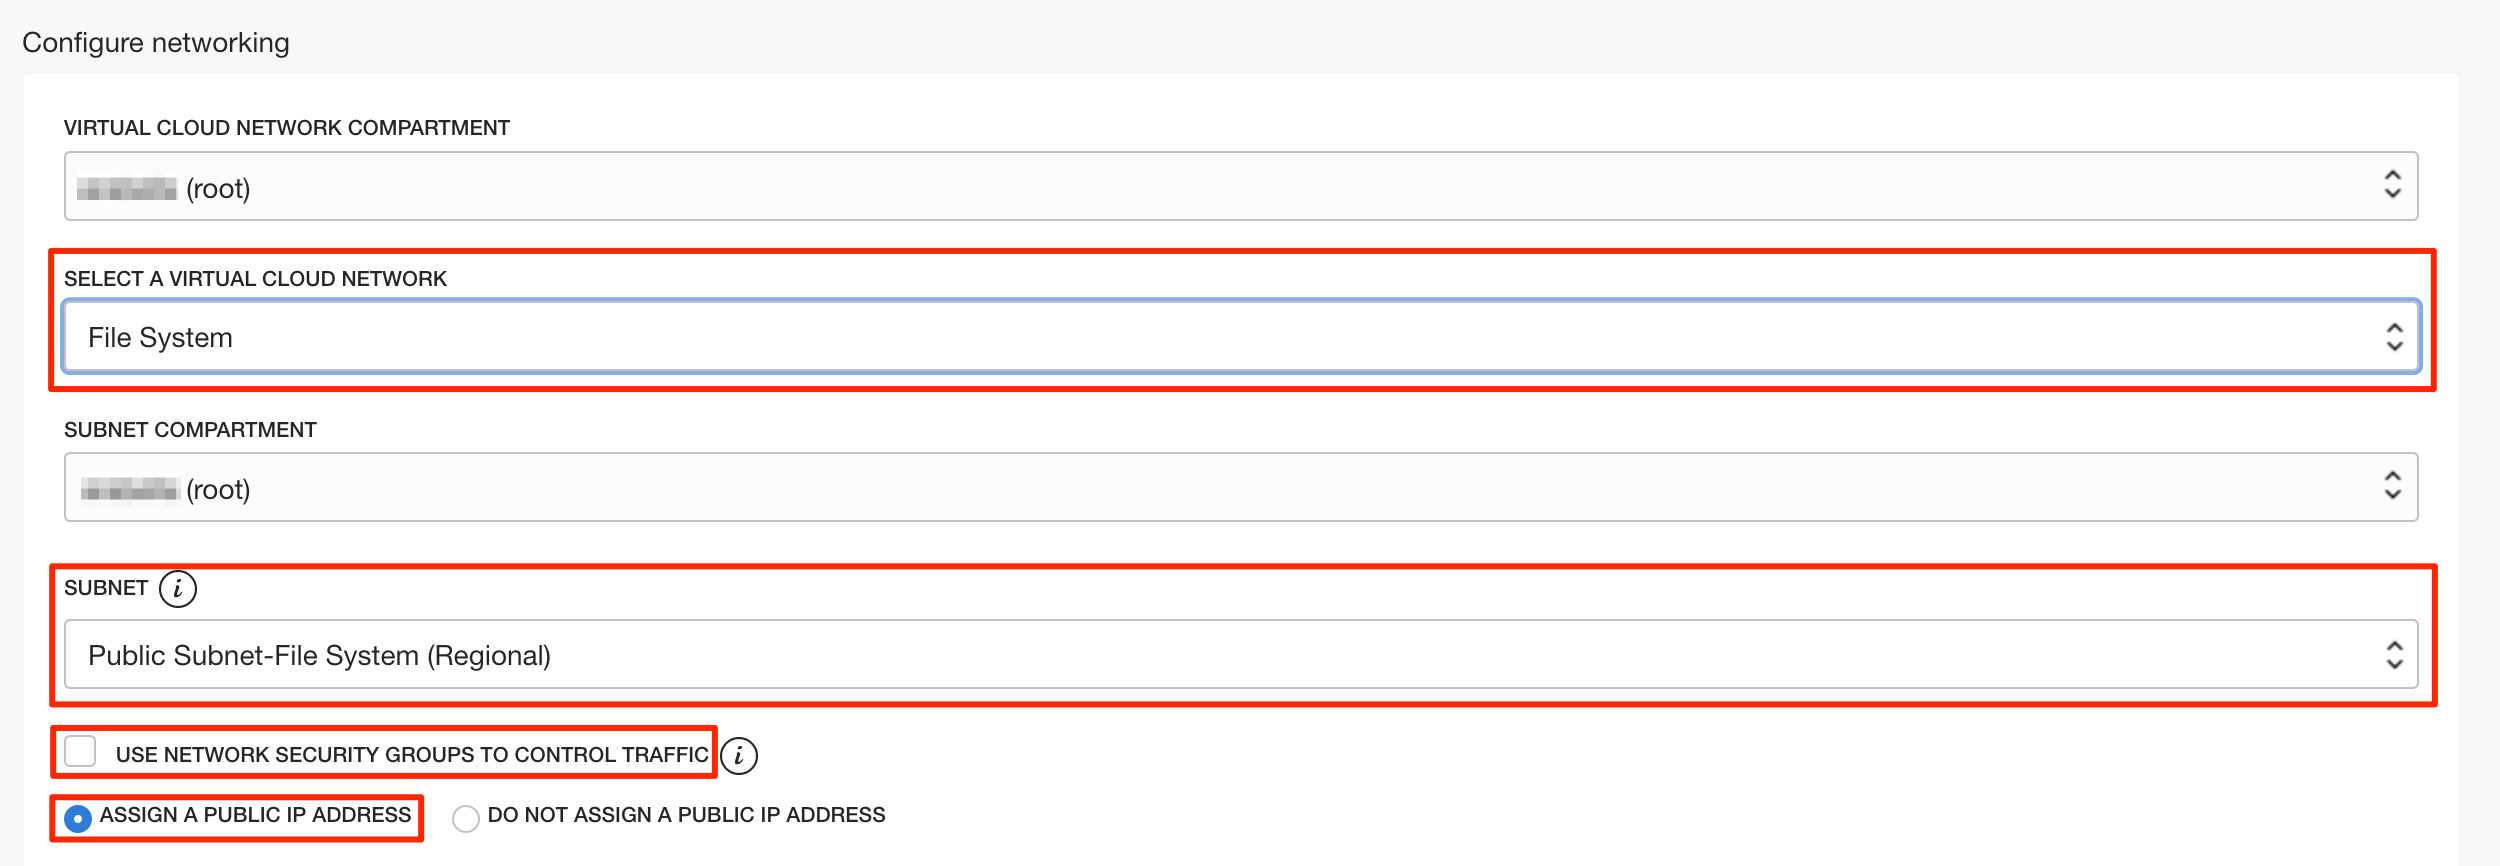
Under Configure Networking:
- Virtual Cloud Network Compartment: Ensure that the compartment in which you created your VCN is selected.
- Select a Virtual Cloud Network: Choose the VCN you created earlier.
- Subnet Compartment: Ensure that the compartment in which you created your VCN is selected.
- Subnet: Choose the Public Subnet (Public Subnet-Name_of_VCN) under Public Subnets.
- Use Network Security Groups to Control Traffic: Leave un-checked.
- Assign a public IP address: Check this option.
- Configure Boot Volume: Leave the default.
- Add SSH Keys: Choose Paste Public Keys and paste the public SSH key you created and saved earlier.
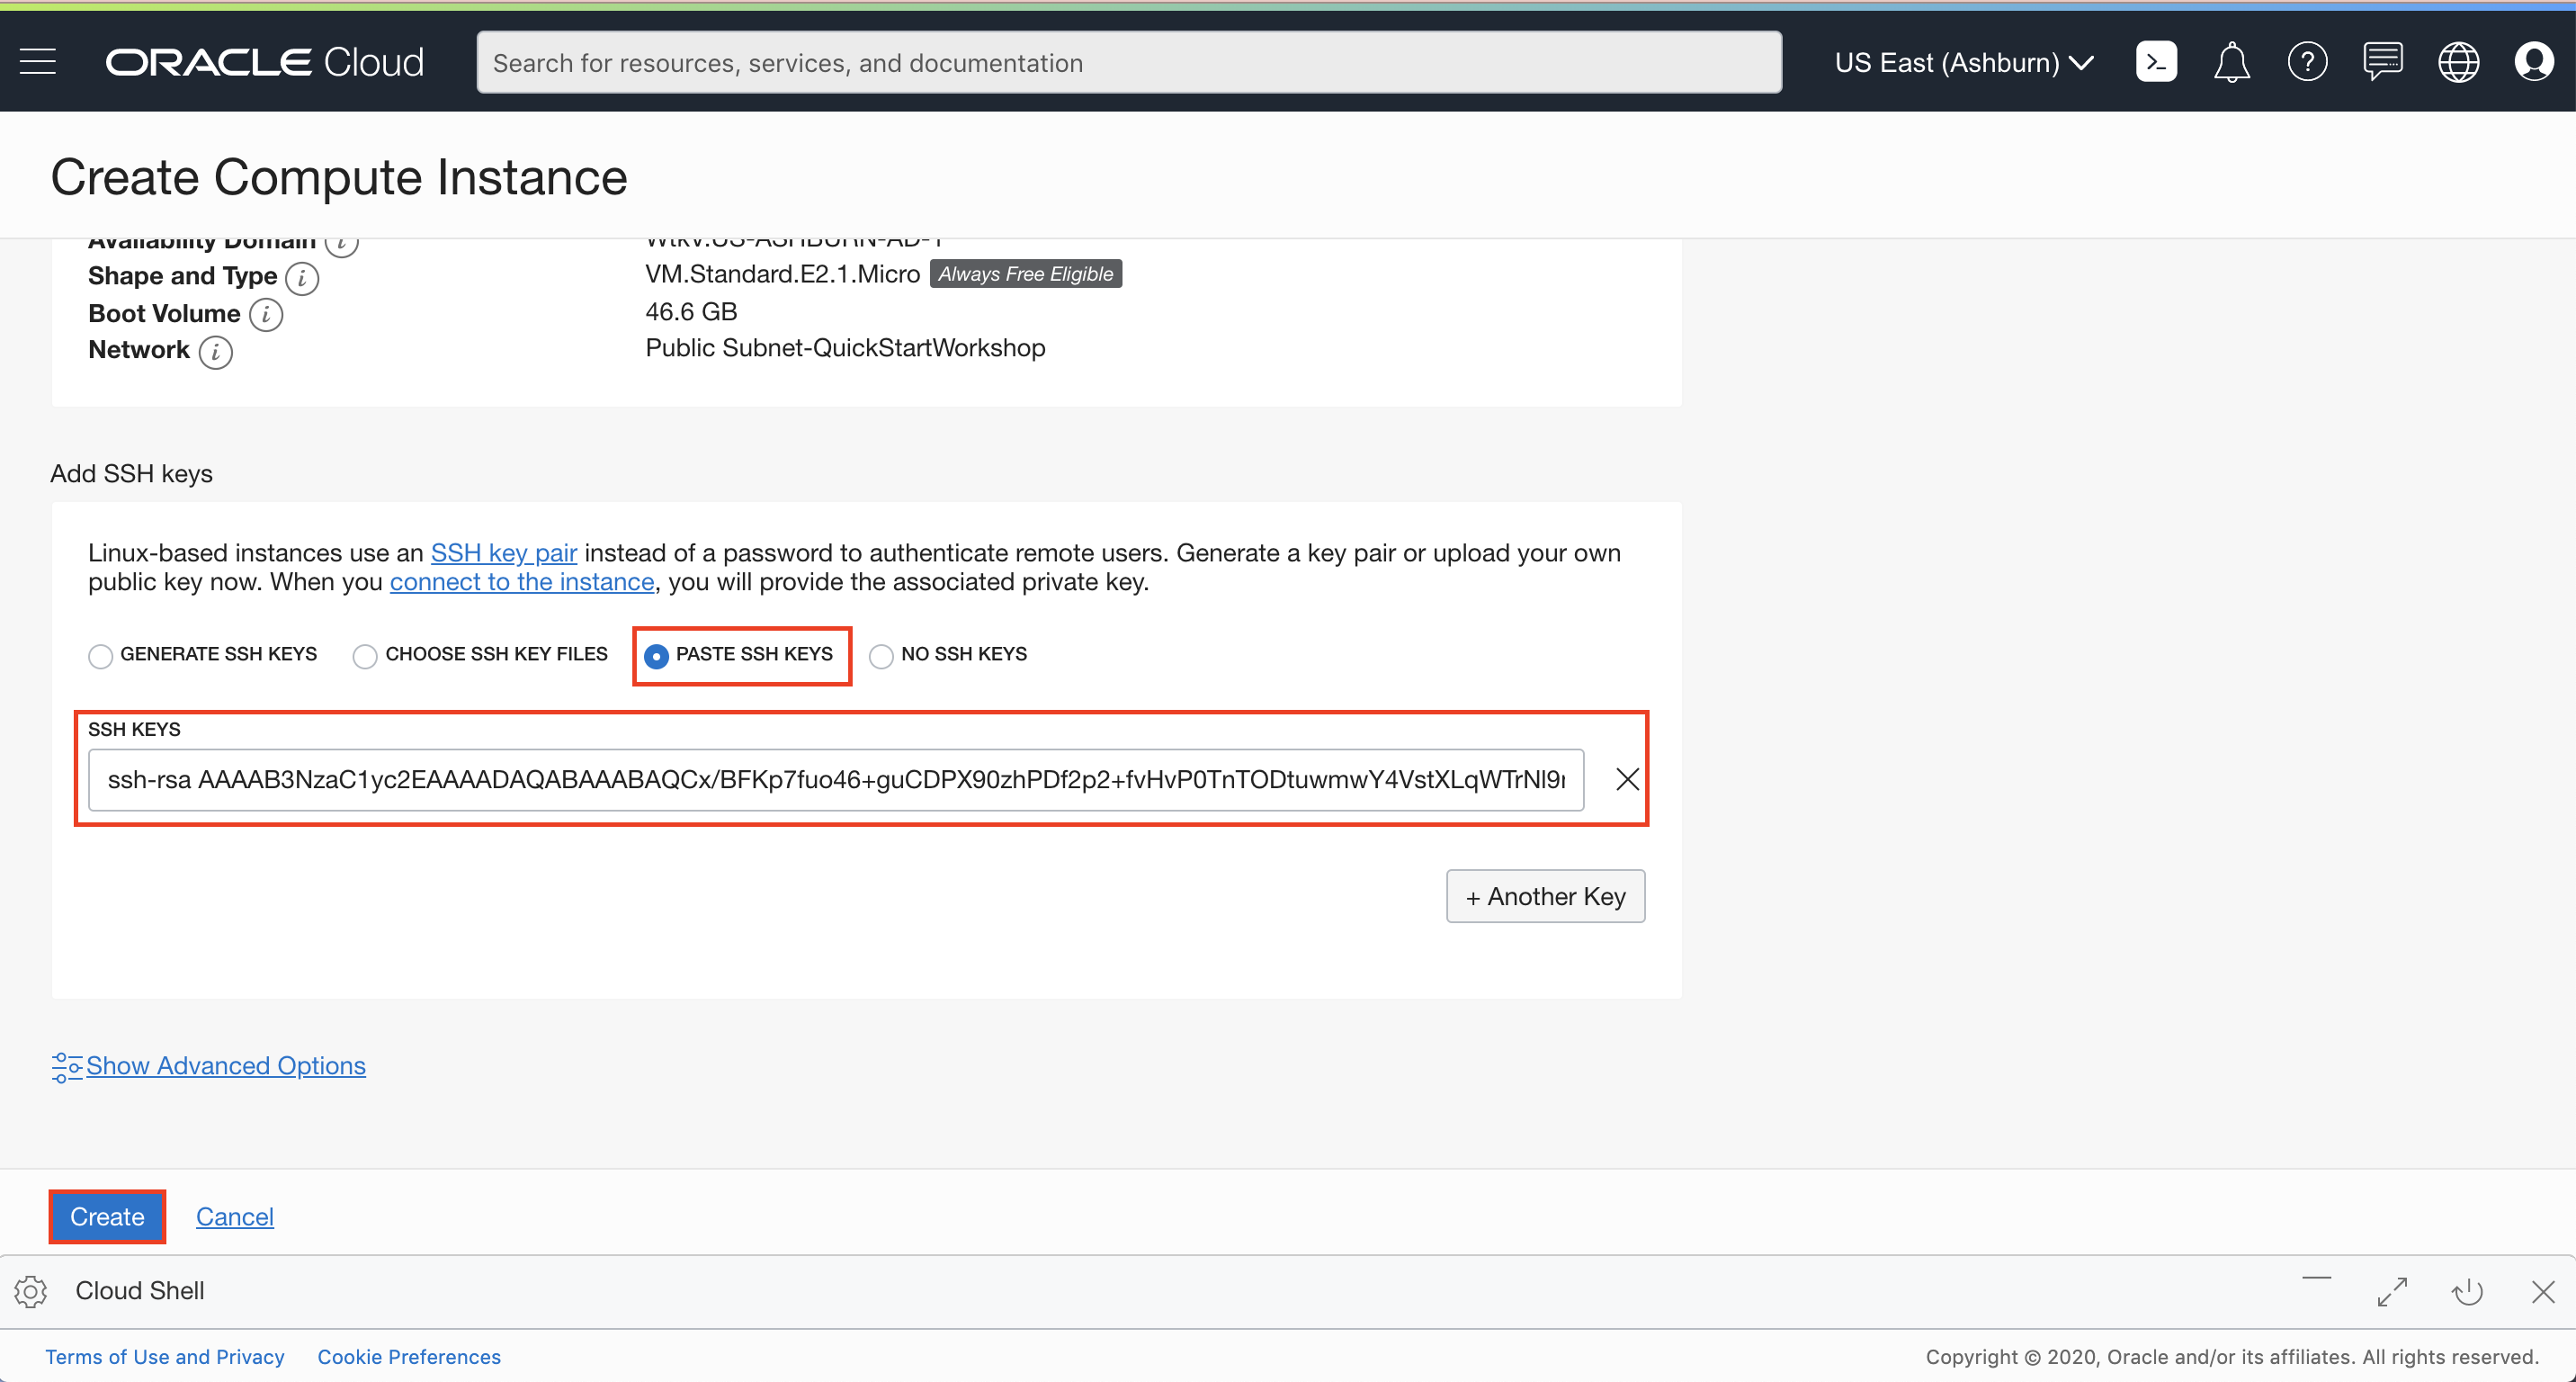
Click Create.
Note: If a
Service limiterror is displayed, choose a different shape from VM.Standard2.1, VM.Standard.E2.1, VM.Standard1.1, VM.Standard.B1.1, or choose a different Availability Domain.Wait for the instance to be in Running state. Go to the directory where you created you SSH Keys.
For example, in Cloud Shell, enter command:
cd .sshEnter ls to verify that your SSH key file exists.
Enter commands:
bashssh -i <SSH_Key_Name> opc@PUBLIC_IP_OF_COMPUTEHint: If
Permission denied erroris seen, ensure that you are using-iin the SSH command. You MUST type the command. Do NOT copy and paste the SSH command.Enter
yeswhen prompted for security message.
Verify that
opc@COMPUTE\_INSTANCE\_NAMEappears on the prompt.
Step 4: Mount the File System Storage to Compute Instance
Users of Ubuntu and Linux operating systems (we launched a Oracle Linux instance) can use the command line to connect to a file system and write files. Mount targets serve as file system network access points. After your mount target is assigned an IP address, you can use it to mount the file system. You need to install an NFS client and create a mount point. When you mount the file system, the mount point effectively represents the root directory of the file storage system, allowing you to write files to the file system from the instance.
In OCI Console, click the navigation button to open the OCI services menu. Under File Storage, click File Systems. Click your file system.
Under Exports, locate the mount target name under Mount Target. Click the Action icon on the right, and select Mount Commands. Execute the three commands in Mount Commands in your Cloud shell / terminal. If you finish this part, you can skip part 2-4 in this step.
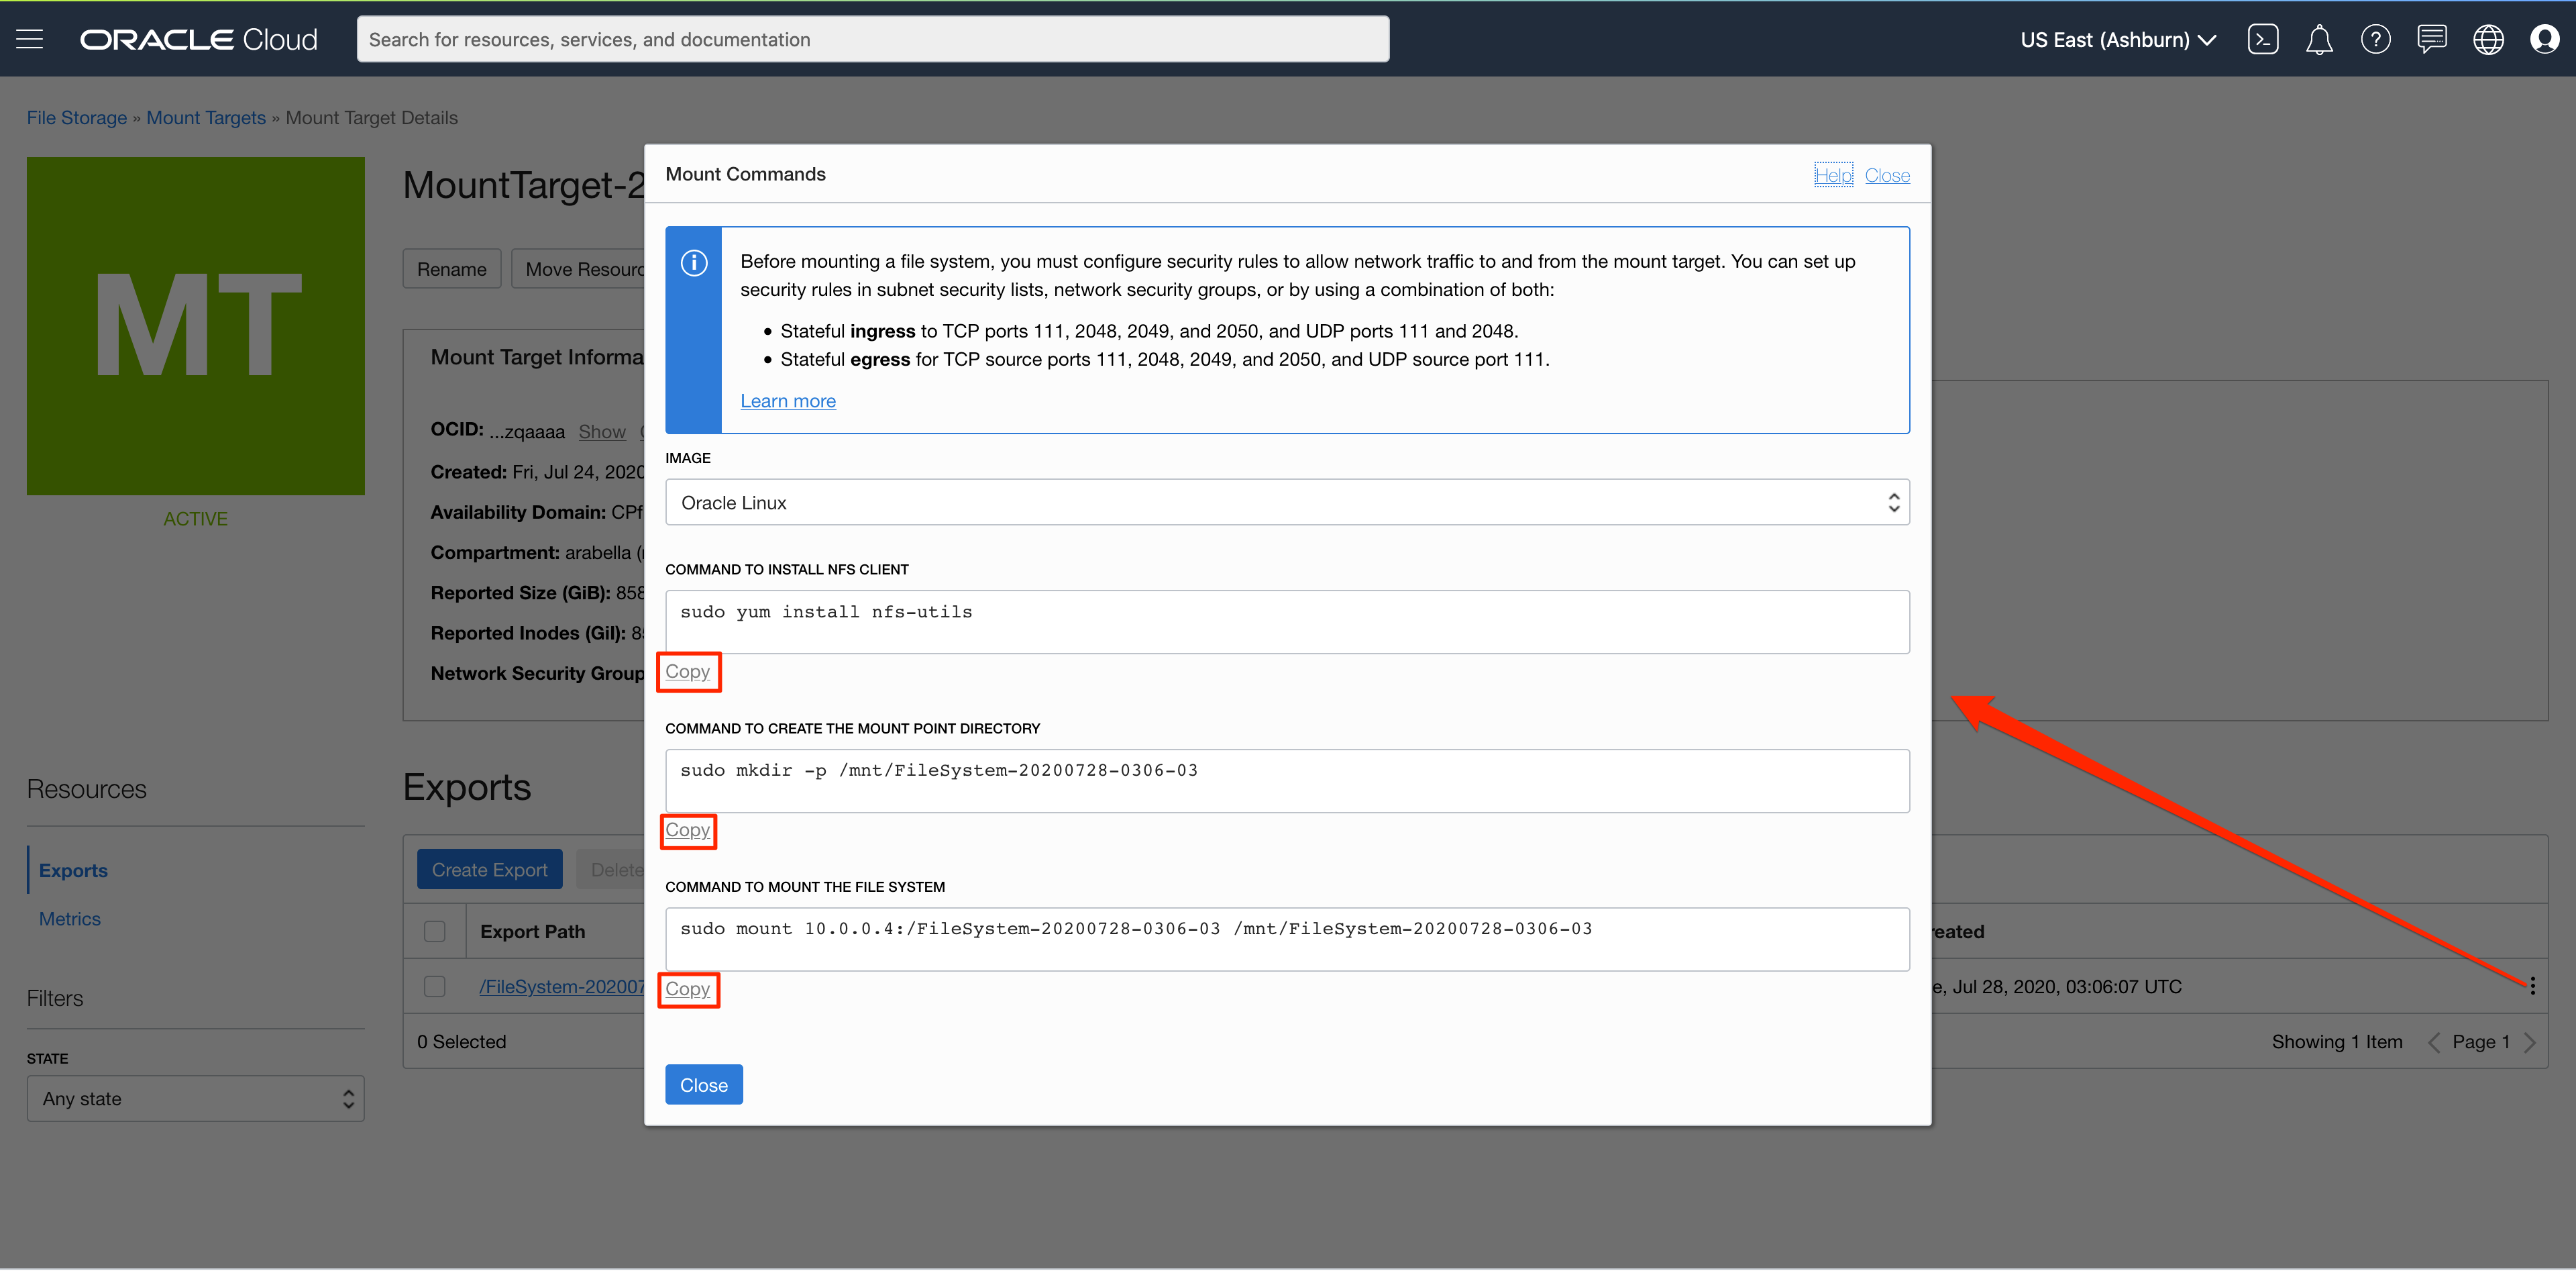
After you SSH to your compute instance, enter the command:
sudo yum install nfs-utils(This is just to ensure
nfs-utilsis installed)Enter the command:
sudo mkdir -p /mnt/nfs-datato create a mount point.
Mount the file system. Enter commands:
bashsudo mount 10.x.x.x:/<EXPORT_PATH_NAME> /mnt/nfs-dataNote: The 10.x.x.x should be replaced with the IP of file system storage. EXPORT_PATH_NAME should be replaced with Export path name used earlier. Example: If 10.0.0.3 is the IP of file system storage, and '/' is the EXPORT_PATH_NAME, then sudo mount 10.0.0.3:/ /mnt/nfs-data.
Enter command:
df -hand
mount | grep /mnt/nfs-dataand verify the mounted file system storage.
Note: You may need to change
nfs-datato the mount point directory you just created.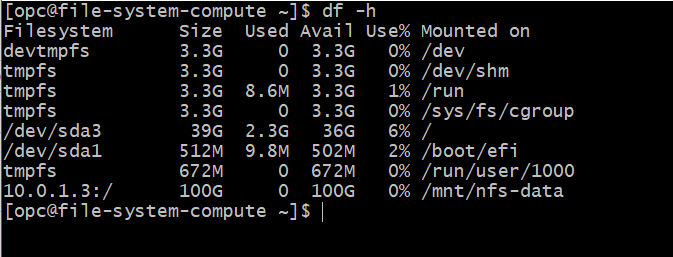

In the OCI services menu, click Networking, Virtual Cloud Networks, then click your VCN instance to view it.
Click Security Lists then Default Security List for YOUR_VCN_NAME. If you do NOT see any Ingress Rule with ICMP as IP protocal and want to ping the mount point, then you can add an Ingress Rule:
- Source CIDR: 0.0.0.0/0
- IP Protocol: ICMP
- Leave other fields blank
Note: If you already had one or multiple ICMP Ingress Rules, you can skip this part.
Optional Step. A second compute instance can be created and have the same file system mounted on it, following step 3 and step 4.
You have now mounted an Enterprise-grade file system storage created in OCI to your compute instance. You can place files in this file system. All other VM instances that have mounted this file system will have access to it.
Step 5: Delete the Resources
In this section, we will delete all the resources we created in this lab.
Delete File System Storage
From the OCI services menu, click File Storage, File Systems, then click your file system name.
Under Exports, click the Action icon for each export item, select Delete, and confirm Delete.
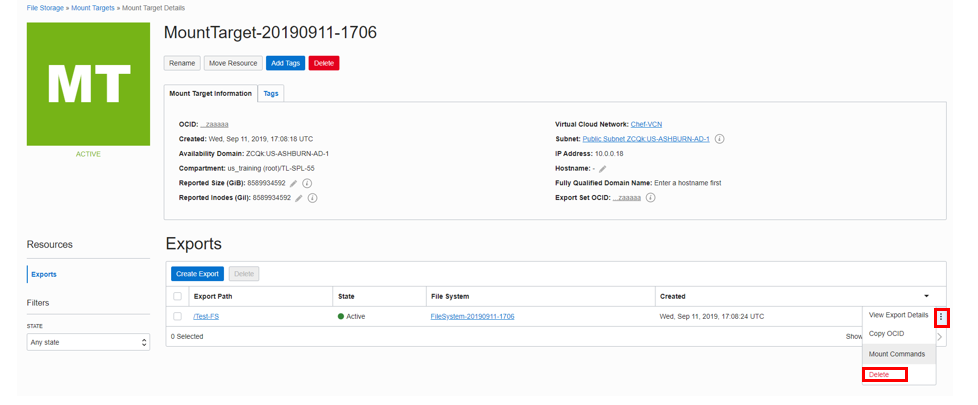
Verify that there is no data under Exports. It may take some time.
Click File Systems on the top of the page. Click the Action icon next to your file system, and click Delete.
Delete Compute Instance
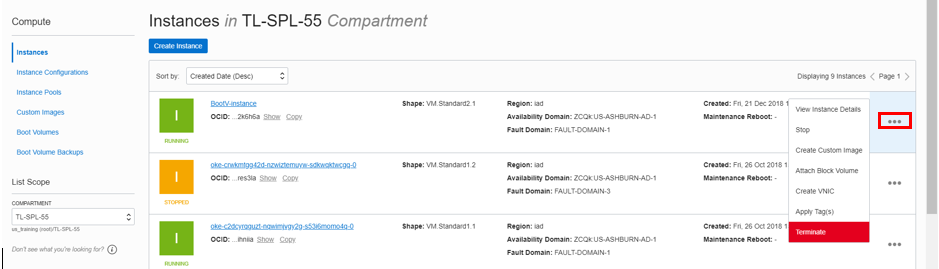
From the OCI services menu, under Compute, click Instances.
Locate your compute instance, click the Action icon next to it, and then click Terminate.
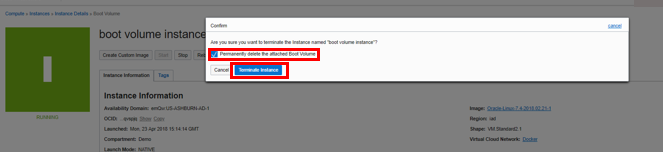
Make sure Permanently delete the attached Boot Volume is checked, and click Terminate Instance. Wait for the instance to fully terminate.
Delete VCN
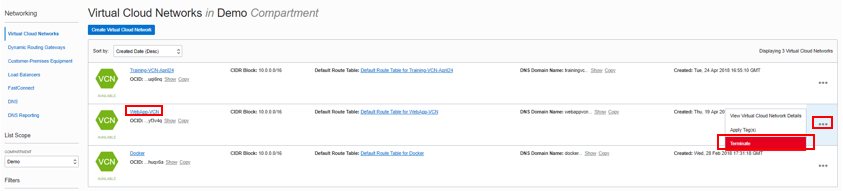
From the OCI services menu, under Networking, click Virtual Cloud Networks. A list of all VCNs will appear.
Locate your VCN, click the Action icon next to it, and then click Terminate. Click Terminate All in the confirmation window. Click Close once the VCN is deleted.
Acknowledgements
- Authors - Flavio Pereira, Larry Beausoleil
- Contributors - Isa Kessinger (QA Intern, LiveLabs QA Team), Yaisah Granillo (Cloud Solution Engineer), Arabella Yao (Product Manager Intern, DB Product Management)
Learn More
Explore other labs on docs.oracle.com/learn or access more free learning content on the Oracle Learning YouTube channel . Additionally, visit education.oracle.com/learning-explorer to become an Oracle Learning Explorer.
For product documentation, visit Oracle Help Center .