Deploy HA applications using load balancers
Introduction
In this lab you will deploy web servers on two compute instances in Oracle Cloud Infrastructure (OCI), configured in High Availability mode by using a Load Balancer.
OCI Load Balancing Service
The Load Balancing Service provides automated traffic distribution from one entry point to multiple servers within your Virtual Cloud Network (VCN). The service offers a Public load balancer with a public IP address, provisioned bandwidth, and high availability. The Load Balancing Service provisions the public IP address across two subnets within a VCN to ensure accessibility even during an Availability Domain outage.
Prerequisites
- Make sure you have credentials handy to sign in to Oracle Cloud
- This tutorial assumes you know how to generate SSH keys on Oracle Cloud Infrastructure
Create a Virtual Cloud Network
Sign in to Oracle Cloud Infrastructure Console using your cloud tenant name, user name, and password.
From the OCI services menu, click Virtual Cloud Networks under Networking. Choose the appropriate compartment from the drop down menu on left part of the screen under Networking and click Start VCN Wizard.
Note: Ensure that the correct compartment is selected under COMPARTMENT list.
Choose VCN with Internet Connectivity and click Start Workflow.
Fill out the dialog box and click Next:
- VCN NAME: Provide a name
- COMPARTMENT: Ensure your compartment is selected
- VCN CIDR BLOCK: Provide a CIDR block (10.0.0.0/16)
- PUBLIC SUBNET CIDR BLOCK: Provide a CIDR block (10.0.1.0/24)
- PRIVATE SUBNET CIDR BLOCK: Provide a CIDR block (10.0.2.0/24)
Verify all the information and click Create.
This will create a VCN with following components: VCN, Public subnet, Private subnet, Internet gateway (IG), NAT gateway (NAT), and Service gateway (SG).
Click View Virtual Cloud Network to display your VCN details.
Create Two Compute Instances and Install a Web Server
Switch to the OCI console. From the OCI services menu, click Instances under Compute.
Click Create Instance. Fill out the dialog box:
Name your instance: Enter a name
Choose an operating system or image source: For the image, we recommend using the Latest Oracle Linux available
Availability Domain: Select availability domain
Instance Shape: Click change shape and choose the AMD E4 shape.
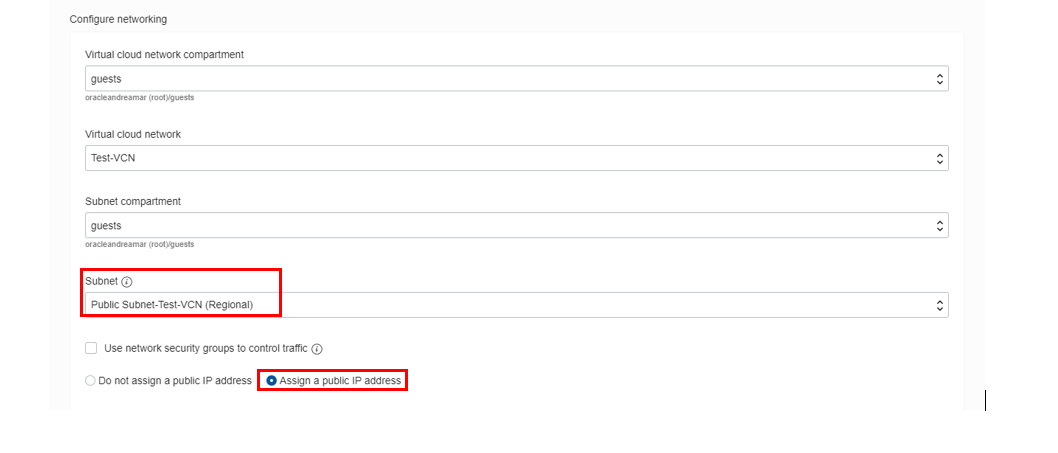
Under Configure Networking
Virtual cloud network compartment: Select your compartment
Virtual cloud network: Choose the VCN
Subnet Compartment: Choose your compartment
Subnet: Choose the Public Subnet under Public Subnets
Use network security groups to control traffic: Leave un-checked
Assign a public IP address: Check this option
Boot Volume: Leave the default
Add SSH Keys: Choose 'Paste SSH Keys' and paste the Public Key you created in Cloud Shell earlier. Ensure that when you are pasting, that you paste one line.
Note The tutorial instruction places the instances on a public subnets to simplify SSH access to them. In a more secure environment, they should be placed on private subnets and accessed throug a bastion server or VPN connection.
Click Create.
Note: If a 'Service limit' error is displayed, choose a different AD.
Repeat steps 1 - 3 to launch a second Compute instance and note down its public IP address.
Wait for the instances to be in Running state.
Launch the Cloud Shell if it is not running. When running, enter the command below:
cd .sshEnter
lsand verify that your key file exists.SSH to the first compute instance. Enter command:
bash ssh -i <<sshkeyname>> opc@<PUBLIC_IP_OF_COMPUTE_1>Note: User name is
opcif you used the Oracle Linux image..Hint: If a 'Permission denied' error is seen, ensure that you are using
-iin the SSH command. You MUST type the command; do NOT copy and paste the SSH command.Enter 'Yes' when prompted for security message.

Verify that opc@
<COMPUTE_INSTANCE_NAME>appears on the prompt.Open up a second tab of Oracle Cloud. Launch a second cloud shell window using the steps above and connect via SSH into the second compute instance (using the same steps as above).
Hint: Ensure to use the IP address of the second compute instance in the SSH command.
Go back to the first tab cloud shell for the first compute instance and install a Web server using the commands below:
Install Apache HTTP Server:
sudo yum -y install httpdOpen port 80 on the firewall to allow http and https traffic:
sudo firewall-cmd --permanent --add-port=80/tcpNote:
--add-portflag has no spaces.Reload the firewall to activate the rules:
sudo firewall-cmd --reloadStart the web server:
sudo systemctl start httpdChange the user privileges (root):
sudo -iCreate index.html file. The content of the file will be displayed when the web server is accessed:
echo 'WebServer1' >>/var/www/html/index.htmlBring up the SSH session for the second Compute instance and repeat commands:
Install Apache HTTP Server:
sudo yum -y install httpdOpen port 80 on the firewall to allow http and https traffic:
sudo firewall-cmd --permanent --add-port=80/tcpNote: The
--add-portflag has no spaces.Reload the firewall to activate the rules:
sudo firewall-cmd --reloadStart the web server:
sudo systemctl start httpdChange the user privileges (root):
sudo -iCreate the index.html file. The content of the file will be displayed when the web server is accessed:
echo 'WebServer2' >>/var/www/html/index.htmlSwitch back to OCI console window.
We now have two compute instances with Web servers installed and a basis index.html file. Before we create the load balancer, we will need to create a new security list, route table, and subnet that the load balancer will use.
Load balancers should always reside in different subnets than your application instances. This allows you to keep your application instances secured in private subnets, while allowing public Internet traffic to the load balancers in the public subnets.
Create a Security List, Route Table, and Additional Subnets
In this section, we will create a new security list. This security list will be used by the load balancer (that will be created later on). This will ensure all traffic to the two web servers is routed properly.
From the OCI services menu, click Virtual Cloud Networks under Networking. This displays the list of VCNs in the current compartment.
Hint: If there are multiple networks, scroll down to locate the one you just created.
Click on your VCN name, click Security Lists and then Create Security List. You will be creating a new security list.
- CREATE IN COMPARTMENT: Select the compartment assigned to you (if not already selected).
- SECURITY LIST Name: Specify a name (for example, LB Security List).
- Click Create Security List
Verify that the new security list got created.
We now have a Security List that will be used by the load balancer. Next we will create a Route table that will be used by two new subnets (that will be used by the load balancer, once created).
Click on Security Lists under Resources.
To create a new route table, click Route Tables and then click Create Route Table. Fill out the dialog box:
- Name: Enter a name (for example, LB Route Table).
- Create in Compartment: This field defaults to your current compartment. Make sure that the correct compartment is selected.
Click +Another Route Rules
Target Type: Select Internet Gateway
Destination CIDR Block: 0.0.0.0/0
Compartment: Make sure that the correct compartment is selected
Target Internet Gateway: Select the Internet gateway for your VCN.
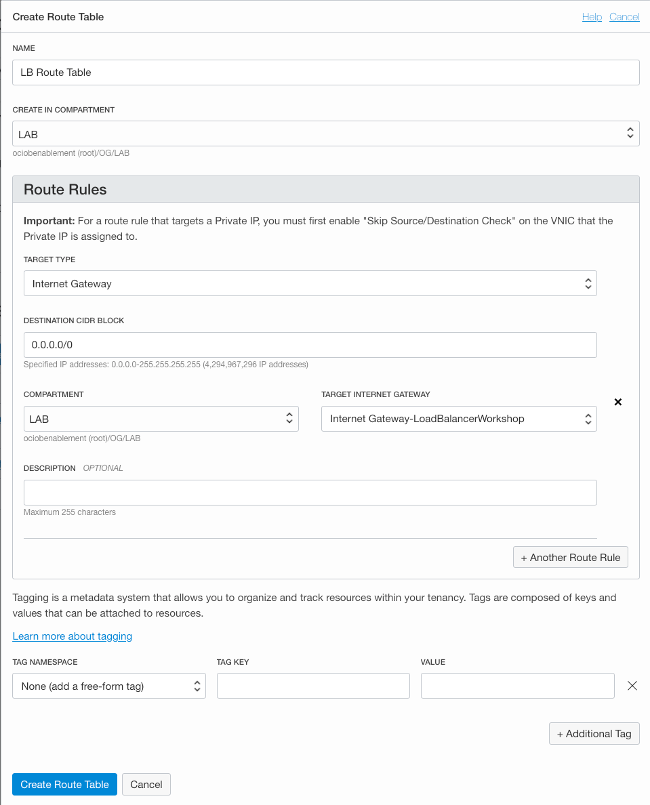
Click Create Route Table.
Ensure that the new route table appears in the list (under Create Route Table).
We now have a route table that allows all traffic. Next we will attach this route table to two new subnets that we will create (this subnet will be used by the load balancer).
Create Load Balancer subnet. If you're not on your VCN details page, go to that page and create subnet.
Click Subnets.
Click Create Subnet. Fill out the dialog box:
- Name: Enter a name (for example, LB-Subnet)
- Subnet Type: Regional
- CIDR Block: Enter 10.0.4.0/24
- Route Table: Select the Route Table you created earlier
- Subnet access: select Public Subnet
- DHCP Options: Select the default
- Security Lists: Select the Security List you created earlier
Leave all other options as default and click Create Subnet.
Create a Load Balancer and Update the Security List
When you create a load balancer, you choose its shape (size) and you specify the subnet (created earlier) from different Availability Domains. This ensures that the load balancer is highly available and is active only in one subnet at a time.
From the OCI services menu, click Load Balancers under Networking.
Click Create Load Balancer. Fill out the dialog box:
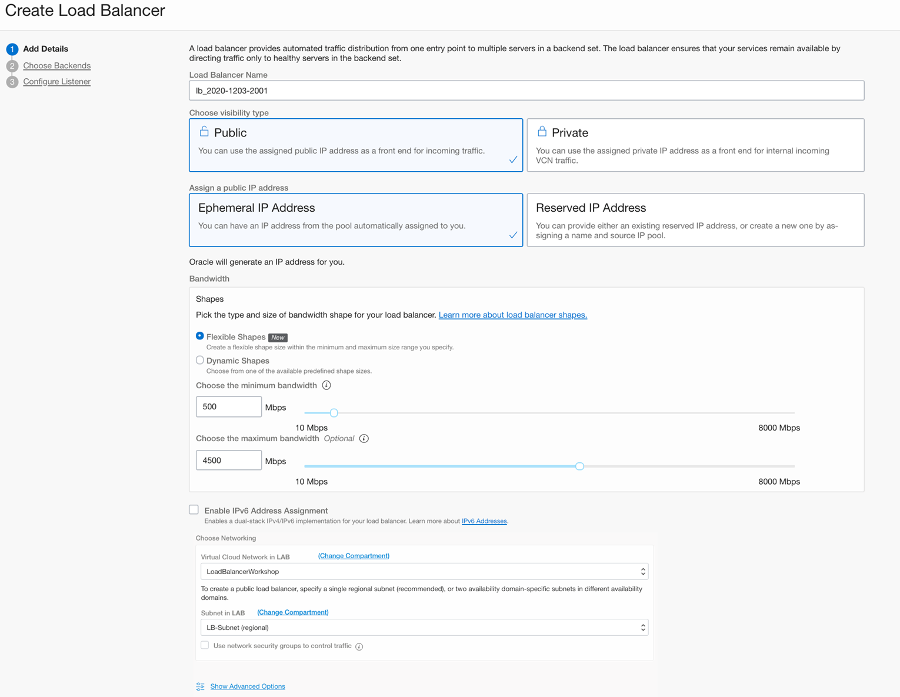
Under Add Details
- LOAD BALANCER NAME: Enter a name for your load balancer
- CHOOSE VISIBILITY TYPE: Public
- CHOOSE THE MAXIMUM TOTAL BANDWIDTH: Small, 100 Mbps (this specifies the bandwidth of the load balancer)
Note: Shape cannot be changed later.
VIRTUAL CLOUD NETWORK: Choose your Virtual Cloud Network
SUBNET: Choose the Regional Subnet we created (10.0.4.0 in this lab)
Under Choose Backends
- SPECIFY A LOAD BALANCING POLICY: Weighted Round Robin
- Click Add Backend and choose the two backend compute instance created earlier
Specify Health Check Policy
- PROTOCOL: HTTP
- Port: Enter 80
- URL PATH (URI): /
Leave other options with the default values
Under Configure Listener
- SPECIFY THE TYPE OF TRAFFIC YOUR LISTENER HANDLES: HTTP
- SPECIFY THE PORT YOUR LISTENER MONITORS FOR INGRESS TRAFFIC: 80
Leave other options with the default values
Click Submit.
Wait for the load balancer to become active and then note down it's public IP address.
We now have a load balancer that will manage the subnet we created earlier.
From the OCI services menu, click Virtual Cloud Networks under Networking. Locate the VCN you created.
Click the VCN name to display in the VCN detail page.
Click Security Lists, and locate the load balancer security list created earlier.
Click the load balancer security list you created earlier and click Add Ingress Rule.
Click +Additional Ingress Rule and enter the following ingress rule; Ensure to leave the STATELESS flag un-checked:
- Source Type: CIDR
- Source CIDR: Enter 0.0.0.0/0
- IP Protocol: Select TCP
- Source Port Range: All
- Destination Port Range: Enter 80 (the listener port)
Click Add Ingress Rule.
Click Egress Rule under Resources. Click Add Egress Rule then click +Additional Egress Rule and enter the following Egress rule; Ensure to leave the STATELESS flag un-checked:
- Destination Type: CIDR
- Destination CIDR: 0.0.0.0/0
- IP Protocol: Select TCP
- Destination Port Range: All
Click Add Egress Rule.
Click Security Lists and locate the default security list of the VCN. Click Add Ingress Rule.
Click +Additional Ingress Rule and add the two below rules for Ingress; Ensure to leave the STATELESS flag un-checked:
First Rule
- Source Type: CIDR
- Source CIDR: 10.0.4.0/24
- IP Protocol: Select TCP
- Source Port Range: All
- Destination Port Range: 80
Click +Additional Ingress Rule and enter the following Ingress rule; Ensure to leave the STATELESS flag un-checked:
Second Rule
- Source Type: CIDR
- Source CIDR: 10.0.5.0/24
- IP Protocol: Select TCP
- Destination Port Range: 80
Click Add Ingress Rule.
We now have the set-up configured with two compute instances running http server with a index.html file and a load balancer with all relevant policies and components.
We will now test the load balancer functionality (load balance using round robin). In case one of the http server in High Availability configuration is un-available, Load Balancer will automatically route the traffic to the available http server.
Note: Be sure to take note of the "Health" field in the Networking > Load Balancers dashboard. If the health is "Critical," the load balancer may not work as intended, and the best course of action may be to create a new one. This is likely the result of something being mis-configured, and it should only happen rarely.
Verify High Availability of HTTP Servers
In this section, we will access the two web servers configured earlier using Load Balancer's Public IP address and demonstrate Load Balancer's ability to route traffic on round robin basis (per the policy configured). In case one of the web server becomes un-available, the web content will be available via the second server (High Availability).
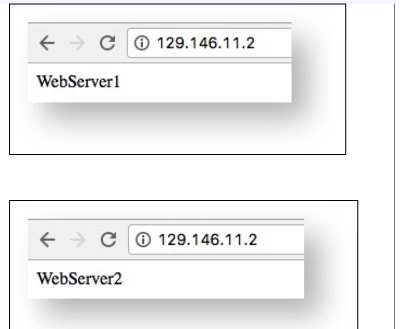
Open a web browser and enter load balancer's public IP address.
Verify the text in index.html file on the two servers (WebServer1, WebServer2) displayed.
Refresh the browser multiple times and observe the load balancer balancing traffic between the two web servers.
Note: In case one of the server goes down, the application will be accessible via the load balancer's public IP address.
This tutorial is not intended to test failover and recovery of backend servers. Troubleshooting issues encountered is out of scope of this tutorial.
Delete the Resources
Note: You can ignore this section if you're using Oracle's free tenancy. If you're trying these steps in your own tenancy, then deleting the resources is optional.
Delete the load balancer and its associated components:
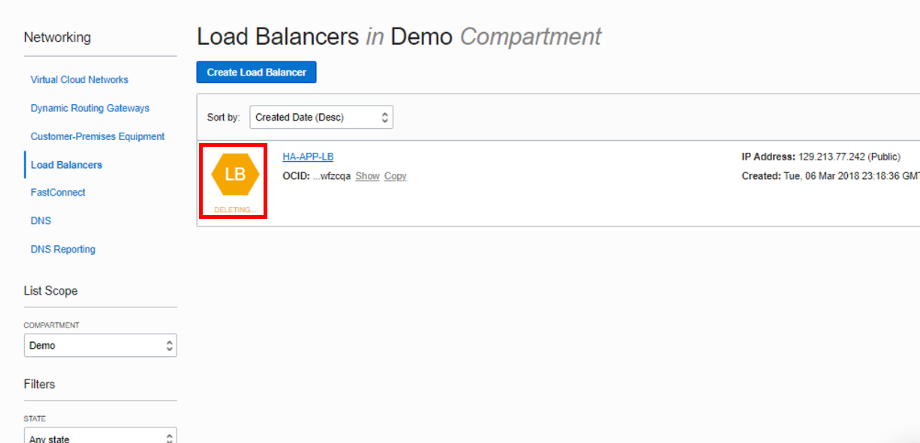
From the OCI services menu, click Load Balancers under Networking. Click your load balancer name.
Click Terminate.
Click OK in the confirm window. Wait for the termination to be completed.
From the OCI services menu, click Instances under Compute.
Locate first compute instance and click on its name. Click on the More Actions button and then select Terminate.
Make sure Permanently delete the attached Boot Volume is checked and click Terminate Instance. Wait for the termination to be completed.
Repeat steps 5 and 6 to delete the second compute instance.
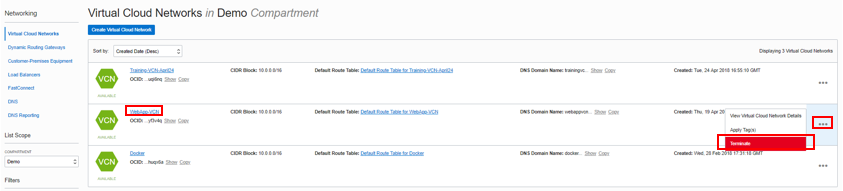
From the OCI services menu, click Virtual Cloud Networks under Networking. A list of all VCNs will
appear.
Locate your VCN. Click the Action icon and then click Terminate. Click Delete All in the confirmation window. Click Close once the VCN is deleted.
Acknowledgements
- Authors - Flavio Pereira, Larry Beausoleil
- Contributors - Yaisah Granillo (Cloud Solution Engineer), Kay Malcolm, Orlando Gentil
Learn More
Explore other labs on docs.oracle.com/learn or access more free learning content on the Oracle Learning YouTube channel . Additionally, visit education.oracle.com/learning-explorer to become an Oracle Learning Explorer.
For product documentation, visit Oracle Help Center .