Deploy Oracle Container Engine for Kubernetes
Introduction
A Kubernetes cluster is a group of nodes. The nodes are the machines running applications. Each node can be a physical machine or a virtual machine. The node's capacity (its number of CPUs and amount of memory) is defined when the node is created. A cluster comprises:
- one or more master nodes (for high availability, typically there will be a number of master nodes)
- one or more worker nodes (sometimes known as minions)
A Kubernetes cluster can be organized into namespaces to divide the cluster's resources between multiple users. Initially, a cluster has the following namespaces:
- default, for resources with no other namespace
- kube-system, for resources created by the Kubernetes system
- kube-node-lease, for one lease object per node to help determine node availability
- kube-public, usually used for resources that have to be accessible across the cluster
Objectives
- Create a Kubernetes cluster
- Deploy a sample app
Prerequisites
Watch the video below for a demo of Oracke Kubernetes Enging (OKE) on Oracle Cloud Infrastructure.
Video for Oracle Kubernetes Engine OKE - Level 100 - Part 2 - OKE Cluster Demo
Step 1: Create Kubernetes Cluster
Sign in to Oracle Cloud Infrastructure Console using your cloud tenant name, user name, and password.
From the OCI services menu, Click Kubernetes Clusters under Developer Services.
There is no need to create any policies for OKE as all the policies are pre-configured.
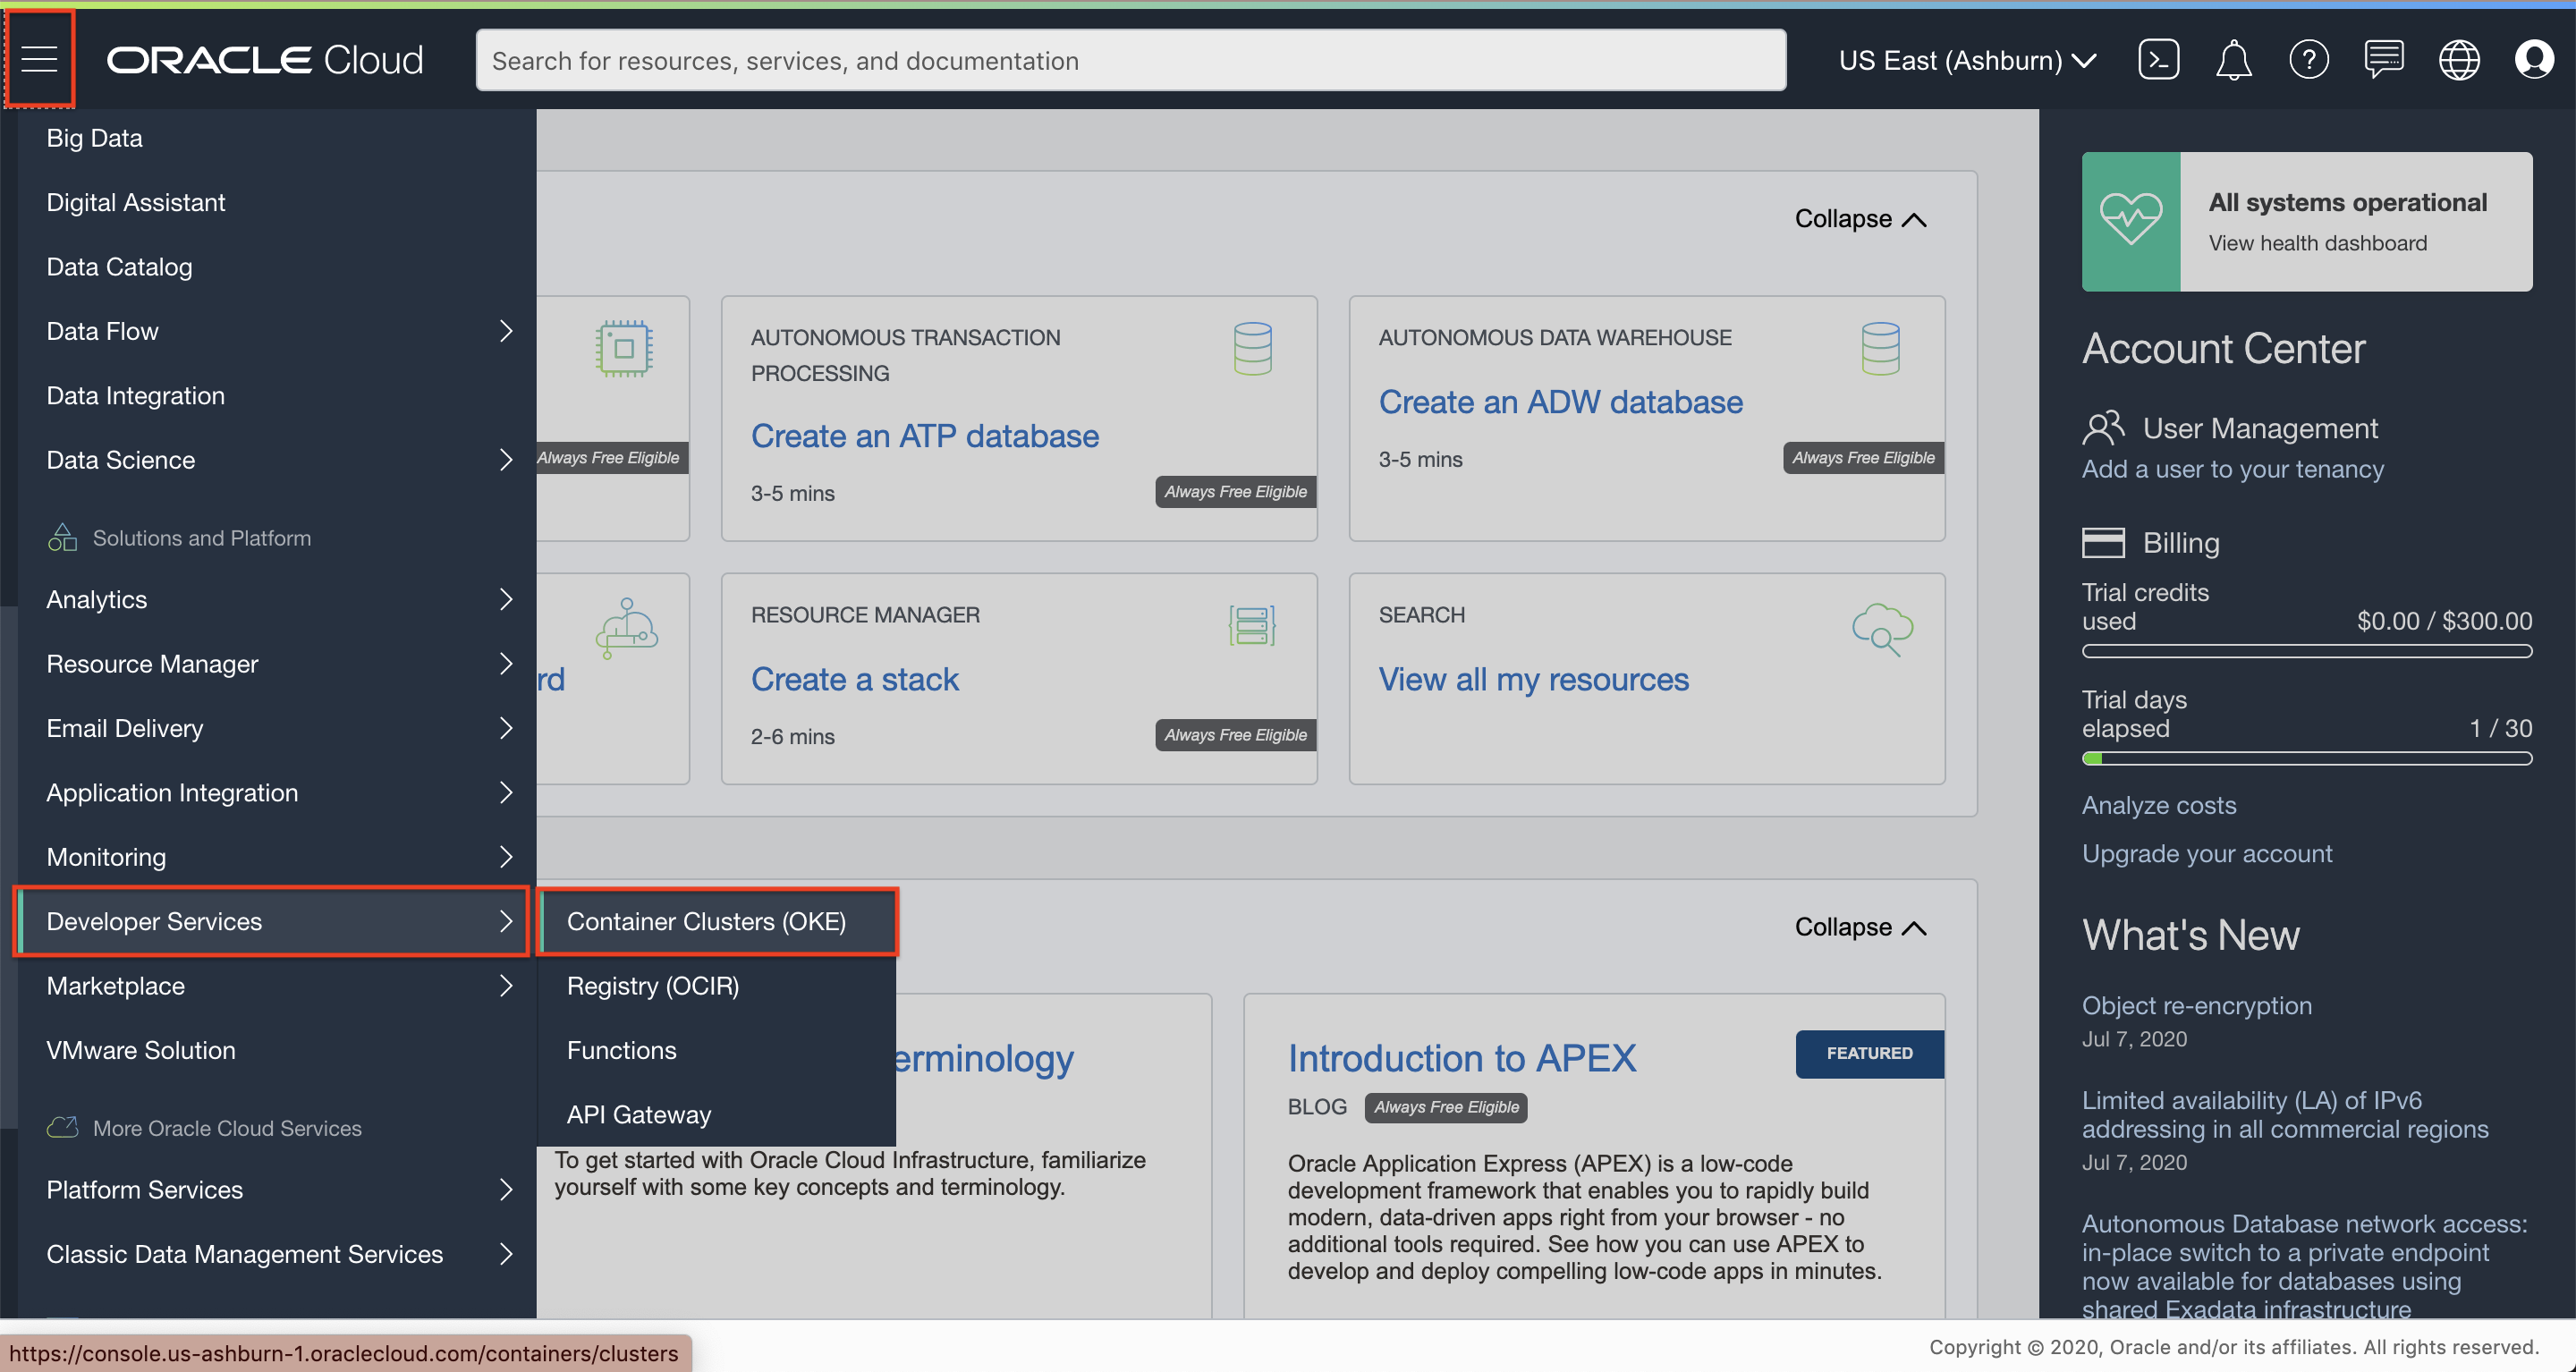
Under List Scope, select your compartment.
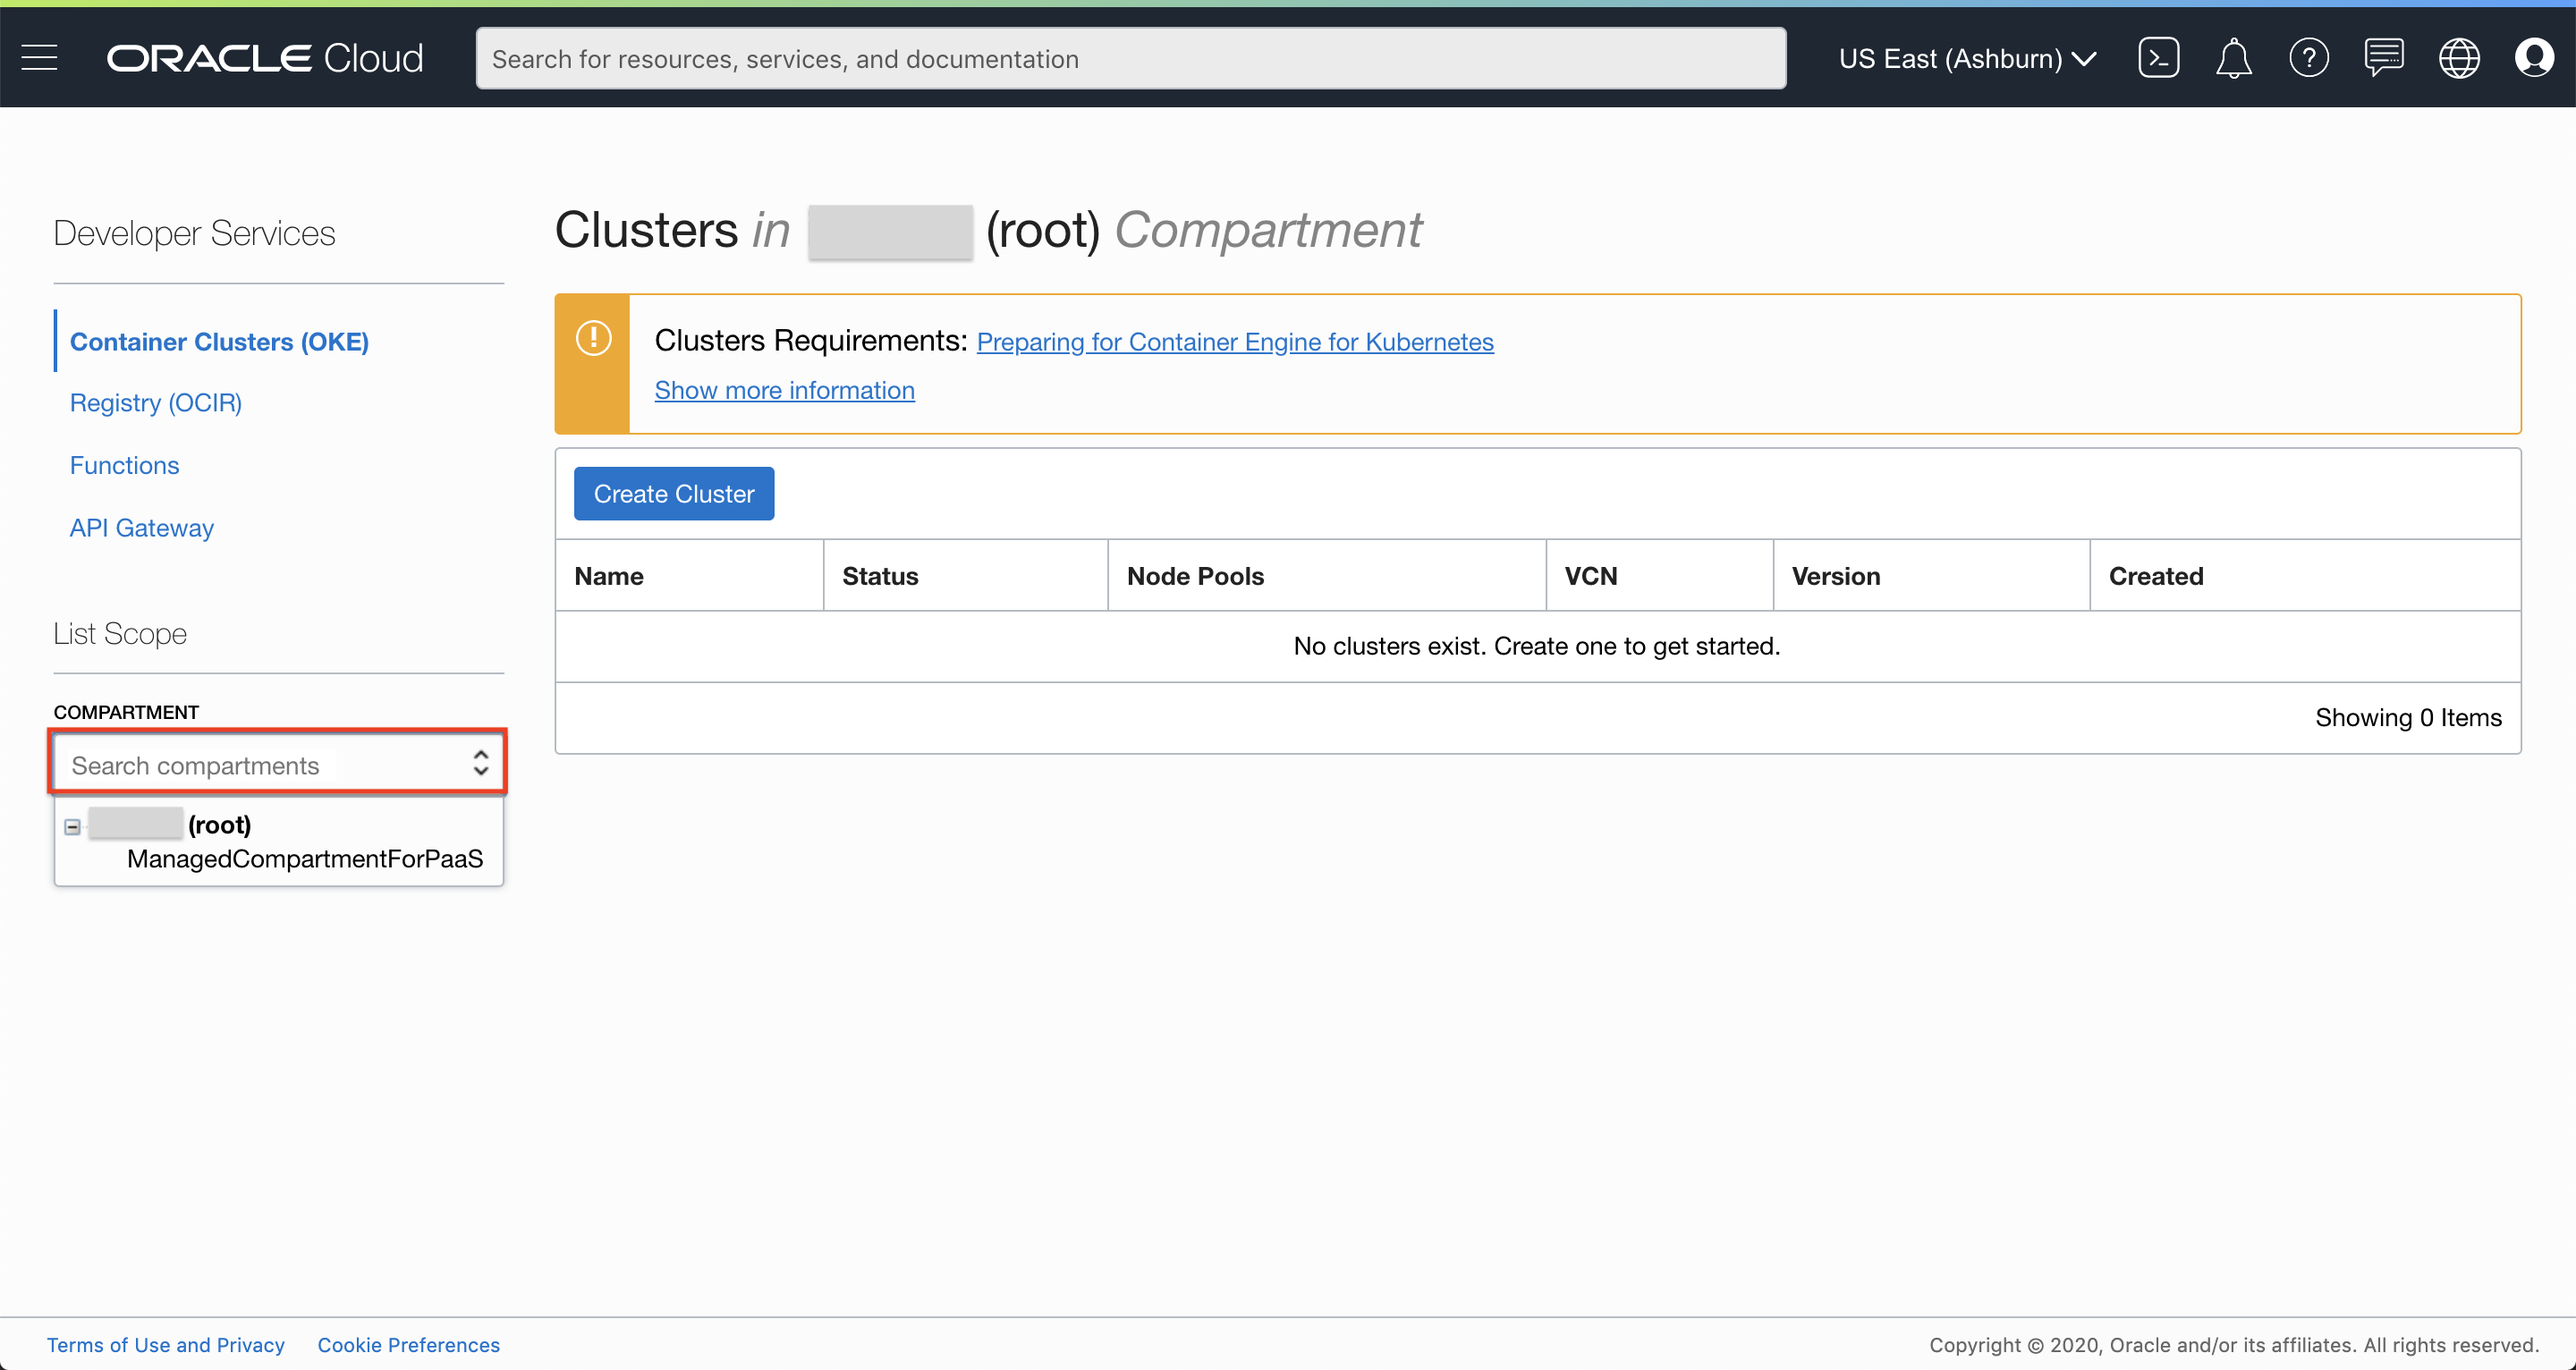
Click Create Cluster. Choose Quick Create and click Launch Workflow.
Fill out the dialog box:
- Name: Provide a name (oke-cluster in this example)
- Compartment: Choose your compartment
- Choose Visibility Type: Public
- Shape: Choose a VM shape
- Number of Nodes: 1
Click Next and click Create Cluster.
We now have an OKE cluster with 1 node and virtual cloud network with all the necessary resources and configuration needed.
Step 2: Check OCI CLI in Cloud Shell
OCI Command Line comes preinstalled in Oracle Cloud Shell.
Check the installed version of OCI CLI.
Start up the Oracle Cloud Shell if it's not already running. Enter command:
oci -vto check the OCI CLI version, which should be 2.5.x or higher.
Step 3: Initialize your environment
Switch to the OCI Console window and navigate to your cluster. In cluster detail window, scroll down and click Quick Start under Resources.
Follow the steps under the Quick Start section.
The Quick Start directions will direct you to copy and execute the commands in your local terminal.
Step 4: Deploy Nginx App on Cluster Using kubectl
Create nginx deployment with three replicas. Enter command:
kubectl run nginx --image=nginx --port=80 --replicas=3Get Kubernetes deployment. Enter command:
kubectl get deploymentsGet Pods. Enter command:
kubectl get pods -o wideCreate a service to expose the application. The cluster is integrated with the OCI Cloud Controller Manager (CCM). As a result, creating a service of type
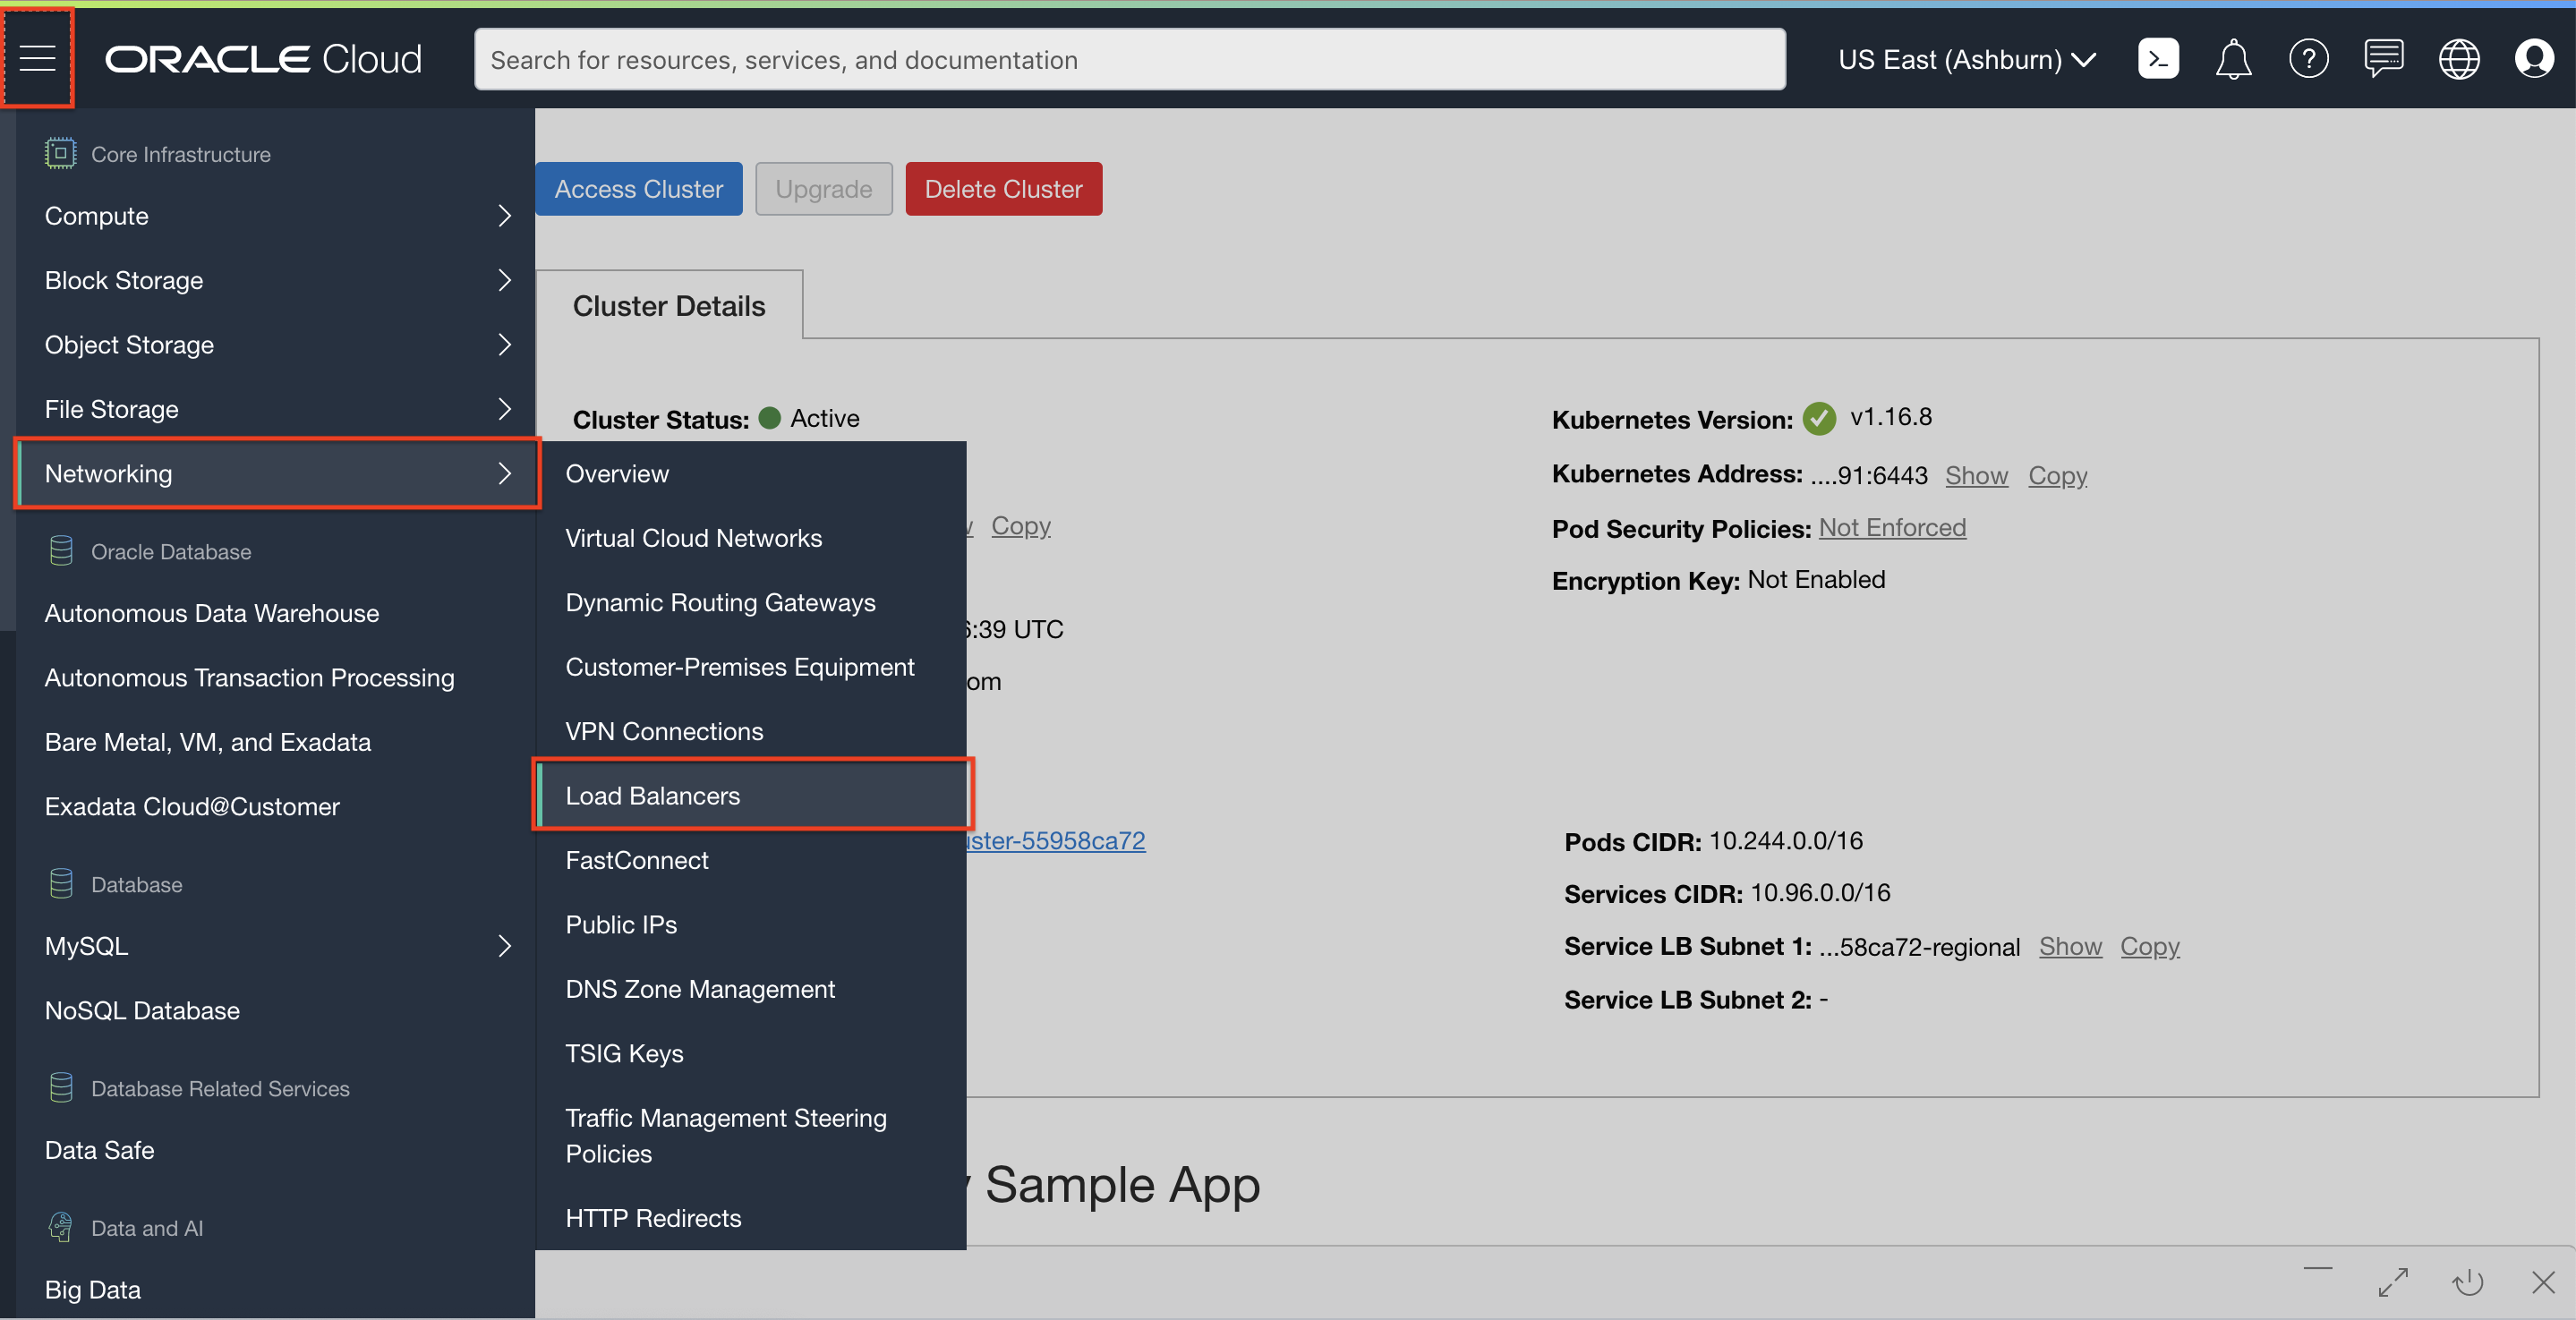
--type=LoadBalancerwill expose the pods to the Internet using an OCI Load Balancer. In the terminal, enter command:kubectl expose deployment nginx --port=80 --type=LoadBalancerSwitch to the OCI Console window. From the OCI services menu, click Load Balancers under Networking. A new OCI LB should be getting provisioned (this is due to the command above).
Once the load balancer is active, click the load balancer name, and from the Load Balancer Information page, note down its IP address.
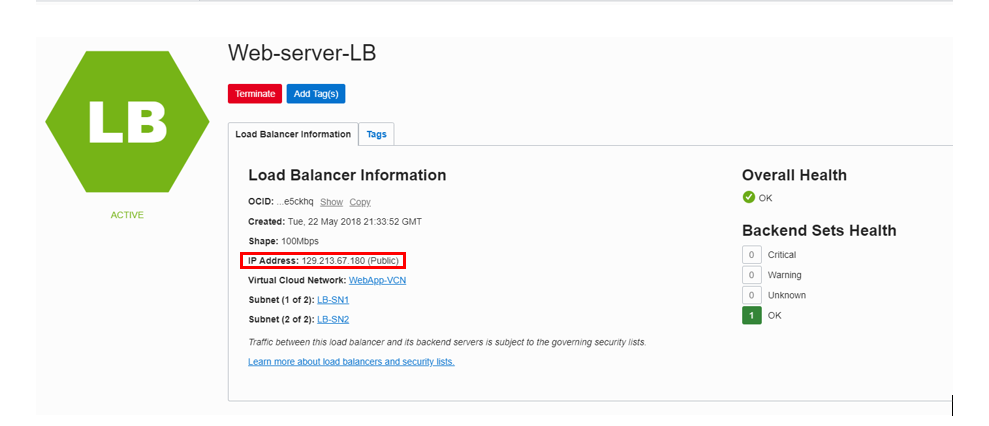
Open a new browser tab and enter URL http://
<Load-Balancer-Public-IP>(http://129.213.76.26 in this example). The Nginx welcome screen should be displayed.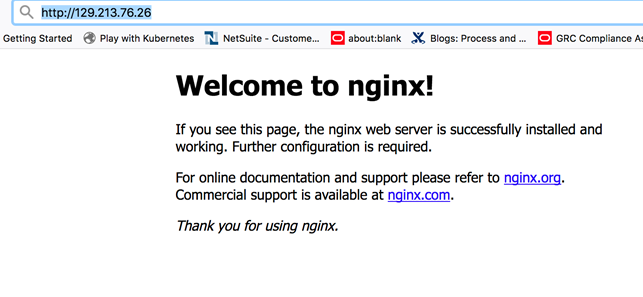
Step 5: Delete the Resources
Delete OKE Cluster
To navigate back to your OCI Console window, click Container Clusters (OKE) under Developer Services.
Navigate to your cluster. Click Delete Cluster and then click Delete in the confirmation window.
Delete VCN
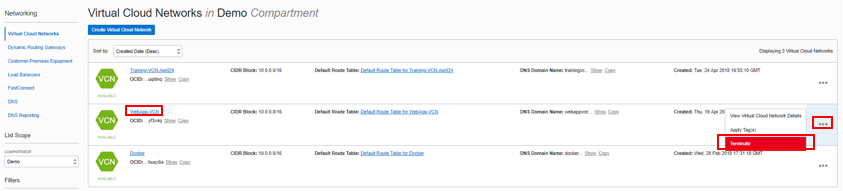
From the OCI services menu, click Virtual Cloud Networks under Networking. A list of all VCNs will appear.

Locate your VCN, click the Action icon, and then click Terminate. Click Delete All in the confirmation window. Click Close once the VCN is deleted.
Delete API Key
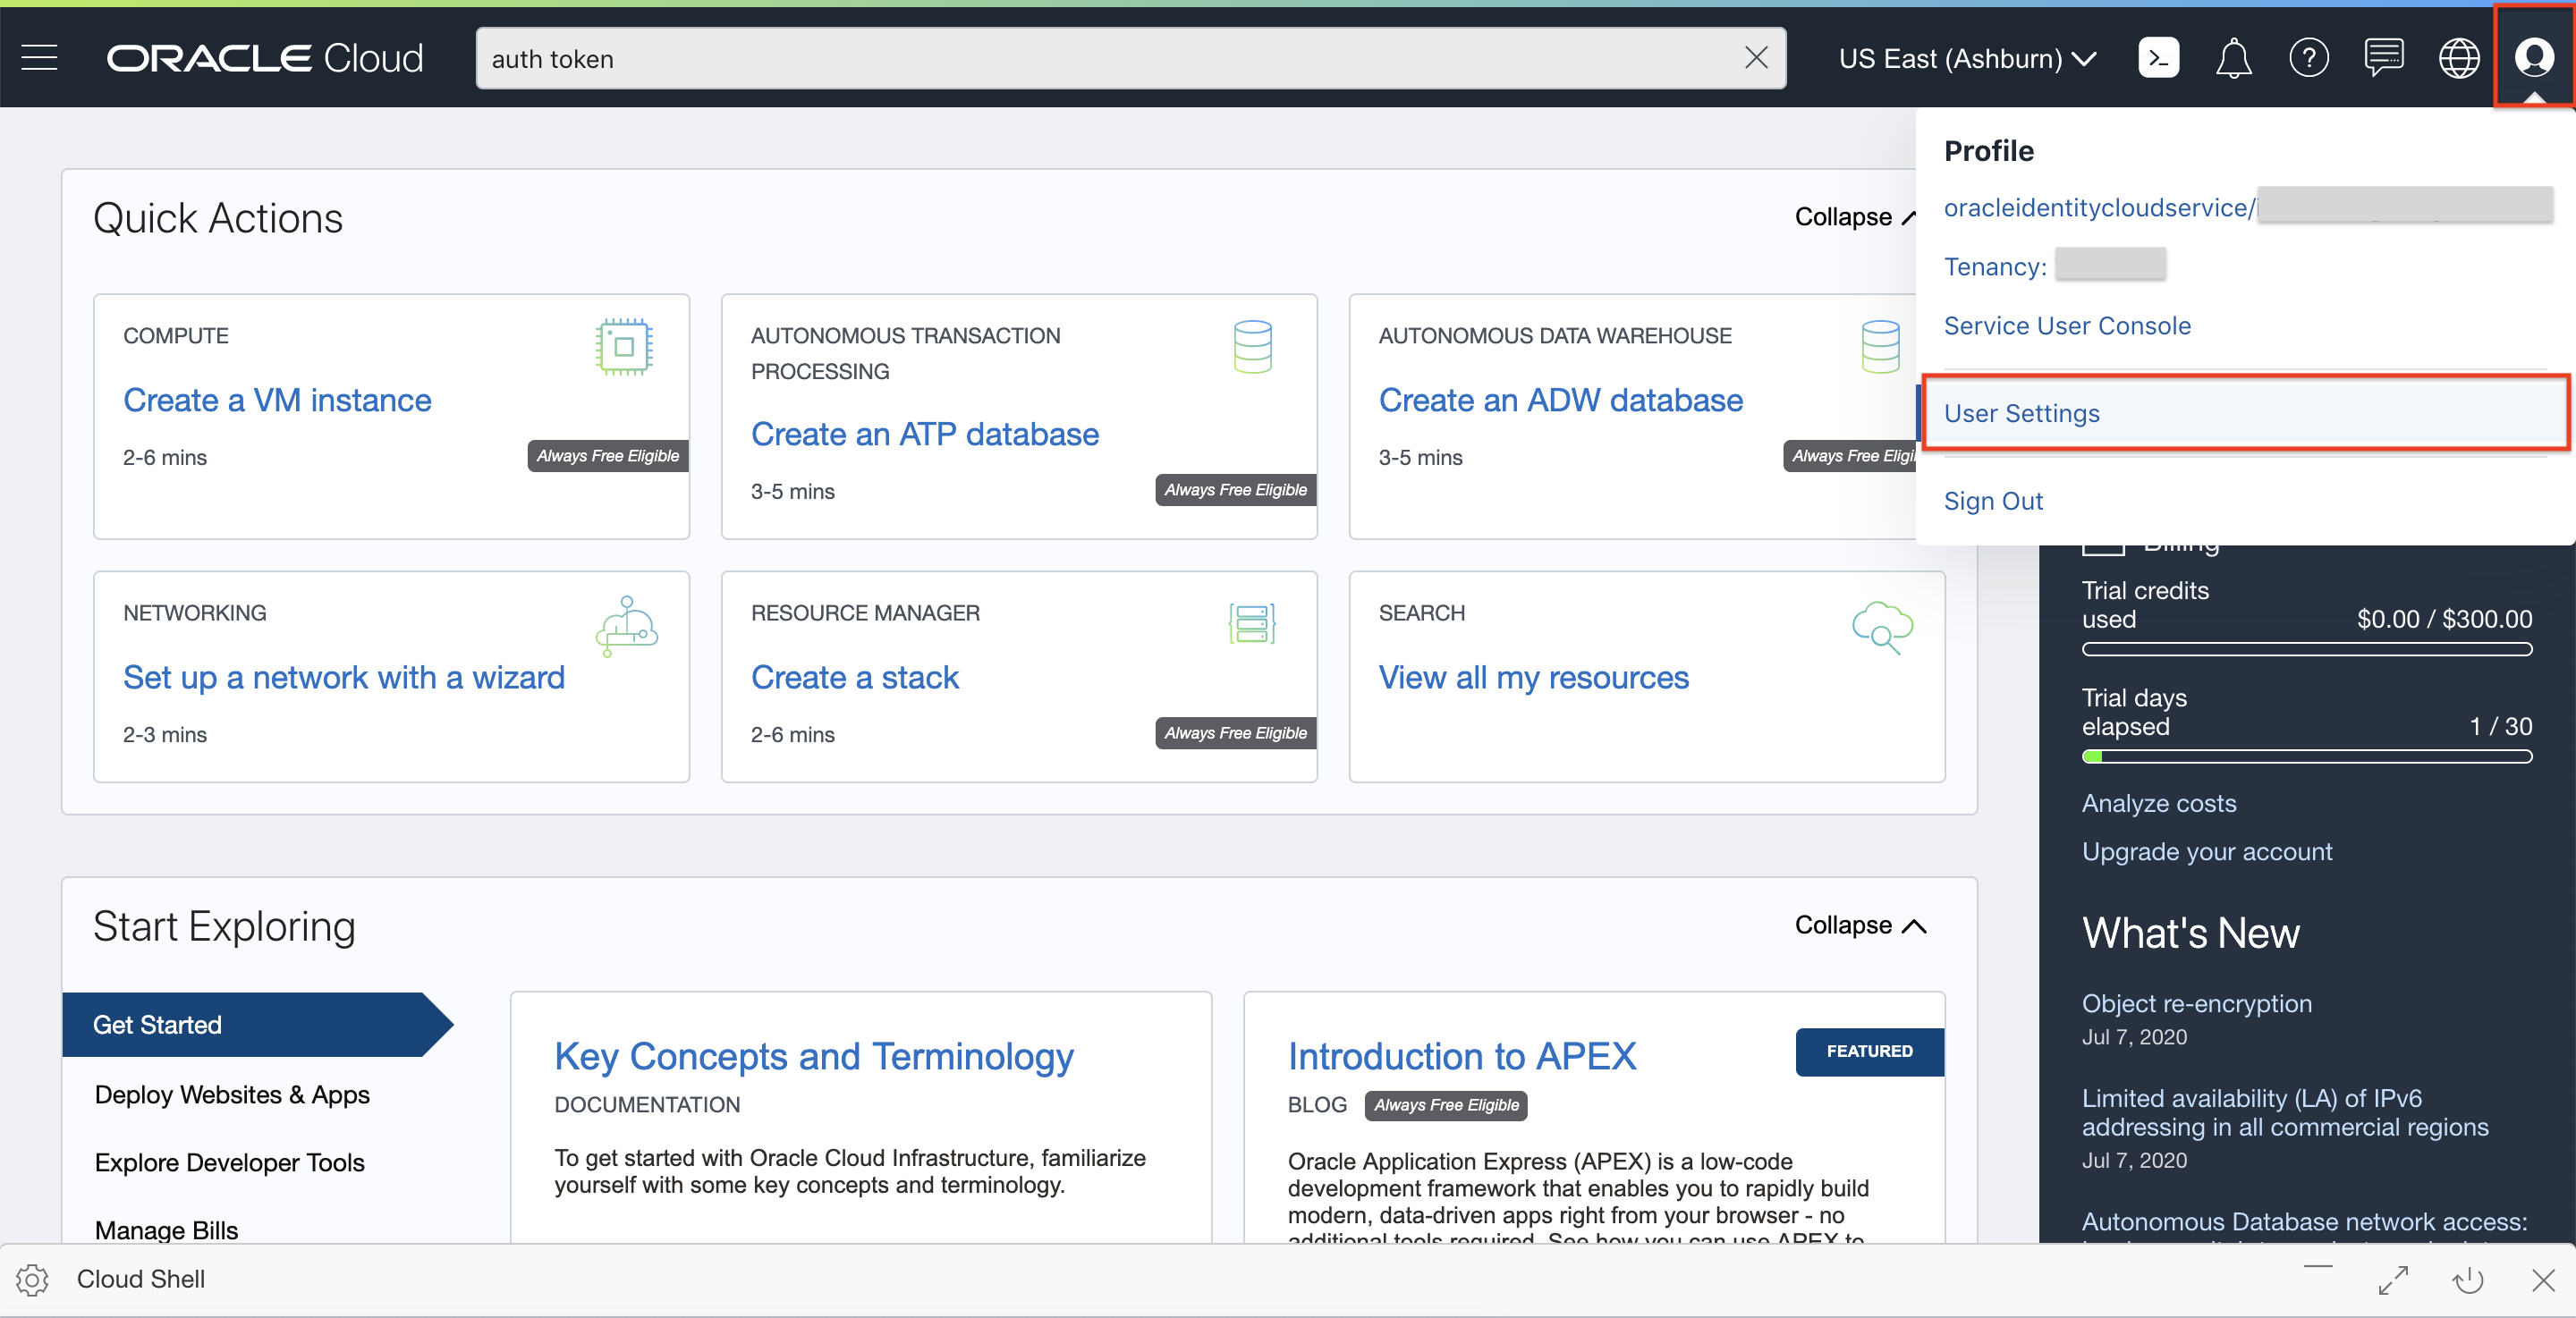
To navigate to user settings, click the Profile icon in the top right corner of the window. Then, select User Settings.
Scroll down to select API Keys under the Resources section.
Click on the Action icon and click Delete to delete the API key.

Acknowledgements
- Authors - Flavio Pereira (OCI Product Manager), Larry Beausoleil (OCI Enablement)
- Contributors - LiveLabs QA Team (Arabella Yao, Product Manager Intern; Isa Kessinger, QA Intern), Yaisah Granillo (Cloud Solution Engineer), Orlando Gentil (OCI Product Manager)
Learn More
Explore other labs on docs.oracle.com/learn or access more free learning content on the Oracle Learning YouTube channel . Additionally, visit education.oracle.com/learning-explorer to become an Oracle Learning Explorer.
For product documentation, visit Oracle Help Center .