Install Podman Desktop
Introduction
Podman Desktop is a Graphical User Interface (GUI) for the Podman CLI, providing an easy way to interact with the Podman engine. Besides making it easy to confirm the status of the Podman engine itself, it also provides an easy way to review and interact with any containers deployed, images stored, and Podman pods and volumes on the machine. On the other hand, note that it does not provide any extra functionality unavailable from the command line.
Objectives
In this tutorial, you'll learn how to:
- Install Podman Desktop
- Verify basic Podman Desktop functionality works
Prerequisites
Minimum of a single Oracle Linux system
Each system should have Oracle Linux installed and configured with:
- A Linux graphical desktop environment
- A non-root user account with sudo access
- Podman and cURL packages
- Access to the Internet
Deploy Oracle Linux
Note: If running in your own tenancy, read the linux-virt-labs GitHub project README.md and complete the prerequisites before deploying the lab environment.
Open a terminal on the Luna Desktop.
Clone the
linux-virt-labsGitHub project.git clone https://github.com/oracle-devrel/linux-virt-labs.gitChange into the working directory.
cd linux-virt-labs/olInstall the required collections.
ansible-galaxy collection install -r requirements.ymlDeploy the lab environment.
ansible-playbook create_instance.yml -e localhost_python_interpreter="/usr/bin/python3.6" -e use_podman=true -e update_all=true -e use_vnc=trueThe free lab environment requires the extra variable
local_python_interpreter, which setsansible_python_interpreterfor plays running on localhost. This variable is needed because the environment installs the RPM package for the Oracle Cloud Infrastructure SDK for Python, located under the python3.6 modules.The default deployment shape uses the AMD CPU and Oracle Linux 8. To use an Intel CPU or Oracle Linux 9, add
-e instance_shape="VM.Standard3.Flex"or-e os_version="9"to the deployment command.Important: Wait for the playbook to run successfully and reach the pause task. At this stage of the playbook, the installation of Oracle Linux is complete, and the instances are ready. Take note of the previous play, which prints the public and private IP addresses of the nodes it deploys and any other deployment information needed while running the lab.
Access the Oracle Linux GUI Desktop Environment
Open a terminal and connect via SSH to the ol-node-01 instance.
The
-Loption enables local forwarding, which opens a local port to connect through an SSH tunnel to the remote VNC server.ssh -L 5914:localhost:5901 oracle@<ip_address_of_instance>Switch to the Luna Desktop and open the TigerVNC Viewer (Applications -> Internet -> TigerVNC Viewer).
Log on to the deployed server's GUI environment by entering
localhost:5914into the VNC Server text box and press the Connect button.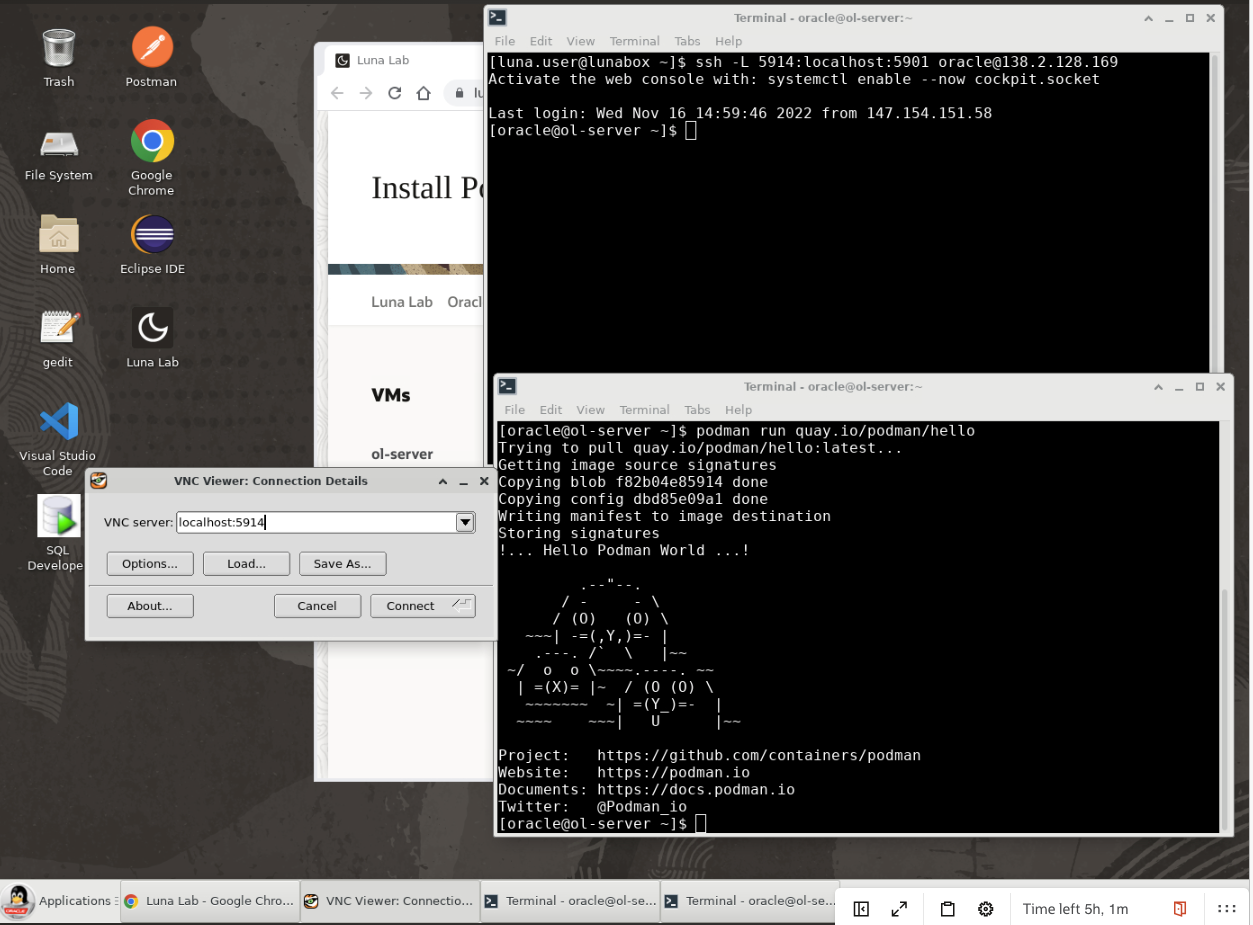
Enter the
oracleuser's password of oracle and press the OK button.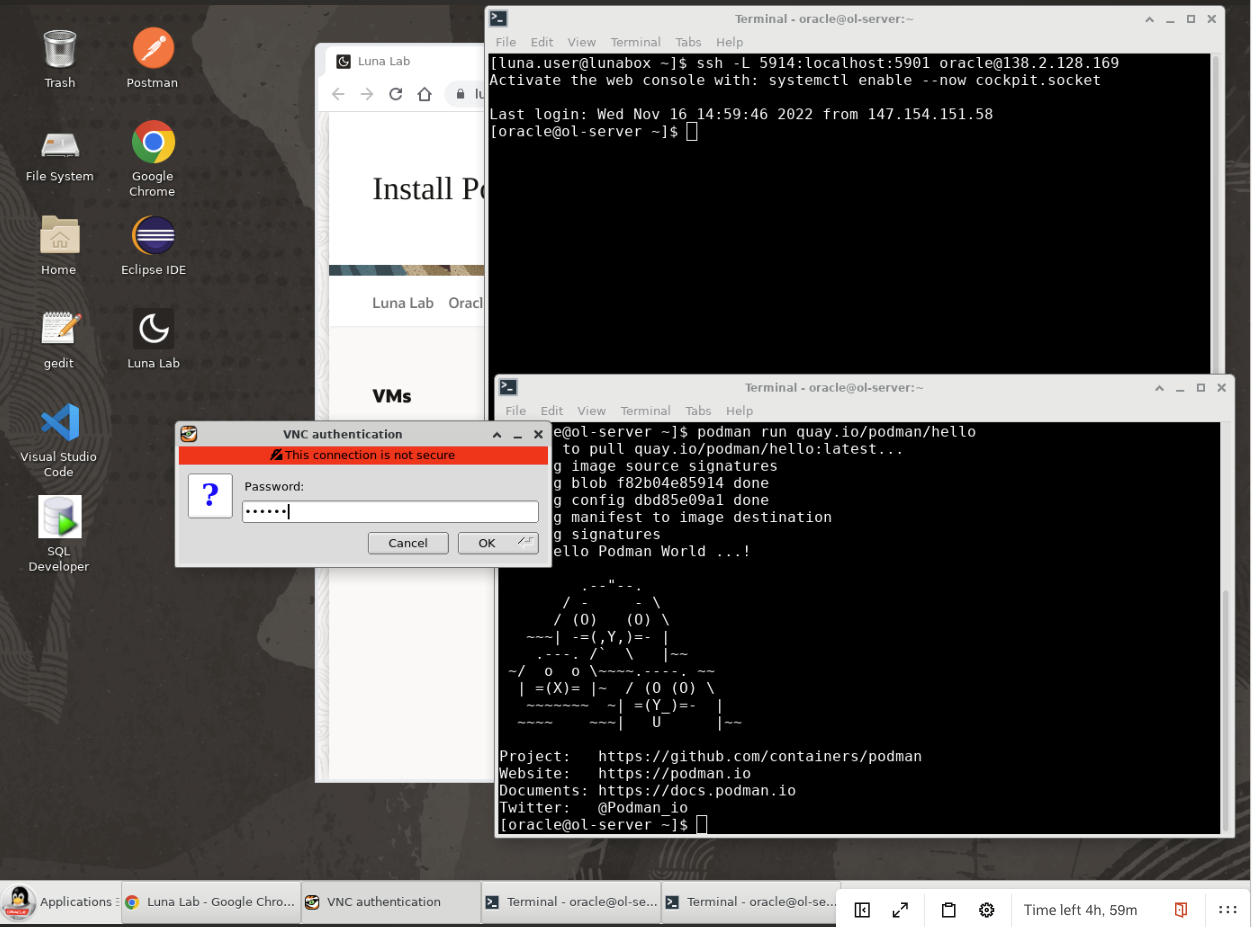
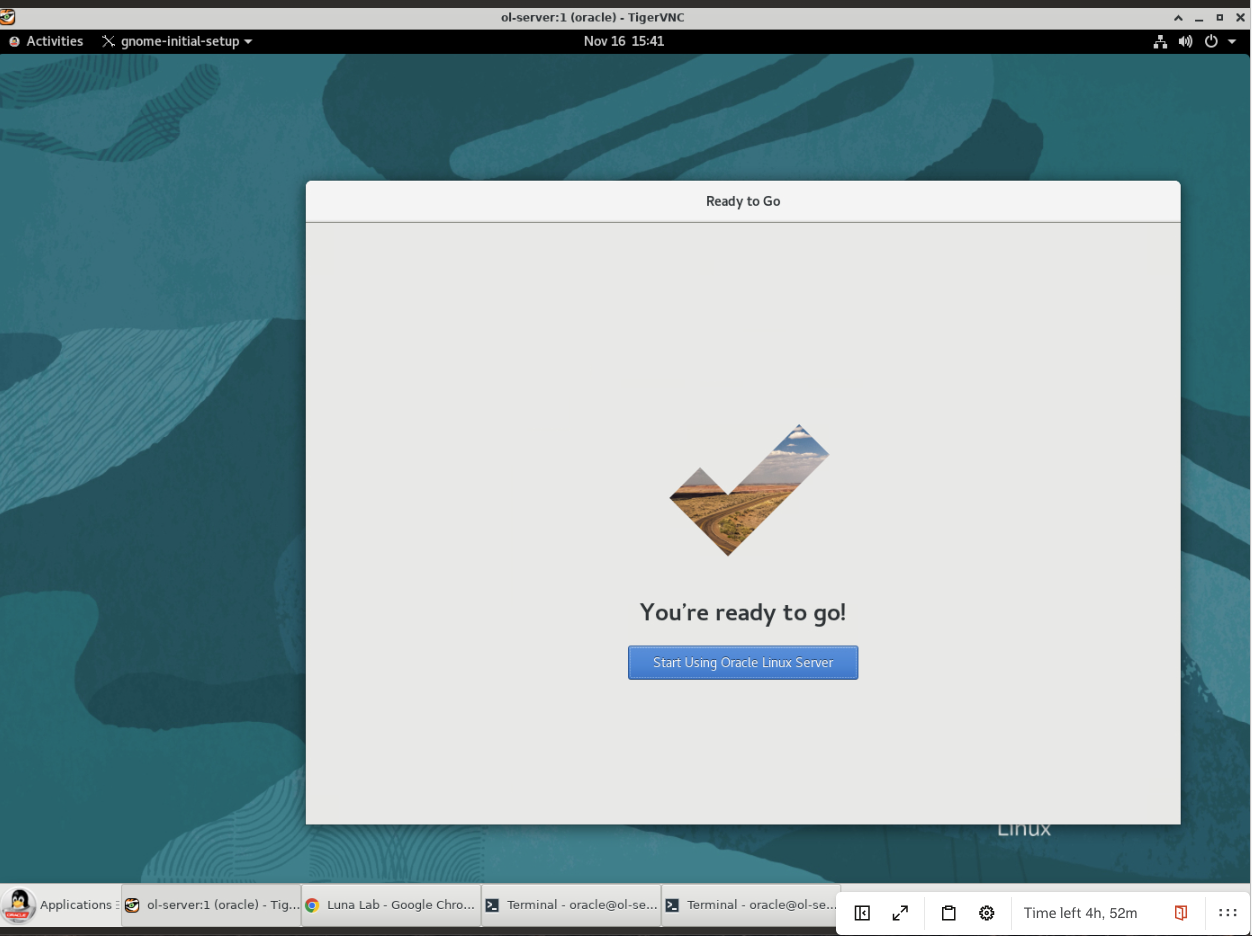
The Server's GUI desktop is displayed with a first-time login setup.
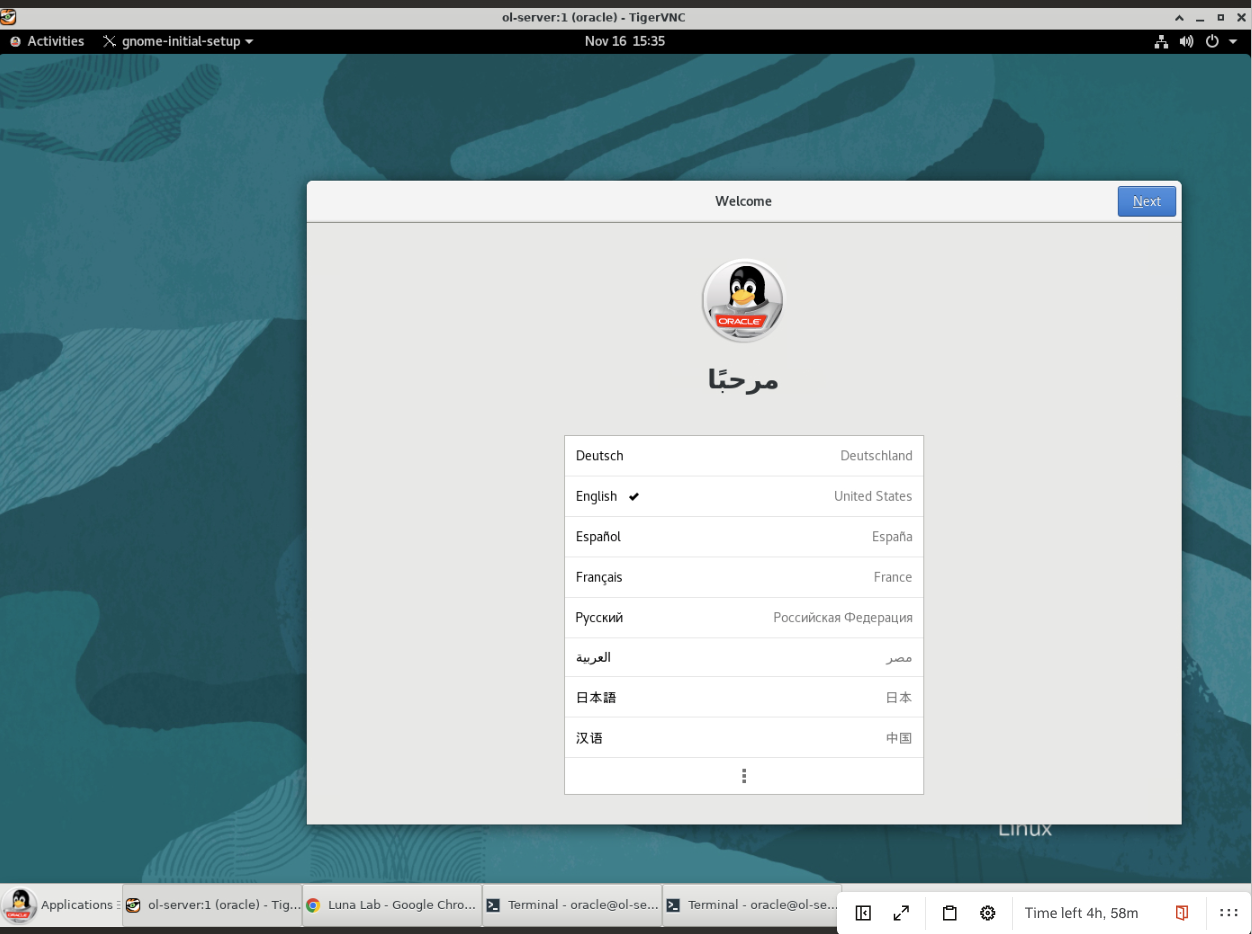
Press the Next button three times, then the Skip button, followed by the Start Using Oracle Linux Server button. Finally, close or minimize the Getting Started window.
Download Podman Desktop
Open the Firefox browser on the remote Oracle Linux instance.
Important: Ensure that Firefox on the remote instance is started (and NOT the Firefox browser from the Luna Desktop). In other words open the Menu called
Activitiesand NOT the menu calledApplications, otherwise the subsequent steps will not work.
Open a new browser tab and enter the following URL to navigate to the Podman Desktop Downloads location.
https://podman-desktop.io/downloads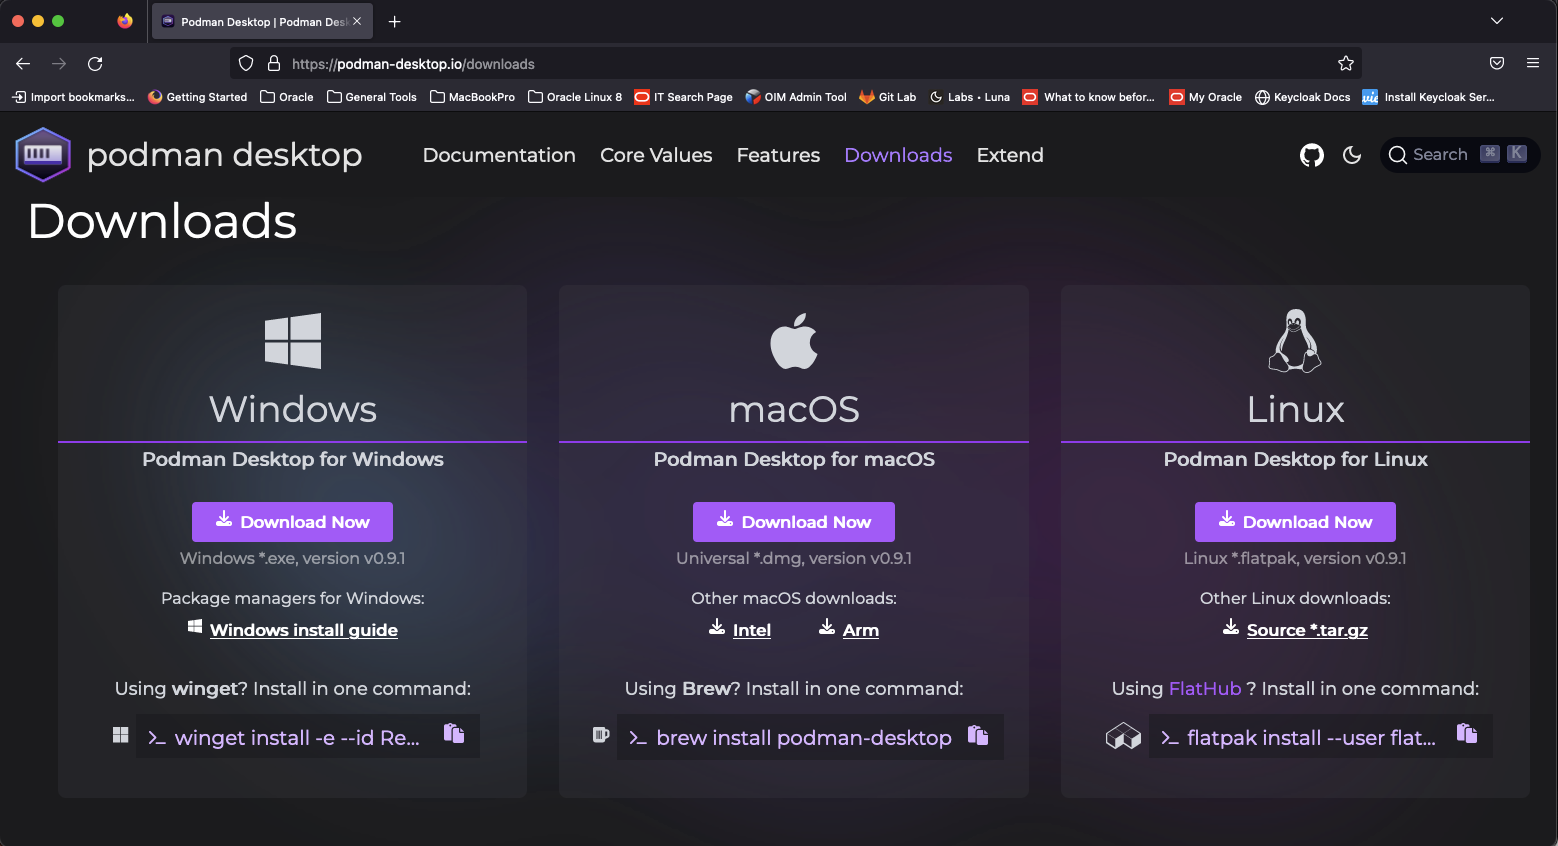
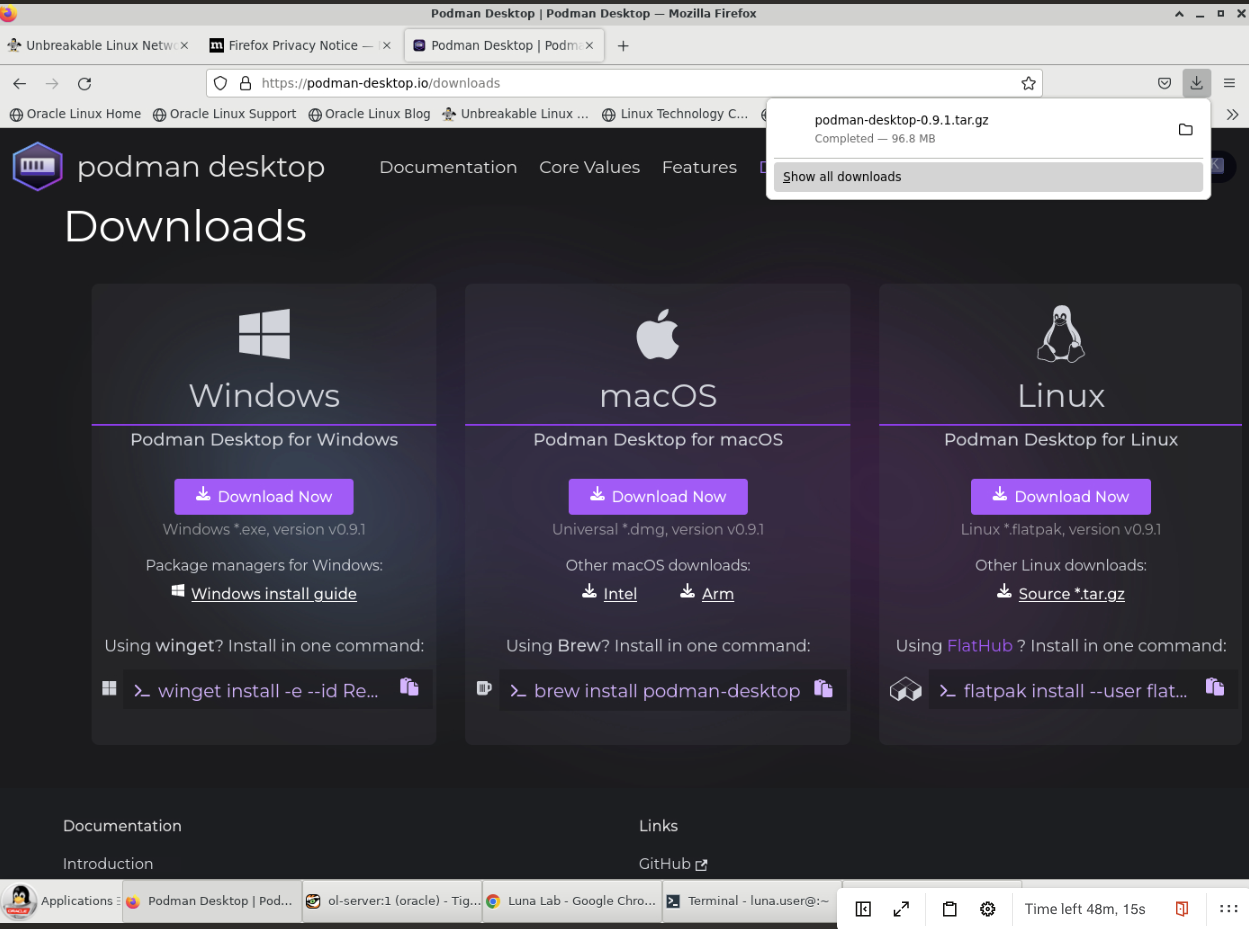
Next, download the Linux version by clicking on the
AMD64 binary (tar.gz)hyperlink.The file is downloaded into the Downloads directory. Click on the Show all downloads text to open the Library Manager.
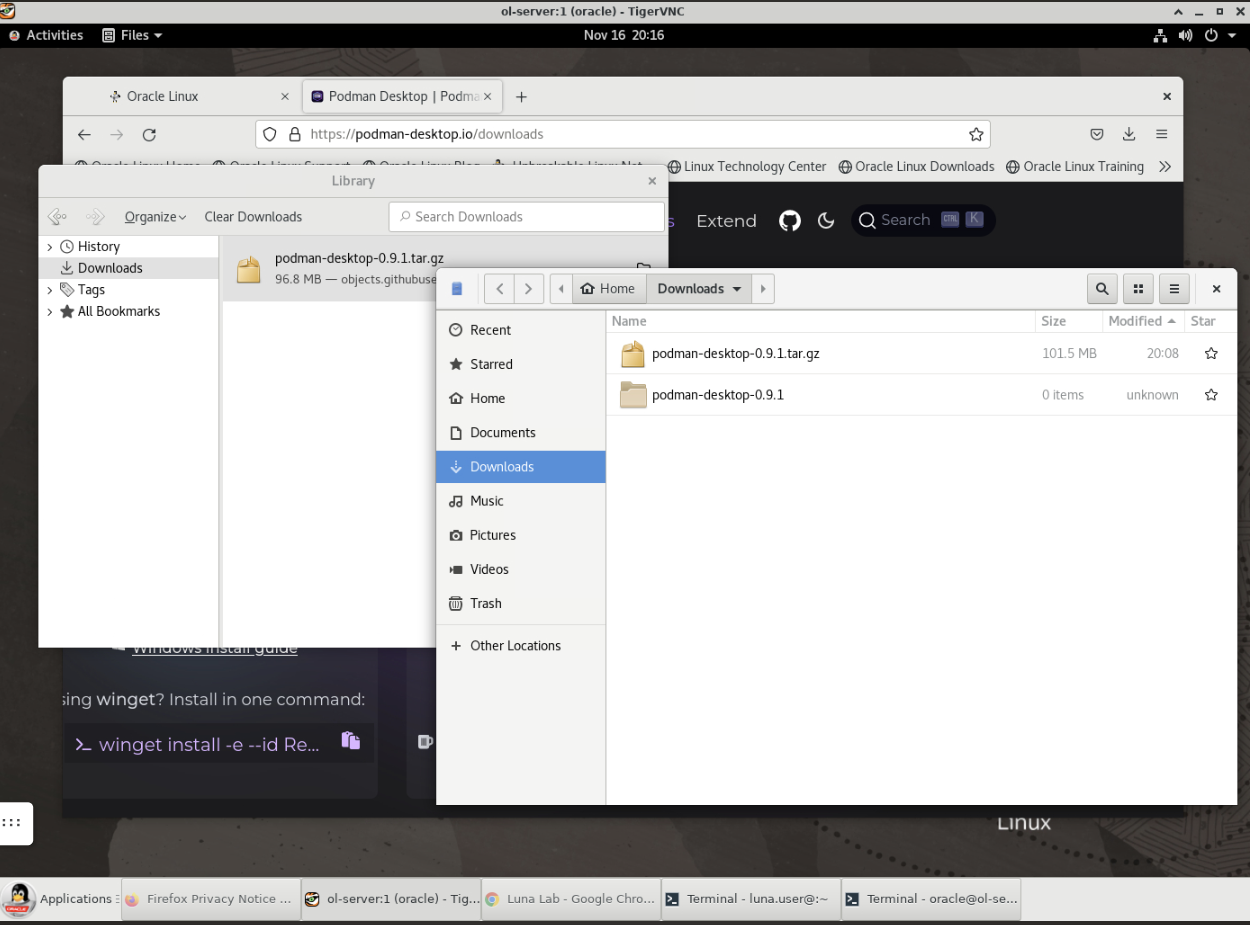
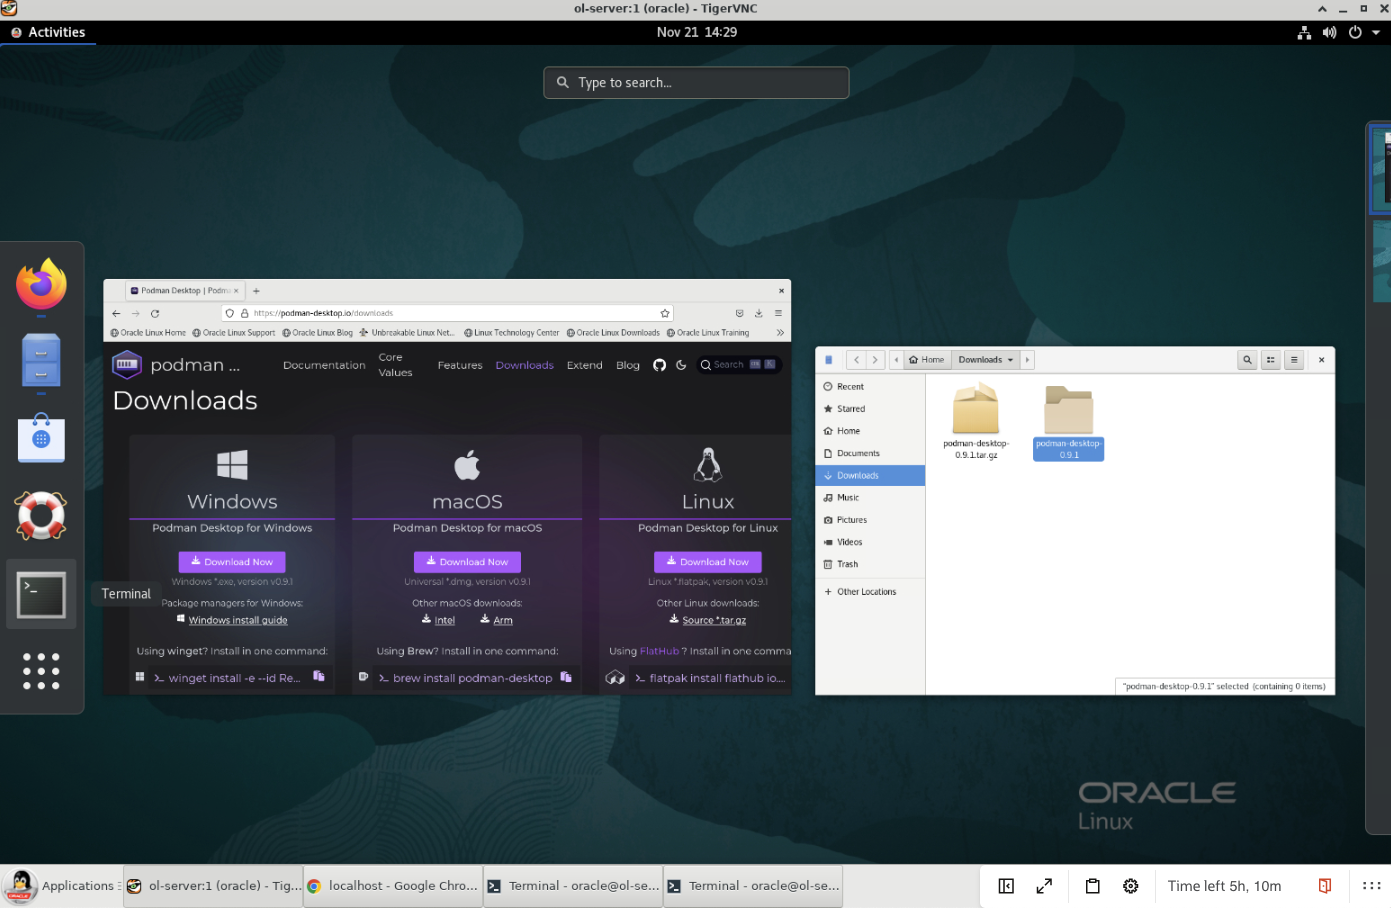
Right-click on the downloaded file in the Library Manager, click on the
Show in Foldermenu.The File Manager opens, showing the downloaded file in the Downloads directory.
You can double-click on the file name to expand it into a directory if it does not automatically expand.
At this point, the Podman Desktop executable has been downloaded. The next step is to open a new Command Prompt window and then start the Podman Desktop application, so let's move on to the fun part.
Open Podman Desktop
After downloading Podman Desktop, the next step is to start it.
Open a new terminal session within the VNC session displaying the ol-node-01 Linux GUI Desktop.
Important: These steps will not work if you open a terminal on the Luna Desktop.
Confirm the Podman CLI is working.
podman run quay.io/podman/helloExample Output:
Trying to pull quay.io/podman/hello:latest...
Getting image source signatures
Copying blob f82b04e85914 done
Copying config dbd85e09a1 done
Writing manifest to image destination
Storing signatures
!... Hello Podman World ...!

         .--"--.
       / -     - \
      / (O)   (O) \
   ~~~| -=(,Y,)=- |
    .---. /`  \   |~~
 ~/  o  o \~~~~.----. ~~
  | =(X)= |~  / (O (O) \
   ~~~~~~~  ~| =(Y_)=-  |
  ~~~~    ~~~|   U      |~~

Project:   https://github.com/containers/podman
Website:   https://podman.io
Documents: https://docs.podman.io
Twitter:   @Podman_io
Change to the directory containing the Podman Desktop expanded TAR file.
cd Downloads/podman-desktop-1.11.1/Start the Podman Desktop application.
./podman-desktop &>/dev/null &The
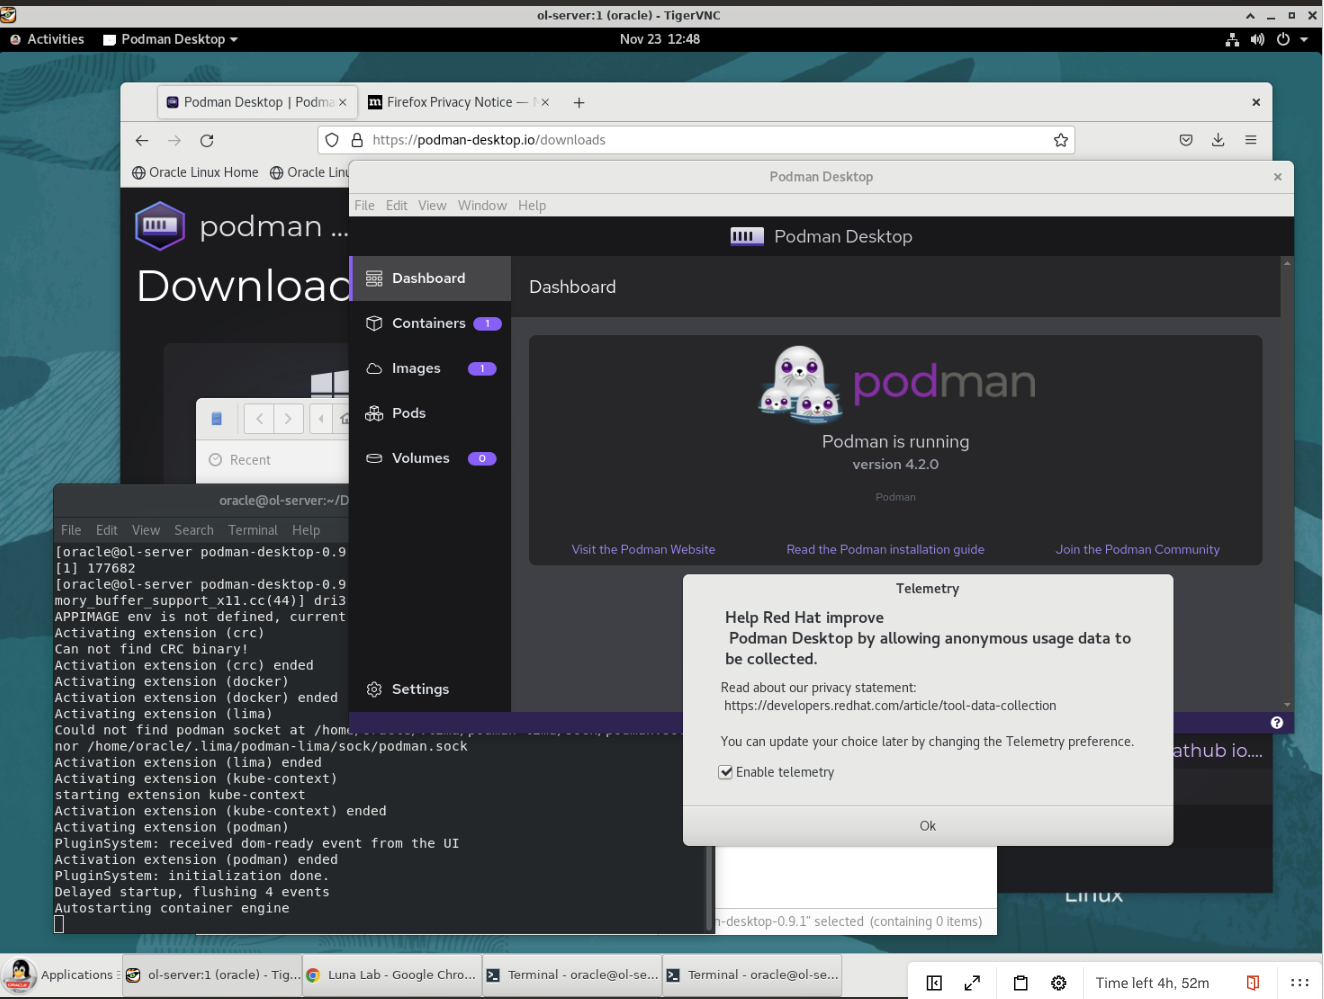
&>/dev/null &after thepodman-desktopcommand causes the terminal process to run in the background and not display any terminal output.Within the Podman Desktop application, click the Go to Podman Desktop button at the bottom right to display the default screen.
An Overview of Podman Desktop
This section provides a short overview of some of the functionality offered by Podman Desktop.
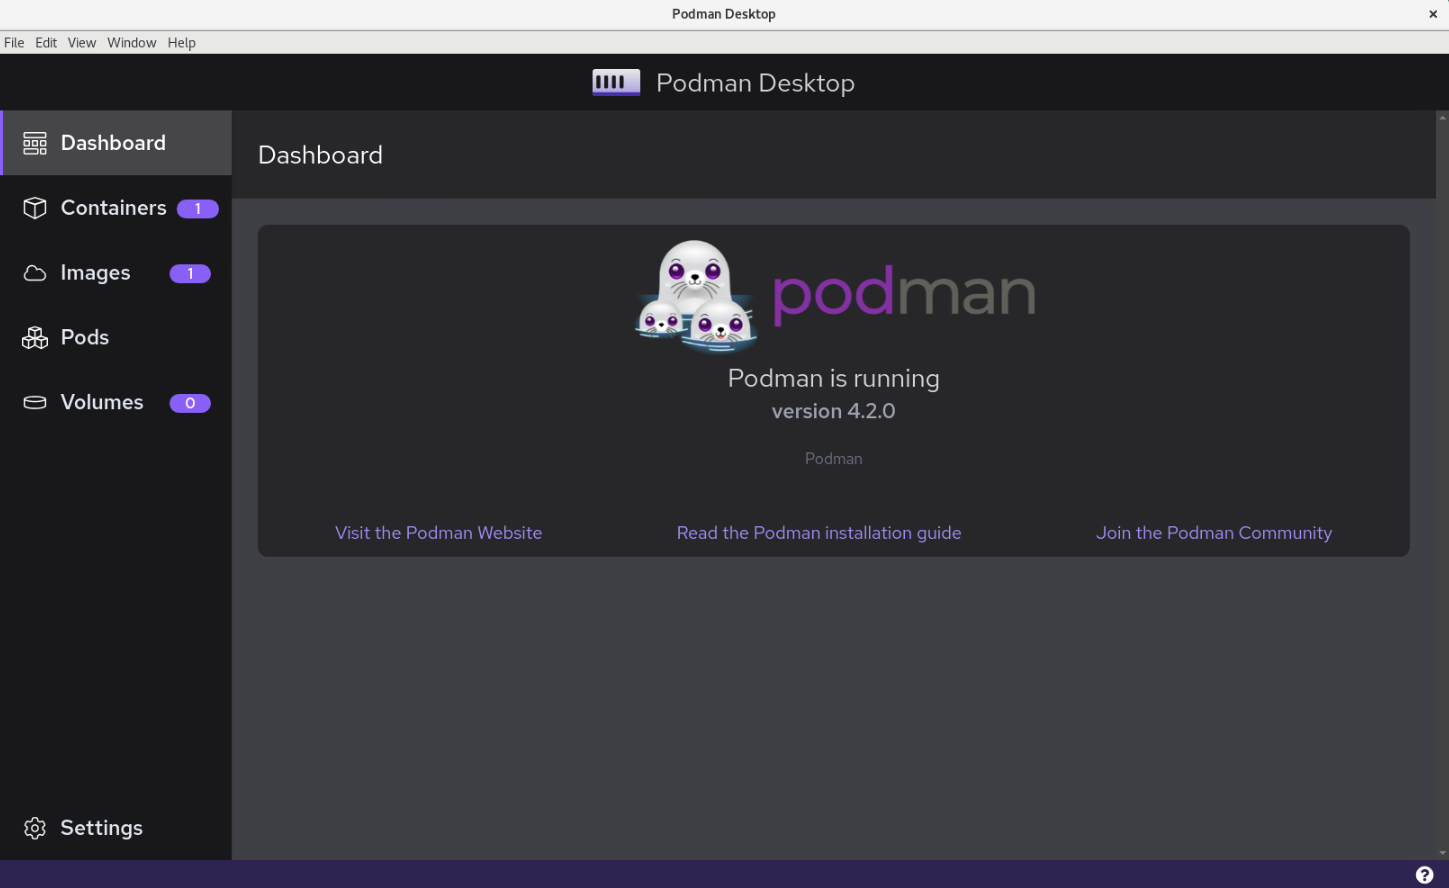
The Dashboard panel appears and shows the version of Podman currently installed on the system.
The Settings section shows some of the options available to alter some of Podman Desktop's behavior.
Click the gear-shaped icon at the bottom of the left-hand navigation menu bar to review what can be changed.
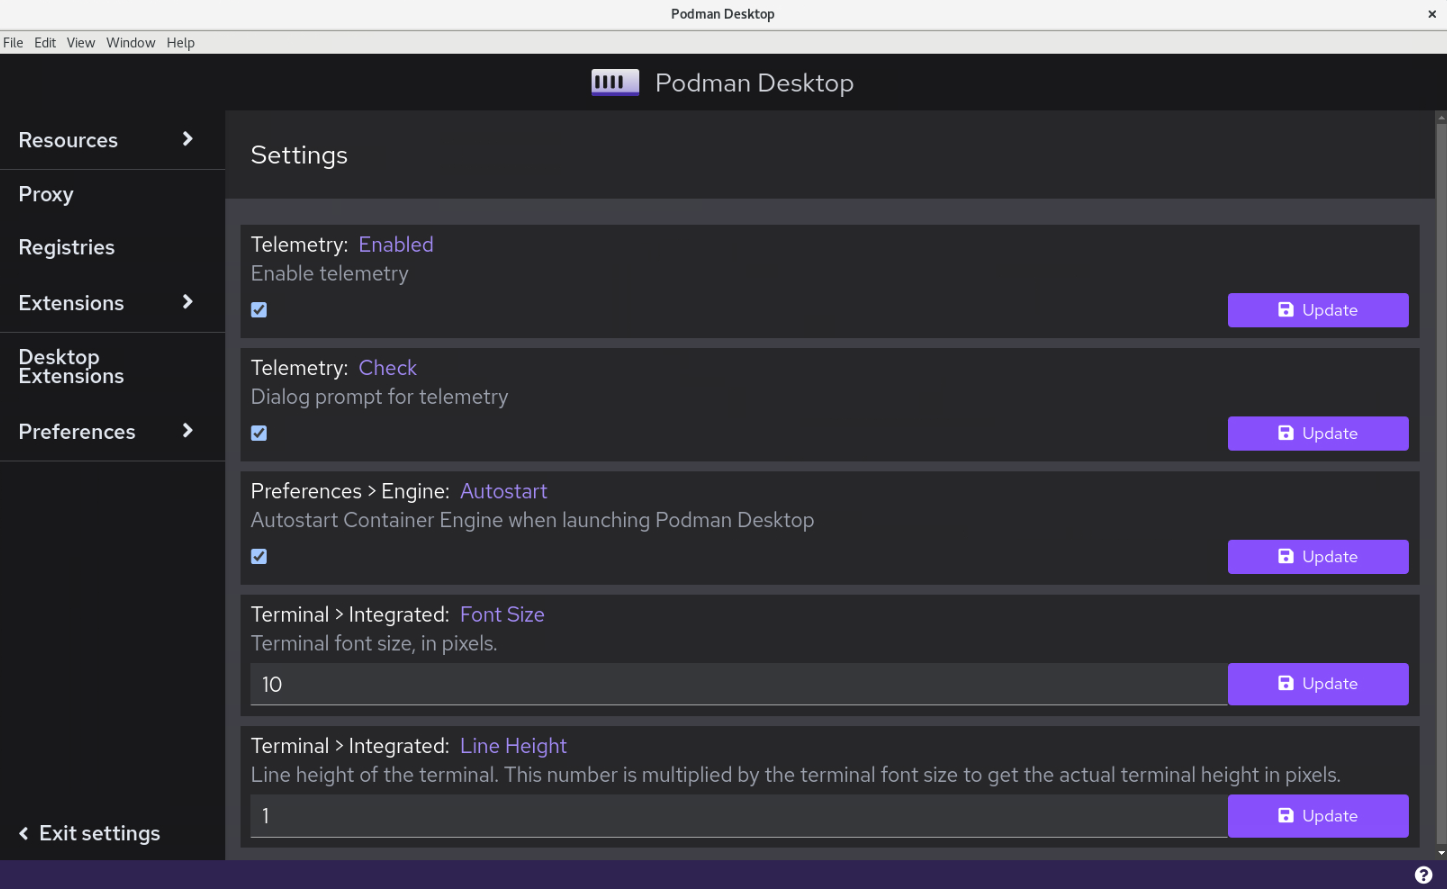
Click the Settings button again to return to the Dashboard panel.
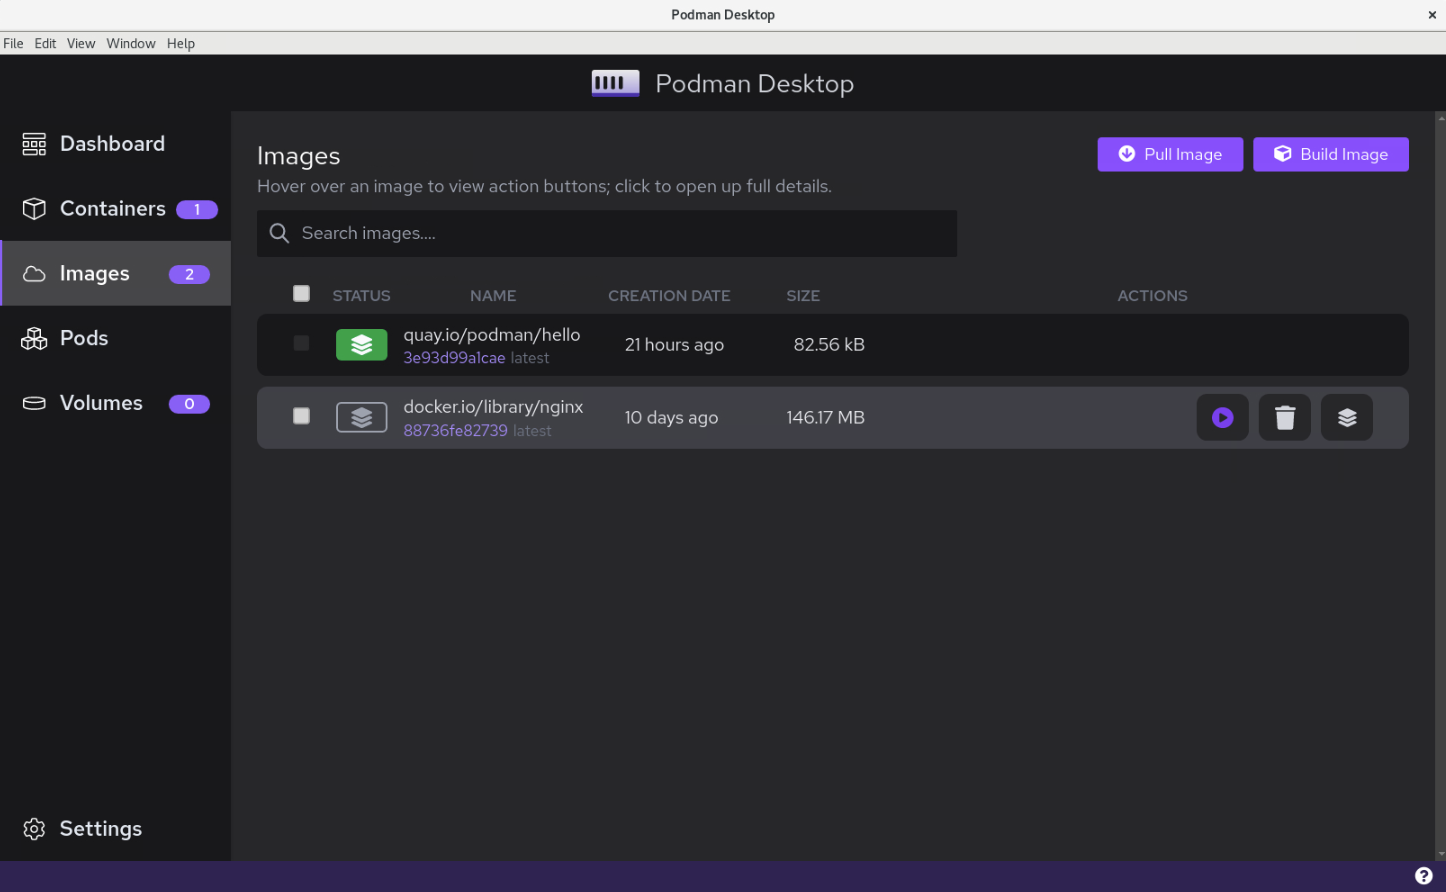
Click the Images menu to review the container images present on the system.
This panel lists all container images that have been pulled to this machine. It currently shows the
quay.io/podman/helloimage that was pulled at the start of this tutorial. It does not represent containers that are, or have been, started.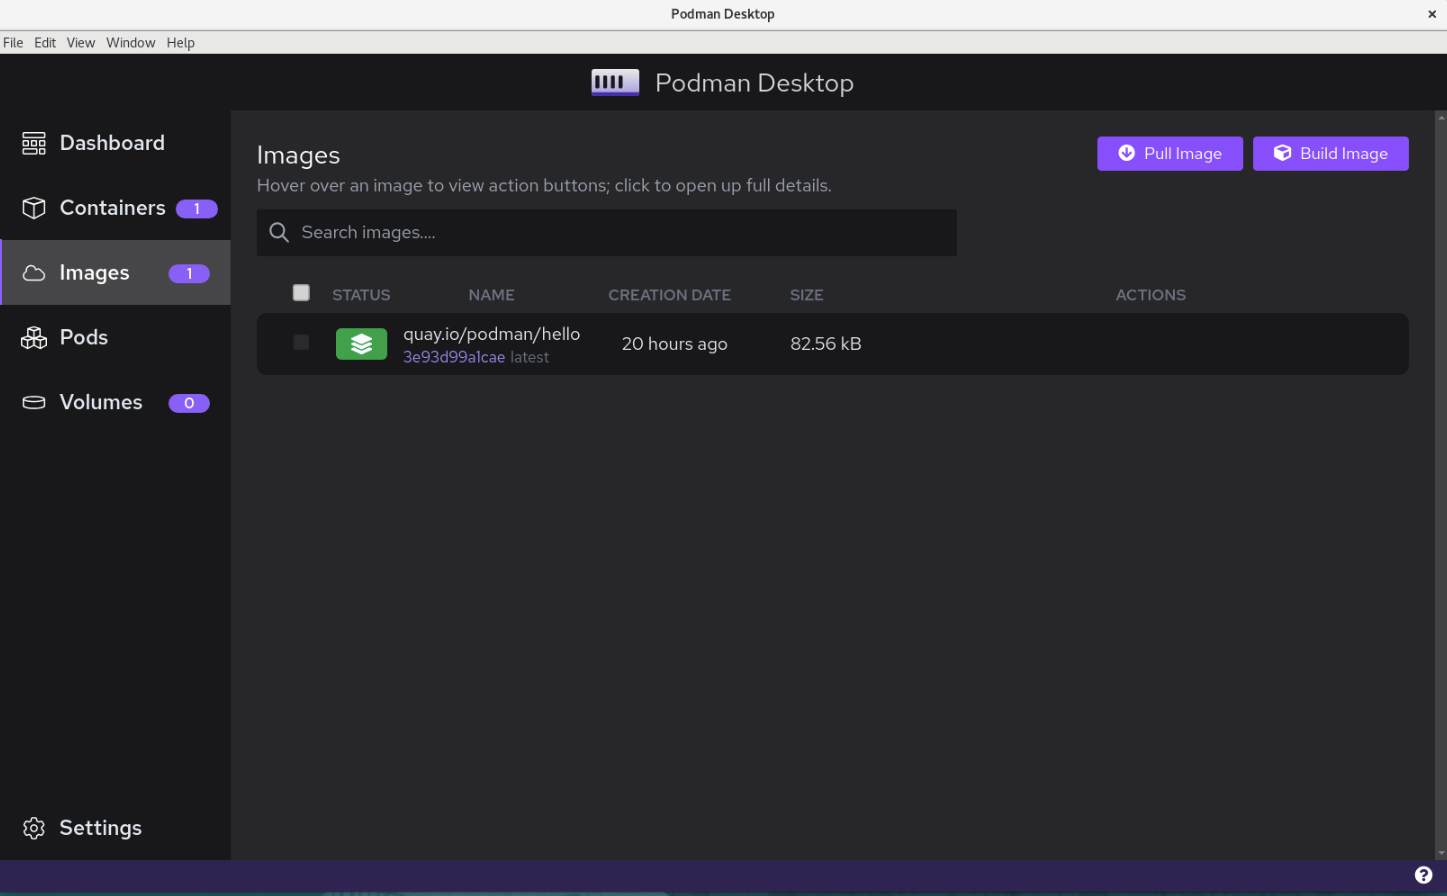
Use the buttons in the upper right corner of the Images panel to:
- Prune - removes unused images.
- Load - load an image from Tar archives.
- Import - imports a container from the filesystem.
- Pull - pulls a container from a Registry.
- Build - used to build a containerfile.
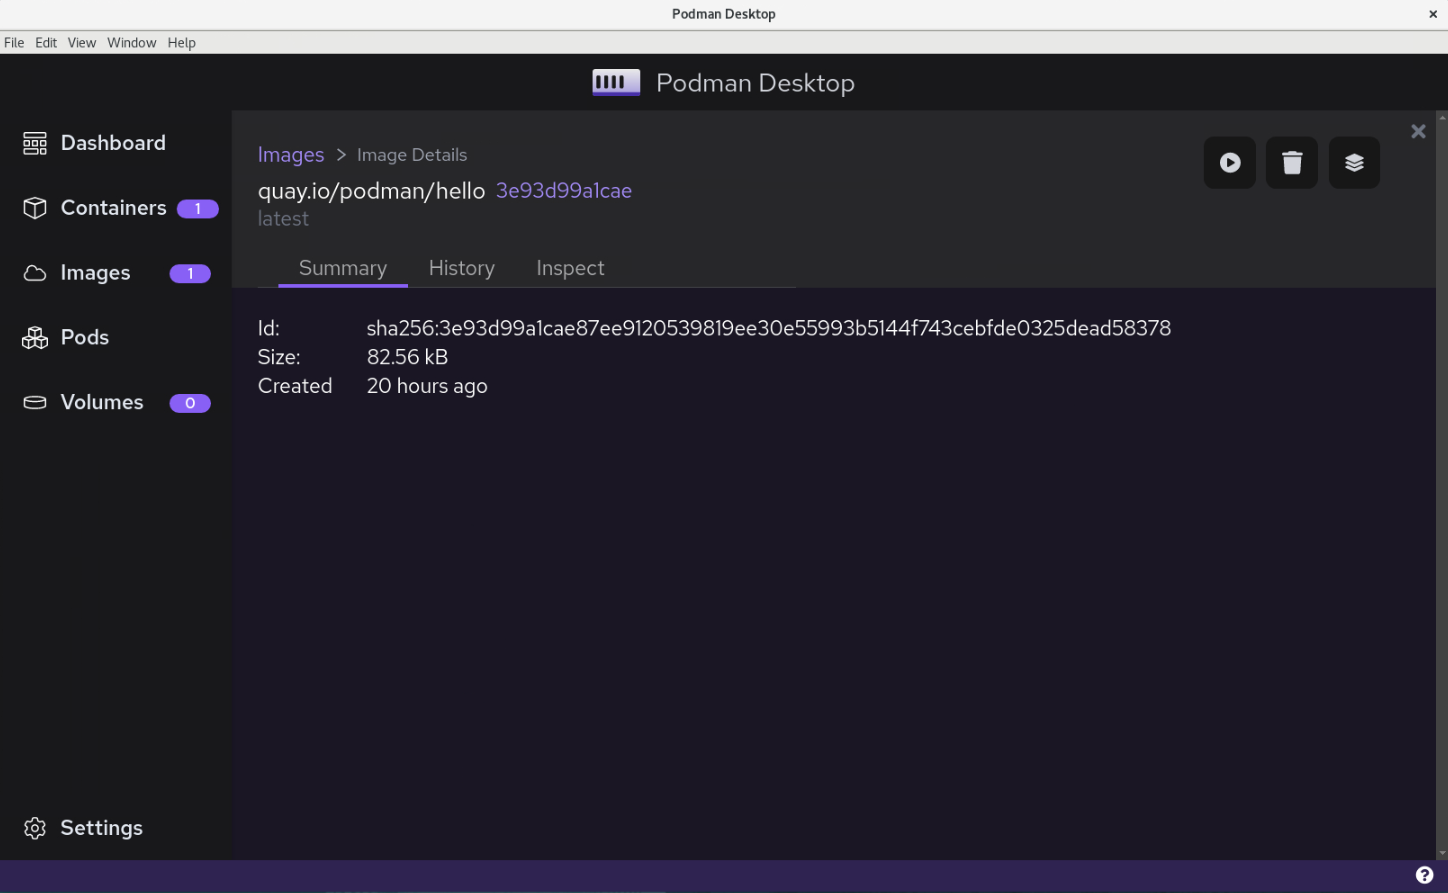
Click the
quay.io/podman/helloimage to review more detailed information about the container image.The tabs represent, in turn:
- Summary - The image ID, size, and creation date information.
- History - Shows information about the layers used to create the container image.
- Inspect - Shows low-level information about the container in a JSON format.
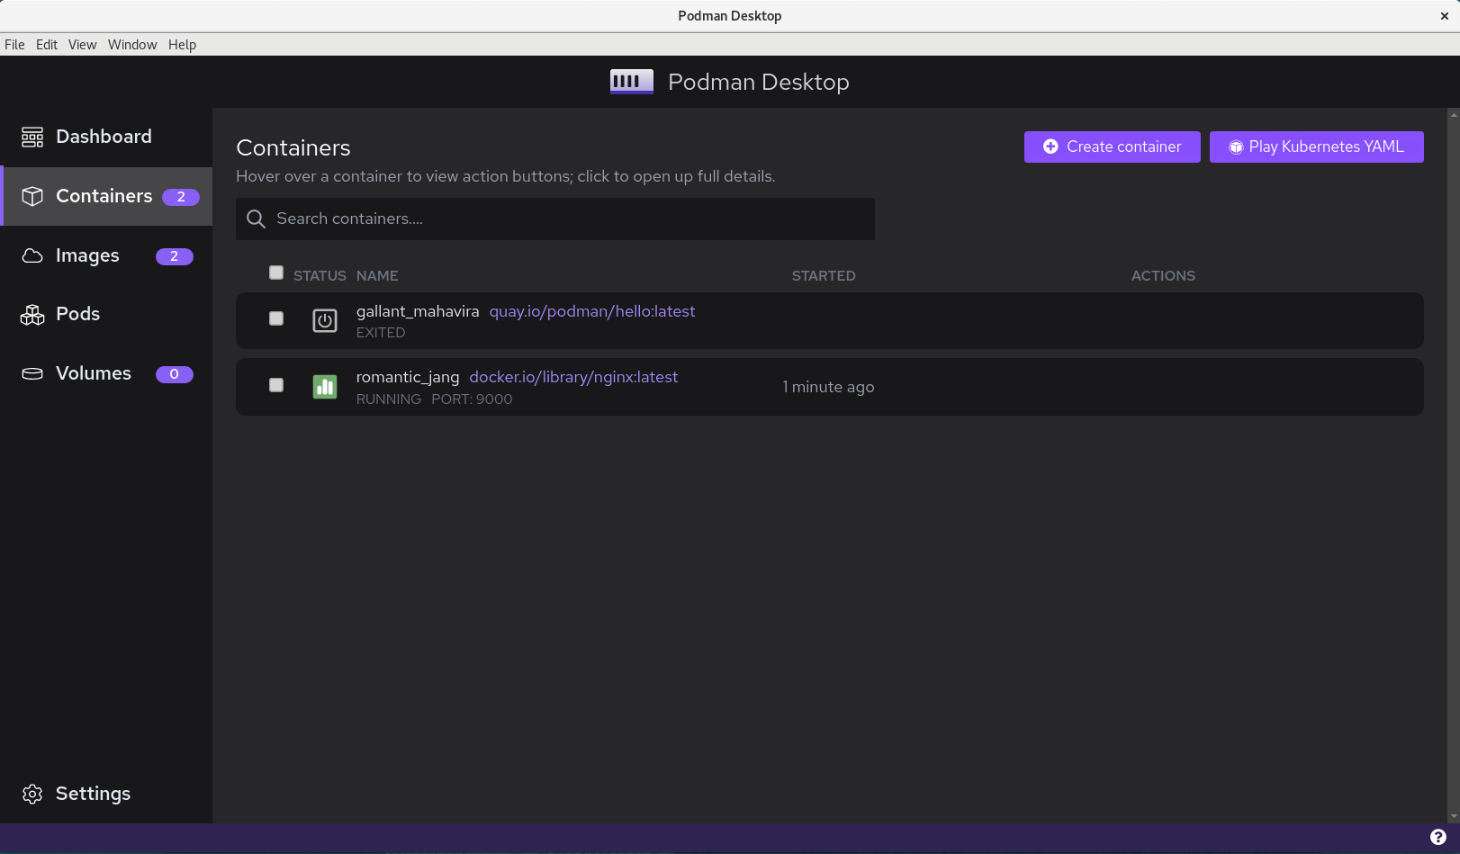
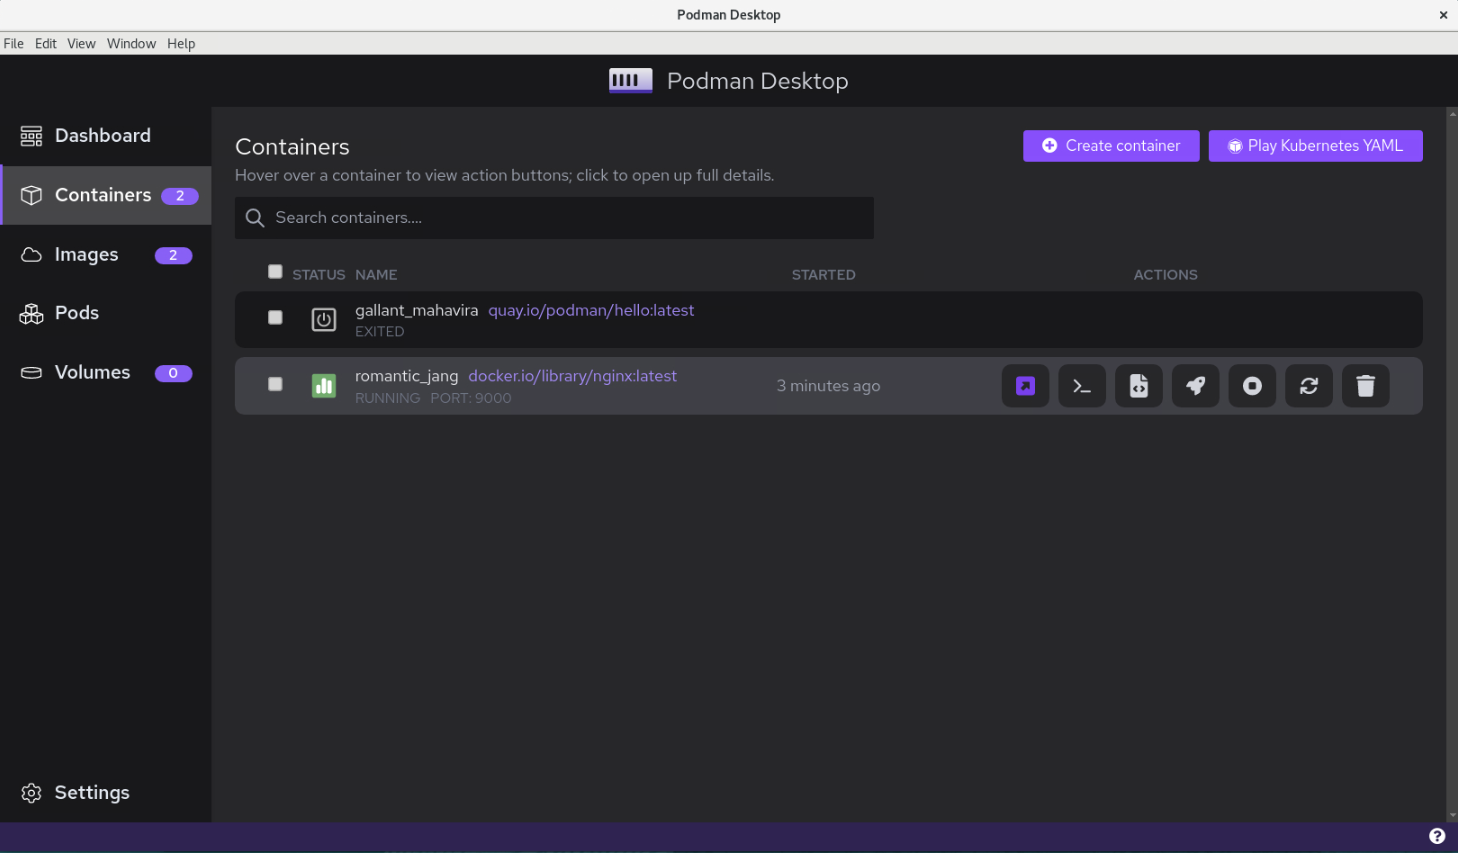
Next, click the Containers menu to review any running or stopped containers.
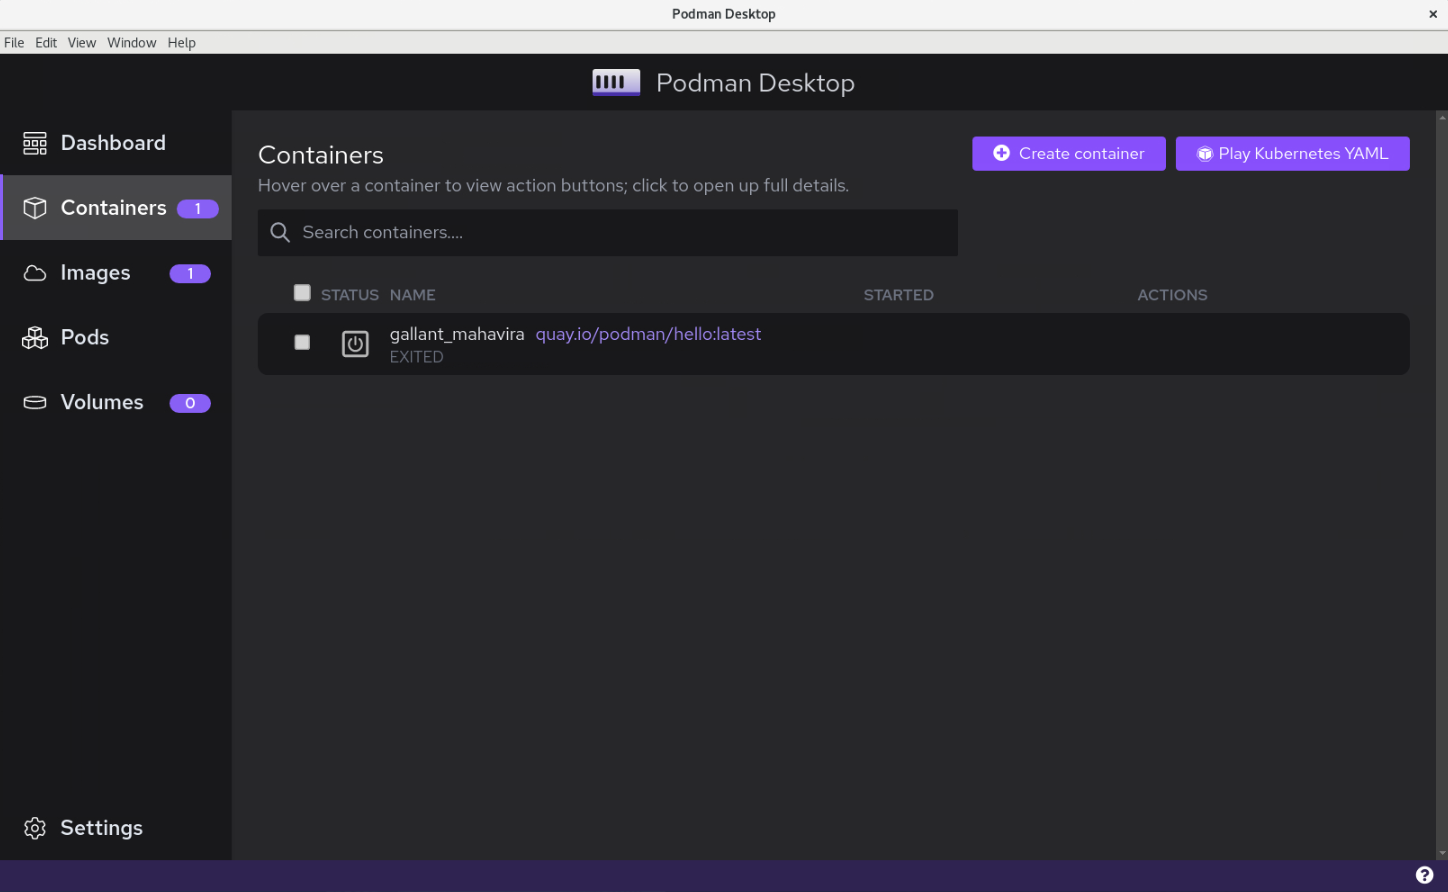
The Containers panel shows information for the
quay.io/podman/helloimage pulled at the start of this tutorial.Click the randomly assigned name for the deployed container.
Click the Logs tab and notice the Logs output seen earlier when running Podman on the command line.
Click on the other menu options (Logs, Inspect, Kube, Terminal) to review other information available via the Podman Desktop GUI.
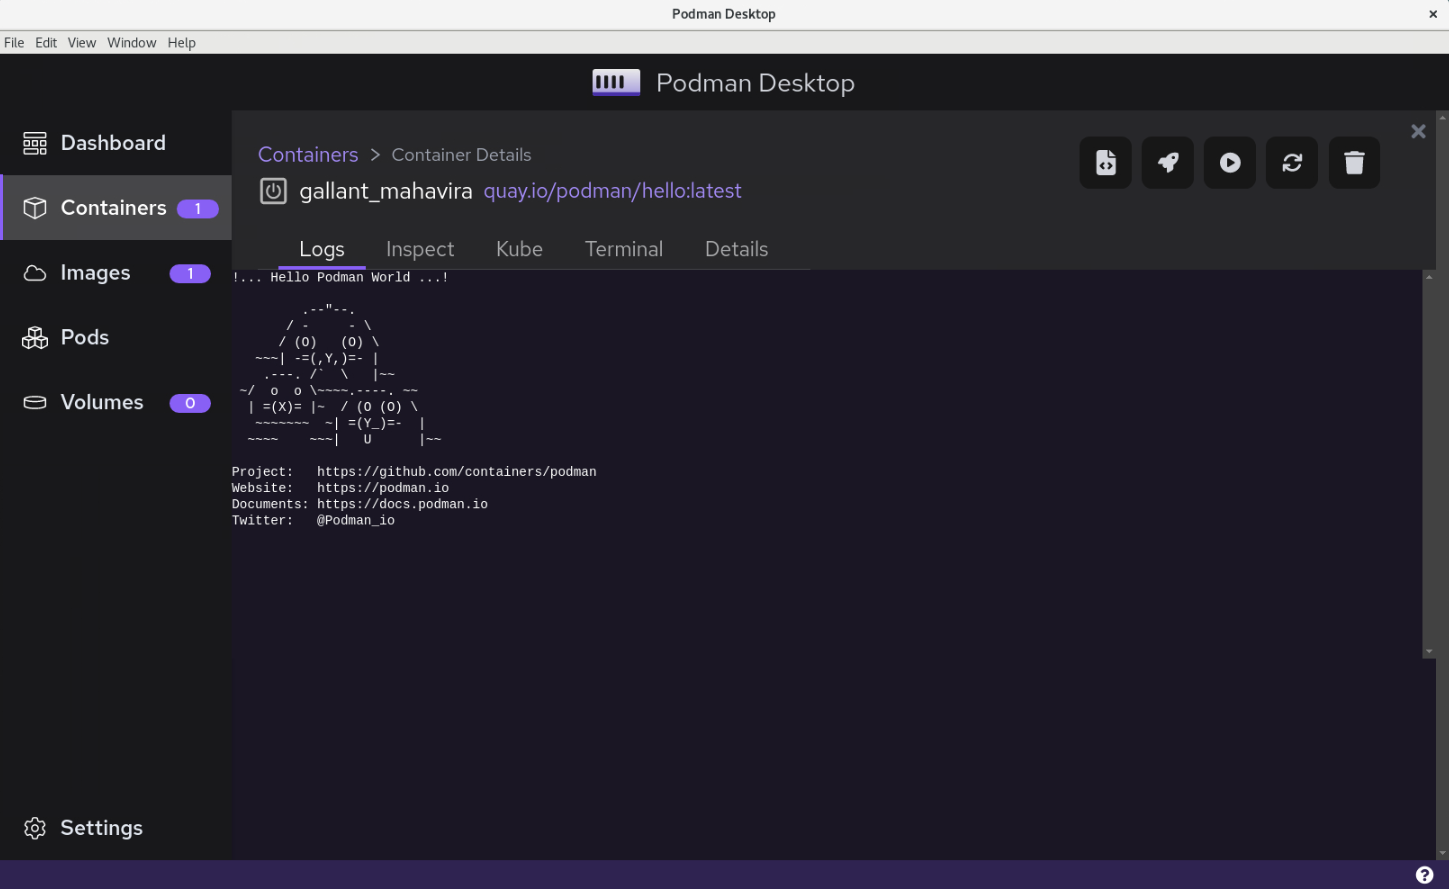
Because the
quay.io/podman/hellocontainer has exited or stopped running, the Terminal tab will not provide access to the container's runtime environment.To return to the Dashboard panel, click on the Dashboard menu item at the top of the navigation menu on the left.
Feel free to click on the Pods and the Volumes navigational menu items.
Nothing will be displayed for these features because no Podman pods or volumes exist on this system.
That concludes our brief overview of installing and navigating the Podman Desktop GUI interface. For more in-depth information describing Podman Desktop's functionality, please refer to the Podman Desktop documentation located here .
The following section provides a simple walkthrough of how to use the Podman Desktop GUI to pull and run an Nginx image.
(Optional) Pull and Run Nginx using Podman Desktop
The following steps provide a simple walkthrough outlining how to pull and run an image - in this example, Nginx.
Click the Images navigational menu to review the container images present on the system.
Click the
Pullbutton.Then, enter
ghcr.io/oracle/oraclelinux8-nginx:1.20into the Image to Pull text box.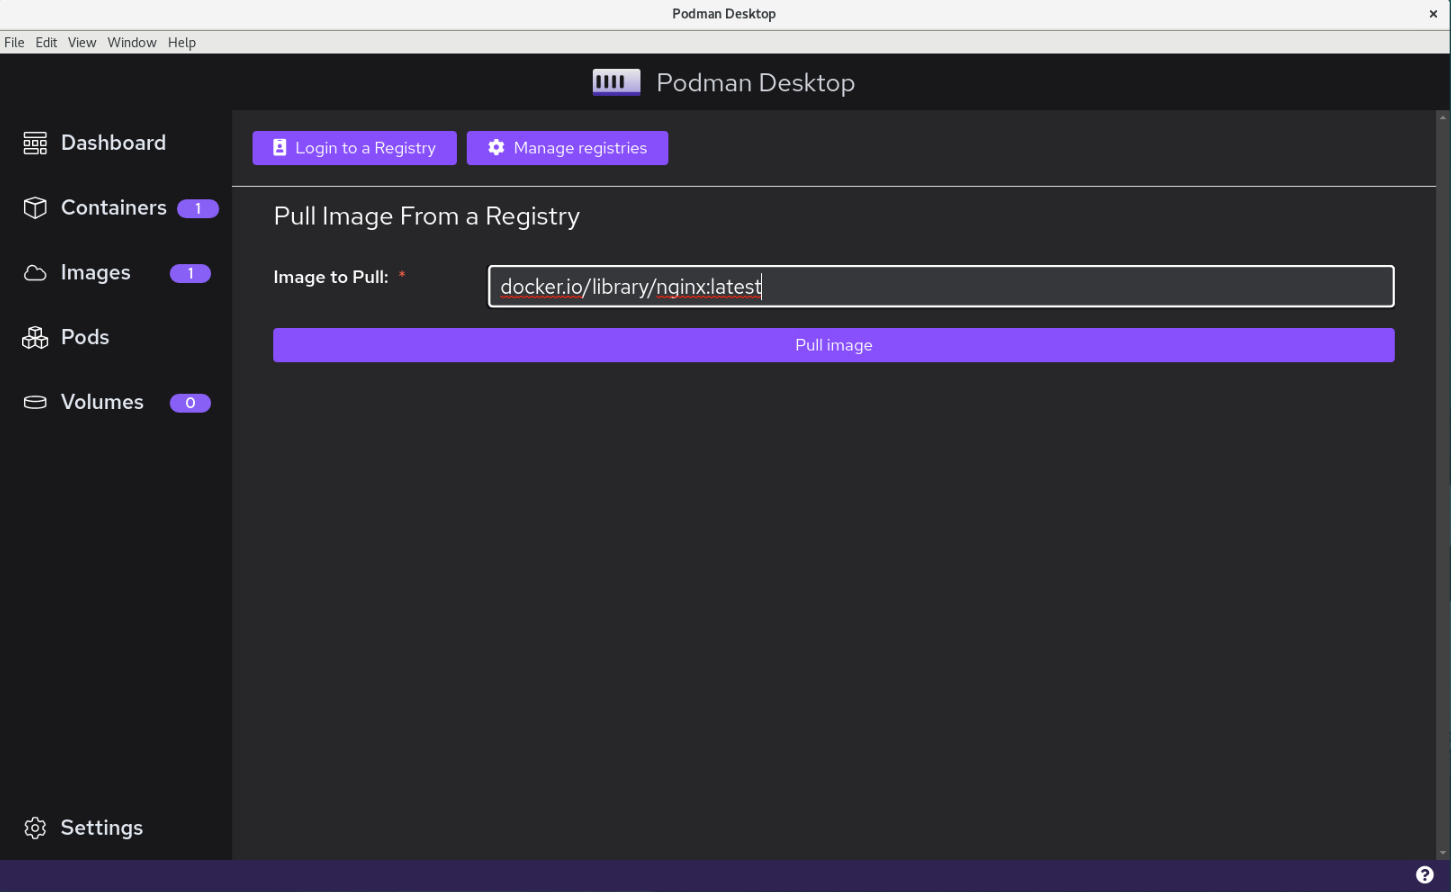
Click the
Pull Imagebutton to start the download.The Nginx image has now been pulled to the local machine and is available to run as a container.
Click the Images navigational menu again to display the available
Nginximage.Under Actions, click the Run Image button
The Run image dialogue box opens, allowing the container's runtime settings to be modified or accept the defaults.
Accept the defaults and press the Start Container button.
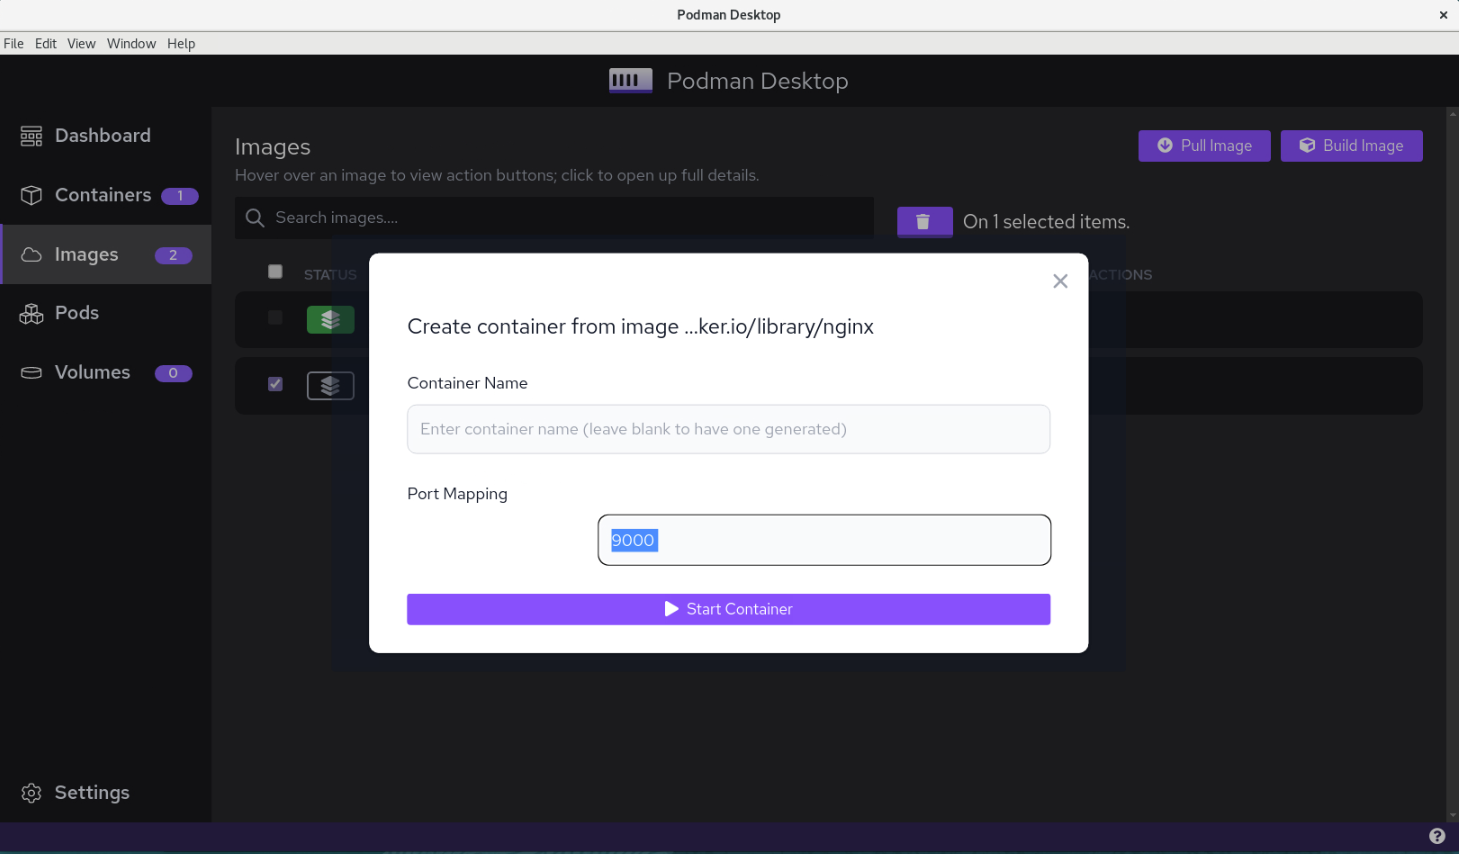
Note: If you get an error about a rootlessport conflict, then update the default port mappings from
9000to9443for443/tcp or HTTPSand9080for80/tcp or HTTP.Podman Desktop automatically switches to the Container Details panel.
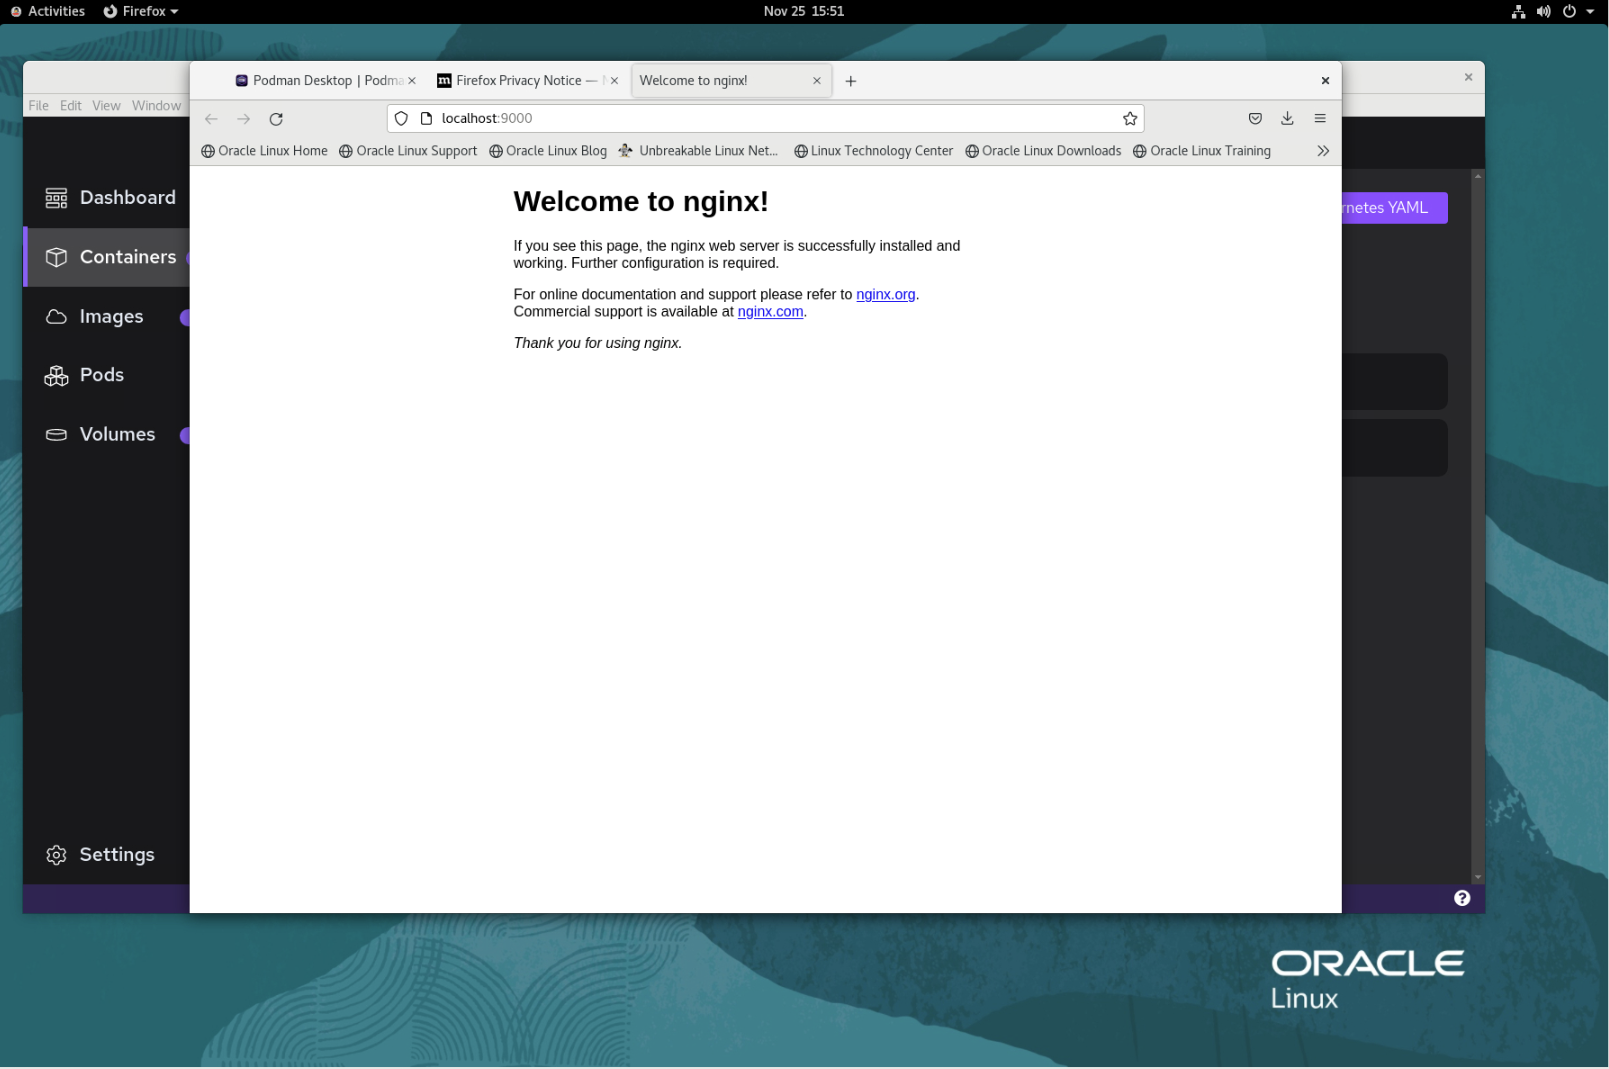
In the upper right corner of the Container Details panel, click the Open Browser button.
A browser opens and displays the Welcome to Nginx! message.
Next Steps
This completes the demonstration showing how to use Podman Desktop to download and then start a Podman container - in this example, Nginx.
In the meantime, many thanks for taking the time to try this tutorial.