Install the VNC Remote Access Server on Oracle Linux
Introduction
Virtual Network Computing (VNC) is a graphical desktop-sharing system that controls remote machines by sending keyboard and mouse events over the network. VNC is particularly useful for remotely controlling Oracle Linux servers that have a graphical desktop environment installed.
You can connect to a VNC server using any compatible software client. VNC is suitable for thin client computing where multiple dumb terminals can share the same hardware resources hosted on an Oracle Linux server.
This tutorial uses TigerVNC to illustrate how to connect to systems remotely. However, you can use a different VNC software of your choice. There is a list of alternative software choices at the end of the tutorial.
TigerVNC Server was rebased from 1.9.0 to 1.10.1 in Oracle Linux 8 Update 3. This newer version is configured differently from previous versions and no longer requires the creation of systemd unit files. The instructions provided here expect you to use the latest version of Oracle Linux and its packages.
Note: TigerVNC Server is available in Oracle Linux 8 and is deprecated in Oracle Linux 9.
Objectives
In this tutorial, you'll learn to:
- Install a graphical desktop environment along with the VNC service
- Set the VNC Password for a user on the system
- Configure the VNC service for a specific user
- Start and enable the VNC service across subsequent boots
- Access the VNC server from a remote client, either directly or using an SSH tunnel
- Optionally enable x509 encryption for direct VNC access
- Optionally create firewall rules to allow direct VNC access
Prerequisite
- Any system with the latest Oracle Linux installed
- Client software such as TigerVNC
Deploy Oracle Linux
Note: If running in your own tenancy, read the linux-virt-labs GitHub project README.md and complete the prerequisites before deploying the lab environment.
Open a terminal on the Luna Desktop.
Clone the
linux-virt-labsGitHub project.git clone https://github.com/oracle-devrel/linux-virt-labs.gitChange into the working directory.
cd linux-virt-labs/olInstall the required collections.
ansible-galaxy collection install -r requirements.ymlDeploy the lab environment.
ansible-playbook create_instance.yml -e localhost_python_interpreter="/usr/bin/python3.6"The free lab environment requires the extra variable
local_python_interpreter, which setsansible_python_interpreterfor plays running on localhost. This variable is needed because the environment installs the RPM package for the Oracle Cloud Infrastructure SDK for Python, located under the python3.6 modules.The default deployment shape uses the AMD CPU and Oracle Linux 8. To use an Intel CPU or Oracle Linux 9, add
-e instance_shape="VM.Standard3.Flex"or-e os_version="9"to the deployment command.Important: Wait for the playbook to run successfully and reach the pause task. At this stage of the playbook, the installation of Oracle Linux is complete, and the instances are ready. Take note of the previous play, which prints the public and private IP addresses of the nodes it deploys and any other deployment information needed while running the lab.
Install a Graphical Desktop Environment
Open a terminal and connect using SSH to the ol-node-01 instance.
ssh oracle@<ip_address_of_instance>Install a GNOME desktop environment and all of its dependencies.
sudo dnf group install -y "Server with GUI"Set graphical mode as the default login type for user accounts, then reboot the server.
sudo systemctl set-default graphicalUpdate all packages to the latest release.
sudo dnf upgrade -y(Optional) Disable Wayland in the graphical desktop.
Uncomment the
WaylandEnable=falseline in the/etc/gdm/custom.conffile to ensure that VNC uses X.org instead of Wayland.sudo sed '/^#WaylandEnable/s/^#//g' /etc/gdm/custom.conf
Install VNC Server Packages and Set the VNC Password
Install the VNC server package and all of its dependencies.
sudo dnf install -y tigervnc-server tigervnc-server-moduleCreate a VNC password for the user account you intend to use for remote sessions.
vncpasswdThe command prompts you for a password and then prompts you again to validate the password. Optionally, you can set a view-only password that allows you to share the screen but does not allow control over the mouse or keyboard.
This action generates configuration information specific to the user account in
$HOME/.vnc/. Suppose this directory already exists from a previous installation. In that case, you can either remove the directory before running thevncpasswdcommand or restore the SELinux context on the directory to ensure that you do not have any issues with SELinux for this service. For example:restorecon -RFv $HOME/.vnc
Configure the VNC Service
Append the user account and the X Server display for the VNC service to the
/etc/tigervnc/vncserver.usersfile.echo ":1=$(whoami)"| sudo tee -a /etc/tigervnc/vncserver.users > /dev/nullAppend the default desktop and screen resolution to the
/etc/tigervnc/vncserver-config-defaultsfile.printf 'session=gnome\ngeometry=1280x1024' | sudo tee -a /etc/tigervnc/vncserver-config-defaults > /dev/nullReload the
systemdservice.sudo systemctl daemon-reloadEnable and start the VNC server by using X Server display 1.
sudo systemctl enable --now vncserver@:1.service
Open a VNC Client and Test Your Deployment
Open a new terminal and connect via SSH to the ol-node-01 instance.
The
-Loption enables local forwarding, which opens a local port to connect through an SSH tunnel to the remote VNC server.ssh -L 5914:localhost:5901 oracle@<ip_address_of_instance>The default VNC port is 5900, but VNC increments that number according to the configured display number. Thus, display 1 corresponds to 5901, display 2 to 5902, and so on. Since we are connecting using an SSH tunnel, you set the VNC port as the internal port number on the tunnel.
If you are running outside the free lab environment and your client is Oracle Linux, you can install the TigerVNC software client.
sudo dnf install -y tigervncSwitch to the Luna Desktop.
The Luna Desktop acts as the client machine in the free lab environment. Use the VNC software to connect to the remote Oracle Linux server domain or IP address. Make sure to specify the external port of the SSH tunnel.
Open the TigerVNC Viewer by clicking the Applications menu, Internet, and then TigerVNC Viewer.

Log on to the deployed server's GUI environment by entering
localhost:5914into the VNC Server text box and pressing the Connect button.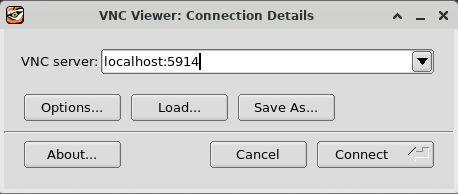
You can also connect by running TigerVNC Viewer from a terminal using
vncviewer localhost:5914.Note that if you enabled X509 encryption, you may need to provide the CA certificate used to sign your keys, or if you used a self-signed certificate, you can use the public certificate as the CA certificate. Some clients may be willing to allow you to accept a self-signed certificate automatically.
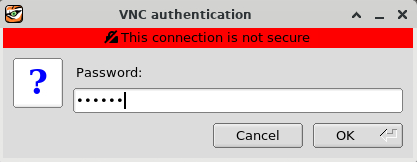
Enter the user's VNC password and click the OK button.
The Server's GUI desktop is displayed with a first-time login setup.
Oracle Linux 8:
A welcome dialog appears.
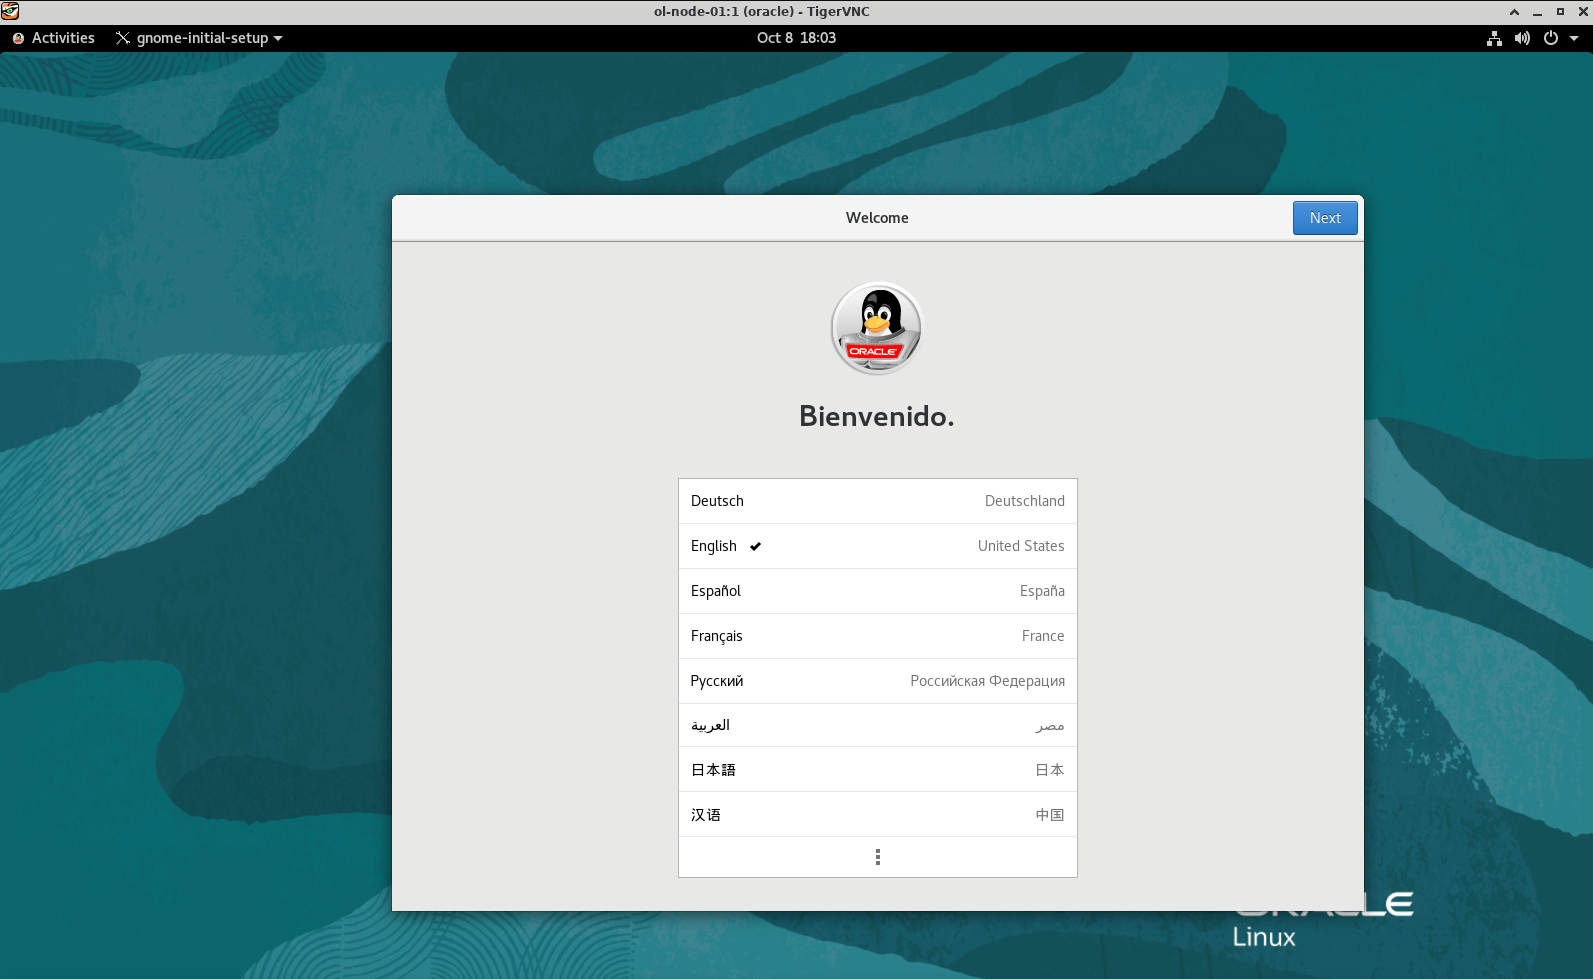
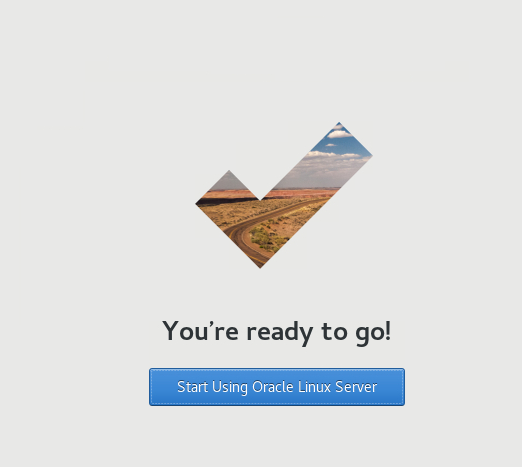
Press the Next button three times, then the Skip button, followed by the Start Using Oracle Linux Server button. Finally, close or minimize the Getting Started window.
Oracle Linux 9:
A welcome dialog appears.

Press the No Thanks button, and the Activities menu appears.
If you encounter connectivity problems, troubleshoot these issues by connecting to the remote server over an SSH tunnel connection.
You may need to perform additional steps if you want to connect to an Oracle Cloud Infrastructure instance. For more information, see Connecting to an Instance in the Oracle Cloud Infrastructure documentation.
If you are trying to connect to a virtual machine hosted by Oracle VM VirtualBox, then you need to configure additional port forwarding for remote access. You can find instructions for configuring virtual networks in the User Guide for your installed version of Oracle VM VirtualBox.
(Optional) Configure X509 Encryption
By default, VNC is not an encrypted protocol, and you should use an SSH tunnel to access it across an unprotected network. You can also configure X509 TLS to encrypt your VNC session. However, this requires that your client software supports X509Vnc encryption and has access to the CA certificate used to sign your certificates.
If you do not have a CA-signed certificate, you can use self-signed certificates, but your client system must have a copy of the public certificate to connect.
Create a self-signed certificate.
openssl req -new -x509 -days 30 -nodes -newkey rsa:2048 -keyout ~/.vnc/private.key \
-out ~/.vnc/public.cert -subj "/C=US/ST=Ca/L=Sunnydale/CN=$(hostname -f)"
Edit the user's custom VNC configuration options in
~/.vnc/config.If the file does not exist yet, you may need to create it yourself. Update the configuration to enable x509Vnc encryption and to provide the full path to the X509 key file and that x509 certificate file.
cat << EOF | tee -a ~/.vnc/config > /dev/null
securitytypes=x509Vnc
X509Key=/home/$(whoami)/.vnc/private.key
X509Cert=/home/$(whoami)/.vnc/public.cert
EOF
Note: You must provide the full path to the key and certificate files. You cannot depend on shell expansion or use variables for this purpose. The expansion in the bash script above is possible as it expands the
$(whoami)command when writing the lines to the~/.vnc/configfile.After editing the configuration, you can restart the service.
sudo systemctl restart vncserver@:1.service
(Optional) Configure the Firewall Rules
Suppose you are using X509 encryption and running a custom firewall profile or an Oracle Cloud Infrastructure instance. In that case, you can open the firewall port for the VNC service, default of port 5901, on your firewall or in your security lists for your network.
If you are using X509 encryption and the firewalld service is running on the host, you can add access to the VNC service. Then, reload the default firewall service. If running within OCI, you must allow the same port access via an Ingress rule.
sudo firewall-cmd --zone=public --add-service=vnc-server --permanent
sudo firewall-cmd --reload
Note: VNC is not an encrypted protocol, and you should not open the firewall to this port and connect directly to a VNC server over an unprotected network. Although we list this step as optional, we do not generally advise it, and you should consider using SSH tunneling or some other mechanism to protect the connection, as demonstrated in the non-optional steps.
Next Steps
You should now have a functional remote desktop environment for running your graphical applications. Check out our other content on the Oracle Linux Training Station.
Related Links
- Oracle Linux Documentation
- Tiger VNC Server configuration documentation in
/usr/share/doc/tigervnc/HOWTO.md/ - GNOME Remote Desktop Project
- KDE
The steps included in this tutorial are available in the shell script at
http://api-v1:3000/api/v1/labs/4a0b9653-a029-4278-9987-362cccf4b384/gitlab/tutorial/files/ol-vnc-setup.sh