Use an Application Catalog with Oracle Cloud Native Environment
Introduction
An application catalog is a searchable software repository that you can install on an Oracle Cloud Native Environment (Oracle CNE) Kubernetes cluster. Oracle CNE supports two application catalogs: the Oracle catalog that ships with Oracle CNE and the external catalog compatible with Artifact Hub .
The Oracle catalog provides a curated selection of software supplied by Oracle. Oracle CNE ships with a built-in catalog called embedded. You can use the embedded catalog without deploying a Kubernetes cluster. The embedded catalog is updated when you update the ocne CLI.
The other catalog that ships with Oracle CNE is called the Oracle Cloud Native Environment Application Catalog. This catalog deploys onto your Kubernetes cluster as the ocne-catalog pod in the ocne-system namespace.
The embedded catalog is updated when you update the ocne CLI, and the Oracle Catalog is updated when you update the Kubernetes version. This behavior means the contents of the two Oracle-supplied catalogs may differ.
Objectives
In this tutorial, you will learn:
- How to manage an Oracle-supplied catalog.
- How to install an application from an Oracle-supplied catalog.
Prerequisites
- Installation of Oracle Cloud Native Environment
- a single control node and one worker node
Configure Oracle CNE
Note: If running in your own tenancy, read the linux-virt-labs GitHub project README.md and complete the prerequisites before deploying the lab environment.
Open a terminal on the Luna Desktop.
Clone the
linux-virt-labsGitHub project.git clone https://github.com/oracle-devrel/linux-virt-labs.gitChange into the working directory.
cd linux-virt-labs/ocne2Install the required collections.
ansible-galaxy collection install -r requirements.ymlDeploy the lab environment.
ansible-playbook create_instance.yml -e localhost_python_interpreter="/usr/bin/python3.6" -e install_ocne_rpm=true -e create_ocne_cluster=true -e "ocne_cluster_node_options='-n 1 -w 1'"The free lab environment requires the extra variable
local_python_interpreter, which setsansible_python_interpreterfor plays running on localhost. This variable is needed because the environment installs the RPM package for the Oracle Cloud Infrastructure SDK for Python, located under the python3.6 modules.The default deployment shape uses the AMD CPU and Oracle Linux 8. To use an Intel CPU or Oracle Linux 9, add
-e instance_shape="VM.Standard3.Flex"or-e os_version="9"to the deployment command.Important: Wait for the playbook to run successfully and reach the pause task. At this stage of the playbook, the installation of the Oracle CNE is complete, and the instances are ready. Take note of the previous play, which prints the public and private IP addresses of the nodes it deploys and any other deployment information needed while running the lab.
Access the Kubernetes Cluster
Open a terminal and connect via SSH to the
ocneinstance.ssh oracle@<ip_address_of_instance>Wait for the cluster to stabilize and all pods to report in a running state.
watch kubectl get pods -AOnce all the pods show a STATUS of Running, type
ctrl-cto exit thewatchcommand.Confirm how many nodes are present.
kubectl get nodes
Managing a Catalog
List the available catalogs.
ocne catalog listDisplay details about the Oracle catalog.
ocne catalog get --name 'Oracle Cloud Native Environment Application Catalog'Example Output:
[oracle@ocne ~]$ ocne catalog get --name 'Oracle Cloud Native Environment Application Catalog'

Catalog
--------
apiVersion: v1
entries:
  bootstrap-capi:
  - apiVersion: v2
    appVersion: 1.9.4
    created: "2025-02-24T01:37:20.540493324Z"
    description: A Helm chart for Cluster API bootstrap providers
...
...
    name: ui
    sources:
    - https://github.com/headlamp-k8s/headlamp/tree/main/charts/headlamp
    - https://github.com/headlamp-k8s/headlamp
    type: application
    urls:
    - ui-2.0.0.tgz
    version: 2.0.0
List all of the applications in the Oracle catalog.
ocne catalog searchExample Output:
[oracle@ocne ~]$ ocne catalog search
APPLICATION             	VERSION
bootstrap-capi          	1.9.4
bootstrap-capi          	1.7.1
cert-manager            	1.14.5
...
...
tigera-operator         	1.29.3
ui                      	2.0.0
Search the Oracle catalog for something specific.
ocne catalog search --pattern 'prom*'Example Output:
[oracle@ocne ~]$ ocne catalog search --pattern 'prom*'
APPLICATION             	VERSION
kube-prometheus-stack   	0.63.0
kube-proxy              	2.0.0
prometheus              	2.31.1
prometheus-adapter      	0.10.0
prometheus-node-exporter	1.6.1
Reviewing Installed Applications
List the installed applications in the cluster.
ocne application list -AExample Output:
[oracle@ocne ~]$ ocne application list -A
Releases
NAME                       	NAMESPACE   	CHART                      	STATUS  	REVISION	APPVERSION
core-dns                   	kube-system 	coredns                    	deployed	1       	2.0.0
flannel                    	kube-flannel	flannel                    	deployed	1       	2.0.0
kube-proxy                 	kube-system 	kube-proxy                 	deployed	1       	2.0.0
kubernetes-gateway-api-crds	kube-system 	kubernetes-gateway-api-crds	deployed	1       	1.2.1
oci-ccm                    	kube-system 	oci-ccm                    	deployed	1       	1.30.0
ocne-catalog               	ocne-system 	ocne-catalog               	deployed	1       	2.0.0
ui                         	ocne-system 	ui                         	deployed	1       	2.0.0
Note: This is a useful way to confirm what applications from a catalog you deployed onto your cluster.
Review details of the installed application.
ocne application show --namespace ocne-system --release uiWhere:
--namespace- The namespace where the application is deployed.--release- The name of the application--computed- Not used in this example but returns details of the YAML deployment used by the deployed application.
Example output:
[oracle@ocne ~]$ ocne application show --namespace ocne-system --release ui
image:
  tag: current
----------------
NAME: ui
NAMESPACE: ocne-system
CHART: ui
STATUS: deployed
REVISION: 1
APPVERSION: 2.0.0
Install an Application
Install the kube-prometheus-stack application.
ocne application install --release kube-prometheus-stack --namespace default --name kube-prometheus-stackExample Output:
[oracle@ocne ~]$ ocne application install --release kube-prometheus-stack --namespace default --name kube-prometheus-stack
INFO[2025-03-21T16:24:58Z] Application installed successfully
Confirm the installation of the application.
ocne application list -AExample Output:
[oracle@ocne ~]$ ocne application list -A
Releases
NAME                       	NAMESPACE   	CHART                      	STATUS  	REVISION	APPVERSION
core-dns                   	kube-system 	coredns                    	deployed	1       	2.0.0
flannel                    	kube-flannel	flannel                    	deployed	1       	2.0.0
kube-prometheus-stack      	default     	kube-prometheus-stack      	deployed	1       	0.63.0
kube-proxy                 	kube-system 	kube-proxy                 	deployed	1       	2.0.0
kubernetes-gateway-api-crds	kube-system 	kubernetes-gateway-api-crds	deployed	1       	1.2.1
oci-ccm                    	kube-system 	oci-ccm                    	deployed	1       	1.30.0
ocne-catalog               	ocne-system 	ocne-catalog               	deployed	1       	2.0.0
ui                         	ocne-system 	ui                         	deployed	1       	2.0.0
Confirm all the Pods are running.
kubectl get pods -n defaultExample Output:
[oracle@ocne ~]$ kubectl get pods -n default
NAME                                                       READY   STATUS    RESTARTS   AGE
alertmanager-kube-prometheus-stack-alertmanager-0          2/2     Running   0          2m30s
kube-prometheus-stack-kube-state-metrics-f5869c58f-fnncf   1/1     Running   0          2m37s
kube-prometheus-stack-operator-76b9d6954f-7rnqc            1/1     Running   0          2m37s
kube-prometheus-stack-prometheus-node-exporter-g6b6n       1/1     Running   0          2m37s
kube-prometheus-stack-prometheus-node-exporter-prqxd       1/1     Running   0          2m37s
kube-prometheus-stack-prometheus-node-exporter-sppst       1/1     Running   0          2m37s
kube-prometheus-stack-prometheus-node-exporter-vw797       1/1     Running   0          2m37s
prometheus-kube-prometheus-stack-prometheus-0              2/2     Running   0          2m30s
Redirect local traffic to the Prometheus service in your cluster.
kubectl port-forward -n default svc/kube-prometheus-stack-prometheus 9091:9090Example Output:
[oracle@ocne ~]$ kubectl port-forward -n default svc/kube-prometheus-stack-prometheus 9091:9090
Forwarding from 127.0.0.1:9091 -> 9090
Forwarding from [::1]:9091 -> 9090
Access the Prometheus UI
Open a new terminal window and configure an SSH tunnel to the
ocneinstance.ssh -L 9093:localhost:9091 oracle@<ip_address_of_node>Open a web browser and enter the URL.
http://localhost:9093/metrics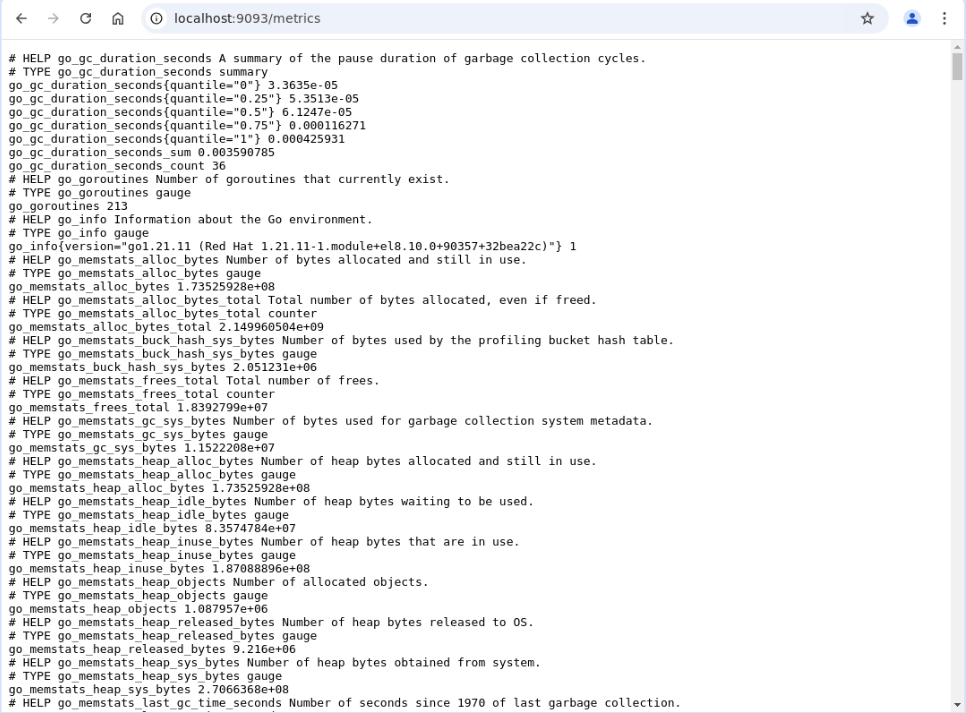
This output confirms that the kube-state-metrics, node exporters, and Alert Manager, which are components of the kube-prometheus-stack, are actively scraping metrics into Prometheus.
Close the browser and exit the terminal window with the SSH tunnel, as they are no longer needed.
Switch to the terminal session that is running the port forward.
Stop the port forward by typing
ctrl-c.
Uninstall an Application
Uninstall the kube-prometheus-stack application.
This step removes the Kubernetes components associated with the application and deletes the instance.
ocne application uninstall --release kube-prometheus-stack --namespace defaultExample Output:
[oracle@ocne ~]$ ocne application uninstall --release kube-prometheus-stack --namespace default
INFO[2025-03-21T18:52:59Z] Uninstalling release kube-prometheus-stack
INFO[2025-03-21T18:53:01Z] kube-prometheus-stack uninstalled successfully
Confirm it is uninstalled.
ocne application list -ARemove the Kubernetes Custom Resource Definitions (CRD) associated with kube-prometheus-stack.
Some applications require you to complete manual steps after uninstalling the application using the
ocne application uninstallcommand. You can find details for each application in the charts directory of the Oracle CNE GitHub project .kubectl delete crd alertmanagerconfigs.monitoring.coreos.com kubectl delete crd alertmanagers.monitoring.coreos.com kubectl delete crd podmonitors.monitoring.coreos.com kubectl delete crd probes.monitoring.coreos.com kubectl delete crd prometheuses.monitoring.coreos.com kubectl delete crd prometheusrules.monitoring.coreos.com kubectl delete crd servicemonitors.monitoring.coreos.com kubectl delete crd thanosrulers.monitoring.coreos.comExample Output:
[oracle@ocne ~]$ kubectl delete crd alertmanagerconfigs.monitoring.coreos.com
customresourcedefinition.apiextensions.k8s.io "alertmanagerconfigs.monitoring.coreos.com" deleted
[oracle@ocne ~]$ kubectl delete crd alertmanagers.monitoring.coreos.com
customresourcedefinition.apiextensions.k8s.io "alertmanagers.monitoring.coreos.com" deleted
[oracle@ocne ~]$ kubectl delete crd podmonitors.monitoring.coreos.com
customresourcedefinition.apiextensions.k8s.io "podmonitors.monitoring.coreos.com" deleted
[oracle@ocne ~]$ kubectl delete crd probes.monitoring.coreos.com
customresourcedefinition.apiextensions.k8s.io "probes.monitoring.coreos.com" deleted
[oracle@ocne ~]$ kubectl delete crd prometheuses.monitoring.coreos.com
customresourcedefinition.apiextensions.k8s.io "prometheuses.monitoring.coreos.com" deleted
[oracle@ocne ~]$ kubectl delete crd prometheusrules.monitoring.coreos.com
customresourcedefinition.apiextensions.k8s.io "prometheusrules.monitoring.coreos.com" deleted
[oracle@ocne ~]$ kubectl delete crd servicemonitors.monitoring.coreos.com
customresourcedefinition.apiextensions.k8s.io "servicemonitors.monitoring.coreos.com" deleted
The application, in this example,
kube-prometheus-stack, is now completely removed from your Kubernetes cluster,
Next Steps
This tutorial introduced you to what you use a Catalog for. Then, how to install, run, and remove an application from a Catalog on your Oracle CNE Kubernetes cluster. Please refer to the Oracle CNE documentation for more details.