Optimize Java Applications for Higher Throughput with Oracle GraalVM
Introduction
This lab shows how to run a Binary Tree benchmark application compiled into a native executable using Oracle GraalVM Native Image and how to apply Profile-Guided Optimization (PGO) to improve its performance.
Profile-Guided Optimization (PGO) is a technique to mitigate the missing just-in-time optimization and gather the execution profiles at one run and then use them to optimize subsequent compilation(s). With PGO you can collect the profiling data and then feed it to the native-image tool, which will use this information to further optimize the performance of the resulting executable.
Notes on Using JMH with Oracle GraalVM Native Image
When running on the JVM, JMH will fork a new JVM for each benchmark to ensure there is no interference in the measurements for each benchmark. This approach is not possible when using Native Image so you should consider the following guidance when building JMH benchmarks that are meant to be run as native executables:
- Include a single benchmark in each native executable
- Annotate the benchmark with
@Fork(0)to ensure that the benchmark is not forked- If you want to profile the benchmark to generate an optimized benchmark, obviously, ignore the benchmark results whilst profiling
Note: Oracle Cloud Infrastructure (OCI) provides Oracle GraalVM at no cost.
Lab Objectives
In this lab you will:
- Connect to a remote host in Oracle Cloud
- Compile and run a JMH benchmark on the JVM
- Build this JMH benchmark into a native executable using Oracle GraalVM Native Image and run it
- Optimize the native executable version with PGO and run it
Estimated lab time: 30-45 minutes
NOTE: If you see the laptop icon in the instructions, it means you need to enter a command. Keep an eye out for it.
![]()
# This is where we you will need to do somethingTo copy a command, hover over the field and then click the Copy to clipboard icon.
To paste a copied command in a terminal window, right click and select the Paste option from the context menu. If you prefer keyboard shortcuts instead, use CTRL+SHIFT+V.
STEP 1: Connect to a Remote Host and Check the Development Environment
Your development environment is provided by a remote host: an OCI Compute Instance with Oracle Linux 9, 4 CPU, and 48GB of memory. The desktop environment will display before the remote host is ready, which can take up to two minutes.
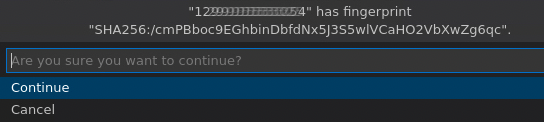
Visual Studio Code (VS Code) will open and automatically connect to the VM instance that has been provisioned for you. Click Continue to accept the machine fingerprint.
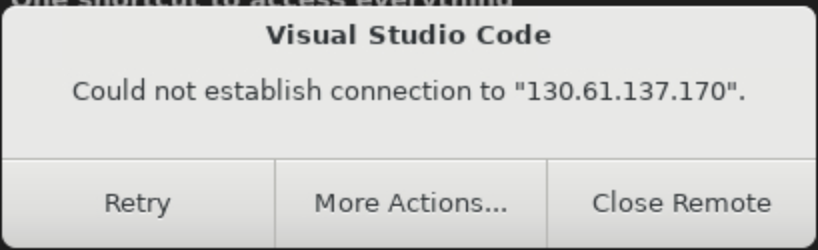
If you do not click Continue, VS Code will popup a dialog box, shown below. Click Retry. VS Code will ask you to accept the machine fingerprint. Then click Continue.
Issues With Connecting to the Remote Development Environment
If you encounter any other issues in which VS Code fails to connect to the remote development environment that are not covered above, try the following:
- Close VS Code
- Double-click the "Luna-Lab.html" icon on your desktop
- Copy the "Configure Script" from the Resources tab and paste it into the Luna Desktop Terminal again
- Repeat the above instructions to connect to the remote development environment
When you see the OS Keyring message for storing the encryption related data not being identified, choose "Use weaker encryption”:

Congratulations, you are now connected to a remote host in Oracle Cloud!
Next, open a Terminal within VS Code. The Terminal enables you to interact with the remote host. A terminal can be opened in VS Code via the menu: Terminal > New Terminal.
Note on the Development Environment
You will use Oracle GraalVM 25 as the Java environment for this lab. Your development environment comes preconfigured the Native Image tooling required for this lab.
You can easily check that by running these commands in your Terminal:
![]()
java -version![]()
native-image --versionYou can proceed to the next step.
STEP 2: Compile and Run a JMH Benchmark on JVM
The source code for the application - JMH benchmark - is available on your remote host. The JMH benchmark originates from the Computer Language Benchmarks Game . It creates binary trees - before any tree nodes are garbage collected - using at-minimum the number of allocations.
To build a native executable of this JMH benchmark, you would need to run the Tracing Agent to supply the reflection configuration to native-image.
This has already been done for you to save time and the generated configuration can be found in src/main/resources/META-INF/native-image/.
Build and then run the benchmark on the JVM with Maven:
![]()
mvn clean package exec:execNote that within the pom.xml file there are instructions to explicitly turn off the GraalVM JIT compiler using the option -XX:-UseJVMCICompiler.
This means that benchmark will run using the C2 JIT compiler.
The application will run the benchmark in three iterations and display the results in the terminal. The run should take less than four minutes to complete. The final result is the most significant. You should see something like:
Benchmark          (binaryTreesN)   Mode  Cnt    Score   Error  Units
BinaryTrees.bench              14  thrpt    3  242.301 ± 1.661  ops/s
You can now proceed to the next step.
STEP 3: Build and Run a JMH Benchmark as a Native Executable
Now build a native executable using Oracle GraalVM Native Image.
The pom.xml includes a profile that will use the Maven plugin for Native Image to compile the application into a native executable (see the native-maven-plugin plugin registration).
The plugin figures out which JAR file it needs to pass to native-image and what the executable main class should be.
Build a native executable. The build should take approximately one minute:

mvn package -PnativeThe
-PnativeMaven profile turns on building a native executable. It will generate a native executable in the target directory, calledbenchmark-binary-tree.Then run the benchmark as a native executable:
./target/benchmark-binary-treeThese are the results obtained with Oracle GraalVM 25:
Benchmark          (binaryTreesN)   Mode  Cnt    Score    Error  Units
BinaryTrees.bench              14  thrpt    3  217.158 ± 28.514  ops/s
The native executable numbers may be similar or better compared to the previous (non-native) option. The results will vary depending on the hardware you run the same benchmark on.
You can now proceed to the next step.
STEP 4: Optimize a Native Executable with PGO and Run
Next you will optimize your application for improved throughput using Profile-Guided Optimization (PGO) . It is a two-step process. First, build an instrumented version of the native executable and run it to trace its execution and collect a performance profile. When the execution finishes, it will generate a profile file, default.iprof, in the project's root directory. Then generate more optimal native executable based on the gathered profile data.
Build an instrumented native executable by passing the
-PinstrumentedMaven profile:mvn package -PinstrumentedIt generates a binary in the target directory, called
benchmark-binary-tree-instr.Run it to collect the code-execution-frequency profiles:
./target/benchmark-binary-tree-instrProfiles collected from this run are stored in the default.iprof file in the current working directory, if nothing else is specified.
Now that you have generated the profile file, build the optimized version:
mvn package -PoptimisedIt generates an optimised binary in the
targetdirectory, calledbenchmark-binary-tree-opt.Finally, run the optimised native executable:
./target/benchmark-binary-tree-opt
These are the results obtained:
Benchmark          (binaryTreesN)   Mode  Cnt    Score     Error  Units
BinaryTrees.bench              14  thrpt    3  227.704  ± 18.281  ops/s
The average score of operations per second significantly increased. The results will vary depending on the hardware you run the same benchmark on.
Summary
This lab showed how you can optimize a native executable with Profile-Guided Optimisation (PGO) to get higher throughput comparing to the Java version while still preserving other benefits: instantaneous startup, lower CPU and memory usage. With PGO you can "train" your application for specific workloads and transform it into an optimized binary without sacrificing any performance.
Learn More
Congratulations! You have successfully completed this lab.