Manage KVM Virtual Machines using Oracle Linux Automation Manager
Introduction
The community.libvirt collection provides libvirt modules and plugins supported by the Ansible libvirt community. These modules and plugins help manage virtual machines (VMs) and containers using the libvirt API.
Objectives
In this tutorial, you'll learn how to:
- Create a playbook that uses the community.libvirt collection
- Configure credentials for Ansible Galaxy
- Create a Job Template
- Run the Job
Prerequisites
- A system with Oracle Linux Automation Manager installed
- Access to a Git repository
- An Oracle Linux system with KVM installed
Note: For details on installing Oracle Linux Automation Manager or KVM, refer to the links provided at the end of this lab.
Deploy Oracle Linux Automation Manager
Note: If running in your own tenancy, read the linux-virt-labs GitHub project README.md and complete the prerequisites before deploying the lab environment.
Open a terminal on the Luna Desktop.
Clone the
linux-virt-labsGitHub project.git clone https://github.com/oracle-devrel/linux-virt-labs.gitChange into the working directory.
cd linux-virt-labs/olamInstall the required collections.
ansible-galaxy collection install -r requirements.ymlUpdate the Oracle Linux instance configuration.
cat << EOF | tee instances.yml > /dev/null
compute_instances:
  1:
    instance_name: "olam-node"
    type: "control"
  2:
    instance_name: "git-server"
    type: "server"
  3:
    instance_name: "kvm-server"
    type: "server"
passwordless_ssh: true
olam_type: single
use_git: true
use_kvm: true
EOF
Create an inventory file.
cat << EOF | tee hosts > /dev/null
localhost ansible_connection=local ansible_connection=local ansible_python_interpreter=/usr/bin/python3.6
EOF
Deploy the lab environment.
ansible-playbook create_instance.yml -i hosts -e "@instances.yml"The free lab environment requires the extra variable
ansible_python_interpreterfor localhost because it installs the RPM package for the Oracle Cloud Infrastructure SDK for Python. The location for installing this package is under the system's default Python modules based on your version of Oracle Linux. Using an inventory variable avoids impacting the plays running on hosts other than localhost.The default deployment shape uses the AMD CPU. You can change the shape of the instances by passing a new shape variable definition on the command line.
For example:
-e instance_shape="VM.Standard3.Flex"Similarly, the default version of the Oracle Linux image uses the variable
os_versiondefined in the `default_vars.yml file. You can modify this value by passing the Oracle Linux major version on the command line.For example:
-e os_version="9"Important: Wait for the playbook to run successfully and reach the pause task. At this stage of the playbook, the installation of Oracle Linux is complete, and the instances are ready. Note the previous play, which prints the public and private IP addresses of the nodes it deploys.
Create a Playbook
Open a new terminal window.
Set a variable to the remote git-server instance.
export REMOTE=<ip_address_of_instance>Create the project directory.
mkdir ~/olamkvmCreate a requirements file.
Oracle Linux Automation Engine uses the requirements file to pull any required collections or roles into the project at runtime.
cat << EOF > ~/olamkvm/requirements.yml
---
collections:
  - name: community.libvirt
  - name: community.general
  - name: community.crypto
EOF
Create a variables file.
The file stores variables and their default values. The playbook imports this file at runtime.
Create a directory to store the file.
mkdir ~/olamkvm/varsCreate the file.
cat << EOF > ~/olamkvm/vars/defaults.yml
---
username: oracle
base_image_name: OL9U5_x86_64-kvm-b253.qcow2
base_image_url: https://yum.oracle.com/templates/OracleLinux/OL9/u5/x86_64/{{ base_image_name }}
base_image_sha: 3b00bbbefc8e78dd28d9f538834fb9e2a03d5ccdc2cadf2ffd0036c0a8f02021
libvirt_pool_dir: "/var/lib/libvirt/images"
vm_name: ol9-dev
vm_vcpus: 2
vm_ram_mb: 2048
vm_net: default
vm_root_pass:
cleanup_tmp: no
EOF
Create the cloud-init templates.
These templates create the meta-data and the user-data files to provision the VM configuration via cloud-init.
Create a directory to store the templates.
mkdir ~/olamkvm/templatesCreate the meta-data template.
cat << EOF > ~/olamkvm/templates/meta-data.j2
instance-id: iid-local01
local-hostname: {{ vm_name }}
EOF
Create the user-data template.
cat << EOF > ~/olamkvm/templates/user-data.j2
#cloud-config

system_info:
  default_user:
    name: opc

ssh_authorized_keys:
  - {{ vm_private_key }}
EOF
Create the libvirt VM definition template.
cat << EOF > ~/olamkvm/templates/vm-template.xml.j2
<domain type="kvm">
  <name>{{ vm_name }}</name>
  <memory unit='MiB'>{{ vm_ram_mb }}</memory>
  <vcpu placement='static'>{{ vm_vcpus }}</vcpu>
  <os>
    <type arch="x86_64" machine="q35">hvm</type>
    <boot dev="hd"/>
  </os>
  <features>
    <acpi/>
    <apic/>
  </features>
  <cpu mode="host-model"/>
  <clock offset="utc">
    <timer name="rtc" tickpolicy="catchup"/>
    <timer name="pit" tickpolicy="delay"/>
    <timer name="hpet" present="no"/>
  </clock>
  <pm>
    <suspend-to-mem enabled="no"/>
    <suspend-to-disk enabled="no"/>
  </pm>
  <devices>
    <emulator>/usr/libexec/qemu-kvm</emulator>
    <disk type="file" device="disk">
      <driver name="qemu" type="qcow2"/>
      <source file="{{ libvirt_pool_dir }}/{{ vm_name }}.qcow"/>
      <target dev="vda" bus="virtio"/>
    </disk>
    <disk type="file" device="cdrom">
      <driver name="qemu" type="raw"/>
      <source file="{{ libvirt_pool_dir }}/{{ vm_name}}.iso"/>
      <target dev="sda" bus="sata"/>
      <readonly/>
    </disk>
    <controller type="usb" model="qemu-xhci" ports="15"/>
    <interface type="network">
      <source network="{{ vm_net }}"/>
      <model type="virtio"/>
    </interface>
    <console type="pty"/>
    <channel type="unix">
      <source mode="bind"/>
      <target type="virtio" name="org.qemu.guest_agent.0"/>
    </channel>
    <memballoon model="virtio"/>
    <rng model="virtio">
      <backend model="random">/dev/urandom</backend>
    </rng>
  </devices>
</domain>
EOF
Create a playbook.
This playbook queries the KVM server for existing VMs and then deploys a new Oracle Linux Cloud Image.
cat << EOF > ~/olamkvm/create_vm.yml
---
- name: Create vm with community.libvirt collection
  hosts: kvm
  become: true

  vars_files:
    - vars/defaults.yml

  tasks:

  - name: Add python lxml module required by libvirt ansible module
    ansible.builtin.dnf:
      name: python3-lxml
      state: present

  - name: Get list of existing VMs
    community.libvirt.virt:
      command: list_vms
    register: existing_vms
    changed_when: false

  - name: Print list of existing VMs
    ansible.builtin.debug:
      var: existing_vms

  - name: Create VM when not exist
    when: ( vm_name not in existing_vms.list_vms )
    block:

    - name: Download base image
      ansible.builtin.get_url:
        url: "{{ base_image_url }}"
        dest: "/tmp/{{ base_image_name }}"
        checksum: "sha256:{{ base_image_sha }}"
        mode: "0664"

    - name: Copy base image to libvirt directory
      ansible.builtin.copy:
        dest: "{{ libvirt_pool_dir }}/{{ vm_name }}.qcow"
        src: "/tmp/{{ base_image_name }}"
        force: false
        remote_src: true
        owner: qemu
        group: qemu
        mode: "0660"
      register: copy_results

    - name: Generate a vm ssh keypair
      community.crypto.openssh_keypair:
        path: ~/.ssh/id_rsa
        size: 2048
        comment: vm ssh keypair
      register: vm_ssh_keypair
      become: true
      become_user: "{{ username }}"

    - name: Create vm meta-data
      ansible.builtin.template:
        src: templates/meta-data.j2
        dest: "~/meta-data"
        mode: "0664"
      become_user: "{{ username }}"

    - name: Read the vm ssh private key
      ansible.builtin.slurp:
        src: "~/.ssh/id_rsa.pub"
      register: vm_ssh_private_key
      become: true
      become_user: "{{ username }}"

    - name: Create var for private key
      ansible.builtin.set_fact:
        vm_private_key: "{{ vm_ssh_private_key.content | b64decode }}"

    - name: Create vm user-data
      ansible.builtin.template:
        src: templates/user-data.j2
        dest: ~/user-data
        mode: "0664"
      become: true
      become_user: "{{ username }}"

    - name: Generate iso containing cloud-init configuration
      ansible.builtin.shell: |
        genisoimage -output /tmp/{{ vm_name }}.iso -volid cidata -joliet -rock ~/user-data ~/meta-data
      become: true
      become_user: "{{ username }}"
      register: generate_iso
      changed_when: generate_iso.rc == 0

    - name: Copy vm iso image to libvirt directory
      ansible.builtin.copy:
        dest: "{{ libvirt_pool_dir }}/{{ vm_name }}.iso"
        src: "/tmp/{{ vm_name }}.iso"
        force: false
        remote_src: true
        owner: qemu
        group: qemu
        mode: "0660"

    - name: Remove vm iso image from tmp
      ansible.builtin.file:
        path: "/tmp/{{ vm_name }}.iso"
        state: absent

    - name: Define the vm
      community.libvirt.virt:
        command: define
        xml: "{{ lookup('template', 'vm-template.xml.j2') }}"

  - name: Start the vm
    community.libvirt.virt:
      name: "{{ vm_name }}"
      state: running
    register: vm_start_results
    until: "vm_start_results is success"
    retries: 15
    delay: 2

  - name: Remove the temporary file
    ansible.builtin.file:
      path: "/tmp/{{ base_image_name }}"
      state: absent
    when: cleanup_tmp | bool
EOF
Add the Project to Source Control
Initialize the project's working directory as a Git repository.
Before initializing the repository, you need to perform some Git first-time setup steps.
Set the default branch name used when initializing a project.
git config --global init.defaultBranch mainSet your identity.
The email and name are examples within this tutorial. Use your email address and name when working on your projects, as Git immutably includes this information in each commit.
git config --global user.email johndoe@example.com
git config --global user.name "John Doe"
Change into the project's working directory.
cd ~/olamkvmInitialize the directory as a local Git repository.
git initThe command returns that it initialized the empty Git repository.
Check the state of the working directory and project staging area.
git statusThe state of the local repository indicates two untracked files, create_vm.yml and requirements.yml, as well as the directories vars and templates.
Add and track the new files in the staging area.
git add --allThe
--alloption adds all untracked and changed files to the staging area.Commit the changes currently in the staging area.
git commit -m 'initial commit'The
-moption allows adding a comment to the committed changes.Create and initialize the remote Git repository.
A remote repository is a shared repository used by all project contributors and stored on a code-hosting service, such as GitHub, or a self-hosted server.
ssh git@$REMOTE "git init -b main --bare /git-server/repos/olamkvm.git"The
-boption ensures the initialization of the remote repository using a branch called main.Accept the ECDSA key fingerprint by typing
yes.Add the new remote repository connection record.
Adding the remote connection to the local repository allows you to use it as a named shortcut in Git commands.
git remote add origin git@$REMOTE:/git-server/repos/olamkvm.gitThe path after the colon is the repository's directory location on the remote Git server.
Verify the newly added connection record.
git remote -vThe output shows the connection record origin pointing to the remote Git repository location for both the
git fetchandgit pushcommands.Push the local repository changes to the remote repository.
git push origin mainUsing the olamkvm source within an Oracle Linux Automation Manager Project is now possible.
Create Ansible Galaxy Credentials
These credentials allow Oracle Linux Automation Manager to pull the OCI Ansible Collection from the public Ansible Galaxy Hub.
Open a new terminal window and configure an SSH tunnel to the olam-node instance.
ssh -L 8444:localhost:443 oracle@<ip_address_of_instance>Open a web browser and enter the URL.
https://localhost:8444Note: Approve the security warning based on the browser used. For the Chrome browser, click the Advanced button and then the Proceed to localhost (unsafe) link.
Log in to the Oracle Linux Automation Manager Web UI. Use the Username
adminand the Passwordadmincreated during the automated deployment.
The Web UI displays after a successful login.
Click Credentials under the Resources section in the navigation menu.
Click the Add button.
Enter or select the following values in the specific fields.
For fields with a search or list of values, we can start typing the requested value and then select it from the list.
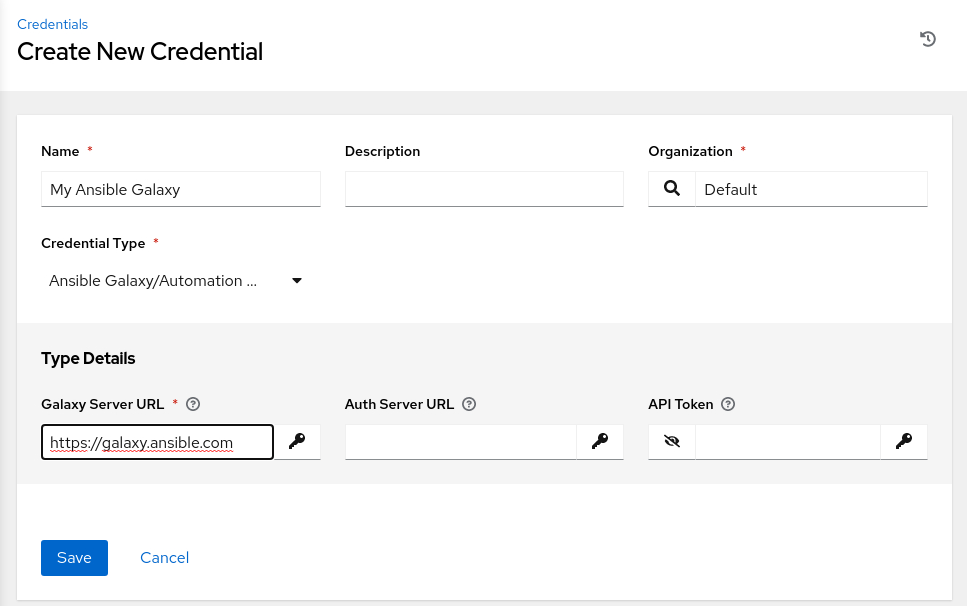
- Name:
My Ansible Galaxy - Organization:
Default - Credential Type: Ansible Galaxy/Automation Hub API Token
Oracle Linux Automation Manager utilizes Ansible Galaxy credentials to facilitate the download of roles and collections using the
ansible-galaxycommand.- Galaxy Server URL:
https://galaxy.ansible.com
- Name:
Review the entries and click the Save button.
Click Organizations under the Access section in the navigation menu.
Assigning the Ansible Galaxy credential within the Organization enables the download of the Oracle Linux Infrastructure Ansible Collection from within the git project.
Click the Default organization and click the Edit button.
Select the search option in the Galaxy Credentials field.
Select My Ansible Galaxy in the Select Galaxy Credentials pop-up dialogand click the Select button.
Review and click the Save button.

Create Machine Credentials
These credentials allow Oracle Linux Automation Manager to connect to the KVM virtualization system via SSH.
Click Credentials under Resources in the navigation menu.
Click the Add button.
Enter or select the following values in the specific fields.
For fields with a search or list of values, we can start typing the requested value and then select it from the list.
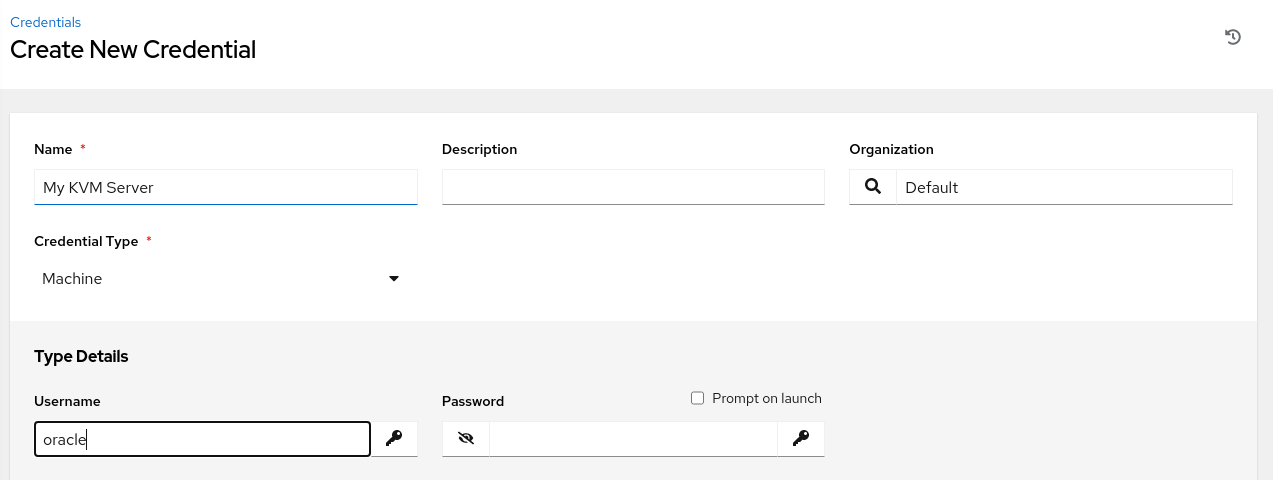
- Name:
My KVM Server - Organization:
Default - Credential Type: Machine
Oracle Linux Automation Manager uses the Machine credentials type to set the information required when establishing an SSH connection to a host.
The page refreshes, requesting the Type Details.
- Name:
Enter the Username.
- Username:
oracle
- Username:
Click the Browse button for the SSH Private Key.
A dialog box appears displaying the Open File window.
Right-click in the central panel of the Open File window and select Show Hidden Files in the pop-up dialog box.
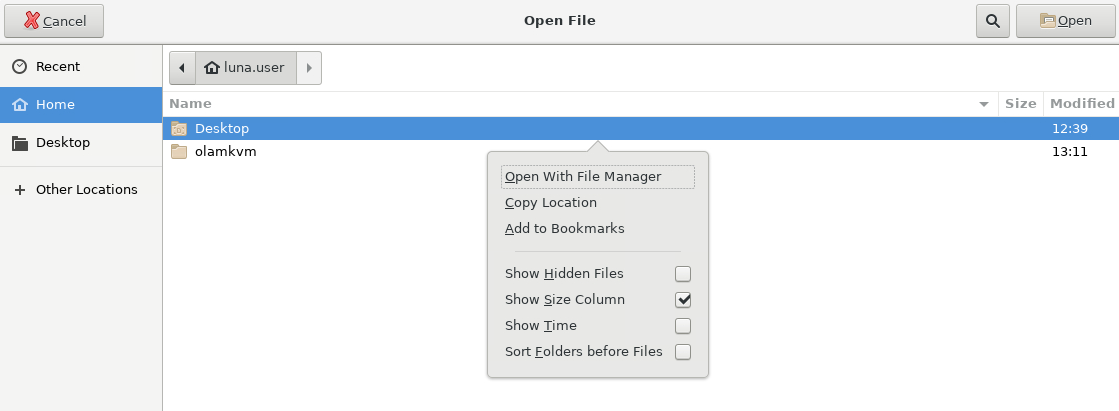
Click anywhere in the central panel to dismiss the dialog box.
Click the Home location in the navigation menu on the left side of the Open File window.
Double-click the .ssh folder in the list, then double-click the id_rsa file.
This action copies the contents of the id_rsa file to the SSH Private Key field.
Review the entries, then scroll to the bottom and click the Save button.
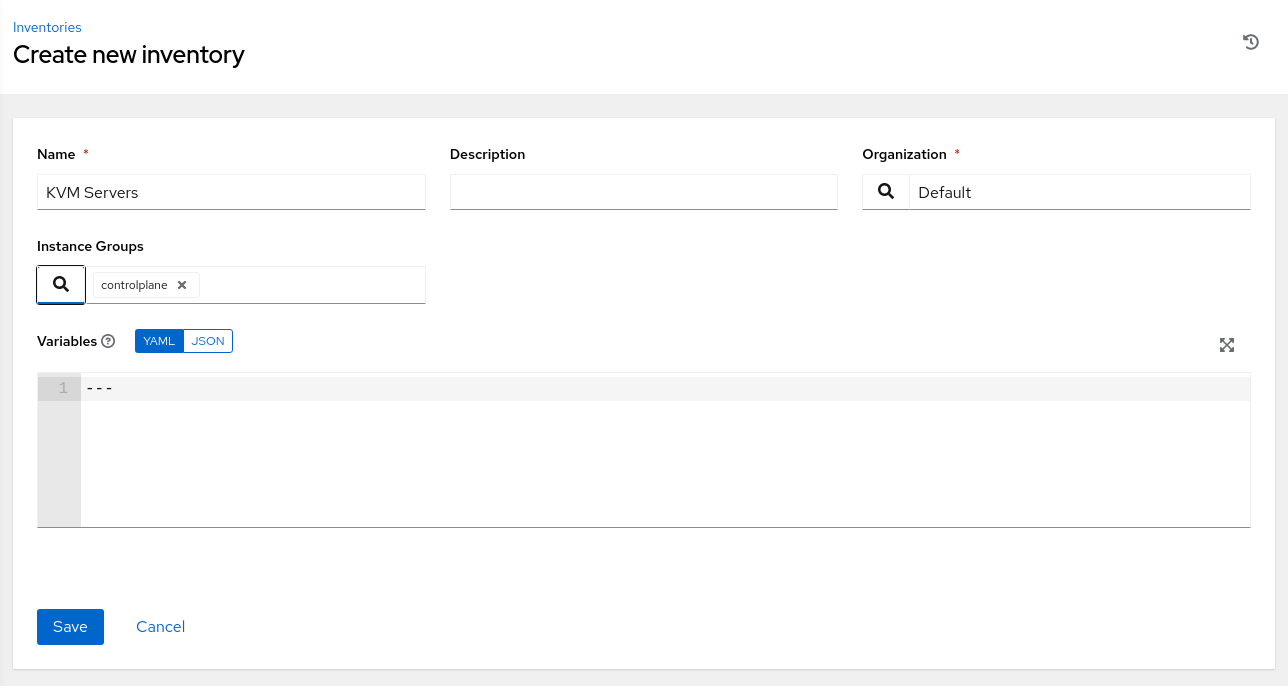
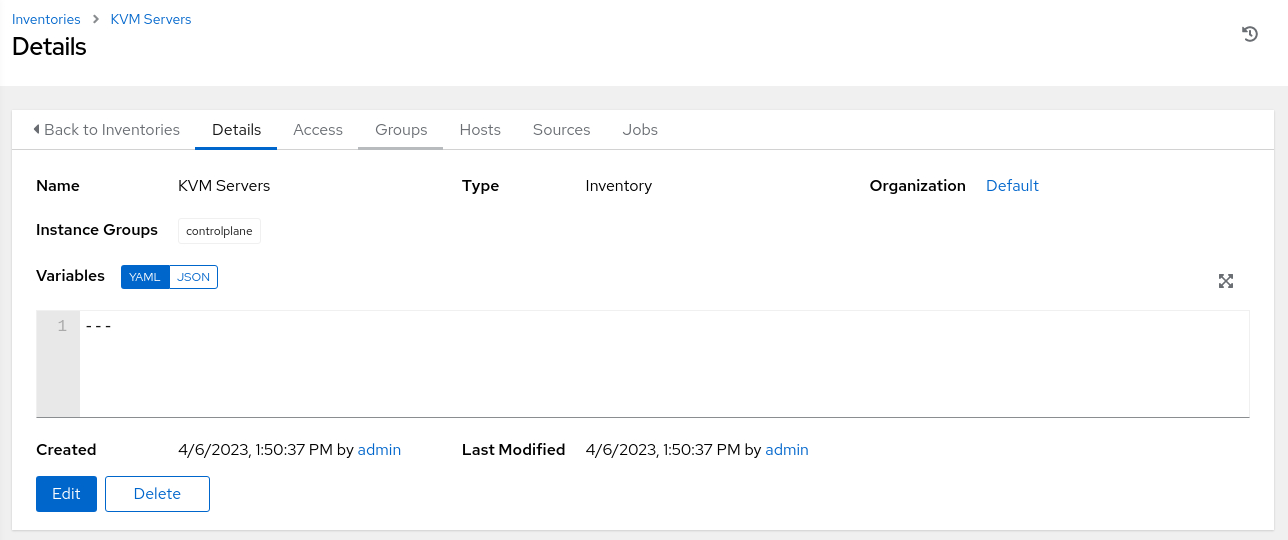
Create an Inventory
Click Inventories in the navigation menu.
Click the Add button and select Add inventory from the drop-down list of values.
Enter or select the following values in the specific fields.
- Name:
KVM Servers - Instance Groups: controlplane
- Name:
Review and click the Save button.
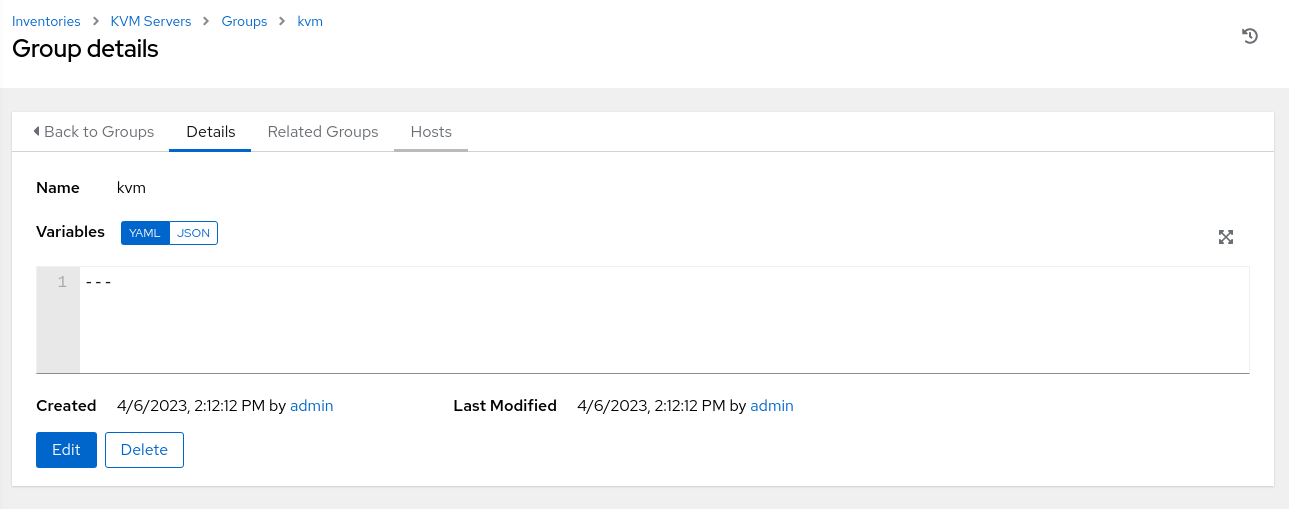
Add a Group to an Inventory
A group within an inventory is a classification of hosts or other groups that allows controlling a set of hosts for a given task.
Click the Groups tab on the KVM Servers Details page.
Click the Add button.
Enter or select the following values in the specific fields.
- Name:
kvm
- Name:
Review and click the Save button.
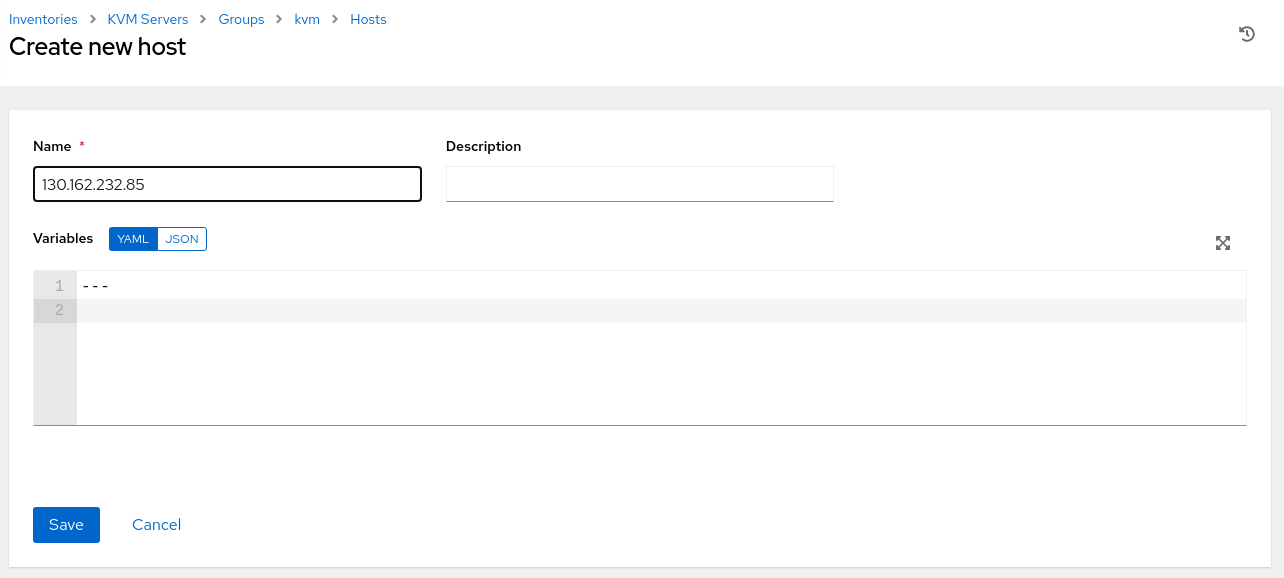
Add a Host to the Inventory Group
Click the Hosts tab on the kvm Group details page.
Click the Add button and select Add new host from the drop-down list of values.
Enter or select the following values in the specific fields.
- Name: Use the public IP address of the kvm-server host.
Review and click the Save button.
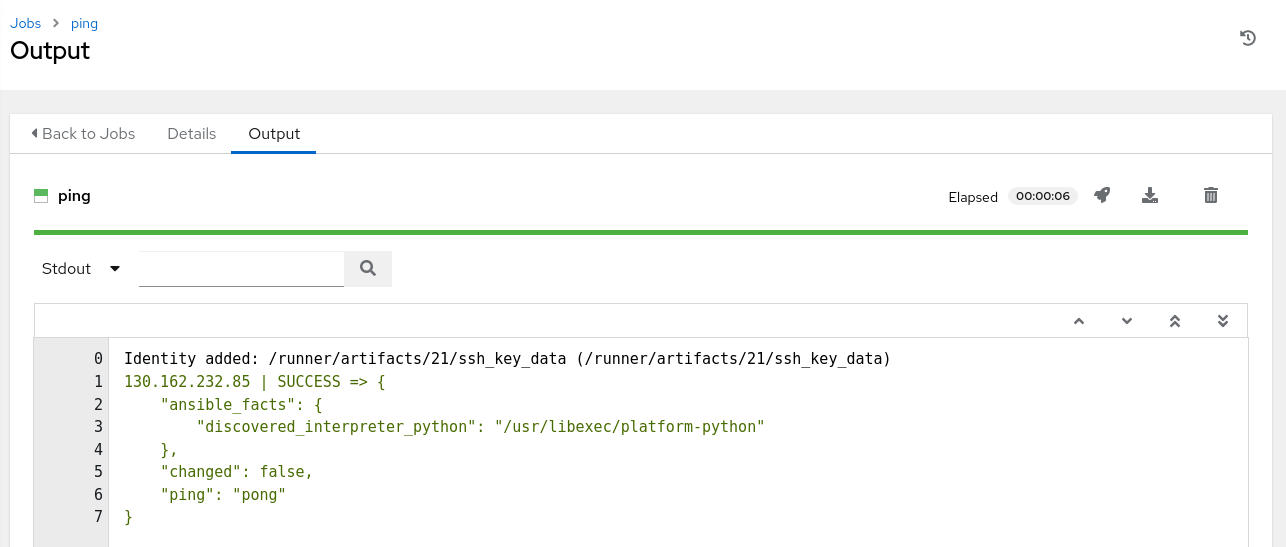
Ping the Inventory Group
Use the ping module to verify Oracle Linux Automation can connect to the host within the inventory group.
Use the breadcrumbs and click on KVM Servers.
Click the Groups tab.
Check the box next to the kvm group and click the Run Command button.
The Run Command pop-up dialog appears.
Select the ping module and click the Next button.
Select the OLAM EE (2.3) Execution Environment and click the Next button.
Select the My KVM Server Machine Credential and click the Next button.
Review and click the Launch button.
A job launches and displays the output from the ping module.
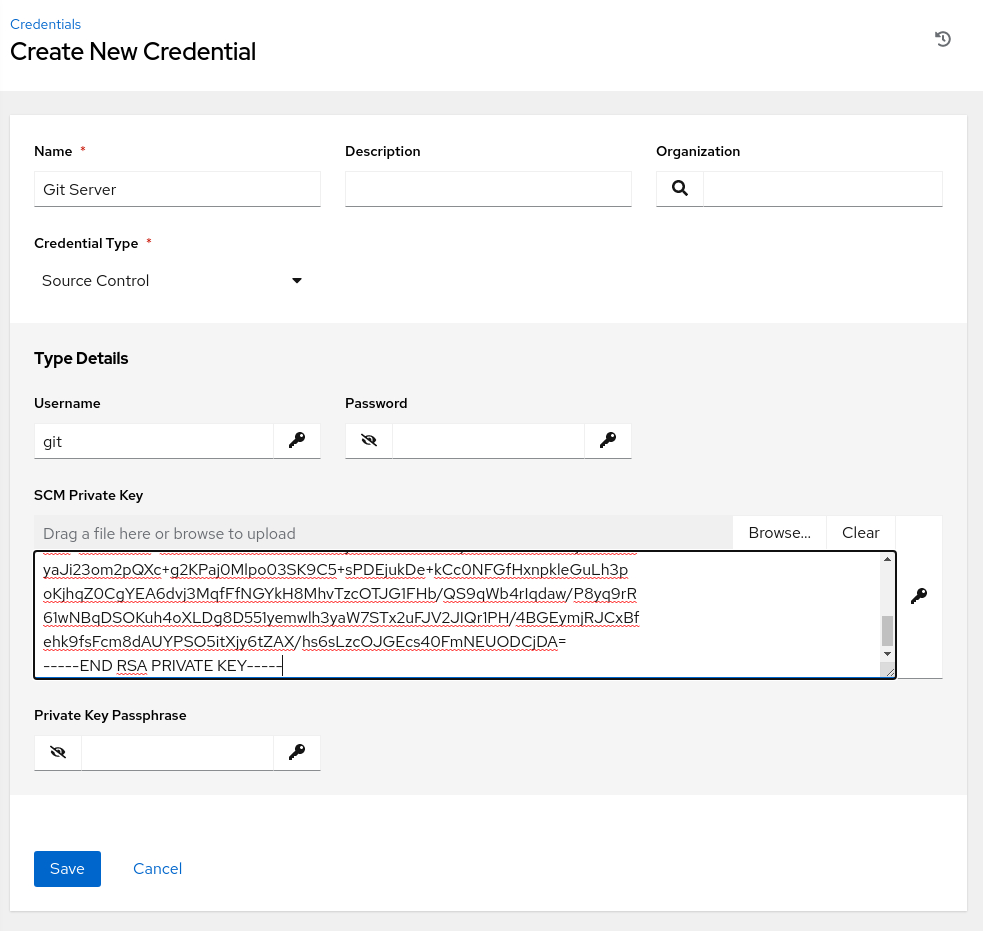
Add Source Control Credential
Click Credentials in the navigation menu.
Click the Add button.
Enter or select the following values in the specific fields.
- Name:
Git Server - Organization:
Default - Credential Type: Source Control
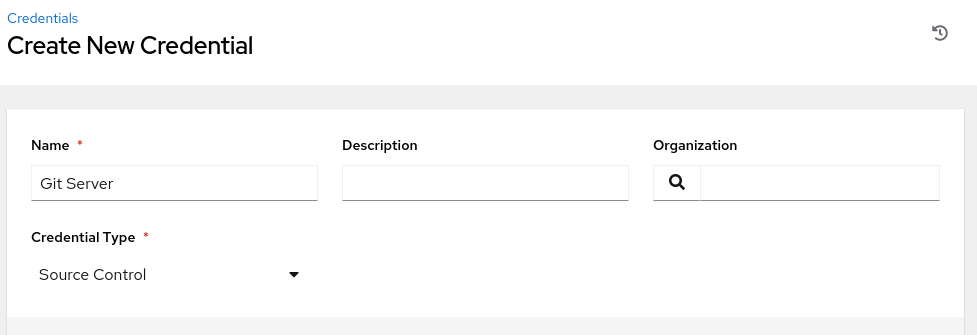
The page refreshes, requesting the Type Details.
- Name:
Enter the Username.
- Username:
git
- Username:
Enter the SCM Private Key
Click the Browse button and double-click the id_rsa file. This action copies the key contents into the SCM Private Key field.
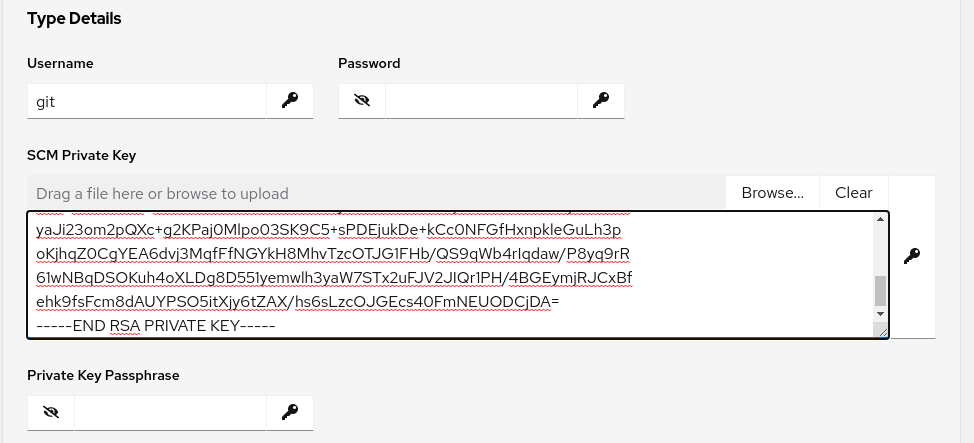
Review and click the Save button.
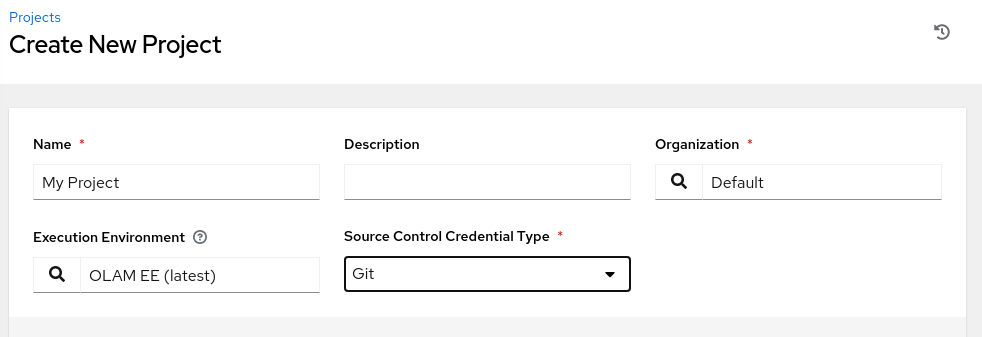
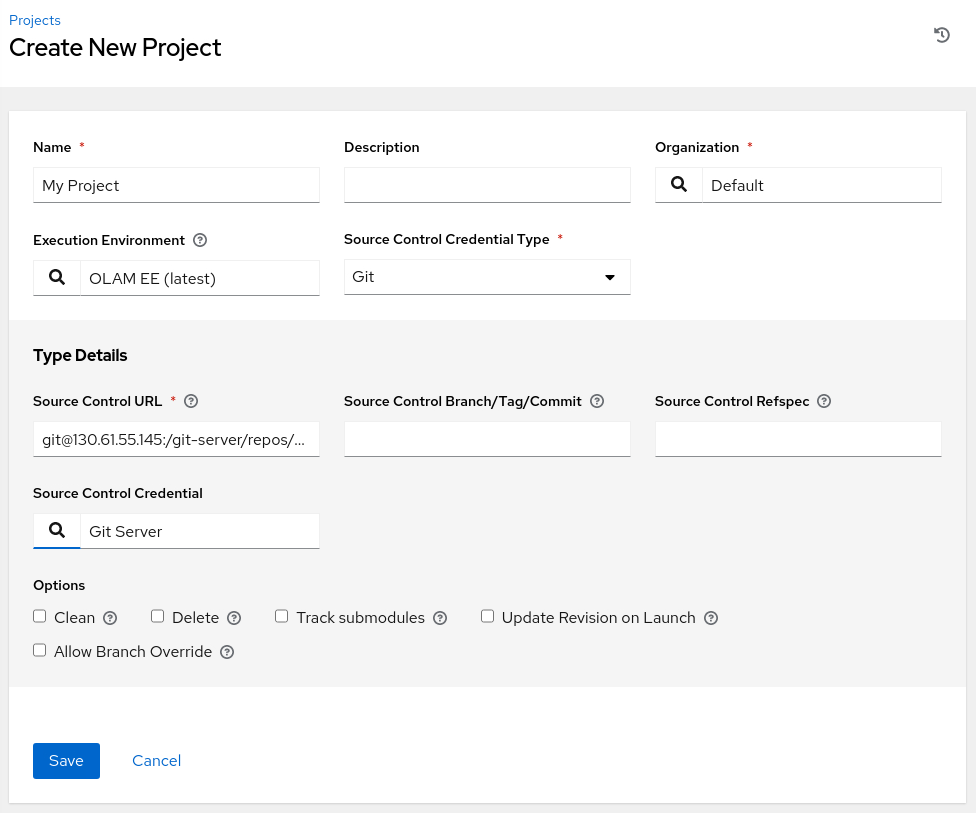
Create a Project
Click Projects in the navigation menu.
Click the Add button.
Enter or select the following values in the specific fields.
- Name:
My Project - Execution Environment: OLAM EE (2.3)
- Source Control Credential Type: Git
The page refreshes, requesting the Type Details.
- Name:
Enter the git-server's remote URL.
- Source Control URL:
git@<ip_address_of_instance>:/git-server/repos/olamkvm.git
- Source Control URL:
Select Git Server for the Source Control Credential.
Review and click the Save button.
Review the project sync status.
After creating the project, the Web UI displays its status in the Details summary as the sync begins. The status transitions from Running to Successful if the configuration is correct and the Git server is reachable.

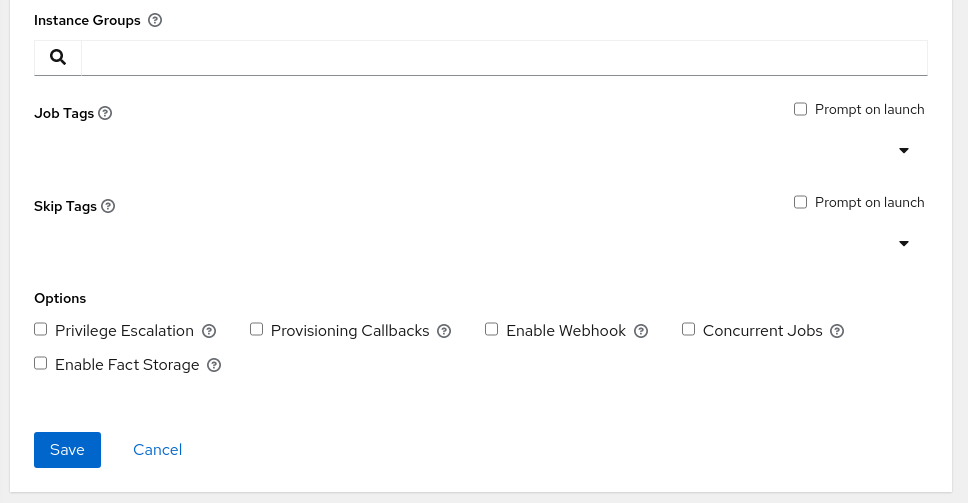
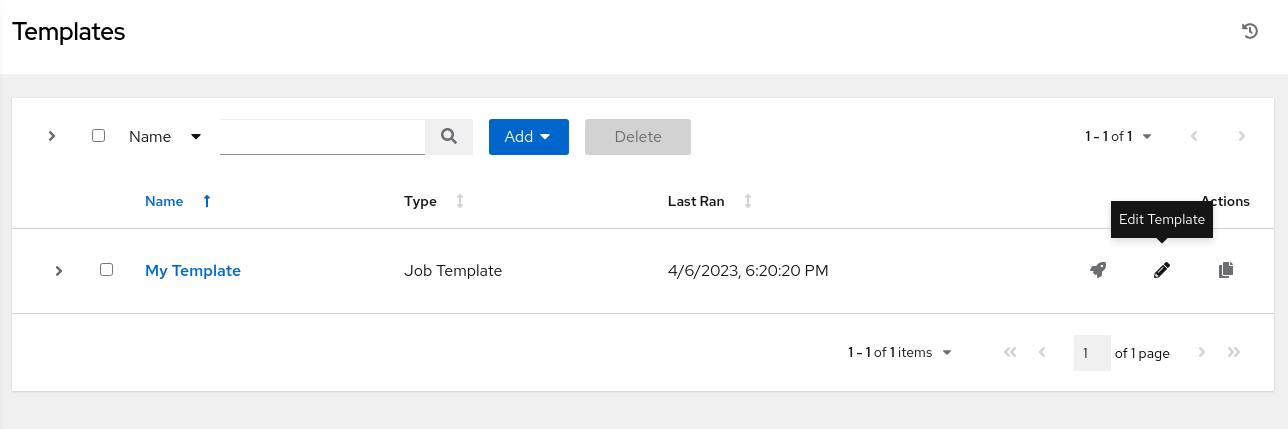
Create a Job Template
Click Templates in the navigation menu.
Click the Add button and select Add job template from the drop-down list of values.
Enter the required values.
- Name:
My Template - Job Type: Run
- Inventory: KVM Servers
- Project: My Project
- Execution Environment: OLAM EE (2.3)
- Playbook: create_vm.yml
- Credentials: My KVM Server
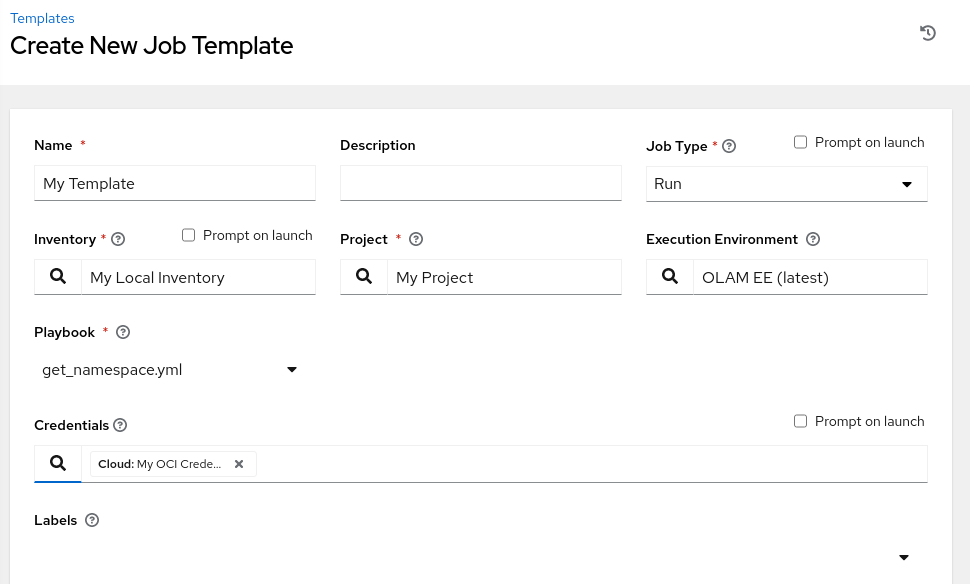
- Name:
Review, scroll down, and click the Save button.
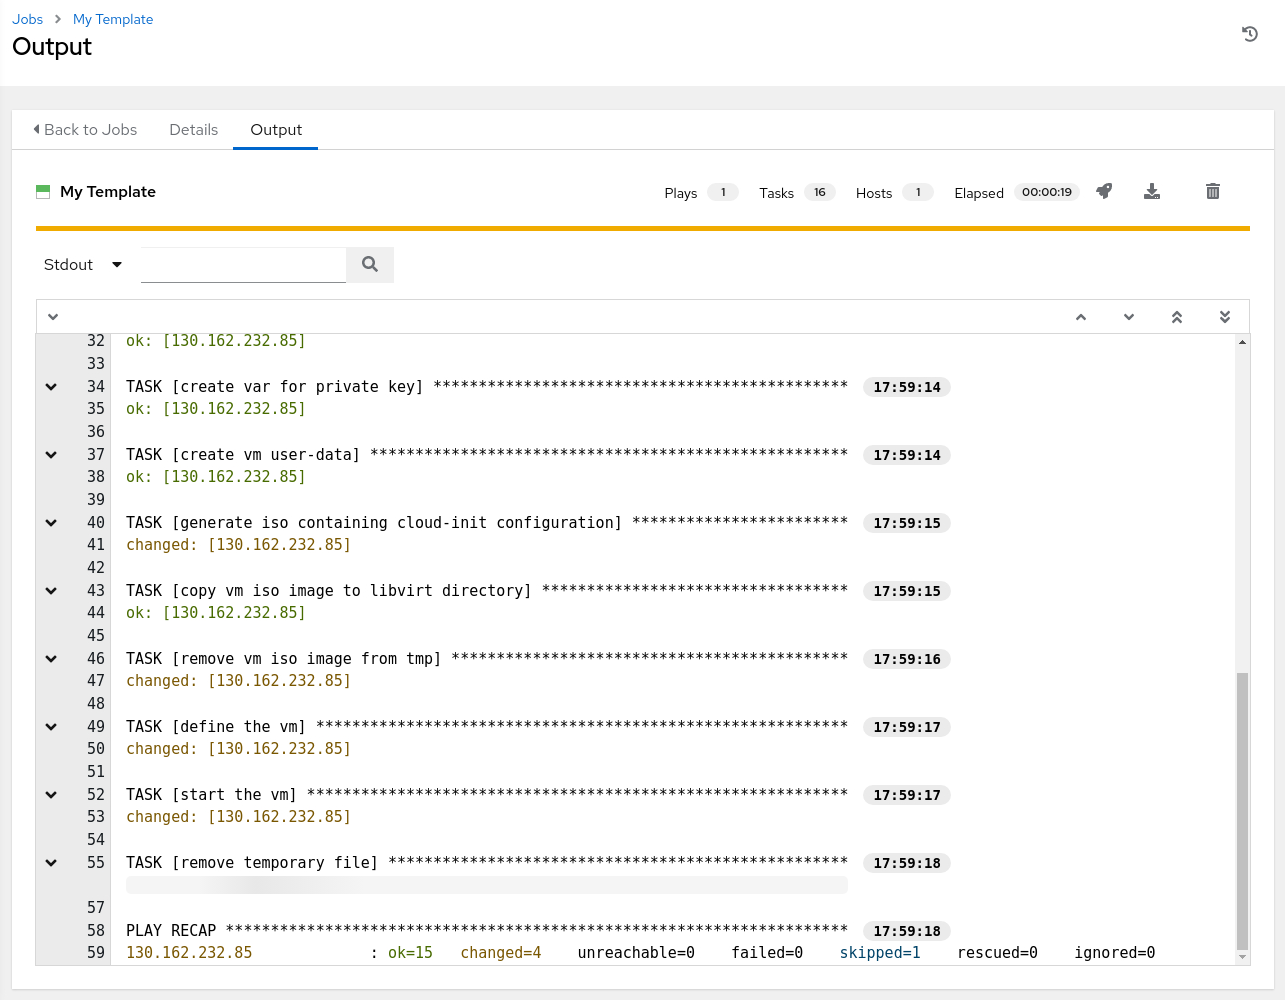
Launch the template.
Launch a job from the template summary page by clicking the Launch button.
If successful, the job launches and displays the output from the template. The standard output shows the playbook running and outputs the results of the playbook.
Verify Virtual Machine Creation
Open a terminal and connect via SSH to the kvm-server node.
ssh oracle@<ip_address_of_instance>Get a list of running VMs.
sudo virsh listExample Output:
[oracle@kvm-server ~]$ sudo virsh list
 Id   Name      State
-------------------------
 1    ol9-dev   running
Get the IP address of the
ol9-devVM.sudo virsh net-dhcp-leases defaultExample Output:
[oracle@kvm-server ~]$ sudo virsh net-dhcp-leases default
 Expiry Time           MAC address         Protocol   IP address           Hostname   Client ID or DUID
------------------------------------------------------------------------------------------------------------
 2023-04-06 18:59:33   52:54:00:6e:93:07   ipv4       192.168.122.167/24   ol9-dev    01:52:54:00:6e:93:07
Connect to the VM.
ssh opc@$(sudo virsh -q domifaddr ol9-dev | awk '{print substr($4, 1, length($4)-3)}')The
-qremoves the header from thevirshcommands output. Theawkpulls the fourth column from thevirsh domifaddrcommand, and thesubstr()strips the last three characters.Disconnect from the VM.
exit
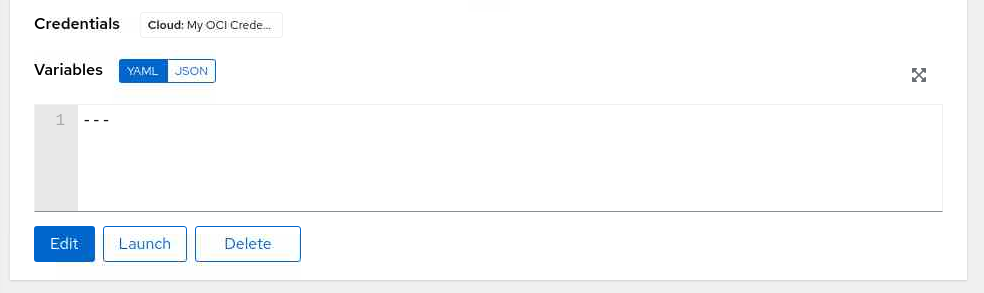
(Optional) Create Another Virtual Machine
The playbook allows the creation of another VM by changing the vm_name variable.
Switch to the browser window containing the Oracle Linux Automation Manager Web UI and log in if necessary.
Click Templates in the navigation menu.
Click the Edit Template icon for My Template.
Add the variable
vm_namewith a value ofol9-newto the Variables section.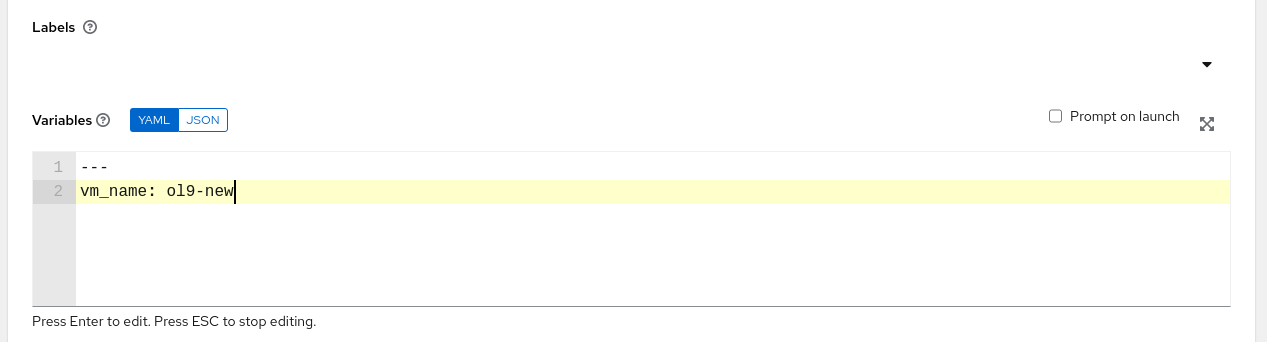
Scroll down and click the Save button.
Launch the template.
Repeat the virtual machine verification steps and connect to the newly created VM.
Next Steps
The combination of the successful output from the Oracle Linux Automation Manager job and the ability to SSH into the virtual machine confirms that everything works as expected. Experiment further with the community.libvirt collection to create virtual machines within Oracle Linux KVM and expand your infrastructure. Then, attempt to provision those virtual machines with additional playbooks. Check out our additional training at the Oracle Linux Training Station.