Run Oracle Database on Oracle Linux for Arm
Introduction
Oracle Database 19c Enterprise Edition, the current long-term support release of Oracle Database, is now certified and available on the popular Arm architecture for cloud and on-premises deployments.
The Oracle Cloud Infrastructure (OCI) Ampere A1 compute platform provides deterministic performance, linear scalability, and an energy-efficient, sustainable, eco-friendly design for Oracle Database customers. Building applications is free to try, easy to learn, and fast to explore.
This tutorial uses the container method to install Oracle Database 19c on Oracle Linux on an OCI Ampere A1 compute instance.
For help outside of this lab environment, see the Oracle Database server Release 19c documentation .
Objectives
In this tutorial, you'll learn how to:
- Install Oracle Database 19c using Podman
- Connect to Oracle Database 19c using SQL*Plus
Prerequisites
Minimum of one Oracle Linux system
Each system should have Oracle Linux installed and configured with:
- A non-root user account with sudo access
Deploy Oracle Linux
Note: If running in your own tenancy, read the linux-virt-labs GitHub project README.md and complete the prerequisites before deploying the lab environment.
Open a terminal on the Luna Desktop.
Clone the
linux-virt-labsGitHub project.git clone https://github.com/oracle-devrel/linux-virt-labs.gitChange into the working directory.
cd linux-virt-labs/olInstall the required collections.
ansible-galaxy collection install -r requirements.ymlDeploy the lab environment.
ansible-playbook create_instance.yml -e localhost_python_interpreter="/usr/bin/python3.6" -e instance_shape="VM.Standard.A1.Flex"The free lab environment requires the extra variable
local_python_interpreter, which setsansible_python_interpreterfor plays running on localhost. This variable is needed because the environment installs the RPM package for the Oracle Cloud Infrastructure SDK for Python, located under the python3.6 modules.The default deployment shape uses the AMD CPU and Oracle Linux 8. To use an Intel CPU or Oracle Linux 9, add
-e instance_shape="VM.Standard3.Flex"or-e os_version="9"to the deployment command.Important: Wait for the playbook to run successfully and reach the pause task. At this stage of the playbook, the installation of Oracle Linux is complete, and the instances are ready. Take note of the previous play, which prints the public and private IP addresses of the nodes it deploys and any other deployment information needed while running the lab.
Accept the Oracle Standard Terms and Restrictions
Use of the Oracle Database image requires the acceptance of the Oracle Standard Terms and Restrictions.
Open a browser and go to https://container-registry.oracle.com .
Click the Sign In button in the upper right corner of the site.

Authenticate using your Oracle Single Sign-On credentials.
Click the Database tile to access the various Oracle Database images.
Under the Repository column, click the enterprise link.
Select your language in the informational tile on the right and click the Continue button.
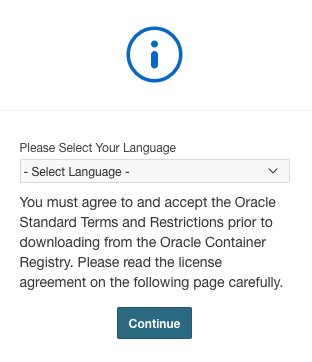
Read and scroll through the Oracle Standard Terms and Restrictions pop-up window.
Click the Accept button at the bottom of the pop-up window.
Verify the acceptance of the Oracle Standard Terms and Restrictions.
The informational tile should now display a green circle with a white check and the date and time of your last acceptance.
Install Podman
Open a terminal and connect via SSH to the ol-node-01 instance.
ssh oracle@<ip_address_of_instance>Confirm the version of Oracle Linux.
cat /etc/oracle-releaseCheck the platform architecture.
uname -mThe
aarch64indicates the hardware platform as the Arm architecture.Install the Podman packages or modules.
Oracle Linux 8:
sudo dnf module install -y container-tools:ol8Oracle Linux 9 and Oracle Linux 10:
sudo dnf install -y container-toolsThe container-tools module or package installs podman and other container tools, including skopeo and buildah. One essential package is container-selinux, which allows running
podmanas a non-root user on a SELinux-enabled system, which Oracle Linux enables by default.
Install Oracle Database 19c Server Using Podman
Create a data volume.
The data volume allows the database to persist during container recreation.
podman volume create oradataCreate a secret.
The secret is a utility to pass secure text strings to the container, such as ssh-keys or passwords.
echo "Welcome1" | podman secret create oracle_pwd -The
SYS,SYSTEM, andPDBADMINadministrative user accounts all use the same password. Oracle recommends that your password be at least 8 characters in length, containing at least 1 upper case character, 1 lower case character, and 1 digit [0-9].Log in to the Oracle Container Registry.
podman login container-registry.oracle.comEnter your Oracle Single Sign On username and password at the given prompts.
Start the Oracle Database container image.
podman run -d --name oracle-db --secret=oracle_pwd -p 1521:1521 -v oradata:/opt/oracle/oradata container-registry.oracle.com/database/enterprise:19.19.0.0Warning: While pulling the image, the process appears to freeze when writing the manifest and storing signatures. After several minutes, the command will complete and present the running container ID.
Verify the Oracle Database image is running.
podman psThe
statusreports the container is running and(starting). Repeat this command usingwatch podman psuntil the status shows as(healthy), which takes around 10 minutes. UseCtrl-Cto exit out of thewatchcommand.
Connect to the Oracle Database 19c Server Container
Get the mapped database port.
podman port oracle-dbGet the Oracle Database Service name.
While the Oracle SID is the unique name that identifies your instance/database, the Service name is the TNS alias you give when remotely connecting to your database.
podman exec -it oracle-db lsnrctl statusThe Service name for the image defaults to
ORCLCDB.Run SQL*Plus using the same image you used to start the database.
podman run --rm -ti container-registry.oracle.com/database/enterprise:19.19.0.0 sqlplus sys/Welcome1@//10.0.0.150:1521/ORCLCDB as sysdbaSelect from the
DUALtable.select * from dual;Example Output:
[oracle@ol-node-01 ~]$ podman run --rm -ti container-registry.oracle.com/database/enterprise:19.19.0.0 sqlplus sys/Welcome1@//10.0.0.150:1521/ORCLCDB as sysdba

SQL*Plus: Release 19.0.0.0.0 - Production on Fri Jul 28 01:21:39 2023
Version 19.19.0.0.0

Copyright (c) 1982, 2023, Oracle.  All rights reserved.


Connected to:
Oracle Database 19c Enterprise Edition Release 19.0.0.0.0 - Production
Version 19.19.0.0.0

SQL> select * from dual;

D
-
X
Select the system date.
select sysdate from dual;Example Output:
SQL> select sysdate from dual;

SYSDATE
---------
28-JUL-23
Exit SQL*Plus.
quit
Stop and Remove the Oracle Database 19c Server Container
Stop the container.
podman stop oracle-dbNote: When stopping the container, ignore the expected warning regarding
StopSignal SIGTERM.Remove the container.
podman rm oracle-dbThe
oradatavolume remains after removing the container, thus preserving any data added or configuration changes made to the database.
Next Steps
With the database installation complete, you can explore its features. See our related links and available training to learn more about Oracle Linux and the Oracle Database.