Configure the Oracle Cloud Native Environment User Interface
Introduction
This tutorial introduces you to the new User Interface (UI) features of Oracle Cloud Native Environment. The UI builds on the upstream Headlamp project, which provides a fully functional Kubernetes UI.
Objectives
In this tutorial, you will learn:
- How to generate a user access token
- How to access the Oracle Cloud Native Environment UI
Prerequisites
- Installation of Oracle Cloud Native Environment
Deploy Oracle Cloud Native Environment
Note: If running in your own tenancy, read the linux-virt-labs GitHub project README.md and complete the prerequisites before deploying the lab environment.
Open a terminal on the Luna Desktop.
Clone the
linux-virt-labsGitHub project.git clone https://github.com/oracle-devrel/linux-virt-labs.gitChange into the working directory.
cd linux-virt-labs/ocne2Install the required collections.
ansible-galaxy collection install -r requirements.ymlDeploy the lab environment.
ansible-playbook create_instance.yml -e localhost_python_interpreter="/usr/bin/python3.6" -e install_ocne_rpm=true -e create_ocne_cluster=true -e "ocne_cluster_node_options='-n 1 -w 1'"The free lab environment requires the extra variable
local_python_interpreter, which setsansible_python_interpreterfor plays running on localhost. This variable is needed because the environment installs the RPM package for the Oracle Cloud Infrastructure SDK for Python, located under the python3.6 modules.The default deployment shape uses the AMD CPU and Oracle Linux 8. To use an Intel CPU or Oracle Linux 9, add
-e instance_shape="VM.Standard3.Flex"or-e os_version="9"to the deployment command.Important: Wait for the playbook to run successfully and reach the pause task. At this stage of the playbook, the installation of Oracle Cloud Native Environment is complete, and the instances are ready. Take note of the previous play, which prints the public and private IP addresses of the nodes it deploys and any other deployment information needed while running the lab.
Confirm the Number of Nodes
It helps to know the number and names of nodes in your Kubernetes cluster.
Open a terminal and connect via SSH to the ocne instance.
ssh oracle@<ip_address_of_node>List the nodes in the cluster.
kubectl get nodesThe output shows the control plane and worker nodes in a
Readystate along with their current Kubernetes version.
Create an Access Token
Oracle Cloud Native Environment deploys the UI into the Kubernetes cluster using a Deployment and Service named ui, which you'll use to access it. Both the Deployment and Service are deployed into the ocne-system namespace. To connect to the Service, you need to generate an access token.
Generate an access token.
kubectl --namespace ocne-system create token uiExample Output:
[oracle@ocne ~]$ kubectl --namespace ocne-system create token ui
eyJhbGciOiJSUzI1NiIsImtpZCI6IjhfRWczUG13VWRfWjFkWDIxdkp6UUZlRzEwU2QxaExkbm9TME1CcS1rVFEifQ.eyJhdWQiOlsiaHR0cHM6Ly9rdWJlcm5ldGVzLmRlZmF1bHQuc3ZjLmNsdXN0ZXIubG9jYWwiXSwiZXhwIjoxNzI4Mzg3MTgwLCJpYXQiOjE3MjgzODM1ODAsImlzcyI6Imh0dHBzOi8va3ViZXJuZXRlcy5kZWZhdWx0LnN2Yy5jbHVzdGVyLmxvY2FsIiwianRpIjoiYzlmMWViZTctYzA1ZC00MTYxLTg2MzctOWNiZGFlNTI5MzFiIiwia3ViZXJuZXRlcy5pbyI6eyJuYW1lc3BhY2UiOiJvY25lLXN5c3RlbSIsInNlcnZpY2VhY2NvdW50Ijp7Im5hbWUiOiJ1aSIsInVpZCI6IjdjY2RjZGZlLTAzNzMtNGUwZS1hMzViLTc5MzdhM2NiZmYzMyJ9fSwibmJmIjoxNzI4MzgzNTgwLCJzdWIiOiJzeXN0ZW06c2VydmljZWFjY291bnQ6b2NuZS1zeXN0ZW06dWkifQ.WSLZFste1ggkE2GtjJ2cBrORNFgCzHOlALNXD_-6vLA9kIiDJHp44HshUcXvUFH1XdFM1SGbiCvITOwT8Y5_93IKVZLu1NRyGPZlo5l4JqwnJtqLn7J6e39OlC2SXqex6vLBCU-sBqiw_P9xksNa7fO_MzsryEo-5oMgsVVo9oJr9wv4LYLv2Obd8U5ukKjBeiRiwTu9MTK0r_GlhmZ9d7GHrYrgF1MJGMgzvqyTyviyIynD2F0OkKARIThghpEL6aou4F_DFFMy8t0qjiJG3rBTXL6fXxZ-3WxZUGdx920ZSHcqG2XOaLY7txRkKYbudIjyt-gODeR-FZCIthw5kw
You will use the displayed token to authenticate when you connect to the UI.
Create a Port Forward to Expose the UI
Port-forwarding provides a quick and easy way to expose the UI service on your local system so you can use it to monitor, troubleshoot, and, if necessary, debug your development environment.
Important: Oracle does not recommend using port-forwarding to expose the UI for a production environment.
Set up port forwarding.
kubectl port-forward --namespace ocne-system service/ui 8443:443Example Output:
[oracle@ocne ~]$ kubectl port-forward --namespace ocne-system service/ui 8443:443
Forwarding from 127.0.0.1:8443 -> 4466
Forwarding from [::1]:8443 -> 4466
Note: The
kubectl port-forwardcommand will continue to run in the foreground. Let it continue while you are accessing the UI.
Log into the UI
Open a new terminal and create an SSH tunnel.
ssh -L 9898:127.0.0.1:8443 oracle@<ip_address_of_node>The tunnel allows access from a browser on your local system to a given port to the remote system running the Kubernetes cluster. You do not need to generate a tunnel if both are on the same system. When running on the same system, you can access the UI using
https://127.0.0.1:8443.Open a browser on the Luna Desktop and enter the URL.
https://127.0.0.1:9898Approve the security warning based on the browser used. For Chrome, click the
Advancedbutton and then theAccept the Risk and Continuelink.Enter the access token.
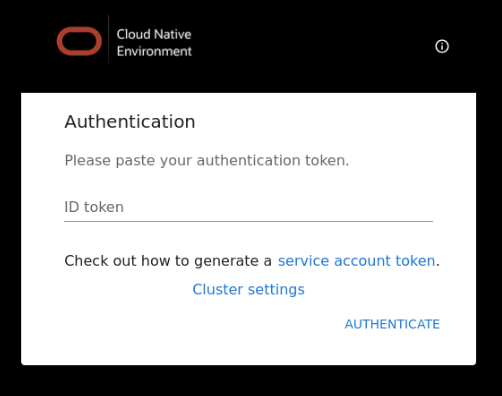
Enter the Access Token you previously created, and click on the
Authenticatelink.
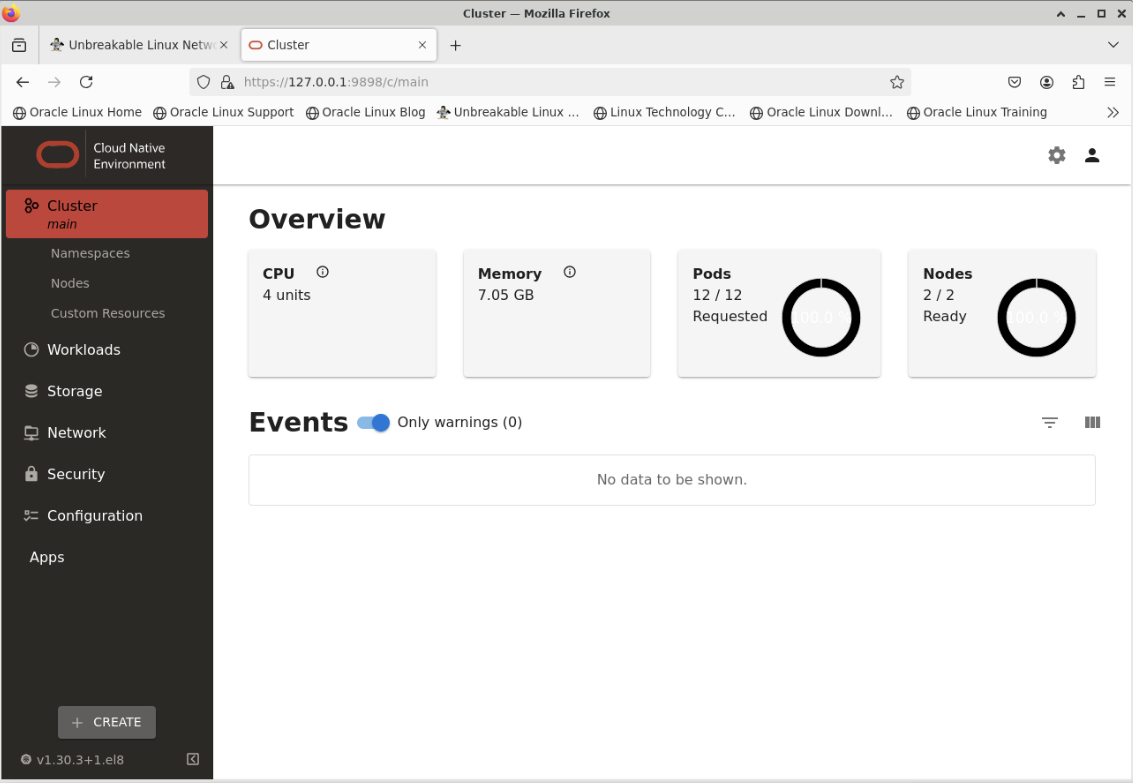
The UI Overview page is displayed.

You may see some Warnings listed in the Event section of the Landing Page. This behavior is normal and will clear after a few minutes.
Explore the cluster's details.
The User Interface provides a useful overview of your cluster's configuration. Feel free to explore and poke around.
Next Steps
Through these steps, you now know how to enable access to the Oracle Cloud Native Environment User Interface (UI). You can explore its many features and functionality, which we'll look to cover in future tutorials.