Migrate Standalone Oracle Autonomous Linux Instances to use OS Management Service
Introduction
Standalone Autonomous Linux instances are instances created with older Oracle Autonomous Linux images, typically from July 2021 and earlier.
These instances are referred to as standalone because, when created, they are not integrated by default with the OS Management service in Oracle Cloud Infrastructure.
An alx-migrate script has been created to migrate these standalone instances to be managed by the OS Management service. Oracle Autonomous Linux instances built with images from August 2021 onwards are by default integrated with the OS Management service.
After the script is installed, the migration can be performed, and the instance registered and then managed using the OS Management service. It then takes advantage of the additional autonomous capabilities provided by the service, such as monitoring processes and critical events, and automatic daily updating and patching.
Note: The migration script can also be used with the Oracle Linux KVM Image, the Autonomous Linux version, with Unbreakable Enterprise Kernel. This lab uses an older Oracle Autonomous Linux image to create an instance suited for migration during the lab.
You can read more detailed information about prerequisites and using this migration script at this documentation link: Migrating a Standalone Autonomous Linux Instance to the OS Management Service
You can watch a free video demonstrating the migration process used in this lab, you can find a link to it in the For More Information section at the end of this lab.
Objectives
In this lab, you will learn to:
- Create an Oracle Autonomous Linux instance using a 2021 custom image
- Use the cloud console to determine a pre built Oracle Autonomous Linux 7 system to be a migration canditate
- Verify instance plugins are enabled to support the migration process
- Install the migration script on the instance
- Run the migration script to integrate the instance with the OS Management service
- Verify the successful migration
Prerequisites
Specific Oracle Cloud IAM (Identity and Access Management) policies are needed to integrate OS Management service support with the migrated Oracle Autonomous Linux instance. During the migration the Oracle Cloud Agent and OS Management Service Agent plugins are stopped and restarted, policies must be in place to allow this.
The required cloud policies needed are already configured for the tenancy and compartment used for this lab.
You can read about the policies required for instances to be managed by the OS Management service at this link: Required IAM Policies for OS Management integration
Setup Lab Environment
You will create a new Oracle Autonomous Linux 7 instance using a specific older image in this lab. The purpose of this lab is to show the older Oracle Autonomous Linux instance being migrated to work with the OS Management service in Oracle Cloud Infrastructure.
To open a terminal by establishing an SSH connection to the new instance terminal, you will use an existing public SSH key from the lab environment and set it to the instance when creating it.
Preparing for the Migration
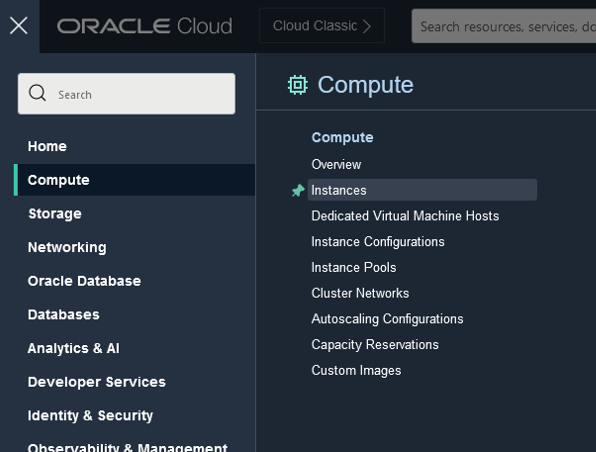
Open the cloud console and navigate to Instances.
Note: Ignore any other instances which may be displayed in the list, you will create a new instance in this lab.
From the instance list screen, click Create instance to open the Create compute instance dialog.
Give the instance the name
alx-migrate-inst1. You can also choose your own name if you prefer.Scroll down to the Image and Shape section and click the Change image button.
You will use a specific image based on an older version of Oracle Autonomous Linux 7 to create the instance. The image used will be specific to the region in which your lab is running.
On your console title bar, you can see the region used for your lab environment, for example here we see it is using the Frankfurt region.

Click onthe Image source dropdown and select Image OCID. This provides an Image OCID input field where you can input an OCID value for the image to be used.

Open the Clipboard tool on your lab floating menu.

If there is anything in the clipboard, click Clear clipboard to remove it. Click the X to close the clipboard.

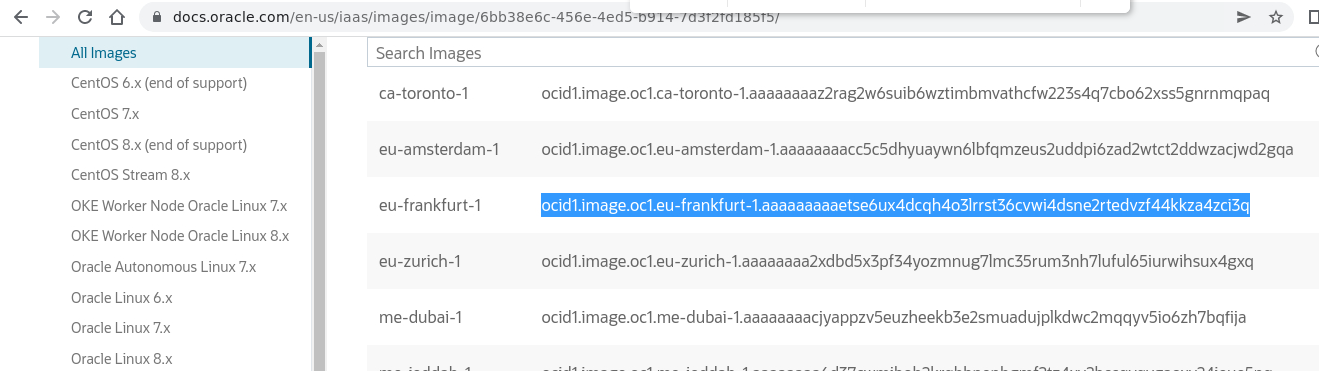
Open a new browser tab or window on your lab desktop and use this link Image Information: Oracle-Autonomous-Linux-7.9-2021.07-0 to find the OCID for the image.
Scroll down to the Image OCIDs section. Under the Region column, find the name of the region shown in your console title bar. For example here we find the eu-frankfurt-1 region. Highlight and copy the OCID name for your region image.
Return to the instance create dialog and open the clipboard tool again. Use
ctrl-vto paste in OCID value into the clipboard. You can verify you have correctly copied the value from the browser window. Close the clipboard.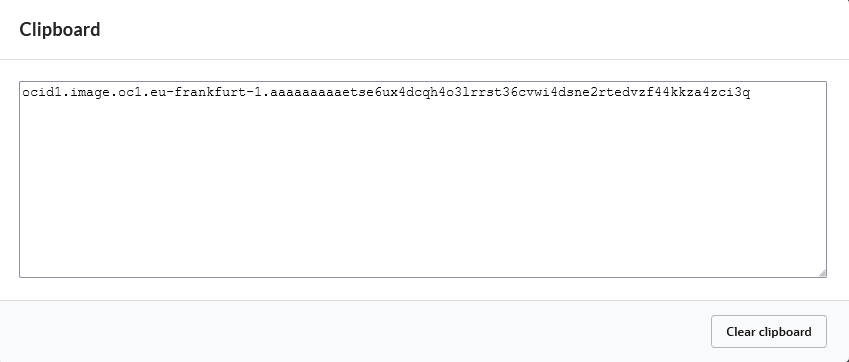
Return to the instance create dialog and paste the OCID value into the Image OCID field. Click Select image. This sets the image to be used for the new instance and automatically shows the image name and size.
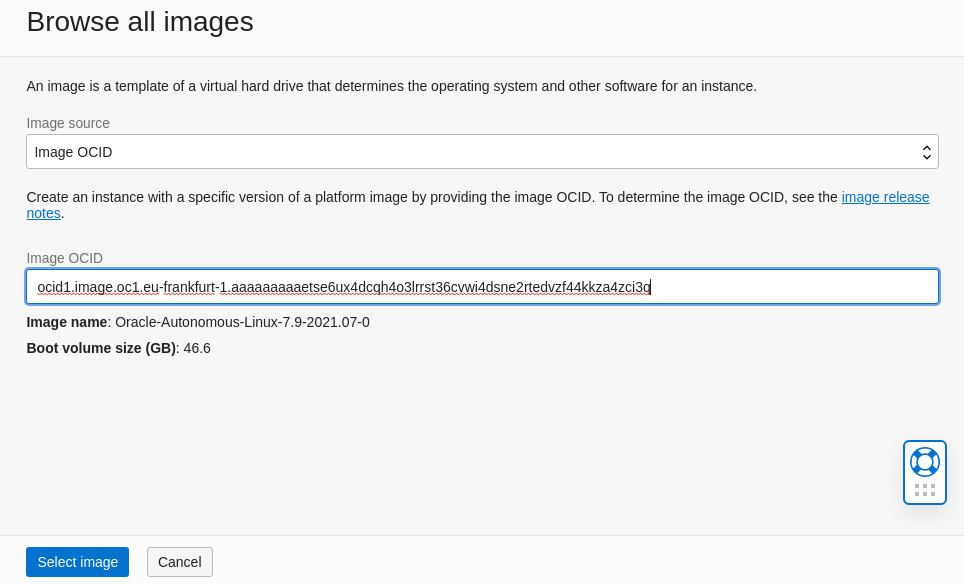
Note: If you get an error after pasting the OCID value to the field, check to make sure you have copied and pasted the full value correctly.
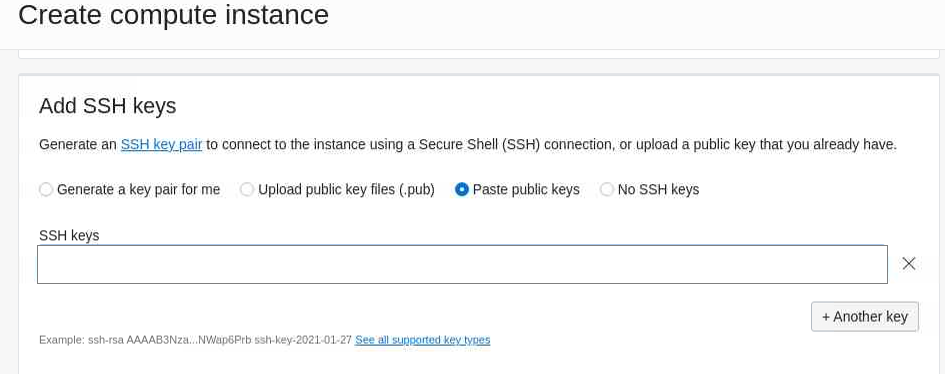
Scroll down to the Add SSH keys section. Select the Paste public keys radio button. This provides an SSH Keys input field to paste in the public key to be used on the instance.
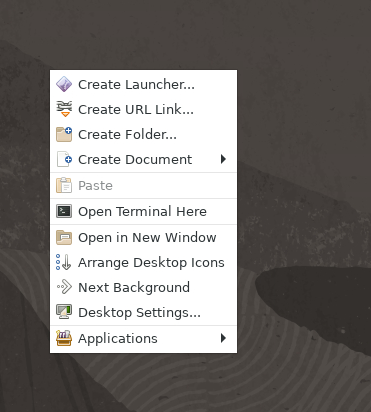
Right click on your luna lab desktop and select Open Terminal Here. This opens a terminal window.
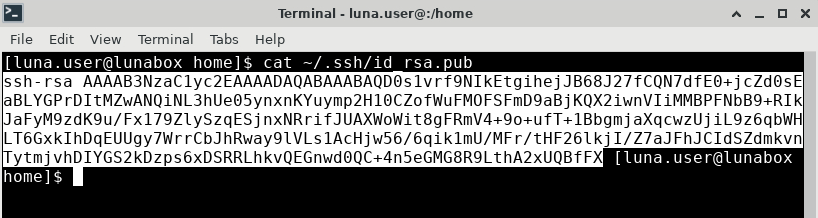
View the contents of the
~/.ssh/id_rsa.pubfile.cat ~/.ssh/id_rsa.pubHighlight and copy the contents of the file. Take care to only copy the contents and not any extra material.
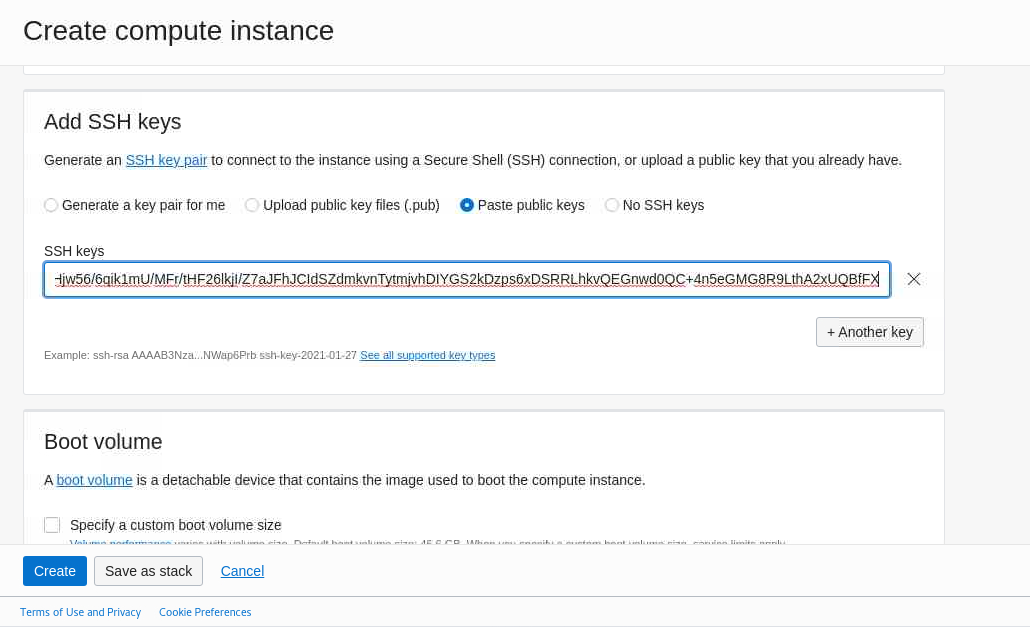
Return to the instance creation dialog and paste the copied key into the SSH keys field.
Note: If you cannot paste the value correctly, open the clipboard, click Clear clipboard to remove anything still there. Try the copy paste to the clipbaord first to verify the value is correct, then paste it into the SSH keys field.
Click the Create button to start the instance creation.
Note: If you get an error after clicking the Create button, check to make sure you have copied and pasted the SSH key value correctly.
The instance takes a few minutes to spin up. When the large box turns green with RUNNING underneath, it is ready.
Verify the instance is built from an image from July 2021 or earlier. You will see the date used in the image name displayed in the Image field.
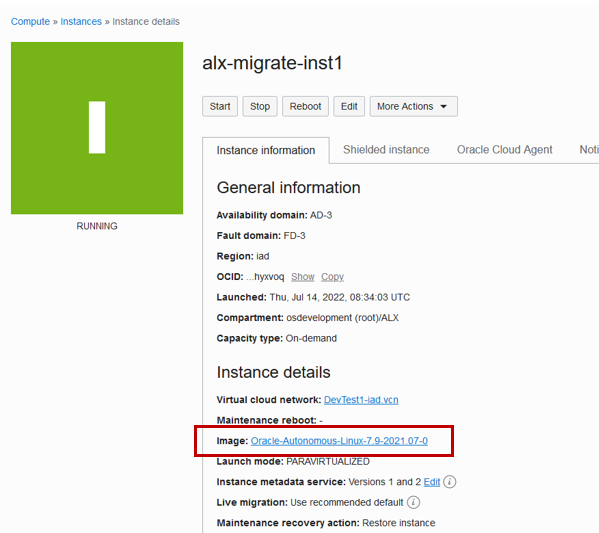
Note: In the instance name
2021-07indicates the year 2021 and month July.Select the Oracle Cloud Agent tab.
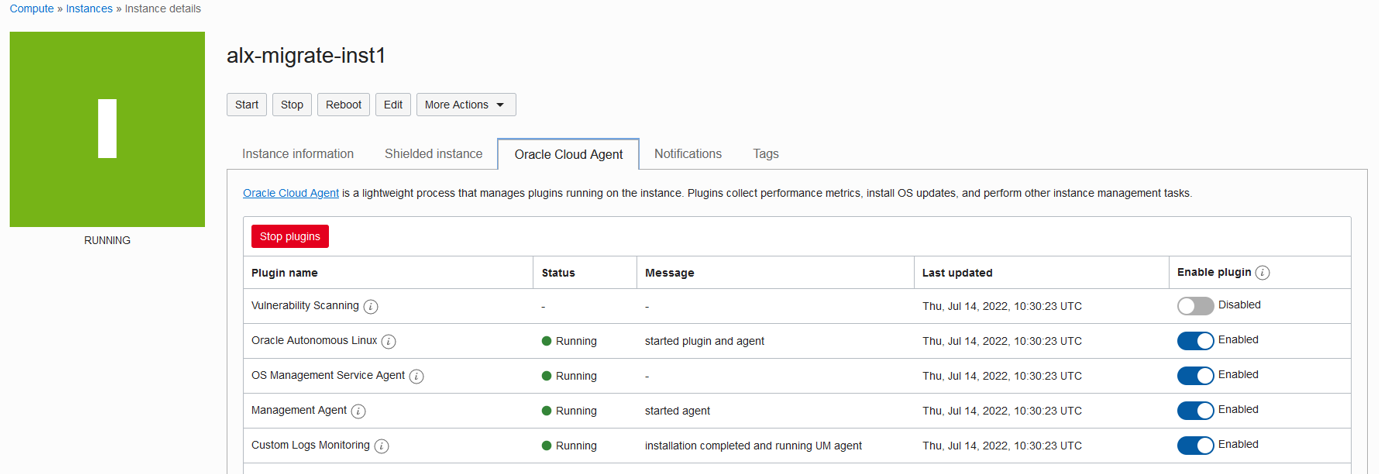
Verify the
Oracle Autonomus LinuxandOS Management Service AgentareEnabledunder the Enable plugin column.Note: The Status column for Oracle Autonomous Linux may not show any status, or show
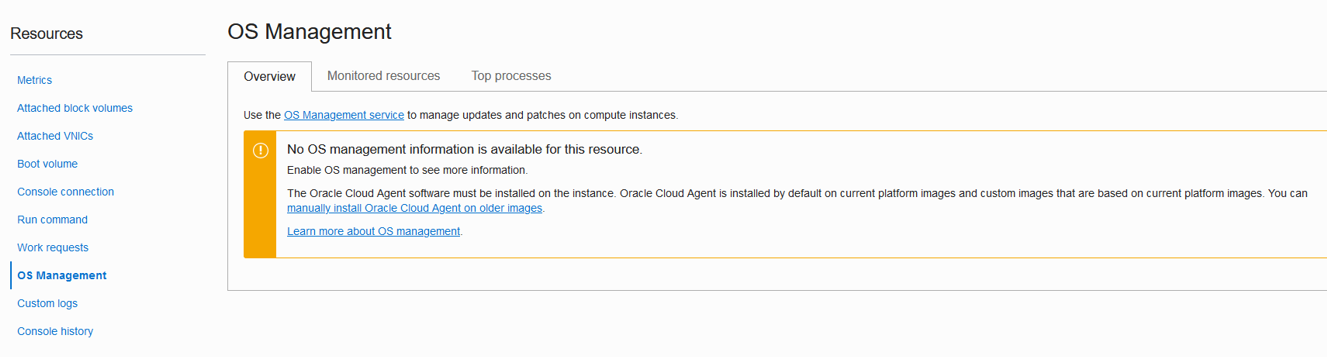
Stopped, this is normal as the instance is not currently managed by the OS Management service. When the migration completes this status will change toRunning. It can take up to 10 minutes for status changes to be reflected in the console.Scroll down to Resources, select OS Management.
In the Overview tab, after a loading period, you will see a message
No OS Management information is available for this resource.This indicates the OS Management service is not monitoring or managing this instance.
Install the migration script
Establish an SSH connection to your lab system instance.
From the instance details screen, copy the Public IP address by either highlighting it and pressing
ctrl-c, or clicking the Copy button beside the address.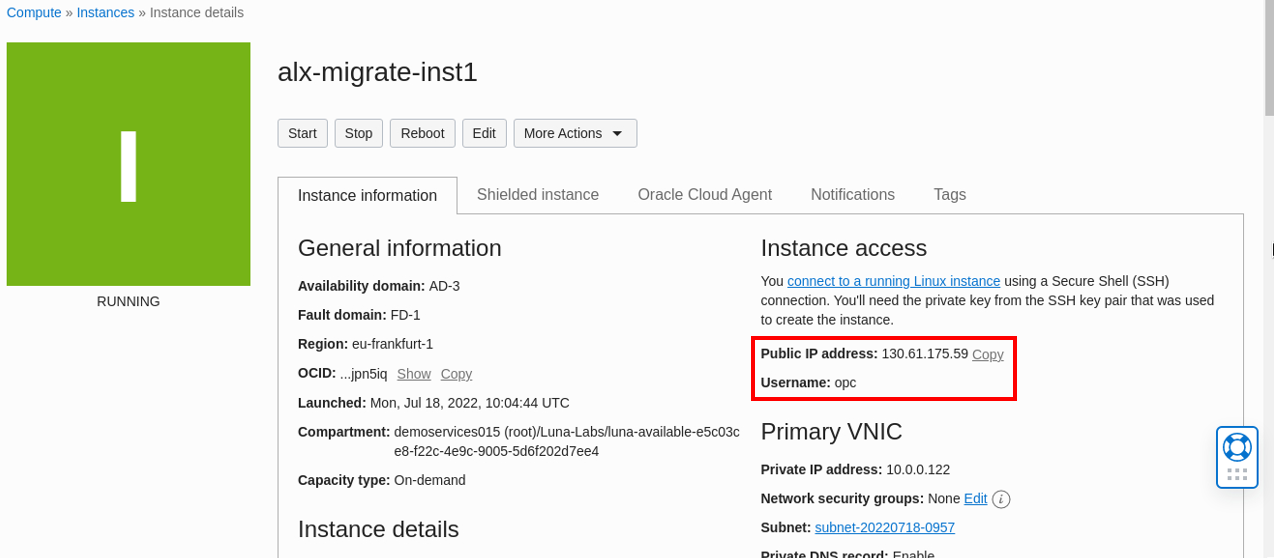
Return to the instance terminal window previously opened for copying the SSH key.
Establish an SSH connection to the new instance using the copied IP address and the username
opc.ssh opc@<ip of new instance>When prompted if you want to continue connecting, type
yesory.Install the alx-migrate package.
sudo yum install alx-migrateWhen promtped to confirm the download, enter
yoryesto download and install the script and any dependencies.- Example file output:
.
===============================================================================================================================================
 Package                                     Arch                    Version                           Repository                         Size
===============================================================================================================================================
Installing:
 alx-migrate                                 noarch                  1.0-19.el7                        ol7_oci_included                   15 k
Installing for dependencies:
 alx-utils-libs                              noarch                  1.0-19.el7                        ol7_oci_included                   15 k
 python3-prompt-toolkit                      noarch                  3.0.29-1.0.2.el7                  ol7_addons                        667 k
 python36-circuitbreaker                     noarch                  1.3.1-1.el7                       ol7_addons                        8.1 k
 python36-typing-extensions                  noarch                  3.7.4.2-1.el7                     ol7_addons                         42 k
 python36-wcwidth                            noarch                  0.2.5-1.el7                       ol7_addons                         42 k
Updating for dependencies:
 python36-arrow                              noarch                  1.1.1-1.el7                       ol7_addons                        115 k
 python36-oci-cli                            noarch                  3.10.5-1.el7                      ol7_addons                         14 M
 python36-oci-sdk                            x86_64                  2.73.0-1.el7                      ol7_addons                         22 M

Transaction Summary
===============================================================================================================================================
Install  1 Package  (+5 Dependent packages)
Upgrade             ( 3 Dependent packages)

Total download size: 37 M
Is this ok [y/d/N]:
.
Note: You can also use the
-yswitch with the command to automatically download and install the script and any dependencies without pausing for user confirmation. The command issudo yum install -y alx-migrate.Examine the output for the
Installedsection, and verify the script was installed succesfully.- Example file output:
.
Installed:
  alx-migrate.noarch 0:1.0-19.el7
.
Run the migration for the instance
Run the migration script.
sudo alx-migrate --accept-termsUsing the command switch
--accept-termsallows the script to continue without pausing to request you accept the terms of its use.The migration process checks the required instance plugins are enabled.
- Example file output:
.
Checking for Oracle Cloud Agent plugins.
.
IAM policies to support the OS Management service managing the instance are checked in the compartment and/or tenancy.
- Example file output:
.
Checking for required IAM policies.
.
Note: If checks for plugins or policies fail, the migration process will stop. It may take some minutes for the error response to be displayed.
With these checks completed successfully, the migration starts.
- Example file output:
.
Starting migration.
The next Daily Autonomous Updates start time: Wed, Jun 29, 2022, 10:15:21 UTC
Generating custom config file for migration.
Migration data has been added to '/etc/oracle-cloud-agent/plugins/oci-alx/custom-config.yml'.
.
Note: Due to the lab environment configuration, you may see multiple messages with the warning
Failed to set locale, defaulting to C. This is a warning from the YUM command, and as the alx-migrate script can take care of the locale, you can ignore this warning. The migration will not fail because of this.The script removes the older al-conf package the installs and the alx-utils package.
- Example file output:
.
Removing al-config package.
warning: /etc/al-config/al.conf saved as /etc/al-config/al.conf.rpmsave
Installing alx-utils package.
.
The OS Management Service Agent and Oracle Autonomous Linux plugins are restarted and the instance is registered with the OS Management service.
It may take 5 to 10 minutes for this to complete.
- Example file output:
.
Initializing Oracle Autonomous Linux.
Restarted abrtd systemd service.
Initialized Oracle Autonomous Linux.
Starting alx service.
Restarting the Oracle Cloud Agent.
Waiting for the OS Management Service Agent plugin to start.
OS Management Service Agent plugin is running.
Waiting for Oracle Autonomous Linux plugin to start.
Oracle Autonomous Linux plugin is running.
Waiting for the instance to be registered with the OS Management service.
The instance has been registered with the OS Management service.
Waiting for the instance to check in with the Oracle Autonomous Linux service.
The instance has checked in with the Oracle Autonomous Linux service.
Validating scheduled job.
Validated scheduled job.
.
Supporting package management channels are enabled for the OS Management service.
- Example file output:
.
Waiting for standard Yum channels to be enabled with the OS Management service.
Standard Yum channels have been enabled:
  - Latest Unbreakable Enterprise Kernel Release 6 for Oracle Linux 7Server (x86_64)
  - Oracle Linux 7Server Add ons (x86_64)
  - Ksplice for Oracle Linux 7 (x86_64)
  - Oracle Linux 7Server Latest (x86_64)
  - Oracle Software for OCI users on Oracle Linux 7 (x86_64)
  - Oracle Linux 7Server Optional Latest (x86_64)
  - Software Collection Library release 3.0 packages for Oracle Linux 7 (x86_64)
  - Ksplice aware userspace packages for Oracle Linux 7Server (x86_64)
.
Examine the output and verify the migration process was completed.
- Example file output:
.
Migration to the Oracle Autonomous Linux service is completed!
.
Verify the Migration was Successful
Return to the cloud console window showing the Instance details page. Refresh the browser window.
Click on the Cloud Agent Tab.
Under the the Status column, verify both plugins for
Oracle Autonomous LinuxandOS Management Service AgentareRunning.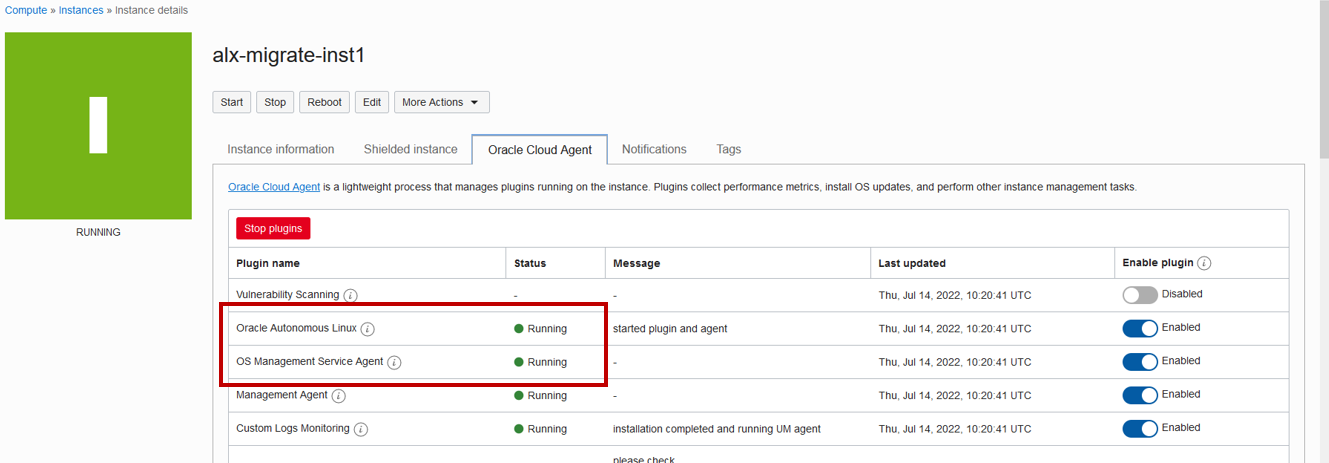
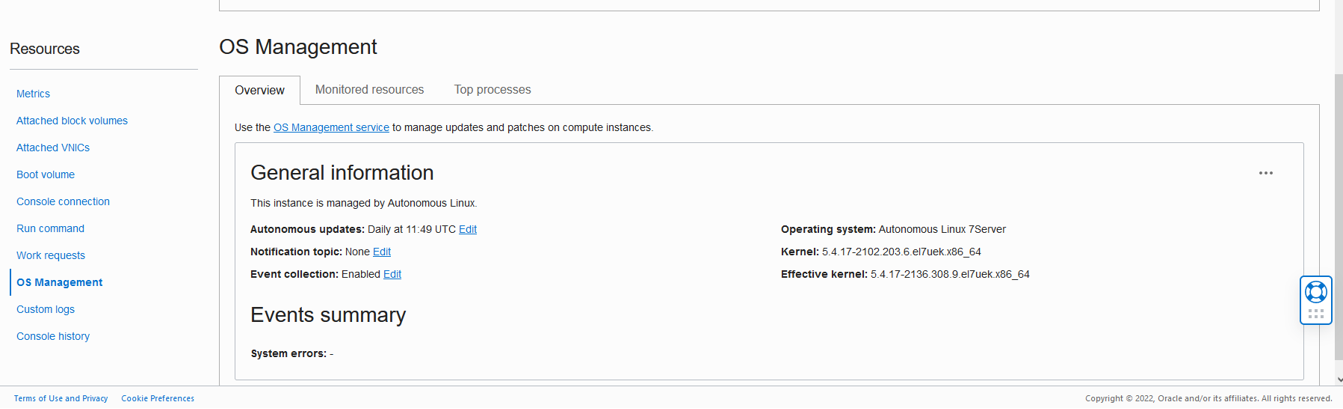
Scroll down to Resources and select OS Management.
In the General Information section you now see OS Management information about autonomous updates being applied daily, and OS and kernel information. This confirms the instance is being monitored and managed for automatic updates as a result of integration with the OS Management service.
Click on the Top processes tab.
In the Compute Instance section you can see the current CPU and memory utilization for this instance. This shows the OS Management service now working with and managing the instance. In a production environment, you can also see the top 10 processes that are currently utilizing the most CPU and Memory on the instance, however this information takes time to be accumulated. In this lab environment you may not see the processs information before the end of the assigned lab time.
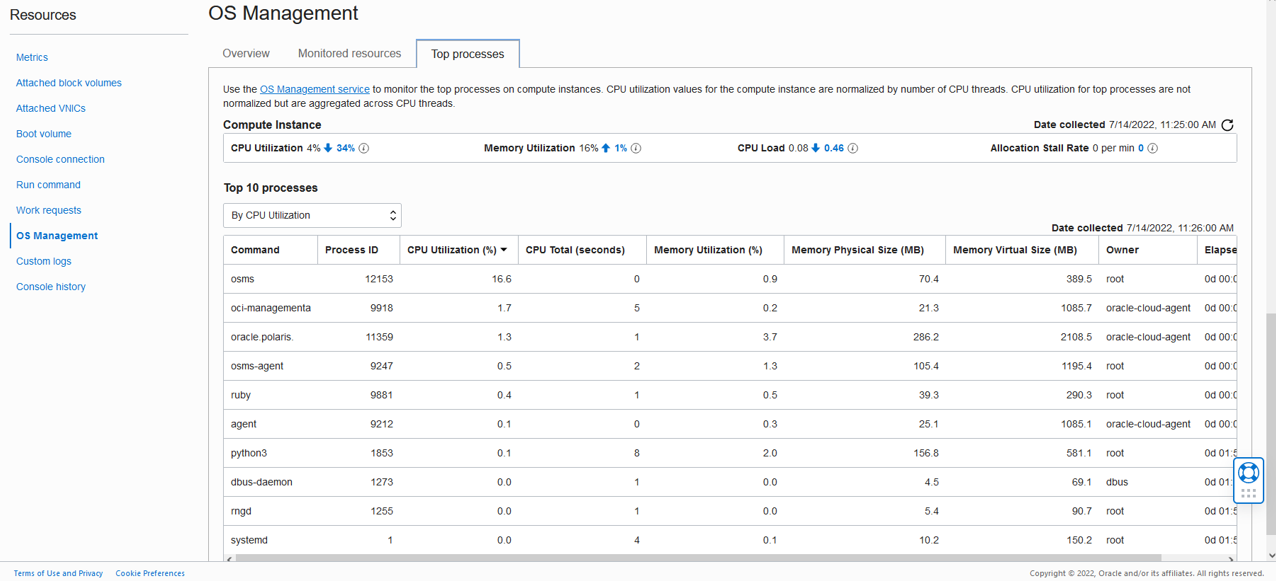
Note: The Monitored resources and Top processes tab information requires additional policies configured, which are not required for the migration process. Policies have already been enabled in this environment to support viewing the Top processes, but not for the Monitored Resources, which is why that tab states this resource information is not available. When support is configured for these tabs, it can take 15 minutes before any information begins to appear.
The migration is now complete and you have verified the standalone Oracle Autonomous Linux instance has now been migrated and now managed by the OS Management service in the Oracle Cloud Infrastructure.
Congratulations!
You have successfully completed this lab.
To end this session, click the End Session button in the toolbar.
For More Information
See other related resources:
Video: Migrate Standalone Oracle Autonomous Linux Instances to use OS Management Service
Document: Migrating a Standalone Autonomous Linux Instance to the OS Management Service
Luna Labs: Linux OS and Virualization Engineering Labs
Learning Path: Cloud Deployment with Linux on Oracle Cloud Infrastructure
Document: Oracle Linux Documentation