Use autofs on Oracle Linux
Introduction
The following tutorial provides step-by-step procedures to configure autofs to mount NFS shares. The benefit of autofs is the file system is mounted only when accessed. This tutorial is targeted at users of Oracle Linux.
Objectives
In this lab, you'll:
- Install
nfs-utils - Configure an NFS server
- Mount NFS shares
What Do You Need?
- A client system with Oracle Linux installed.
- An NFS server up and running with a shared data directory at
/nfs-share.
Install the autofs Package
Note: When using the free lab environment, see Oracle Linux Lab Basics for connection and other usage instructions.
Open a terminal and connect to your client instance.
Install the NFS utilities and autofs packages.
sudo dnf install -y nfs-utils autofsThis command will install the daemon and tools associated with the NFS client and automount function.
Verify the autofs files exist in the
/etcdirectory.ls -lh /etc/auto*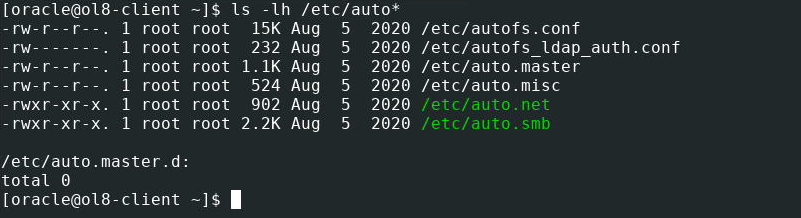
Create Mount Point
Create a directory to use as the mount point for the autofs service.
sudo mkdir /nfs-mount
Configure a Master Map File
This is the first of two files read by the autofs service. The master map file (/etc/auto.master) contains entries in the following format:
mount-point [map-type[,format]:]map [options]
Rather than edit the main file, the service also includes and reads files conforming to this format when placed in the /etc/auto.master.d directory.
Add a Master Map Entry File to
/etc/auto.master.d.echo "/nfs-mount /etc/auto.mynfs --timeout=180" | sudo tee /etc/auto.master.d/mynfs.autofs > /dev/nullThis entry defines the mount point as
/nfs-mountand the map file asauto.mynfs. The share will automatically unmount after 180 seconds if there no action performed on the share. The file created has an extension of.autofs.Verify the entry.
ls -lh /etc/auto.master.d
cat /etc/auto.master.d/mynfs.autofs
For more details, check out man auto.master.
Configure a Map File
This is the second file read by the autofs service. The map files contain entries using the following format:
mount-point mount-options location
Create the map file
/etc/auto.mynfs.echo "mynfs -fstype=nfs,rw,soft,intr <SERVER_IP_ADDRESS>:/nfs-share" | sudo tee /etc/auto.mynfs > /dev/nullWhere:
mynfsis a mount point.-fstype=nfsis the file system type, andrw,soft,intrare mount options.<SERVER_IP_ADDRESS>is the IP address of the server instance hosting the NFS server.:/nfs-shareis the NFS share.
For more details on the mount options, check out man mount.
Start Service
Start and enable the autofs service in a single step.
sudo systemctl enable --now autofs
Try to Access the Mount Point
The mount point for the NFS share is /nfs-mount/mynfs.
Change to the mount point and get a directory listing.
cd /nfs-mount/mynfs; ls -l
Get a file system disk usage report.
df -Th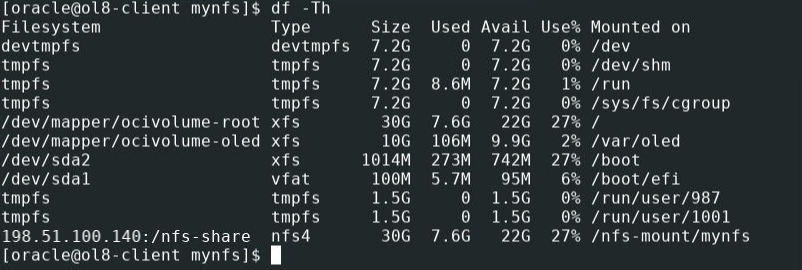
The output shows the NFS share and the autofs mount point details.
More Learning Resources
Explore other labs on docs.oracle.com/learn or access more free learning content on the Oracle Learning YouTube channel . Additionally, visit education.oracle.com/learning-explorer to become an Oracle Learning Explorer.
For product documentation, visit Oracle Help Center .